How to Add Free Sections to Your Shopify Store
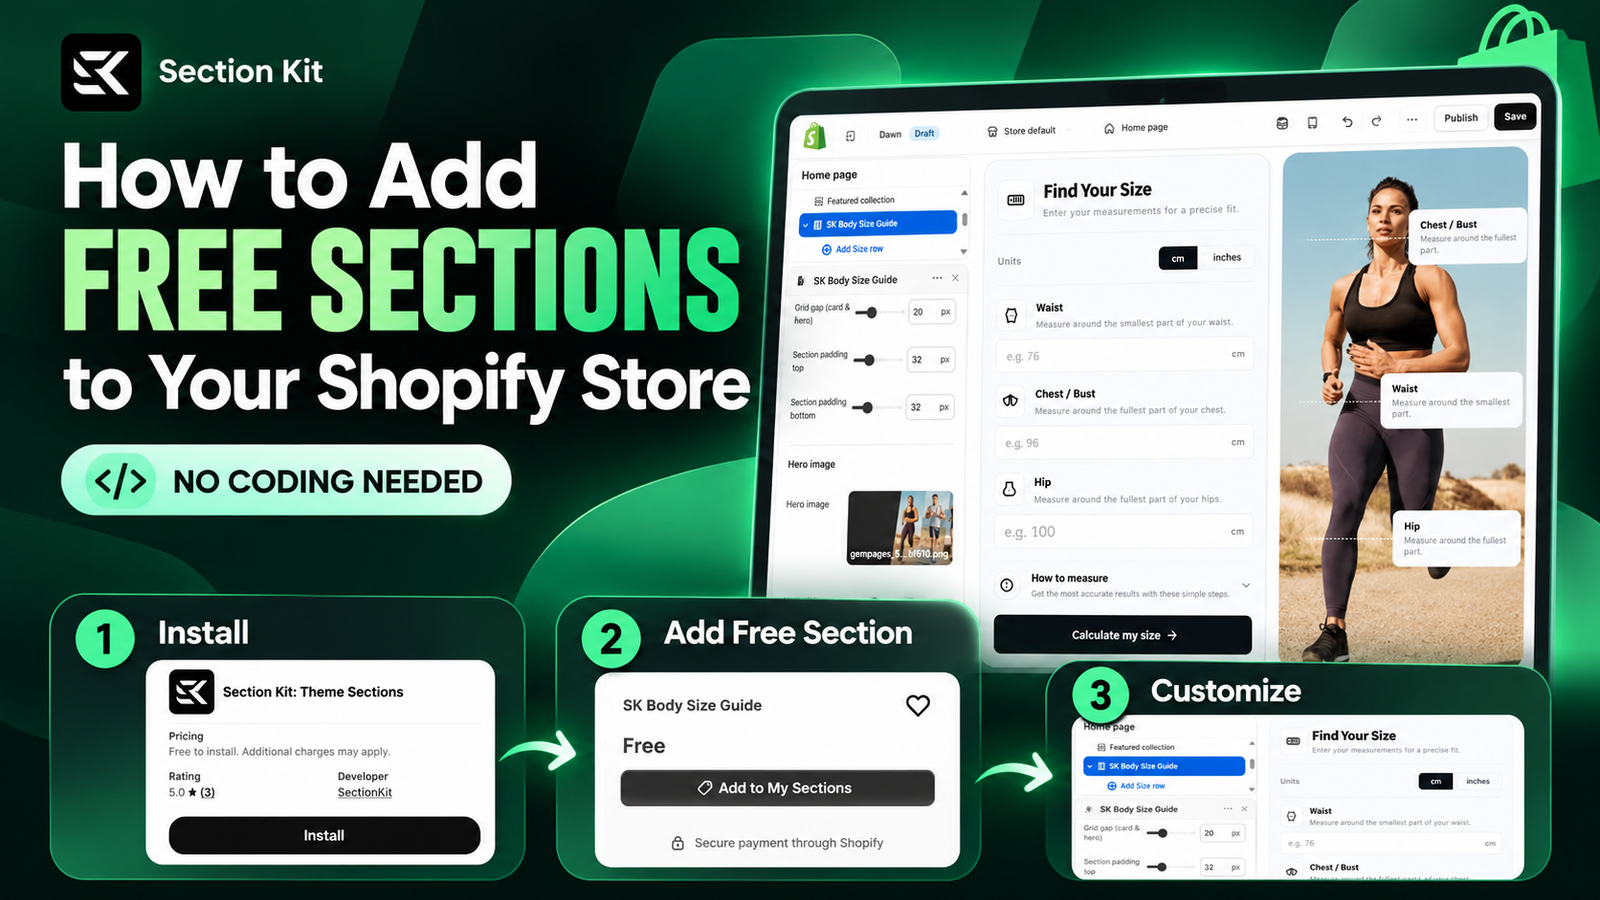
A Shopify store needs more than attractive product images. Customers also need clear information, useful guidance, and an easy way to find what they are looking for. The right sections help you organize that experience.
A size guide can help shoppers understand fit. An FAQ can answer common questions. A collection section can make products easier to discover. Each addition should solve a specific problem for your customers.
But what happens when your theme does not include the section you need?
Why Your Shopify Theme Might Need More Sections
You open the theme editor, click Add section, and look for a layout or feature that suits your store. Your theme has the basics, but the section you had in mind is missing.
The sections available in Shopify depend on your theme and its version. That means the editor can customize the sections your theme provides, but it does not automatically include every feature your business needs.
For an apparel store, that gap might be an interactive sizing tool. For a home improvement store, it might be a material calculator. For another business, it could simply be a better way to present customer questions or product benefits.
You could commission custom development, build a section yourself, or explore a page builder. Those approaches can suit larger projects, but you may only need one useful addition to your existing store.
How Section Kit Helps Fill That Gap
Section Kit: Theme Sections lets you add premade sections and customize them inside Shopify’s theme editor. It provides free sections alongside premium sections available for a one-time charge.
For this tutorial, we will use the SK Body Size Guide, which is marked Free in the screenshots. It gives shoppers a place to enter body measurements and receive sizing guidance based on the size ranges you configure.
You can add this section, adjust its layout, upload your own image, and configure its content without manually editing theme code.
Free installation does not mean every section is free. Choose a section clearly marked Free when following this guide.
Section Kit Compared With Other Options
| Option | How you use it | When it makes sense |
| Your theme’s built-in sections | Add and customize sections already included with the theme | Your theme already provides the layout and functionality you need |
| Section Kit | Choose a free or premium premade section, install it into your theme, and customize it in Shopify | You want to add a specific section while keeping your existing theme |
| Section Store | Another section library with free sections and one-time paid sections; it also offers a separate paid Plus plan | You want to compare available designs and additional features |
| A page builder | Use the selected app’s editing tools to create page layouts | You need wider control over a complete page |
| Custom development | Build a section around your requirements | You need functionality that existing sections do not provide |
Section Kit is a practical starting point when a suitable free section solves your problem. Other section apps also offer free options, so compare the actual section, its settings, and how well it fits your store.
How to Add Free Sections With Section Kit
Step 1: Install Section Kit
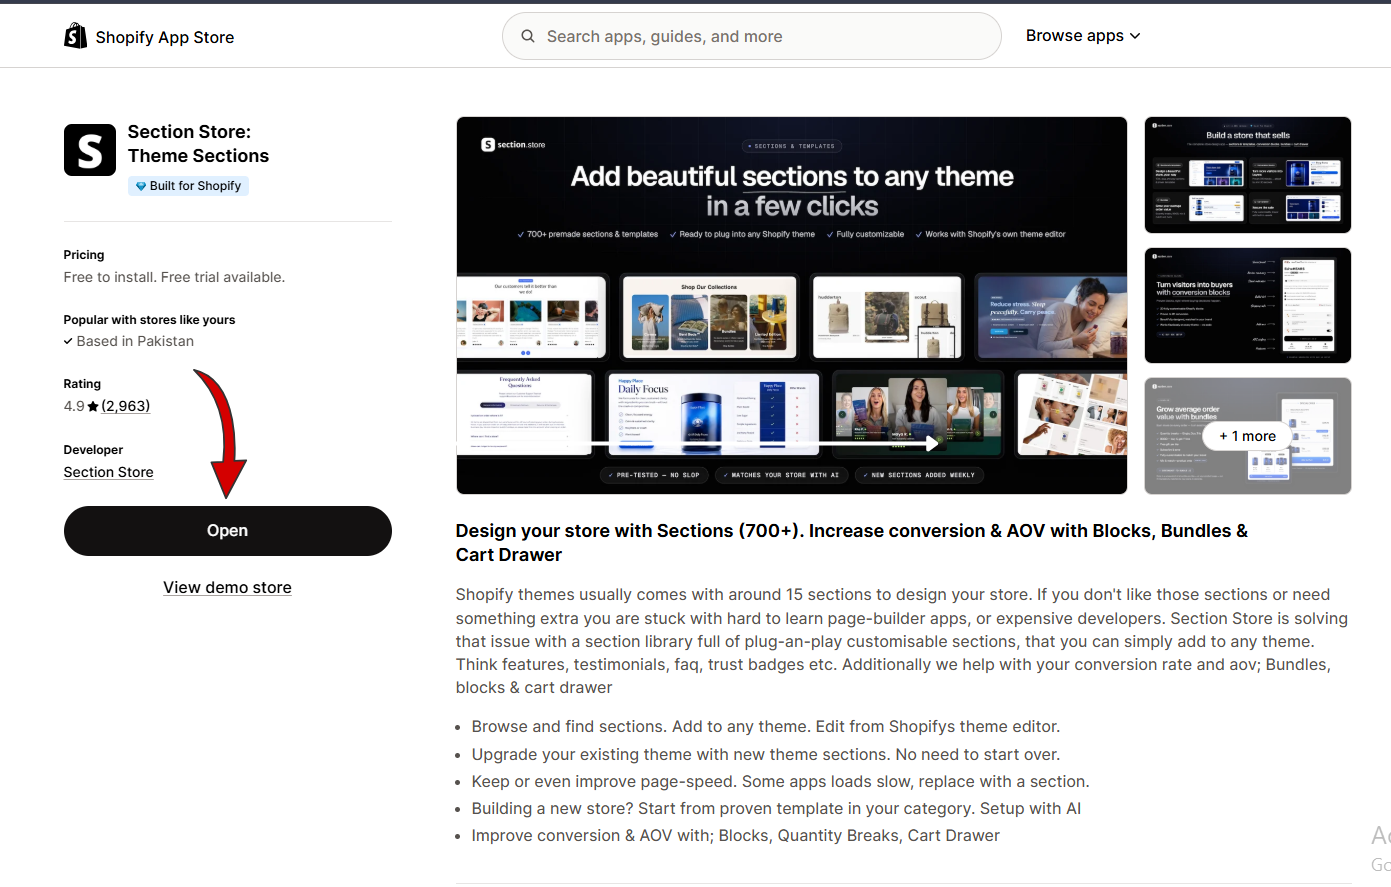
Open the Section Kit: Theme Sections listing in the Shopify App Store and click Install.
If prompted, sign in and select your store. Review the permissions Shopify displays, then complete the installation. Open the app from your Shopify admin.
Step 2: Open Free Sections
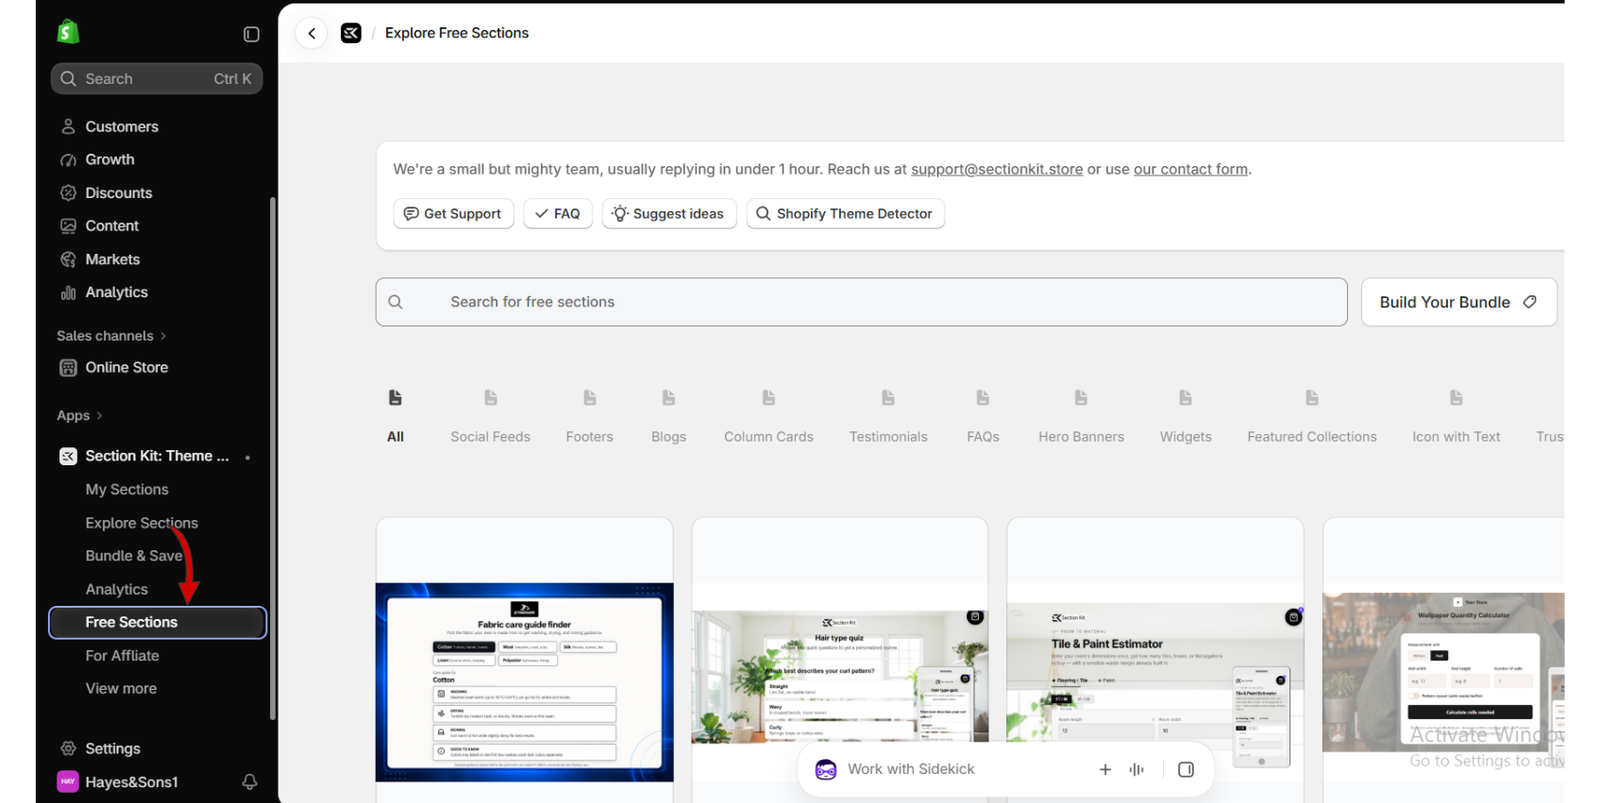
Inside Section Kit, click Free Sections in the left sidebar.
This opens the free-section library. Browse the cards, use the category filters, or enter a keyword in Search for free sections to find something relevant to your store.
Choose a section that answers a customer need rather than adding content only to fill space.
Step 3: You Can Also Search Through Explore Sections:
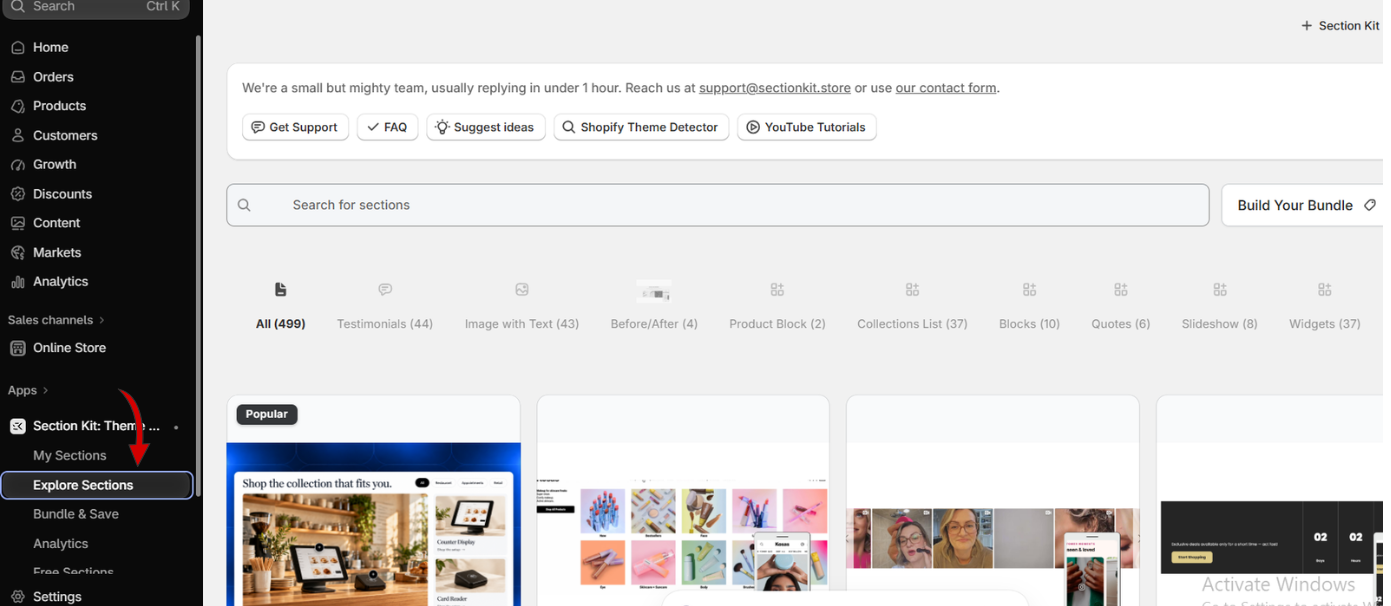
You can also search for free sections from Explore Sections.
This page lets you browse the wider library and search for a section by name or keyword. Open the section’s details and confirm that it is marked Free before adding it.
This is an alternative discovery route. You do not need to visit both pages to install the same section.
Step 4: Select a Free Section and Add It to My Sections
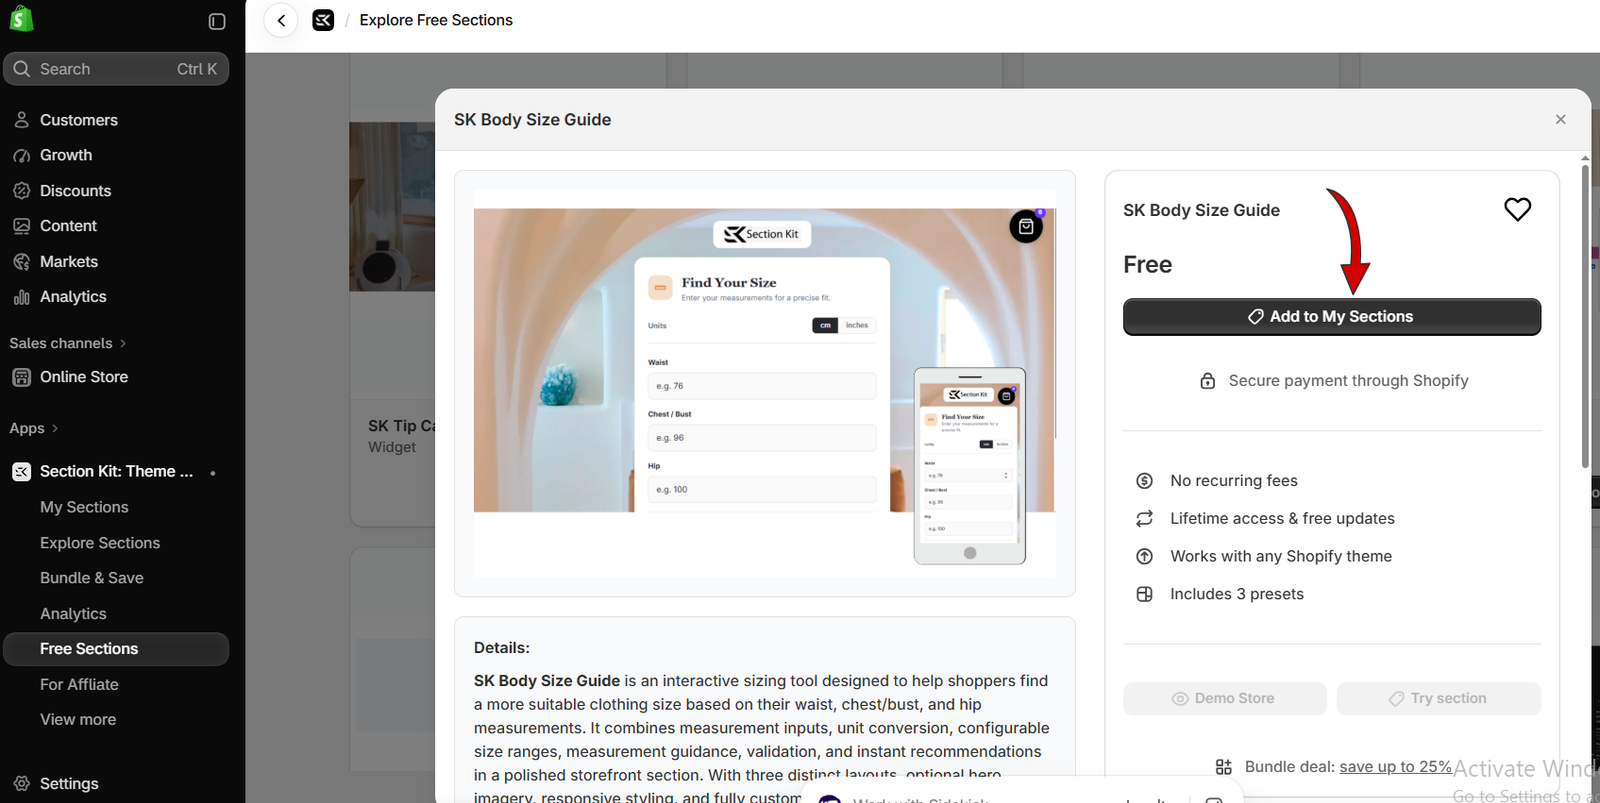
Open SK Body Size Guide, or another free section you want to use.
Review the preview and description. In this example, the details panel displays Free above the Add to My Sections button.
Click Add to My Sections.
This adds the section to your collection inside the app. It still needs to be installed into your chosen theme and placed on a page.
Step 5: Find the Section in My Sections
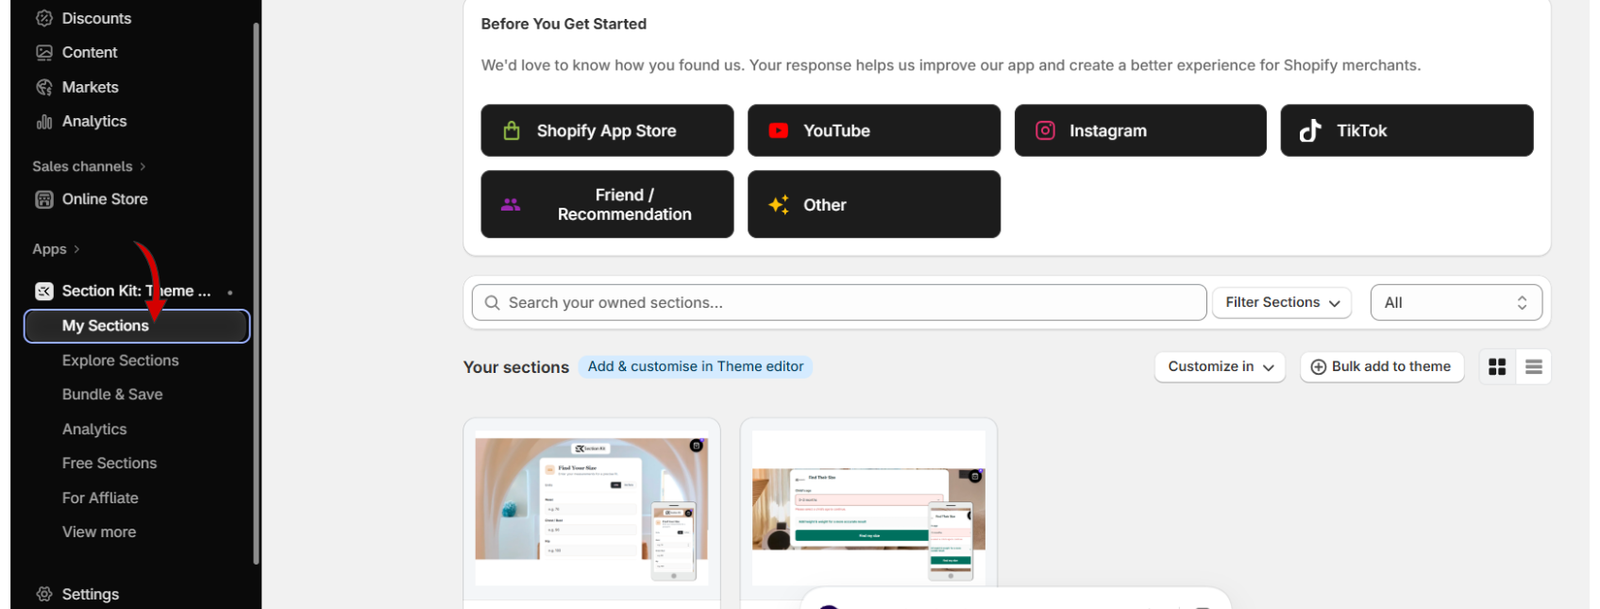
Click My Sections in the app sidebar.
Locate SK Body Size Guide. If you have several sections, use the search field to find it by name.
The section is now available for the next part of setup: adding it to a theme.
Step 6: Click Customize and Select Your Theme
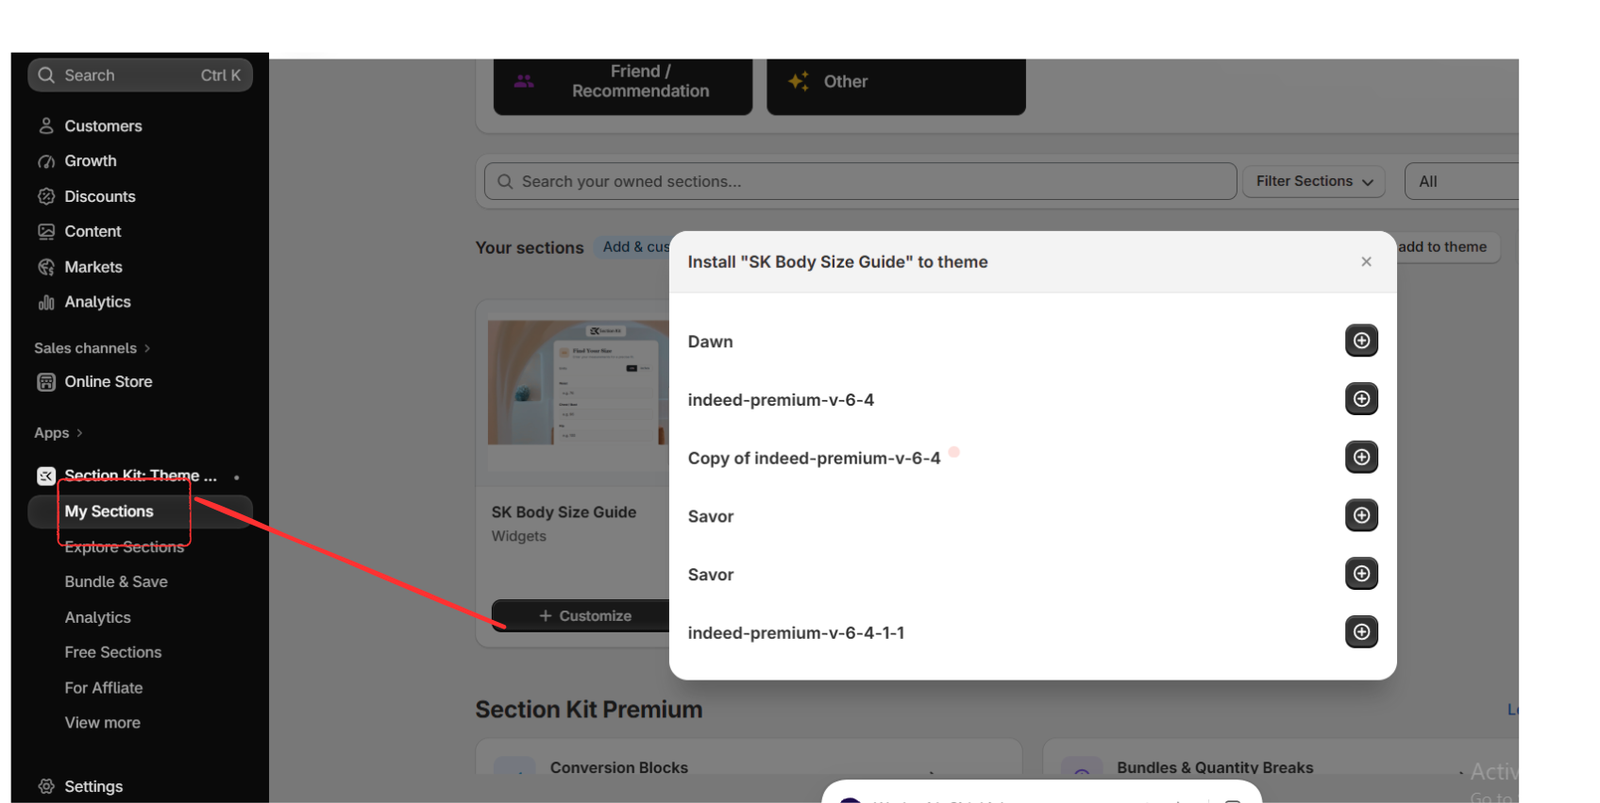
Click Customize on the section’s card.
A dialog opens with the themes available in your store. Find the theme you want to edit and click the plus (+) button beside its name.
The screenshots use Dawn. Choose your own intended theme, especially if your store has several copies or draft themes.
Installing the section into one theme does not automatically place it into every theme.
Step 7: Open the Theme Customizer
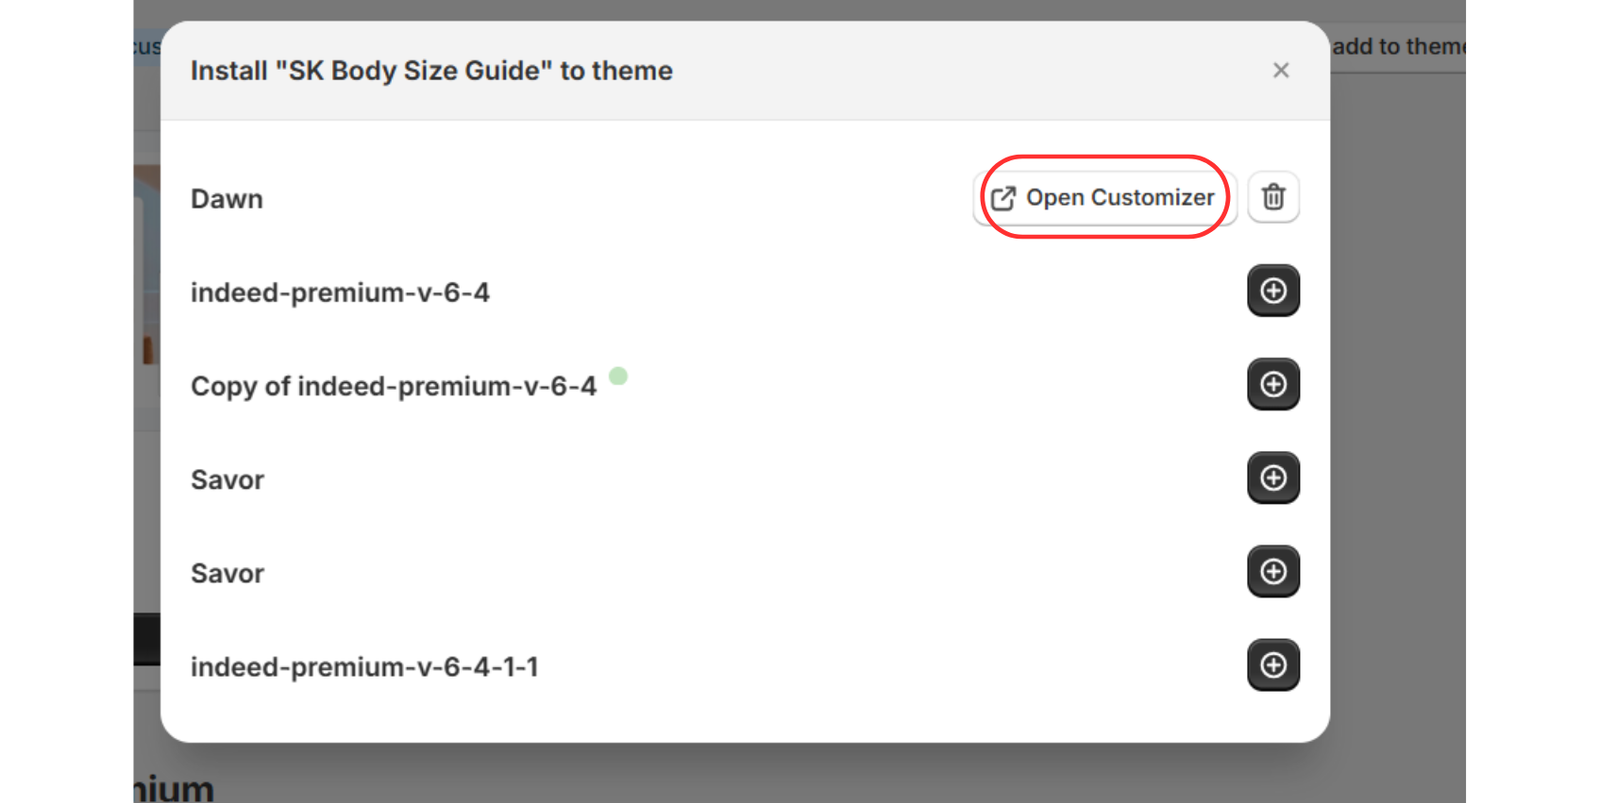
Once installation finishes, the selected theme displays Open Customizer.
Click it to open Shopify’s theme editor. Check the theme name and select the page or template where you want the section to appear.
The screenshots show the Home page. Your placement can depend on the section’s purpose and the templates your theme supports.
Step 8: Add the Section to the Page
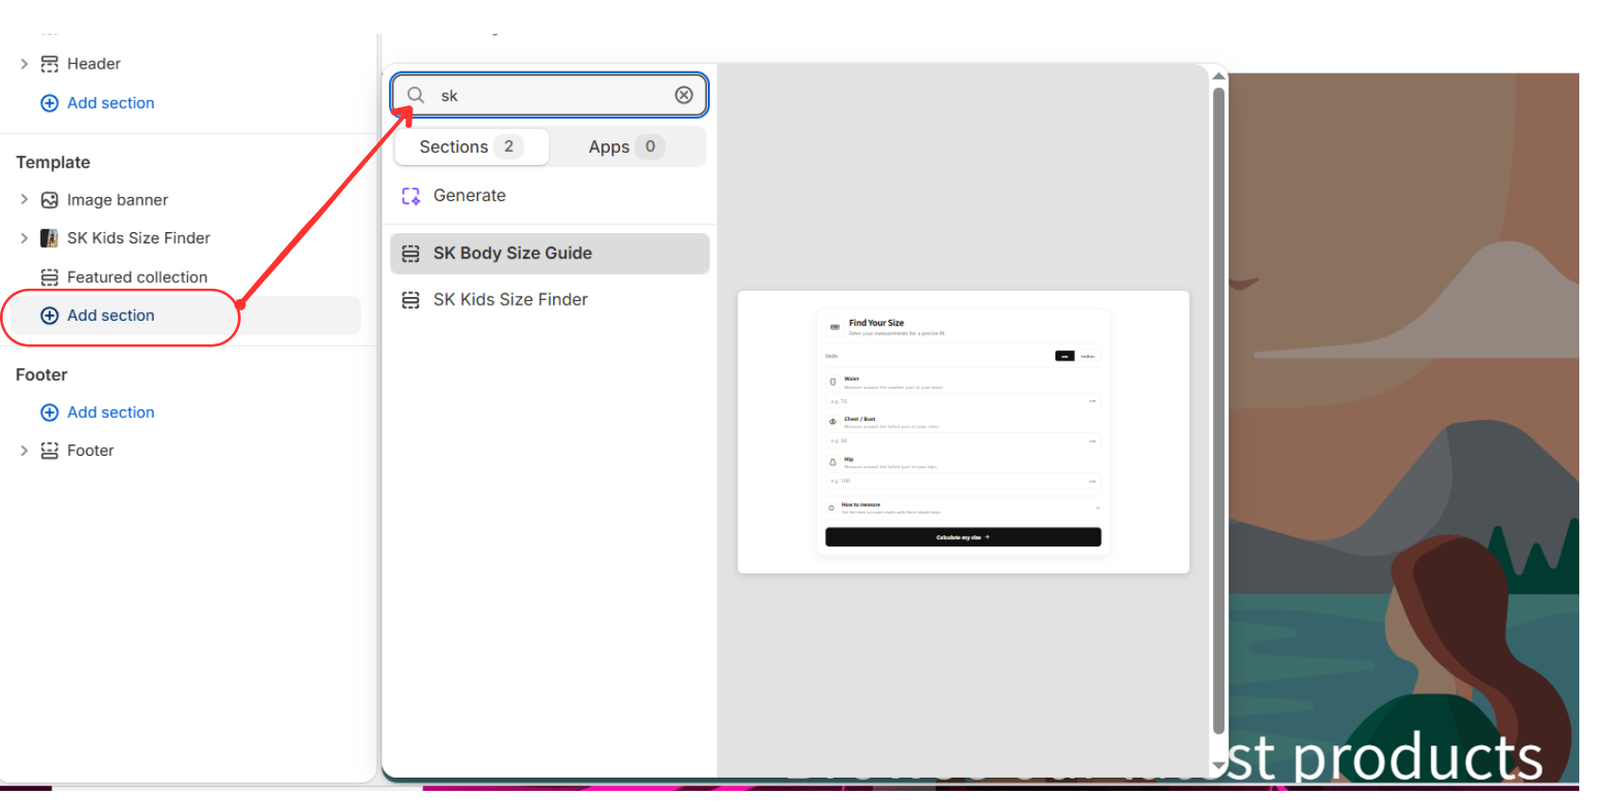
In the theme editor sidebar, click Add section in the template area.
Type sk or the section’s name into the search field. Under the Sections tab, select SK Body Size Guide.
The section appears in the page preview. Move it to a suitable position in the sidebar so customers can find it naturally.
Step 9: Customize the Layout and Size Settings
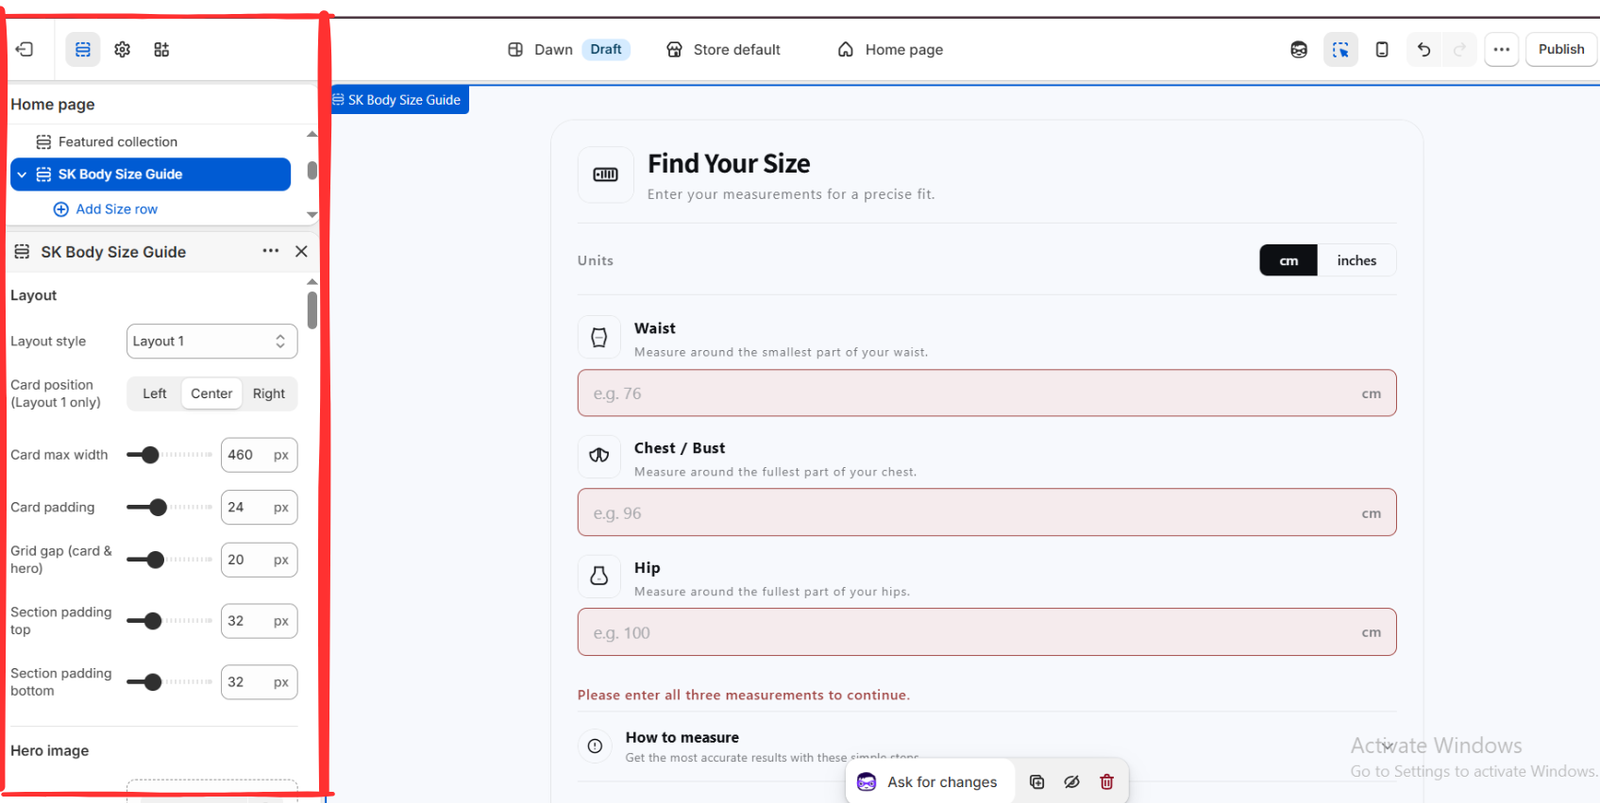
Click SK Body Size Guide in the sidebar to open its settings.
The screenshot shows controls for layout style, card position, maximum width, card padding, spacing, and section padding. Adjust these to fit your store’s design.
For this sizing tool, also configure the Size row blocks using your actual product measurements and size ranges. Default or example values should be replaced with information appropriate to your products.
Test the measurement inputs and recommendations before making the section available to shoppers.
Step 10: Add Your Image, Review, and Save
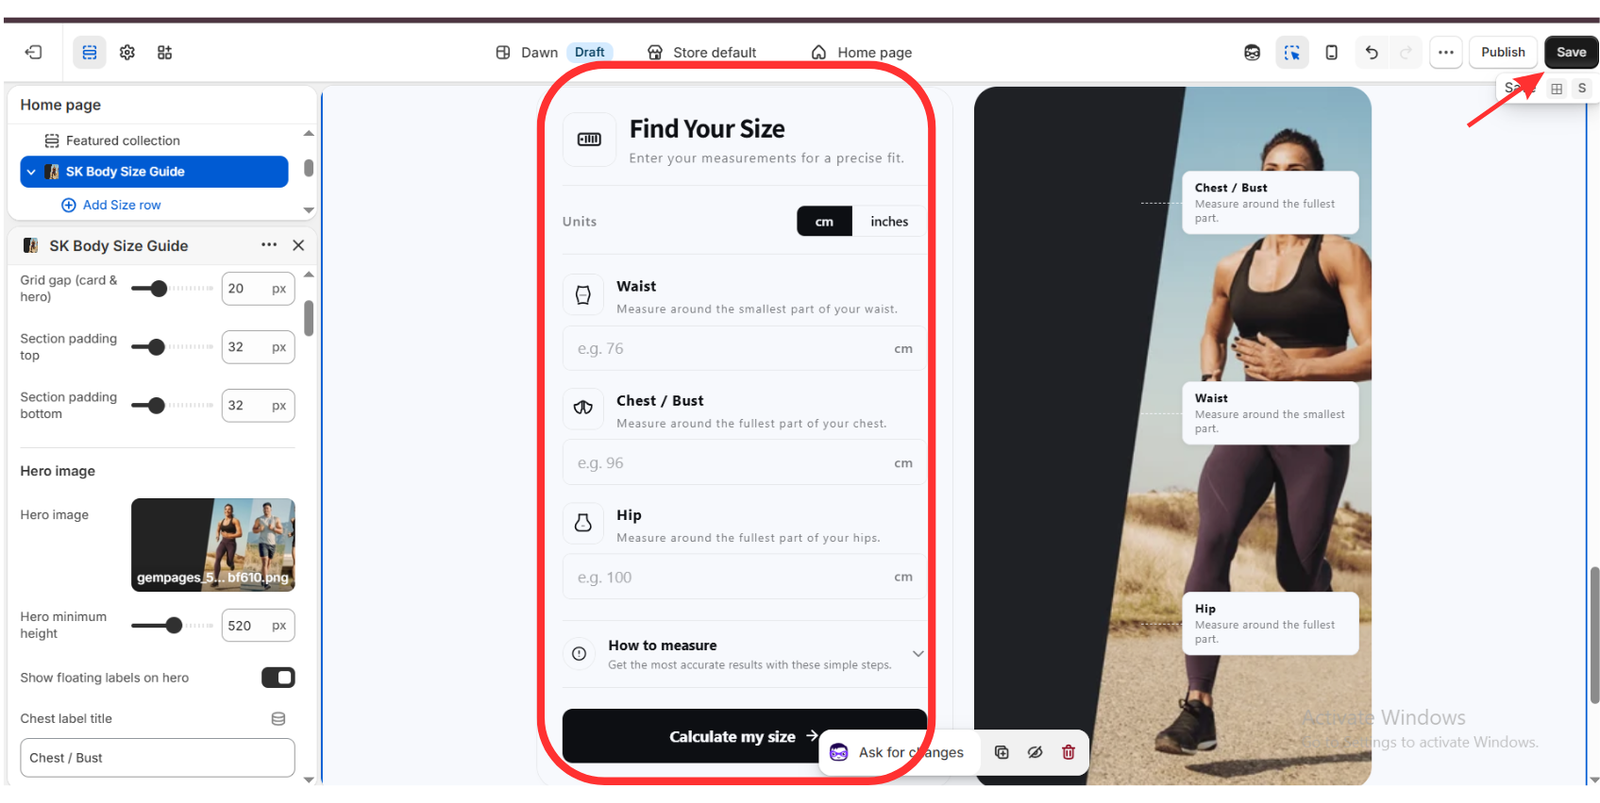
Use the Hero image setting to upload or select an image that suits your store. Adjust the available image settings and measurement labels as needed.
Review the finished section on desktop and mobile. Check the text, spacing, image, and sizing behavior, then click Save.
The screenshots show Dawn as a Draft theme. Saving keeps your changes in that draft; publish the theme when you are ready for it to replace the current live theme.
If Your Section Does Not Appear
Confirm that you installed it into the same theme you are editing. Then reopen the editor and search for the section’s full name under Add section → Sections.
If you can see it in the editor but not on your storefront, check that you saved your changes and that the storefront is using the theme and template you edited.
Start With One Useful Free Section
You do not need a complete redesign to make your Shopify store more useful. Start with a missing feature that helps customers understand your products or navigate your store.
Section Kit gives you a way to try a suitable free section, customize it in Shopify, and build on the theme you already use.
Ready to add your first free section? Install Section Kit: Theme Sections, open Free Sections, and choose the right addition for your store.
APP LINK HERE: Theme Sections on the Shopify App Store




