How to Add an Animated Cursor to a Shopify Store
Introduction
Your Shopify store’s personality comes from more than its logo, colors, and product photography. Small interactive details can also shape how it feels to browse. An animated cursor adds movement and a distinctive visual touch as desktop visitors move their mouse across your storefront.
If you want to add an animated cursor to a Shopify store without manually editing theme code, Custom Cursor provides a practical starting point. This guide walks through the setup using the five images provided, from installing the app to enabling it in your theme.
The Headache: Making Your Store Feel Different Without Extra Development
Merchants often spend time refining banners, collections, and product pages, yet the browsing experience still feels similar to other stores using the same theme. A custom pointer is one way to add personality, but setting it up manually introduces extra work.
You may need to prepare cursor assets, write CSS or JavaScript, manage hover behavior, and test the result across different pages. Animated effects can require additional scripting. For merchants who simply want a small design enhancement, that process can take attention away from products and daily store operations.
There is also a practical challenge: the cursor must remain easy to see and use. A pointer that is too large, distracting, or difficult to distinguish from the background can make browsing less comfortable.
Why Use the Custom Cursor App?
Custom Cursor brings cursor selection and storefront activation into a visual workflow inside Shopify. Its listing describes support for custom cursor designs, animated cursor effects, and custom uploads, with availability depending on the selected plan.
Instead of building the effect from scratch, you can select an available design, adjust its size, publish the settings, and enable the app embed in your theme. The supplied images show where those controls appear.
Before choosing a design: check that it is available on your plan and supports the animation you want. A decorative cursor icon and an animated cursor are not necessarily the same thing. The still images in this guide show the selected design and activation process; they cannot demonstrate its movement.
Why an Animated Cursor Can Matter
A carefully chosen cursor can reinforce the mood of your store. A playful design may fit gifts or accessories, while a subtle effect may better suit a minimal storefront. The aim is to make the experience feel consistent with your brand.
Treat the animation as a finishing detail. Keep product information, navigation, and purchase buttons easy to use. A custom cursor alone does not guarantee higher conversions or sales, and it should never compete with the content shoppers came to see.
How to Add an Animated Cursor to a Shopify Store: Step by Step
Step 1: Install Custom Cursor
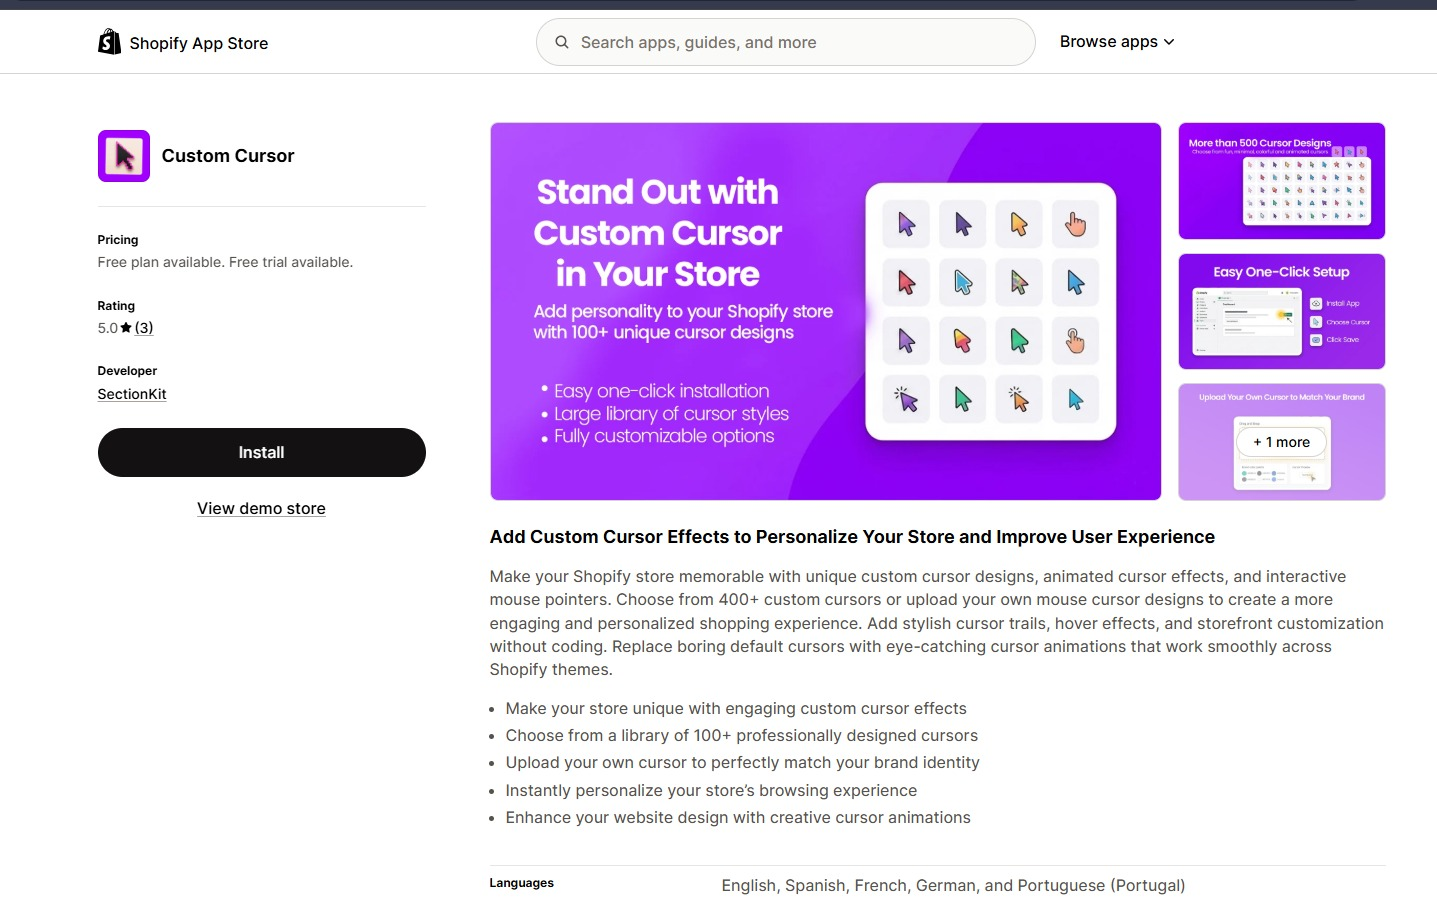
Open the Custom Cursor listing in the Shopify App Store. Select Install, choose the store you want to customize if prompted, and complete Shopify’s installation process after reviewing the requested permissions.
The first image shows the app listing and its Install button. After installation, open the app from your Shopify admin.
Step 2: Choose Your Cursor and Publish the Settings
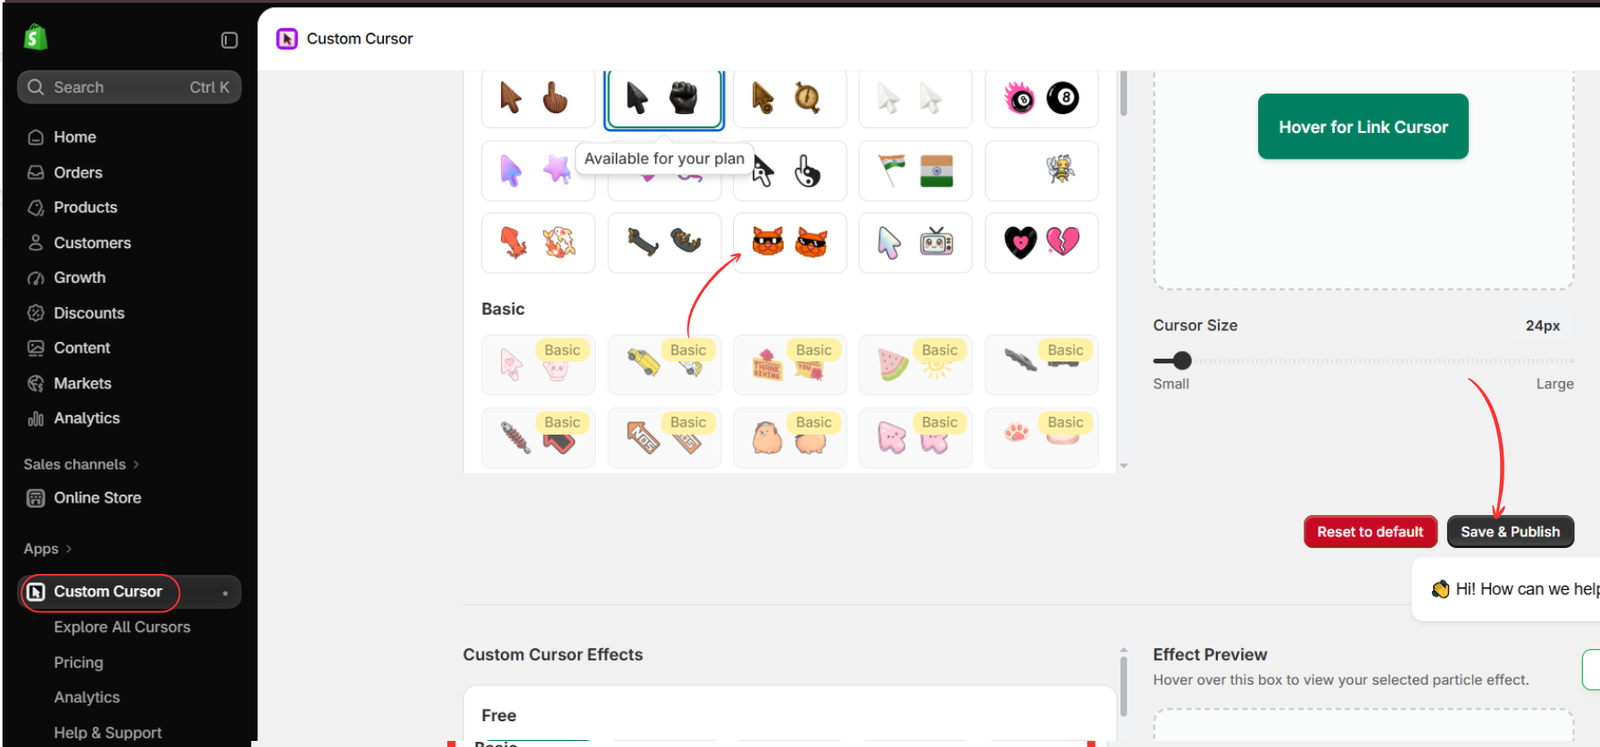
In Shopify admin, open Apps → Custom Cursor. Browse the cursor library and select an animated design available on your plan. The second image points to an orange cat design as the example selection.
Use the preview area to check the pointer and its link-hover appearance. Adjust the Cursor Size slider so the cursor is visible without covering important text or buttons. The image shows a size of 24px; use the size that suits your own storefront.
When you are satisfied, click Save & Publish. This saves the app configuration. You still need to enable its theme embed in the following steps.
Step 3: Open Your Shopify Theme Editor
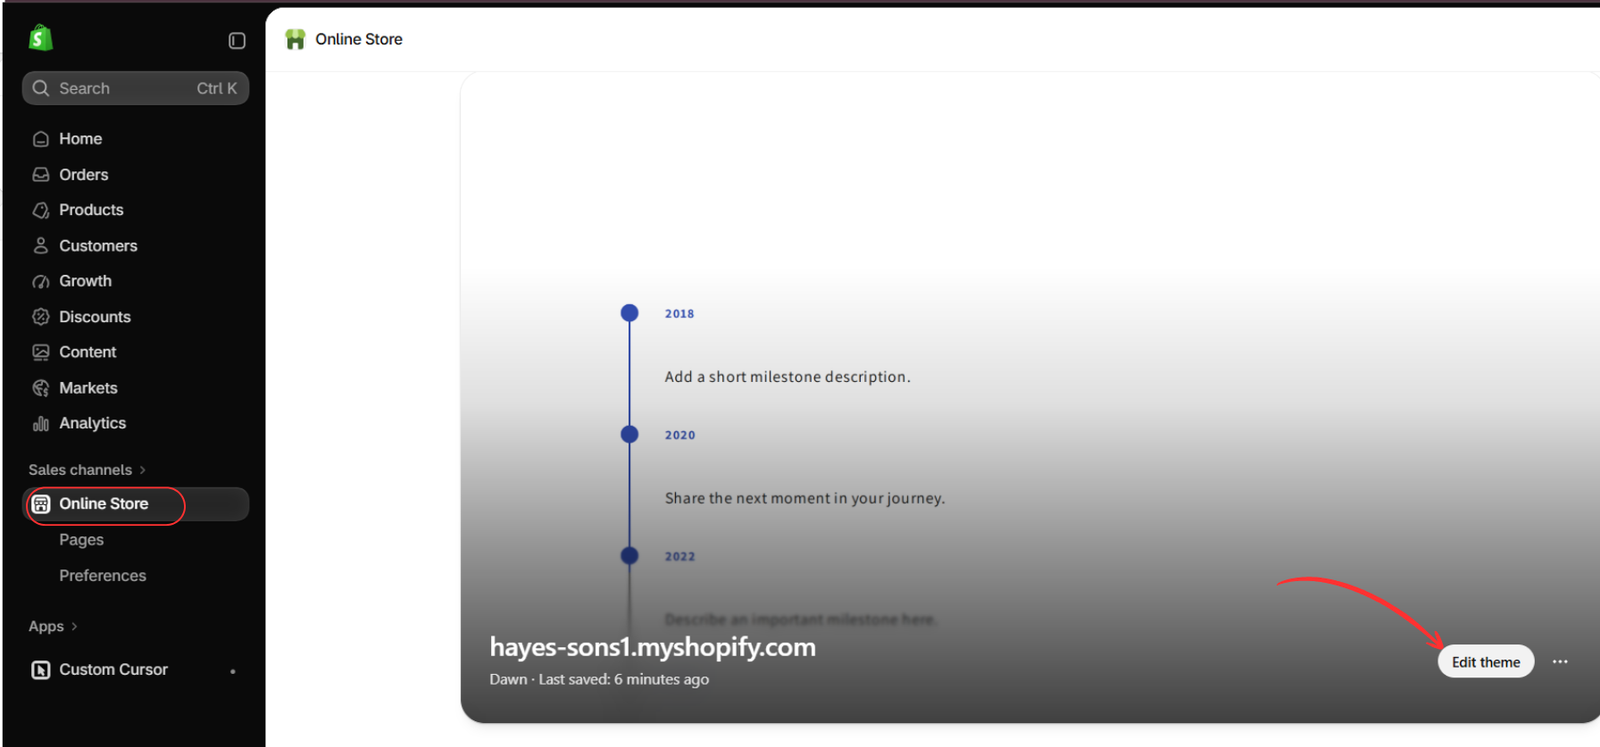
Go to Online Store → Themes and locate the theme where you want the cursor to appear. Click Edit theme, as highlighted in the third image, to open the visual theme editor.
Make sure you are working with the intended theme. Enabling an embed in a draft theme does not activate it in a different live theme.
Step 4: Find the Custom Cursor App Embed
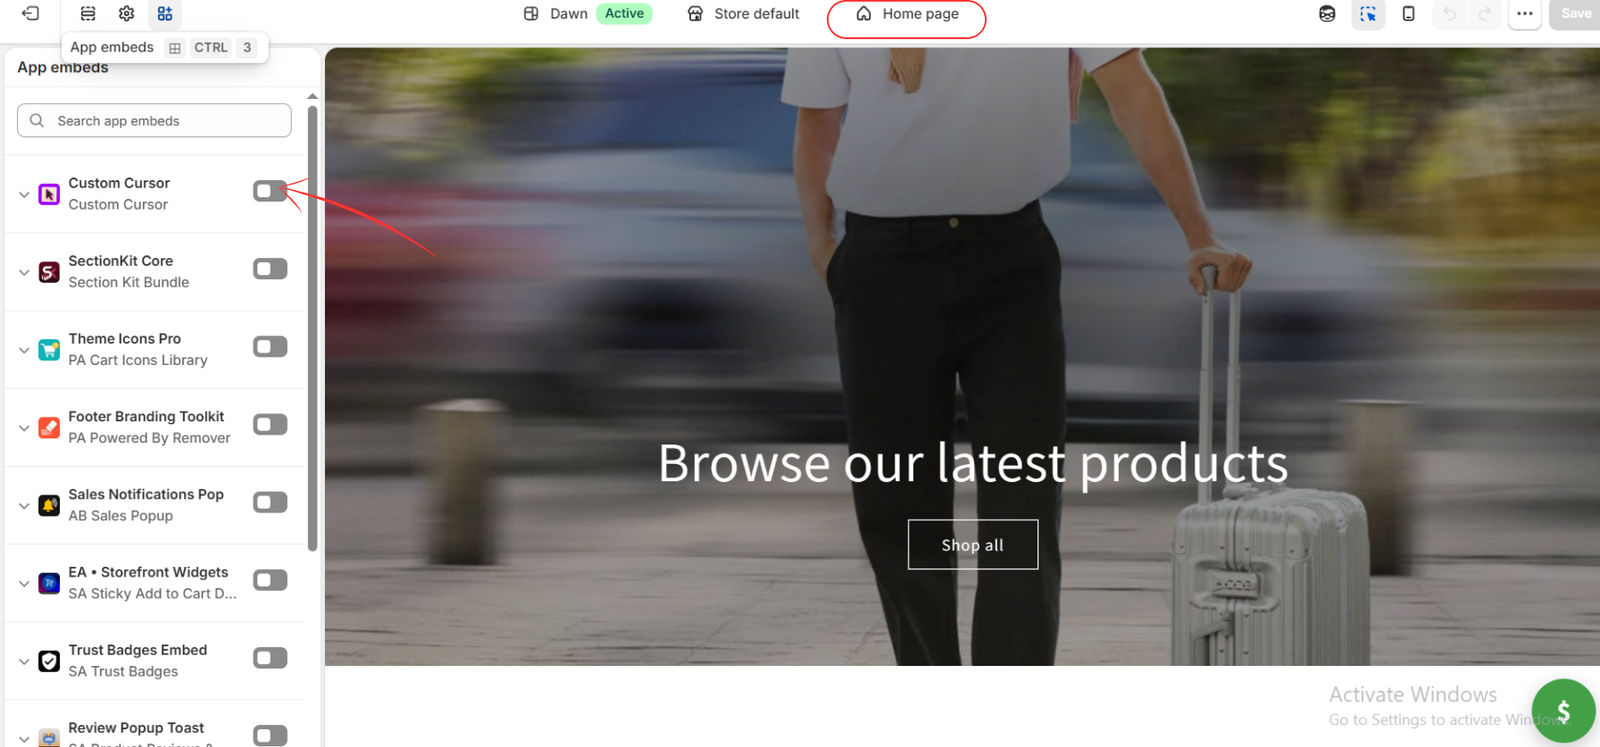
Inside the theme editor, open App embeds from the left toolbar. Locate Custom Cursor in the list, or use the app embed search field if needed.
The fourth image shows the Custom Cursor toggle switched off. Turn it on to enable the app in this theme. You do not need to add a homepage section for this step.
Step 5: Save and Check the Result
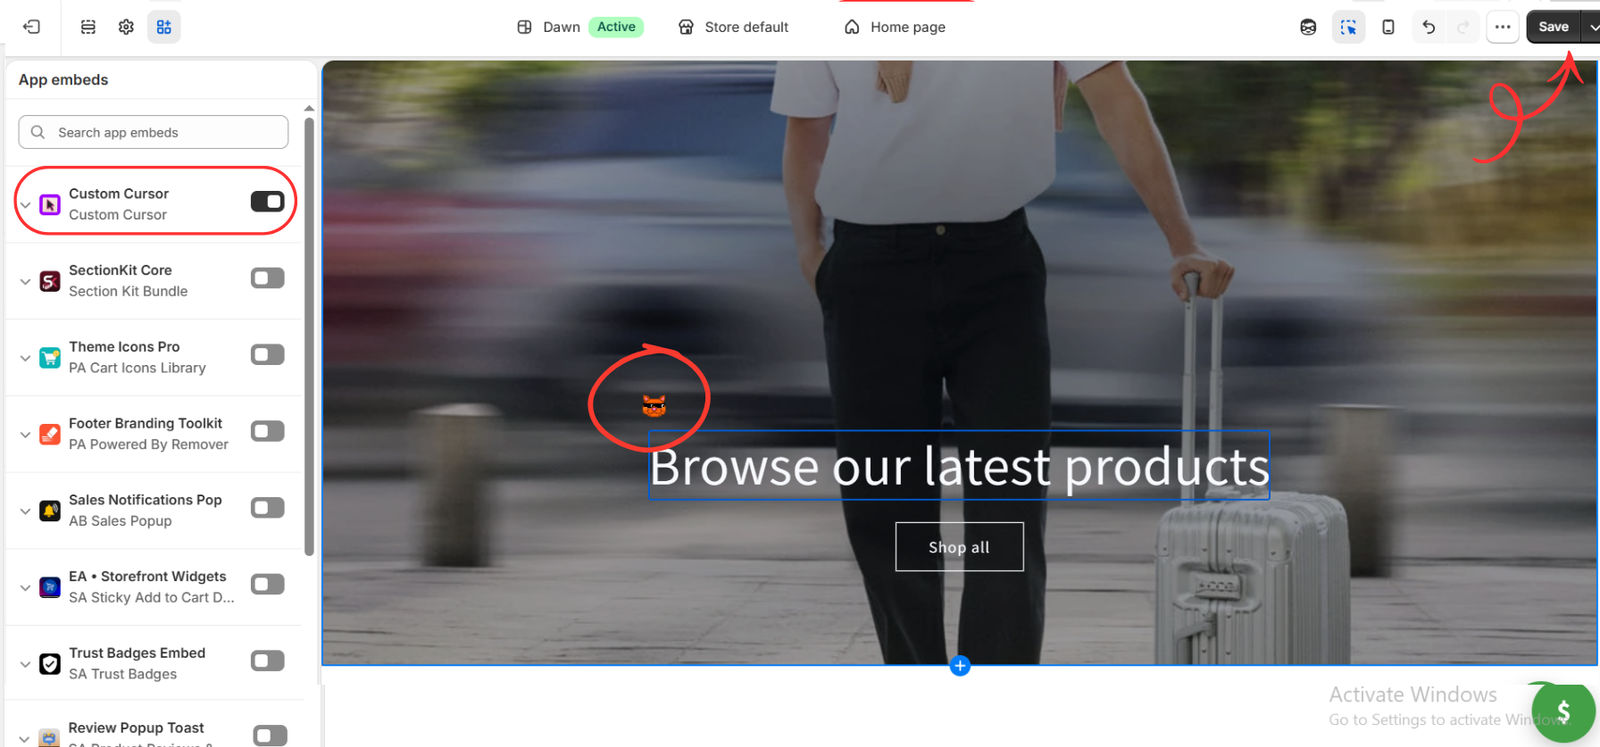
With the Custom Cursor embed enabled, click Save in the top-right corner of the theme editor. The fifth image shows the enabled toggle, the Save button, and the selected orange cat cursor in the storefront preview.
Open the storefront in a separate browser tab on a desktop computer. Move your mouse across the homepage and hover over navigation links, product cards, and buttons. Confirm that the chosen animation appears and that clicking still feels natural.
Check a collection page and a product page as well. Because this is a mouse-pointer effect, a touchscreen-only phone is not a suitable way to verify the animation.
If Your Animated Cursor Does Not Appear
- Check both saves: confirm you clicked Save & Publish in the app and Save in the theme editor.
- Check the theme: verify that Custom Cursor is enabled in the theme your storefront is using.
- Check the selected design: make sure it supports animation and is available on your plan.
- Refresh the storefront: reload the page or test in a fresh browser tab after saving.
- Test with a mouse: inspect the effect on a desktop browser rather than relying on a touchscreen preview.
Keep the Effect Useful and On Brand
Start with a modest cursor size and a restrained animation. Test it against both light and dark areas of your store, and make sure shoppers can still recognize links and buttons. If the effect feels distracting, choose a simpler design or reduce its visual intensity.
Conclusion
To add an animated cursor to a Shopify store, install Custom Cursor, select an available animated design, publish your settings, and enable the app embed in the correct theme. After saving, test the effect across your desktop storefront to make sure it complements the shopping experience.
Ready to personalize your store? Explore Custom Cursor on the Shopify App Store.




