HOW TO ADD CURSOR TRAIL EFFECTS TO A SHOPIFY STORE
Introduction
A Shopify storefront can look polished and still benefit from a small interactive detail. Cursor trail effects add particles or visual accents that follow the mouse as desktop visitors move across your pages. Used carefully, they can give a store a playful or distinctive feel without changing its core layout.
If you want to add cursor trail effects to a Shopify store without writing the animation code yourself, Custom Cursor offers a visual setup workflow. This guide follows the seven supplied images in order, from installation and cursor selection to choosing an effect and enabling the app in your theme.
The Main Headache: Adding Interactive Effects Without Extra Coding
Merchants often want their store to feel different from other shops using a similar theme. However, adding motion manually can involve writing JavaScript, styling particles, and checking how the effect behaves over navigation, product cards, and buttons.
A cursor trail also needs to remain secondary to shopping. An effect that covers product details, distracts from prices, or makes a page feel sluggish can work against the experience you are trying to improve. Choosing the right effect is as important as installing it.
Another common source of confusion is the difference between a cursor design and a trail. Changing the pointer to a cat, arrow, or other icon does not by itself enable particles behind it. The pointer and trail are configured in separate areas of the app shown in your images.
Why Use the Custom Cursor App?
Custom Cursor supports cursor designs and cursor trail effects through an app-based workflow. You can choose a pointer, browse the Custom Cursor Effects panel, preview a particle effect, and publish your settings without building the effect from scratch.
The supplied interface also includes None and Remove all effects controls, making it easier to return to a simpler appearance. Before selecting an effect, check its availability on your active plan and review any usage allowances shown in the app.
Why Cursor Trail Effects Can Be Useful
A subtle trail can reinforce a store’s visual style. Warm particles may suit a seasonal campaign, while a light, minimal effect may complement a creative accessories shop. The goal is to add a coherent finishing detail rather than motion for its own sake.
Keep the effect restrained and test it against the actual content of your store. Cursor trails do not guarantee higher conversions or sales. Product clarity, useful information, and easy navigation remain more important than decorative motion.
How to Add Cursor Trail Effects to a Shopify Store: Step by Step
Step 1: Install Custom Cursor
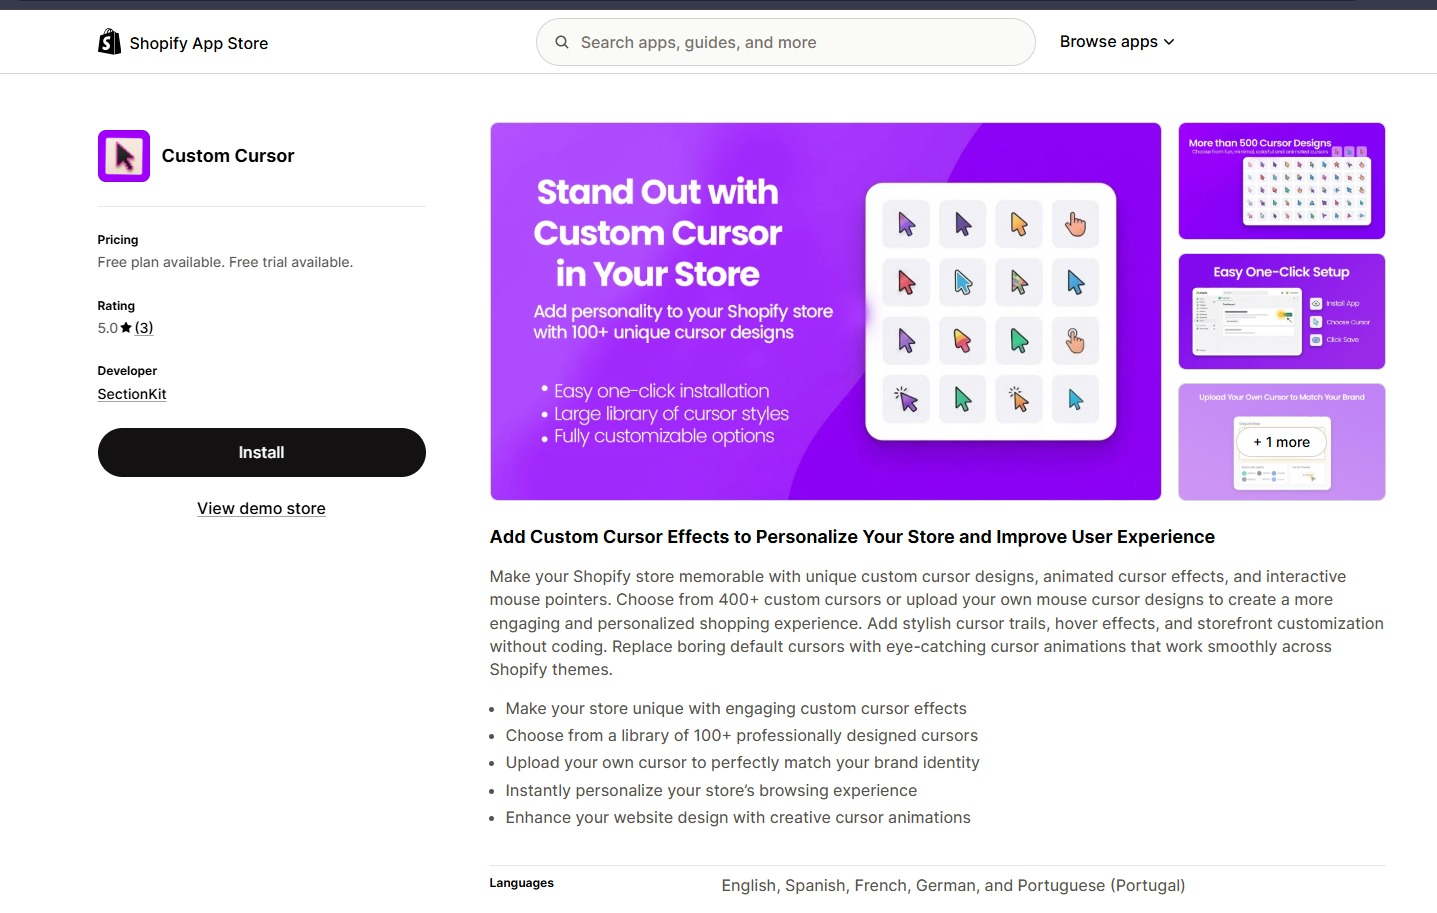
Open the Custom Cursor listing in the Shopify App Store and click Install. Select the correct store if prompted, review the requested permissions, and complete the installation process.
The first image shows the app listing and Install button. After installation, open the app from your Shopify admin.
Step 2: Open the App and Review the Cursor Gallery
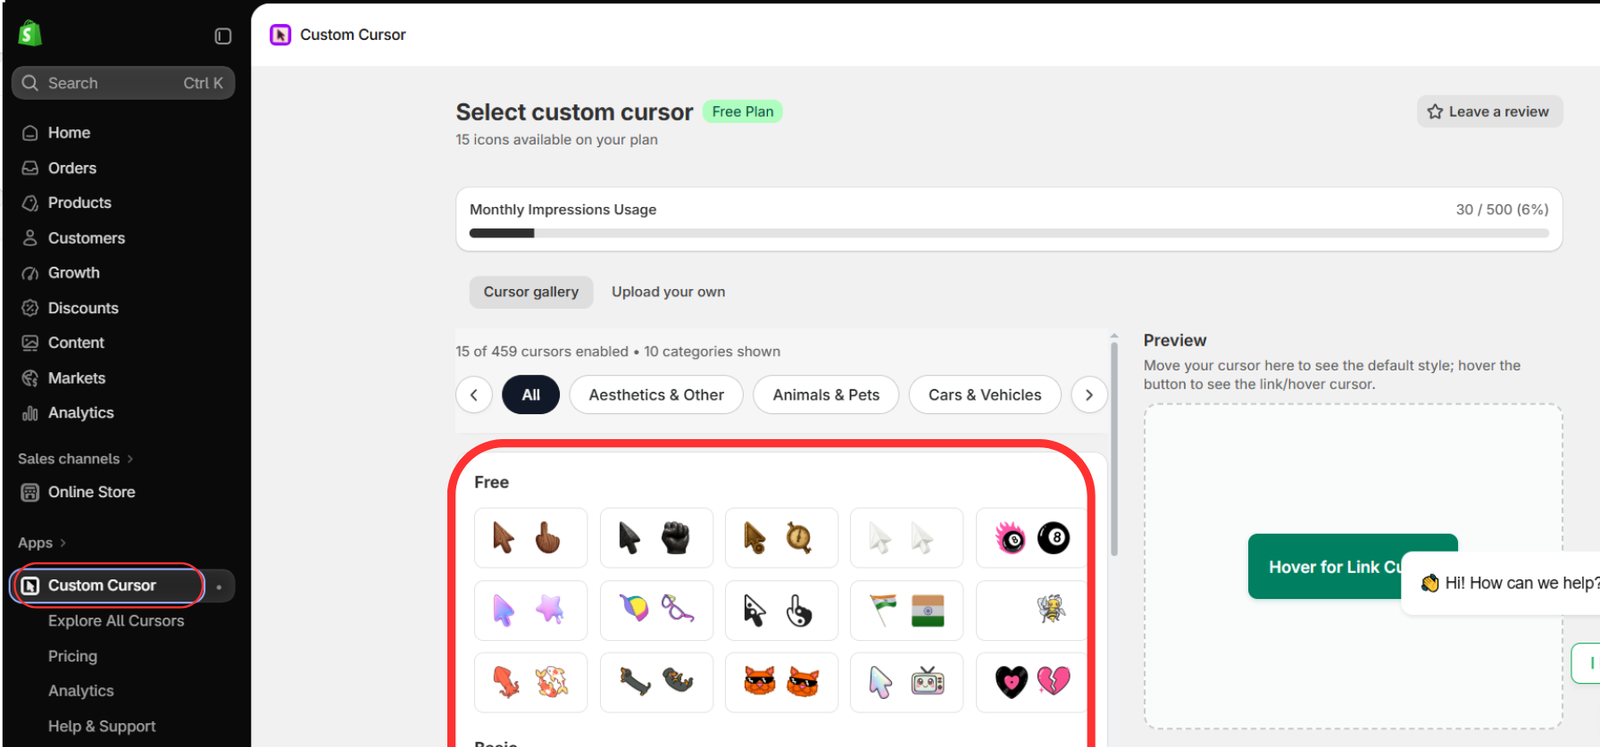
Go to Apps → Custom Cursor in Shopify admin. The second image shows the cursor gallery, your plan badge, monthly impressions usage, and a preview area.
Browse the available designs to find a pointer that matches your store. Use the category filters if helpful. Check plan labels before choosing, because some designs may require a different plan.
Step 3: Select a Pointer and Save Its Settings
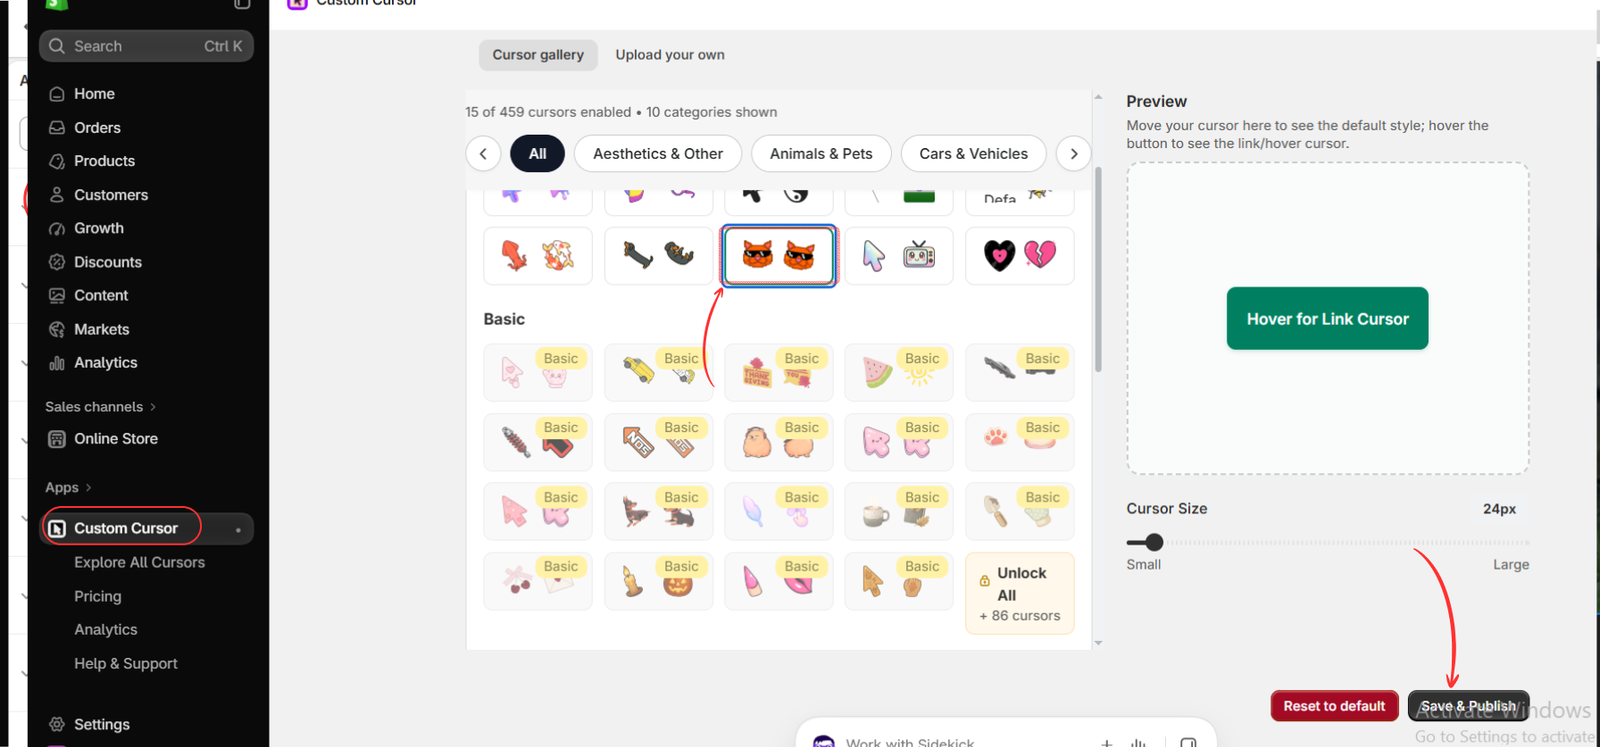
Choose the cursor design you want to use alongside the trail. The third image highlights an orange cat design as the example selection.
Move your mouse inside the preview area and hover over the preview button to check the pointer and link-hover appearance. Adjust Cursor Size if needed; the image shows 24px, but you should choose a size that works for your own store.
Click Save & Publish to save the pointer configuration. This step sets the cursor design. The trail is configured next.
Step 4: Choose and Preview a Cursor Trail Effect
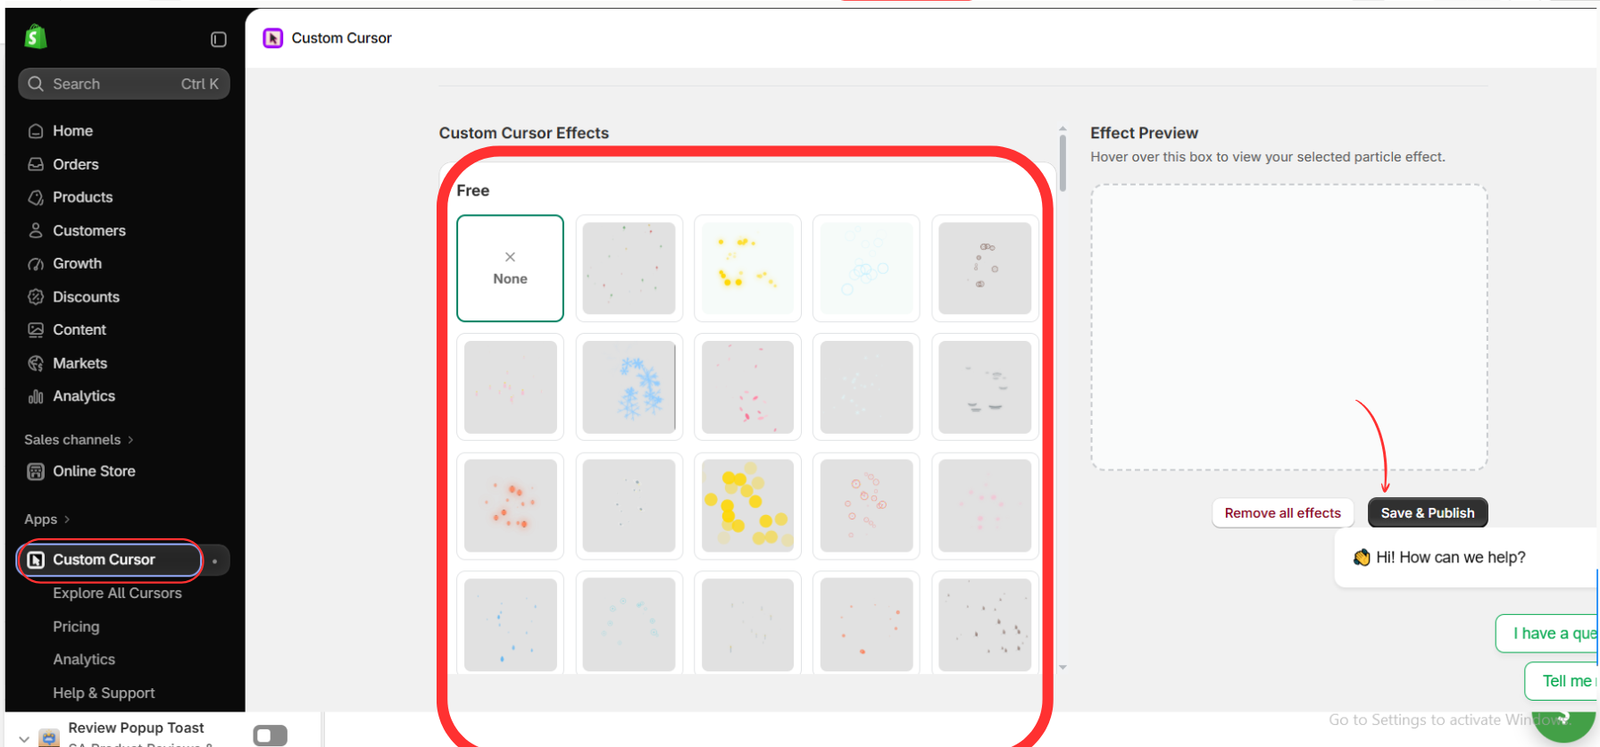
Scroll to Custom Cursor Effects. The fourth image shows the effect tiles and the Effect Preview box.
Select an available particle effect rather than None. Move your mouse over the Effect Preview box to inspect how it follows your pointer. Compare a few options and choose one that stays visible without overpowering text or product images.
The fourth image currently shows None selected, so you must choose a different tile to activate a trail. Once you are satisfied with the preview, click the Save & Publish button in the effects area.
The final image in this guide illustrates a yellow particle trail. You can choose an available effect with a similar appearance or select another style that better matches your storefront.
Step 5: Open the Theme Editor
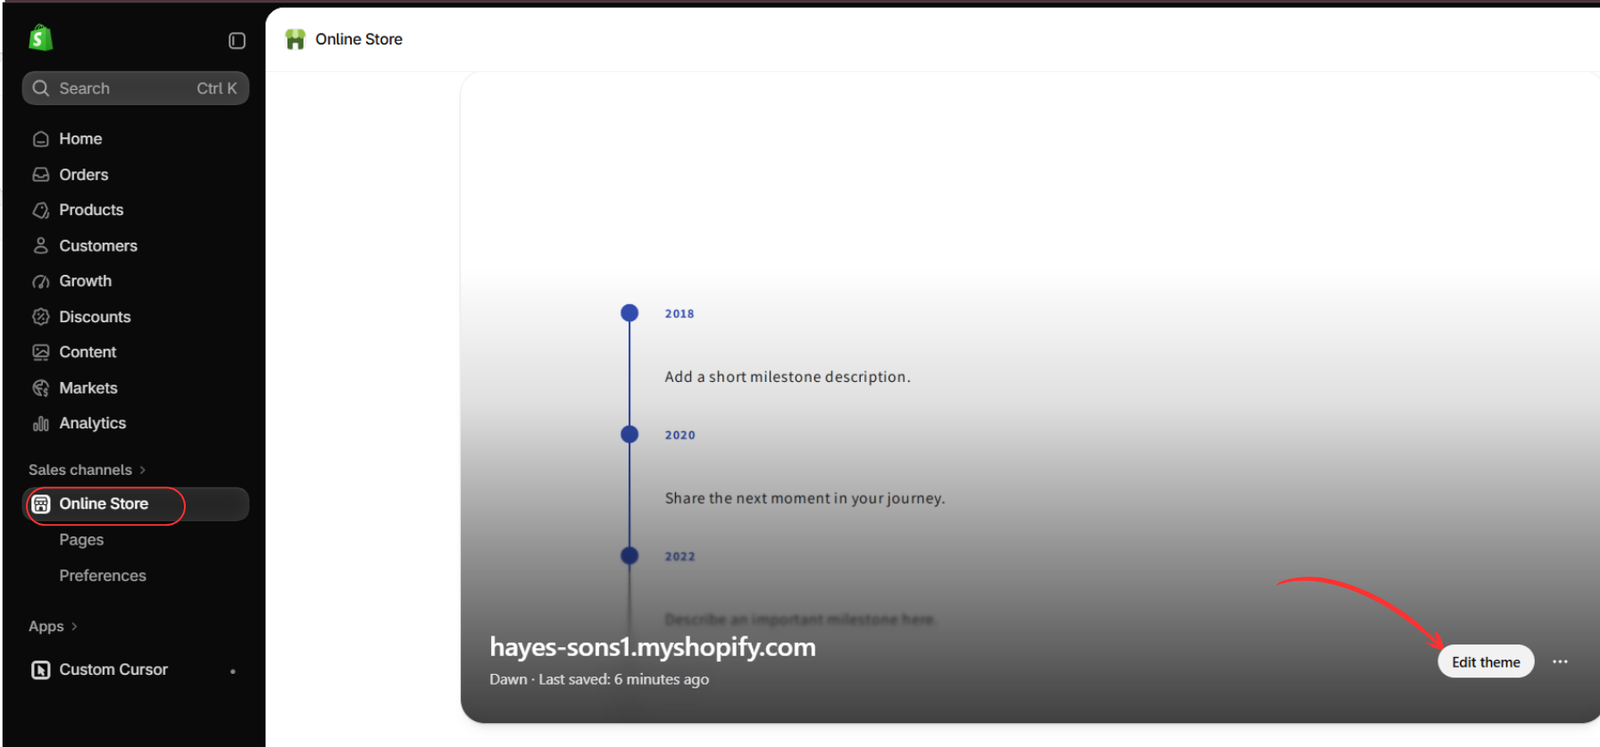
Go to Online Store → Themes and find the theme where you want the effect to appear. Click Edit theme, as highlighted in the fifth image.
Make sure you open the intended theme. An app embed enabled in a draft theme does not activate it in a different live theme.
Step 6: Find the Custom Cursor App Embed
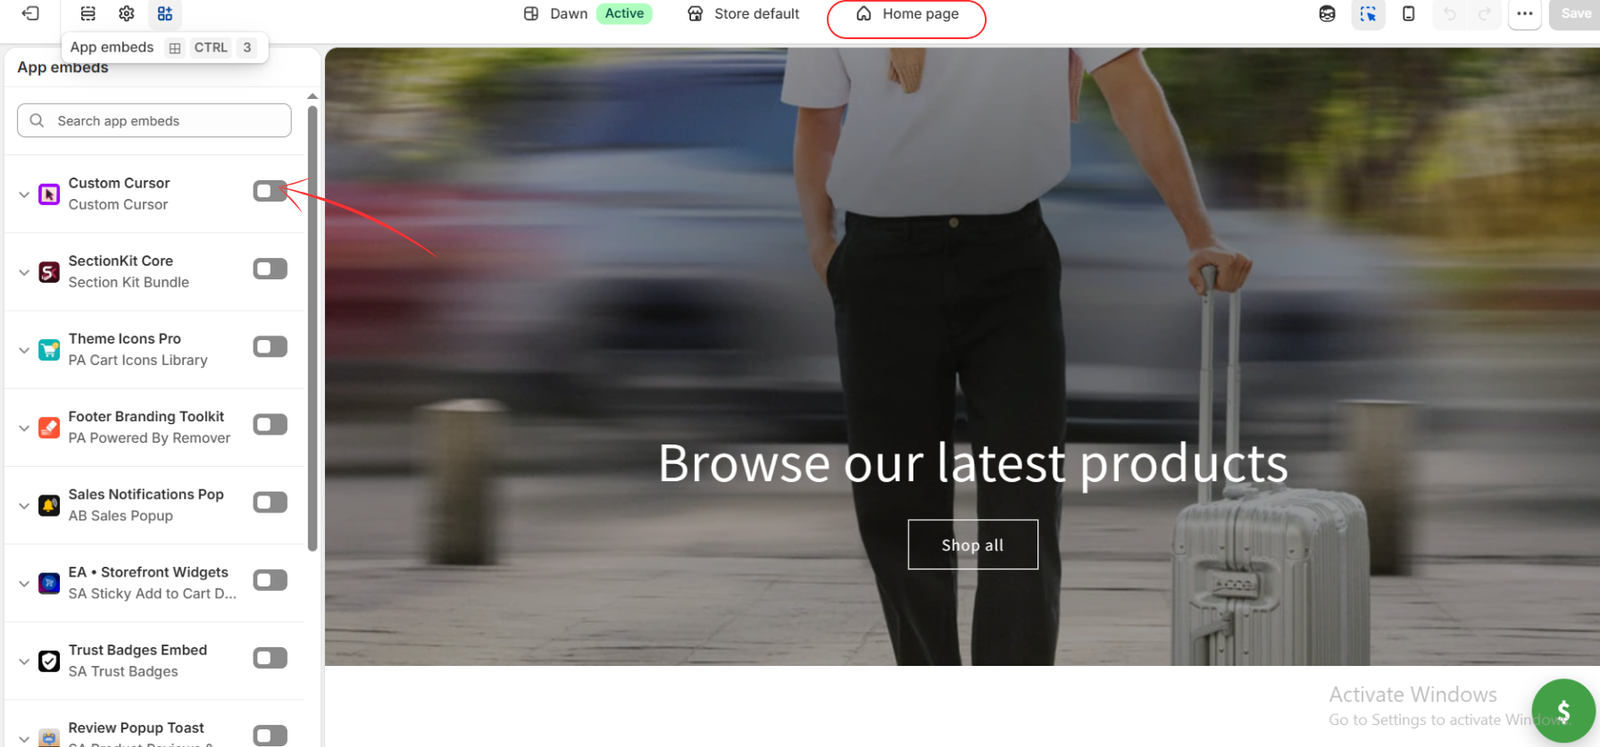
In the theme editor, open App embeds from the left toolbar. Find Custom Cursor, using the search field if necessary.
The sixth image shows its toggle switched off. Turn it on to enable the app in this theme. You do not need to add a separate homepage section for the cursor effect.
Step 7: Save and Test the Trail on Your Storefront
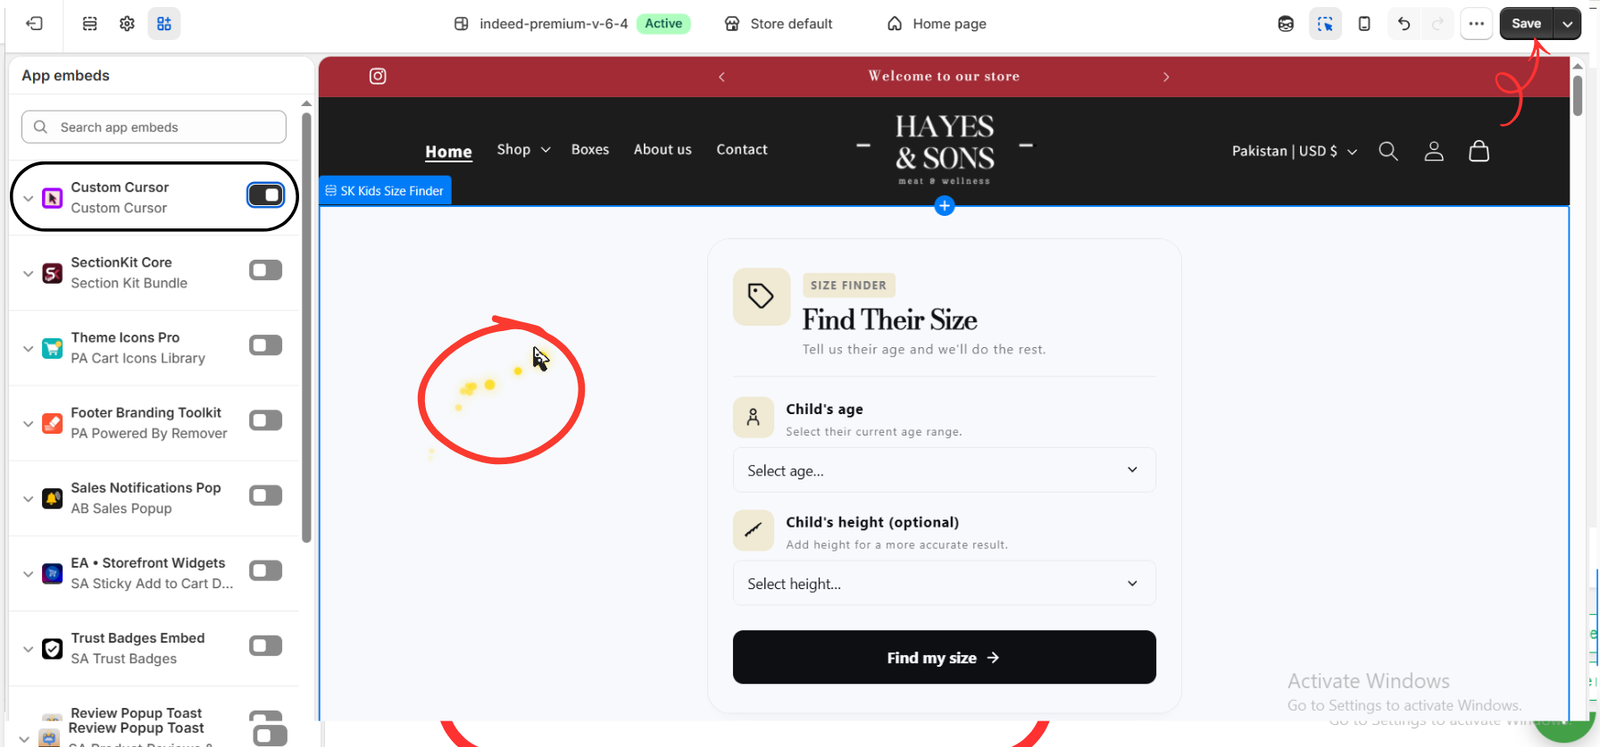
With the Custom Cursor embed enabled, click Save in the top-right corner. The seventh image shows the enabled embed and a yellow particle trail following the pointer.
This final example uses a different theme from the earlier theme-editor images. Apply the same activation process to your own intended theme; you do not need to switch themes to use a trail.
Open your storefront in a separate desktop browser tab and move your mouse over the homepage, a collection page, and a product page. Confirm that the trail appears, links still respond naturally, and the effect does not cover important content.
The size-finder section visible in the final image belongs to that example storefront. It is not part of the cursor trail setup.
If Your Cursor Trail Does Not Appear
- Check the effect selection: make sure None is not selected in Custom Cursor Effects.
- Save the effects area: confirm you clicked Save & Publish after selecting the particle effect, not only after choosing the pointer.
- Check the theme embed: enable Custom Cursor in the correct theme and click Save.
- Check availability: review the app for plan restrictions or usage messages.
- Test on desktop: refresh the storefront and move a mouse or trackpad pointer. A touchscreen-only phone is not a suitable way to verify a mouse trail.
Keep the Trail Subtle and Comfortable
Test the effect across light and dark backgrounds. Look at product titles, prices, menu links, and purchase buttons while moving the mouse. Keep the trail secondary to those elements and avoid effects that make reading difficult.
Check that scrolling and navigation remain responsive. If the effect is distracting or uncomfortable, choose a simpler option. To remove the trail, select None or use Remove all effects, then save the change. To disable the app in the theme, switch off its embed and save the theme.
Conclusion
To add cursor trail effects to a Shopify store, install Custom Cursor, choose your pointer, select a particle effect, and publish both settings. Enable the app embed in your intended theme, save, and test the result on a desktop storefront.
Ready to personalize your browsing experience? Explore Custom Cursor on the Shopify App Store.




