HOW TO ADD A GUARANTEE BANNER TO A SHOPIFY PRODUCT PAGE
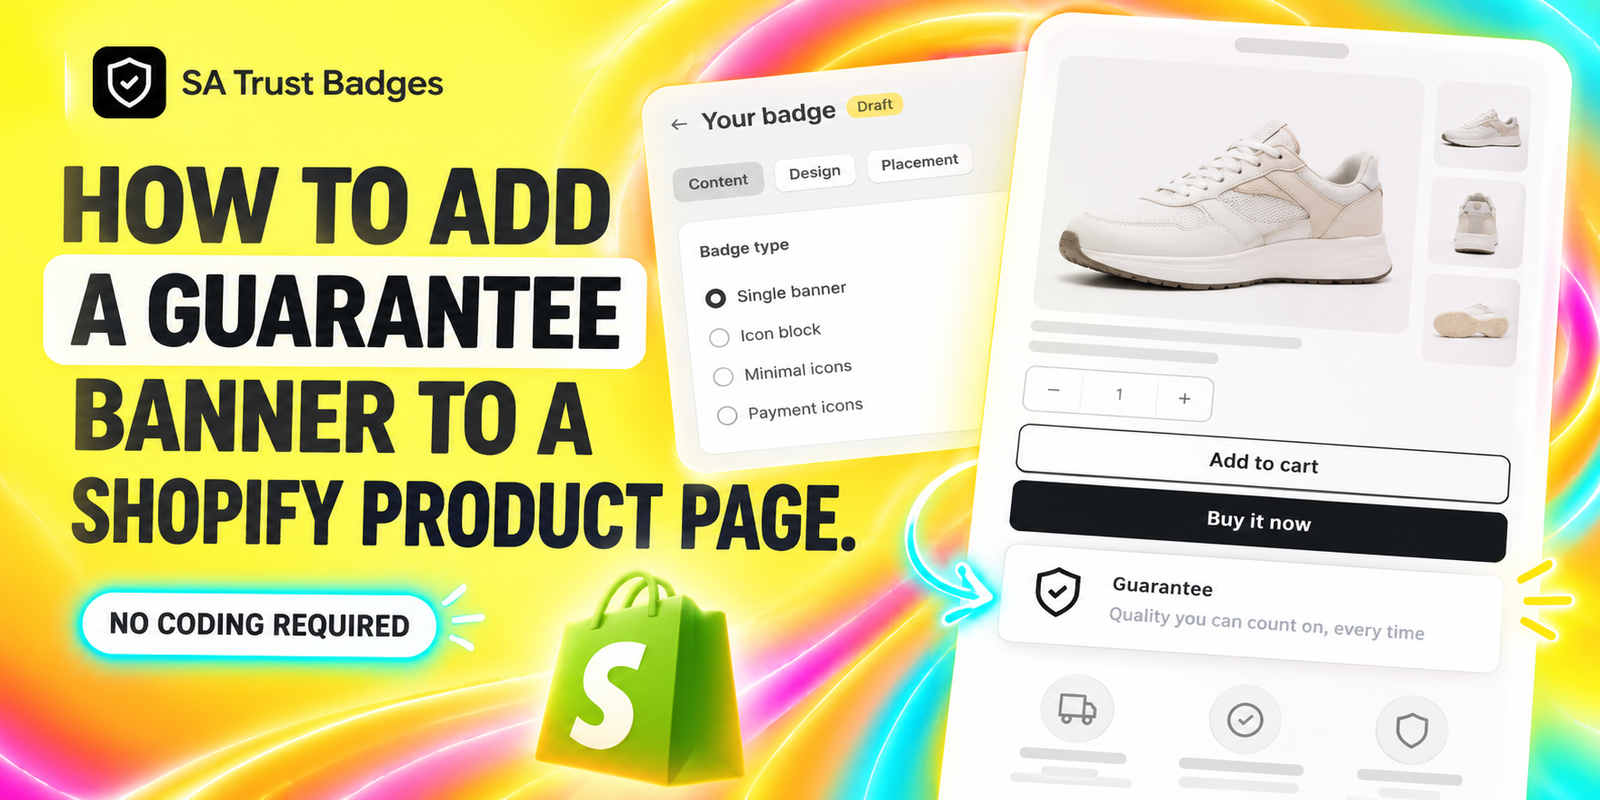
Customers want more than an attractive product image before they place an order. They also want to understand what reassurance your store offers if a product does not meet their expectations. When that information is difficult to find, shoppers may hesitate at the exact moment they are ready to buy.
A guarantee banner puts a short, clear message on your product page, close to the purchase controls. In this guide, you will learn how to add a guarantee banner to a Shopify product page using SA Trust Badges. The five images below follow the setup in order, from installing the app to enabling the finished banner in your theme.
The problem merchants face
Many stores describe their products in detail but leave reassurance about quality, returns, or warranties in a separate policy page. A first-time visitor may never see that information before deciding whether to order.
Merchants can also struggle to highlight a guarantee without making the product page crowded. Adding an image manually may create inconsistent spacing, unreadable text on mobile, or extra work whenever the message changes. A small, focused banner gives one important promise a clear place in the buying journey.
Why use SA Trust Badges?
SA Trust Badges provides guarantee banners and other trust content for Shopify stores. Its official listing describes customizable layouts, colors, icon sizes, borders, and product or collection targeting. It also supports integration through Shopify Theme App Embeds.
For this tutorial, you will use the Single banner format visible in your images. This combines an icon, a title, and a supporting line in one compact card. You can configure the content in the app and enable its theme integration without manually inserting Liquid code.
Review the current app plans and usage limits before choosing a plan. Available features may vary by subscription.
Why a guarantee banner matters
A guarantee banner makes your reassurance easier to notice near the Add to Cart or Buy it now buttons. A short message and recognizable shield icon can help customers locate the information quickly while keeping the page easy to scan.
The message should explain a promise your store actually supports. If you offer a defined warranty or return period, make the terms accessible through your product information or policy pages. The banner presents your guarantee; it does not create a warranty or change your existing policies. Clear wording and dependable service are what give the message meaning.
Step 1: Install the app
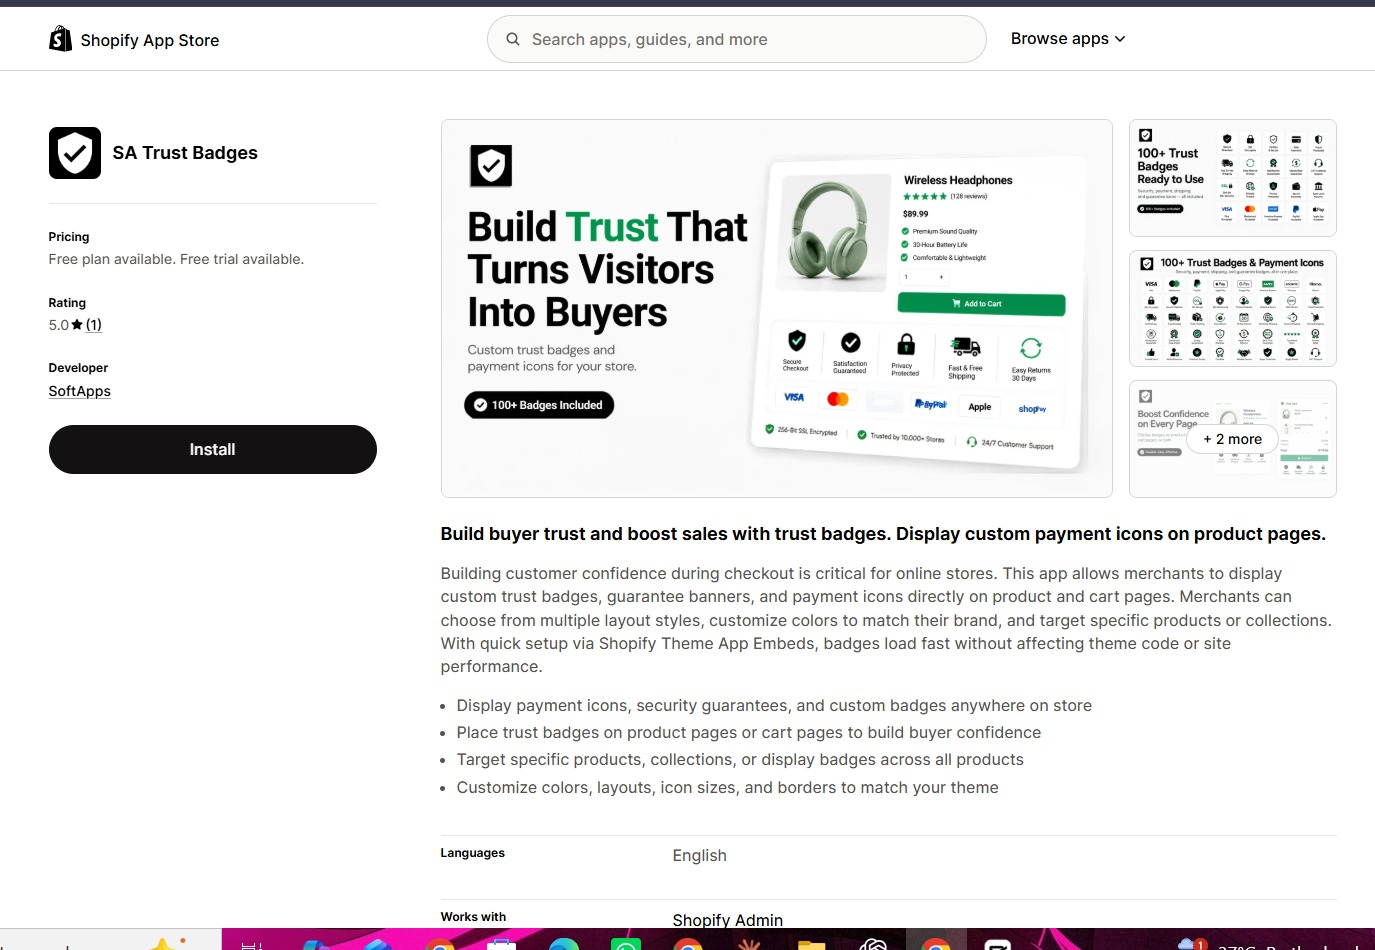
Visit SA Trust Badges on the Shopify App Store and click Install. Sign in and select your store if prompted, review the requested access, and complete installation.
Once installed, open SA Trust Badges from your Shopify admin. The first image shows the app listing and the Install button.
Step 2: Create a product banner
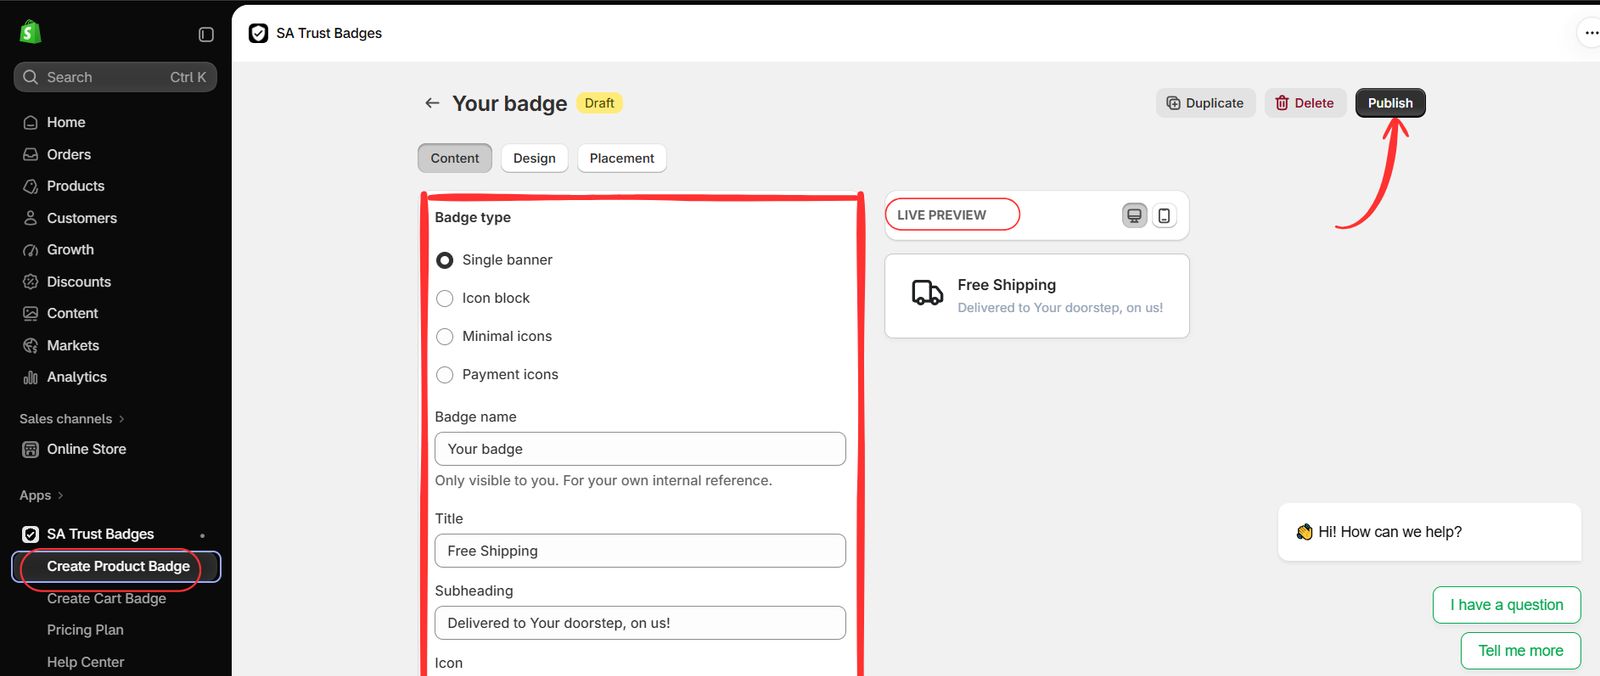
In the app menu, select Create Product Badge. In the Content tab, choose Single banner as the badge type.
Add an internal Badge name, such as “Product guarantee banner,” so you can identify it later. This name is for your own reference, as shown beneath the field in the image.
The second image displays the initial “Free Shipping” example. This demonstrates the same single-banner structure you will use for your guarantee. You do not need to publish that shipping example first; replace its content in the next step.
Step 3: Add the guarantee message and publish
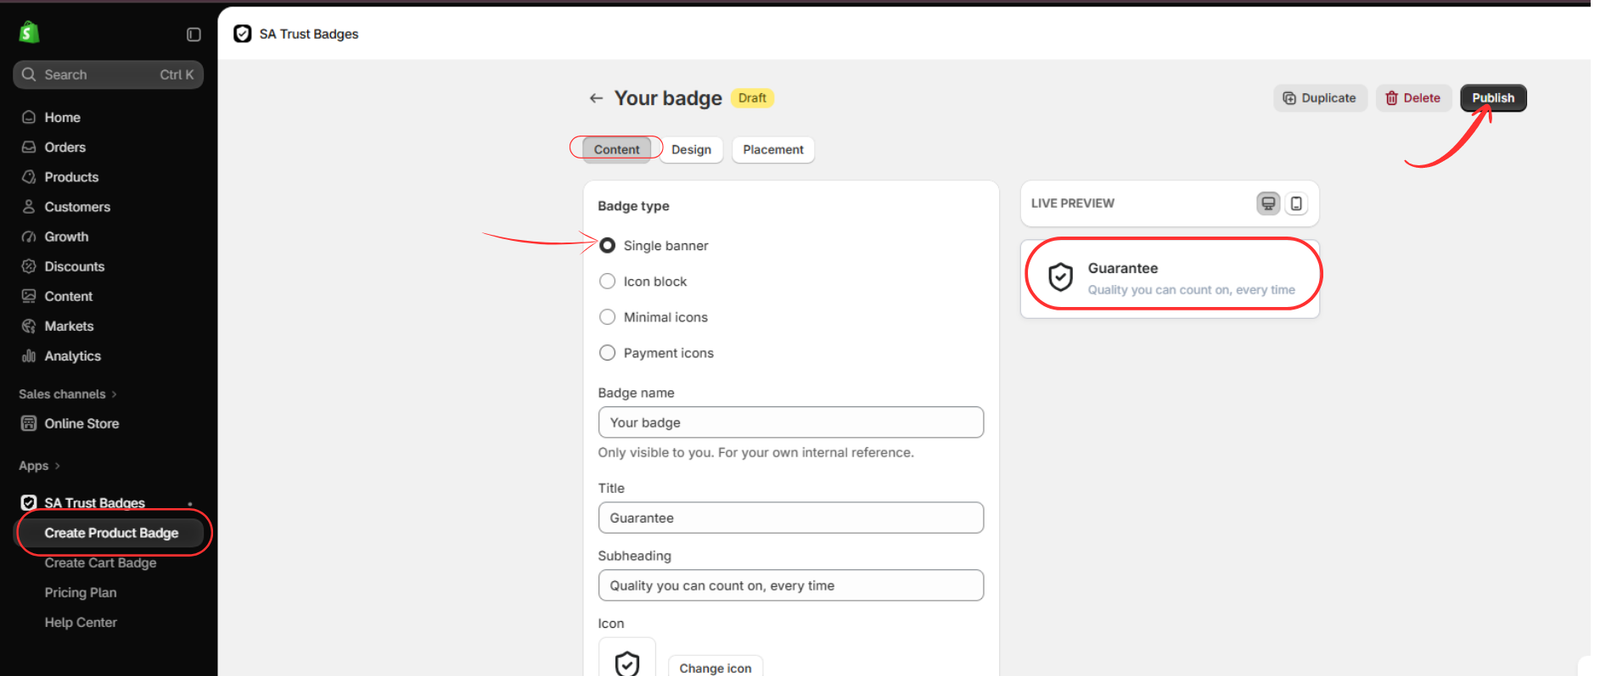
Replace the example content with your guarantee message. To reproduce the third image, use the following fields:
- Title: Guarantee
- Subheading: Quality you can count on, every time
- Icon: A shield with a check mark
Use Change icon to select an appropriate icon. Keep the wording short enough to read comfortably on mobile, and adapt it if your store offers a more specific guarantee.
Open Design to review the available styling controls. Choose readable text colors and a background that fits your product page. Then review Placement and configure the product-page display using the options available in your app.
Check the Live Preview on desktop and mobile. When the message, icon, design, and placement are ready, click Publish. Publishing in the app prepares the banner, but the theme embed must also be enabled for storefront display.
Step 4: Open your theme editor
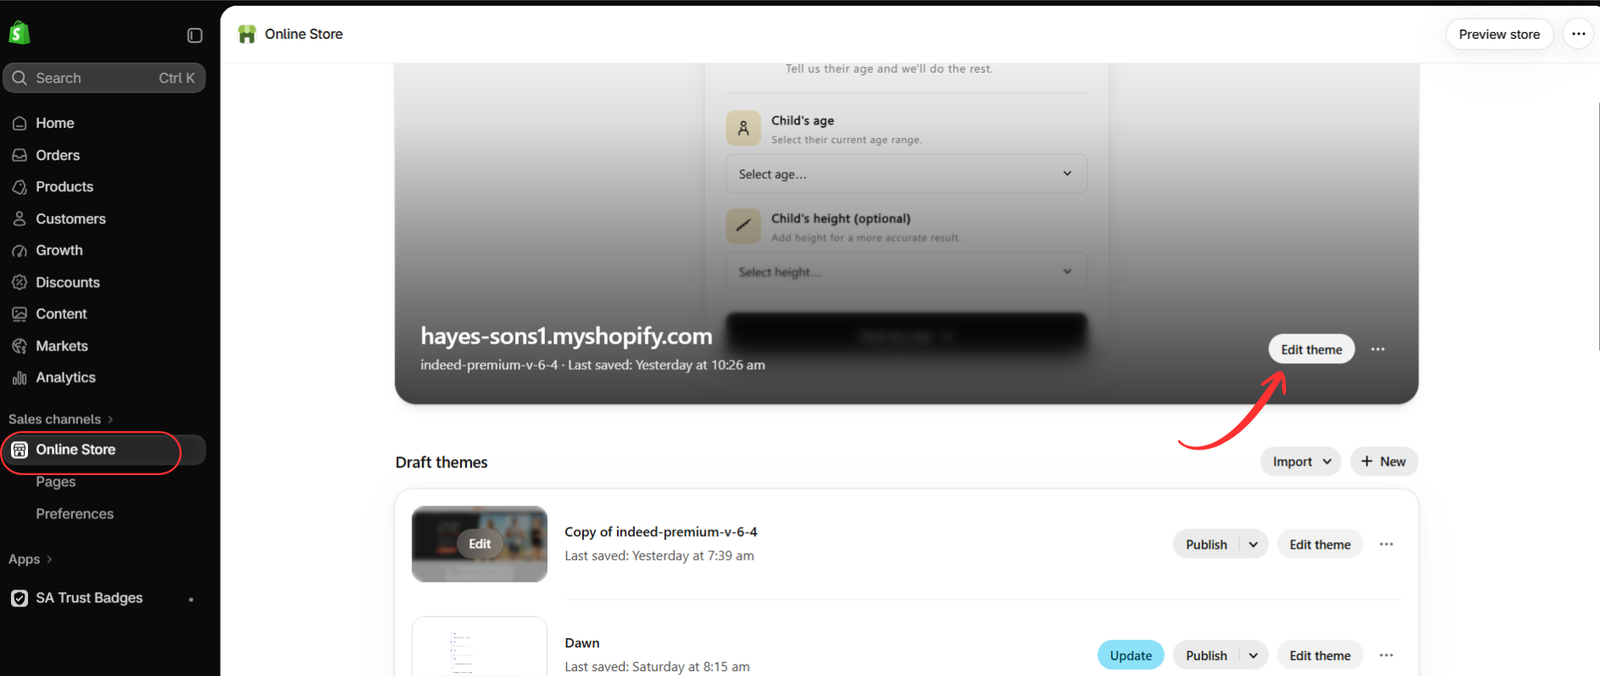
Go to Online Store → Themes in Shopify admin. Find the theme where you want to display the guarantee banner and click Edit theme, as highlighted in the fourth image. Your admin may label this action Customize.
Check that you are opening the correct theme. Changes to a draft theme should be reviewed in its preview; they will not automatically update a different live theme.
Step 5: Enable the app embed and save
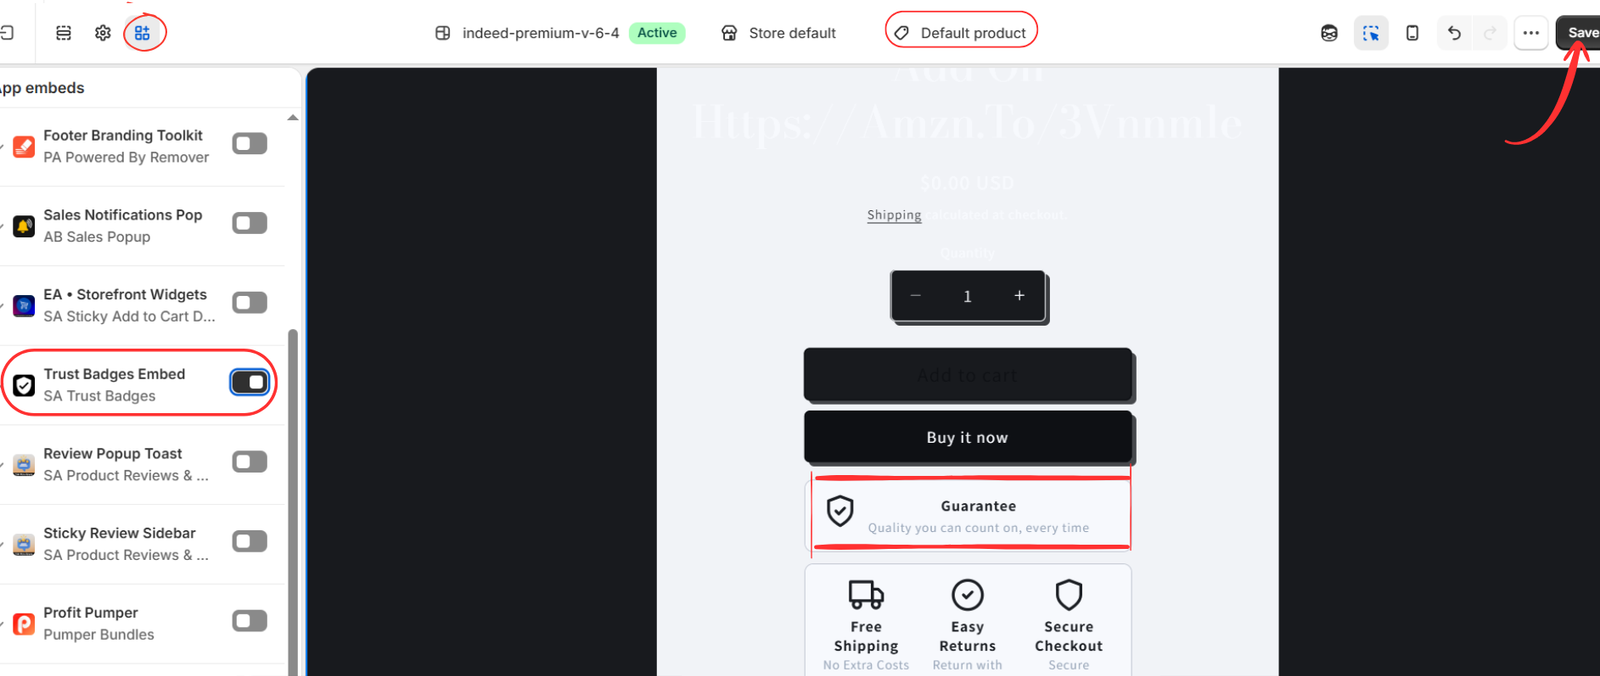
Inside the theme editor, open App embeds. Locate Trust Badges Embed under SA Trust Badges and switch it on.
Open the product template you want to inspect. The fifth image shows Default product selected and the guarantee banner below the purchase buttons. Check the result in your own theme, then click Save.
If your store uses multiple product templates, preview a representative product from each relevant template. The banner should appear where intended without overlapping buttons or other product details.
Check the finished banner
Open a relevant product on your storefront after saving and refresh the page. Confirm that the icon, title, and supporting line are readable on desktop and mobile. Review spacing around the purchase buttons and remove any unnecessary duplicate guarantee content.
If the banner does not appear, check that it is published in the app, the embed is enabled in the intended theme, and the placement or targeting settings include the product you are viewing. Also review your plan limits. If the issue continues, contact app support with the product and theme details.
Keep your guarantee clear
A well-placed guarantee banner gives shoppers a quick way to notice your store’s reassurance before ordering. Keep the design simple, the wording accurate, and the supporting policy easy to find.
To set yours up, install SA Trust Badges, select Single banner, customize your guarantee, publish it, and enable the theme embed. The image sequence above shows each stage of the process.
Feature reference: SA Trust Badges official Shopify App Store listing. Interface examples follow the supplied images.




