HOW TO ADD PRODUCT BUNDLES TO A SHOPIFY PRODUCT PAGE
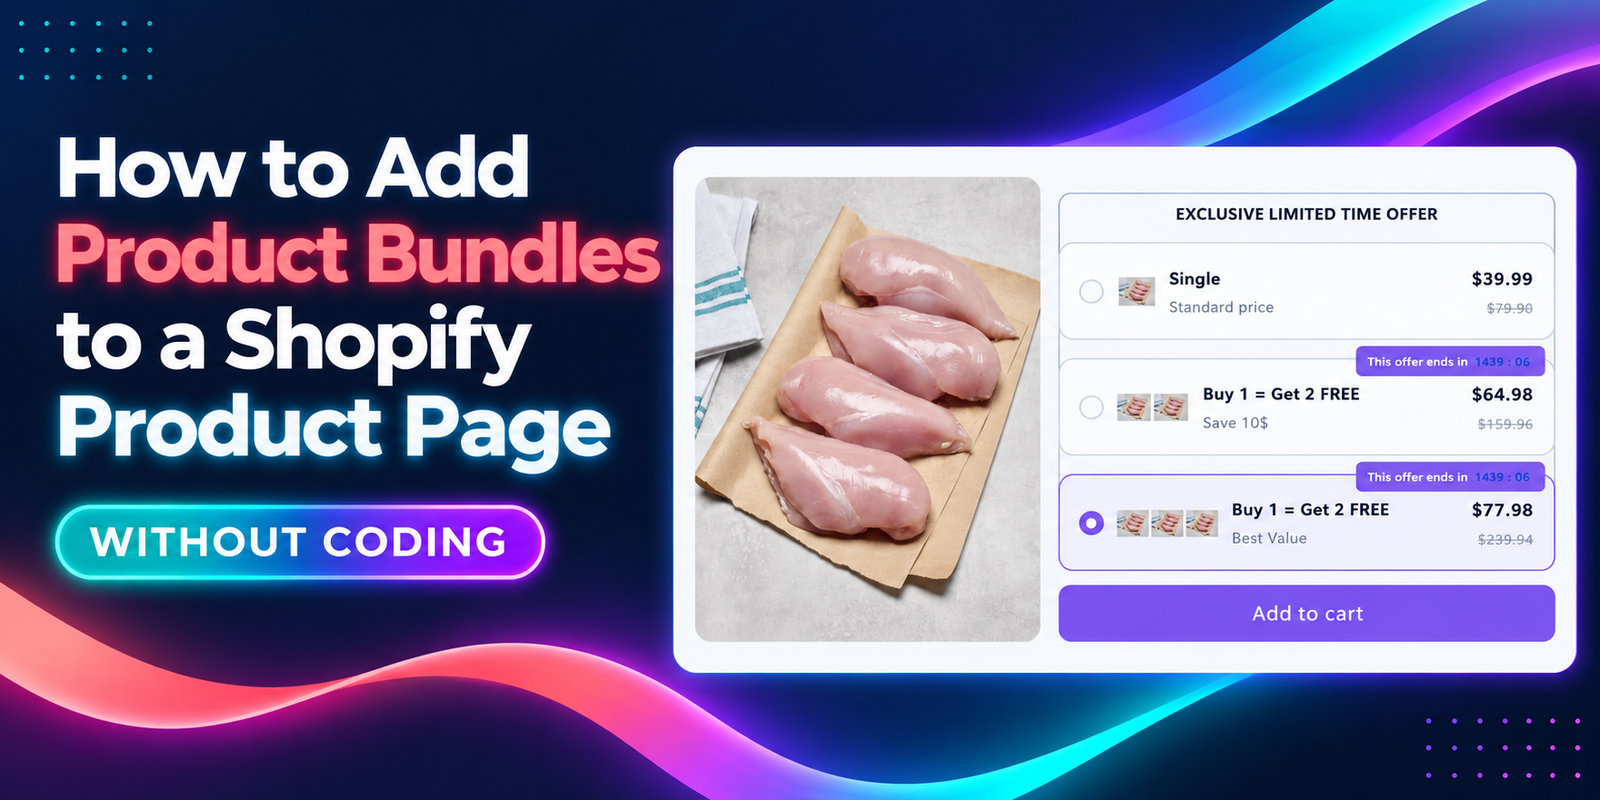
A customer who is ready to buy one product may also be interested in a larger pack or a useful combination of items. Product bundles make those options easier to discover without asking shoppers to search your entire store.
In this guide, you will learn how to add product bundles to a Shopify product page using Section Kit Bundles. The walkthrough follows the seven images below in order, from installing the app to enabling the bundle widget in your theme.
The challenge Shopify merchants face
Getting visitors to a product page takes effort. However, many shoppers choose just one item because the page does not clearly explain why buying more could be worthwhile. Related products may be difficult to find, and a discount mentioned in a banner may be easy to overlook when customers are choosing their purchase.
Merchants also need to manage the practical side of an offer: which products qualify, how much customers save, what the widget looks like, and whether the offer appears on the right pages. Building and maintaining a custom bundle interface can add development work whenever a campaign changes.
Why use a product bundle app?
A bundle app brings offer configuration and product-page presentation into one workflow. Section Kit Bundles supports quantity breaks, BOGO offers, product bundles, and customizable widget styling without coding. This tutorial uses its Classic volume discount template to demonstrate a quantity-based bundle on a product page.
The goal is to present a useful purchasing choice at the moment customers are deciding what to buy. Instead of relying on a separate promotion page, you can show the available quantities and savings beside the product.
Why product bundles matter
- Encourage larger purchases: a relevant multi-item offer can give customers a reason to increase their order quantity.
- Make value easier to understand: clear bundle prices help shoppers compare a single item with a larger pack.
- Simplify product discovery: complementary bundles can introduce useful items customers might otherwise miss.
- Keep promotions easier to manage: update an offer’s configuration and design from the app instead of rebuilding the presentation for every campaign.
Bundles can support a higher average order value, but results depend on product fit, pricing, margins, and customer demand. Start with an offer that makes sense for your shoppers rather than adding a discount to every product.
Before you begin
Have access to your Shopify admin, decide which products should qualify, and choose the quantities and savings you want to offer. Check product availability and your profit margin before setting a discount. The images demonstrate one store’s setup; names, products, and available settings may differ in your account.
How to add product bundles to a Shopify product page: step by step
Step 1: Install Section Kit Bundles
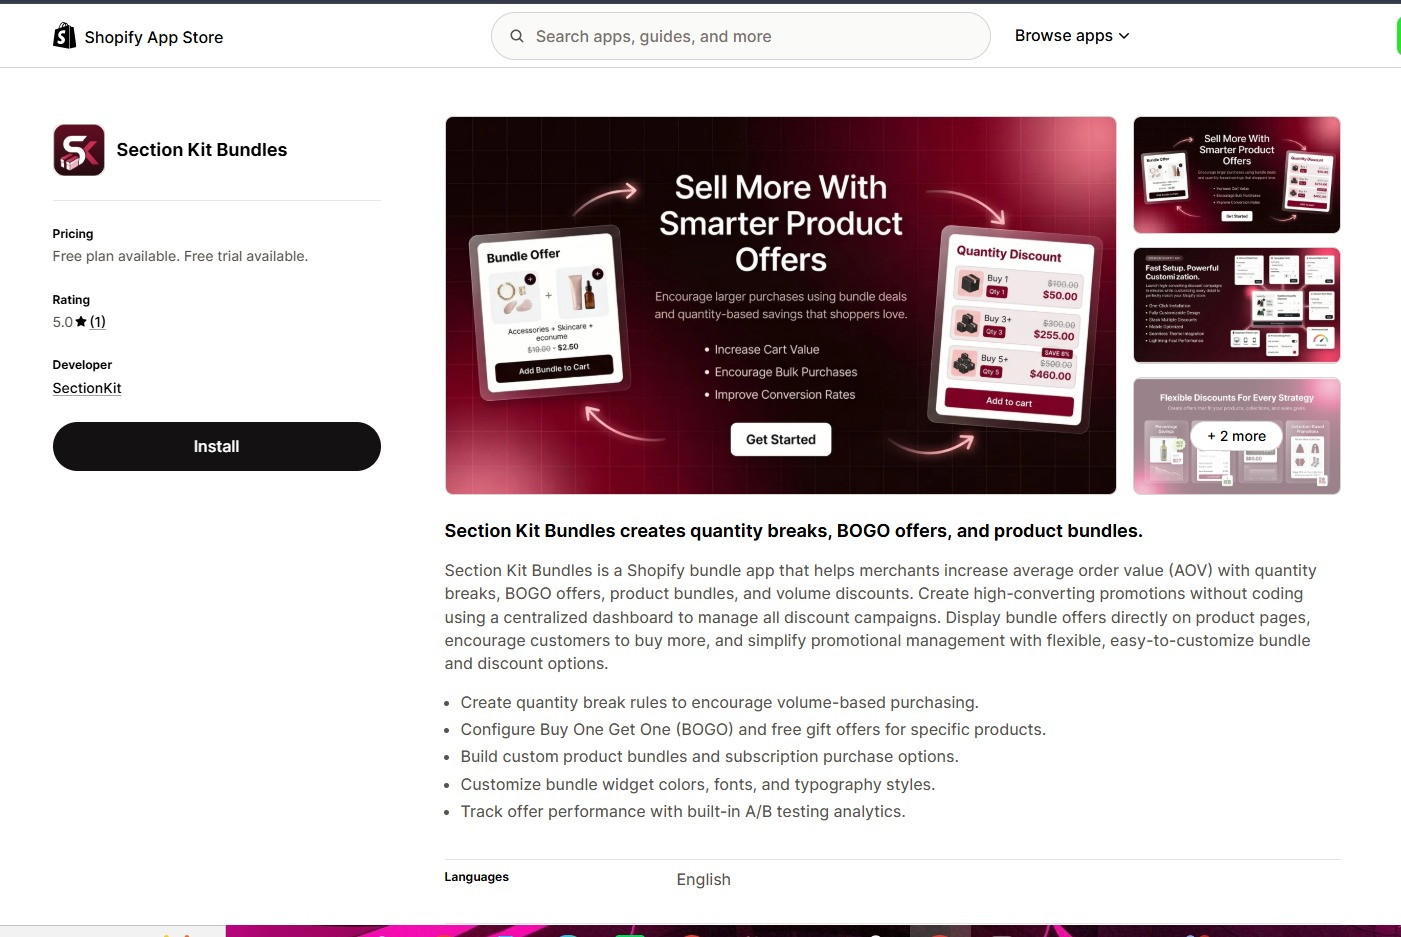
Open the Section Kit Bundles listing in the Shopify App Store. Click Install, select your store if prompted, and follow Shopify’s installation instructions. Once installation is complete, open the app from your Shopify admin.
Step 2: Create a new bundle
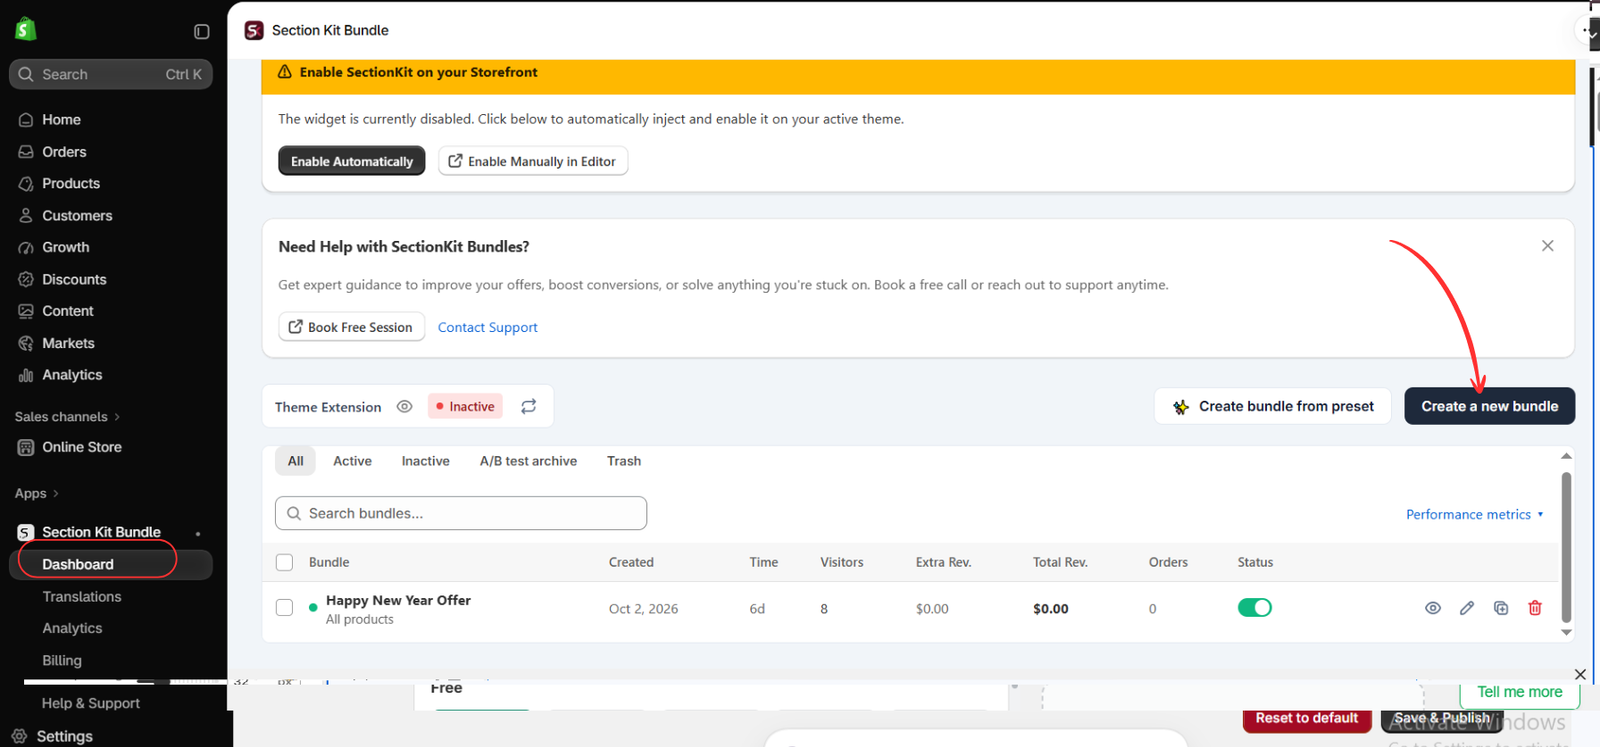
In the app, open Dashboard and click Create a new bundle. This starts the offer creation process. The image also shows that the theme extension is inactive: creating an offer and enabling its storefront display are separate tasks. You will enable the storefront display in the final step.
Step 3: Choose a bundle template
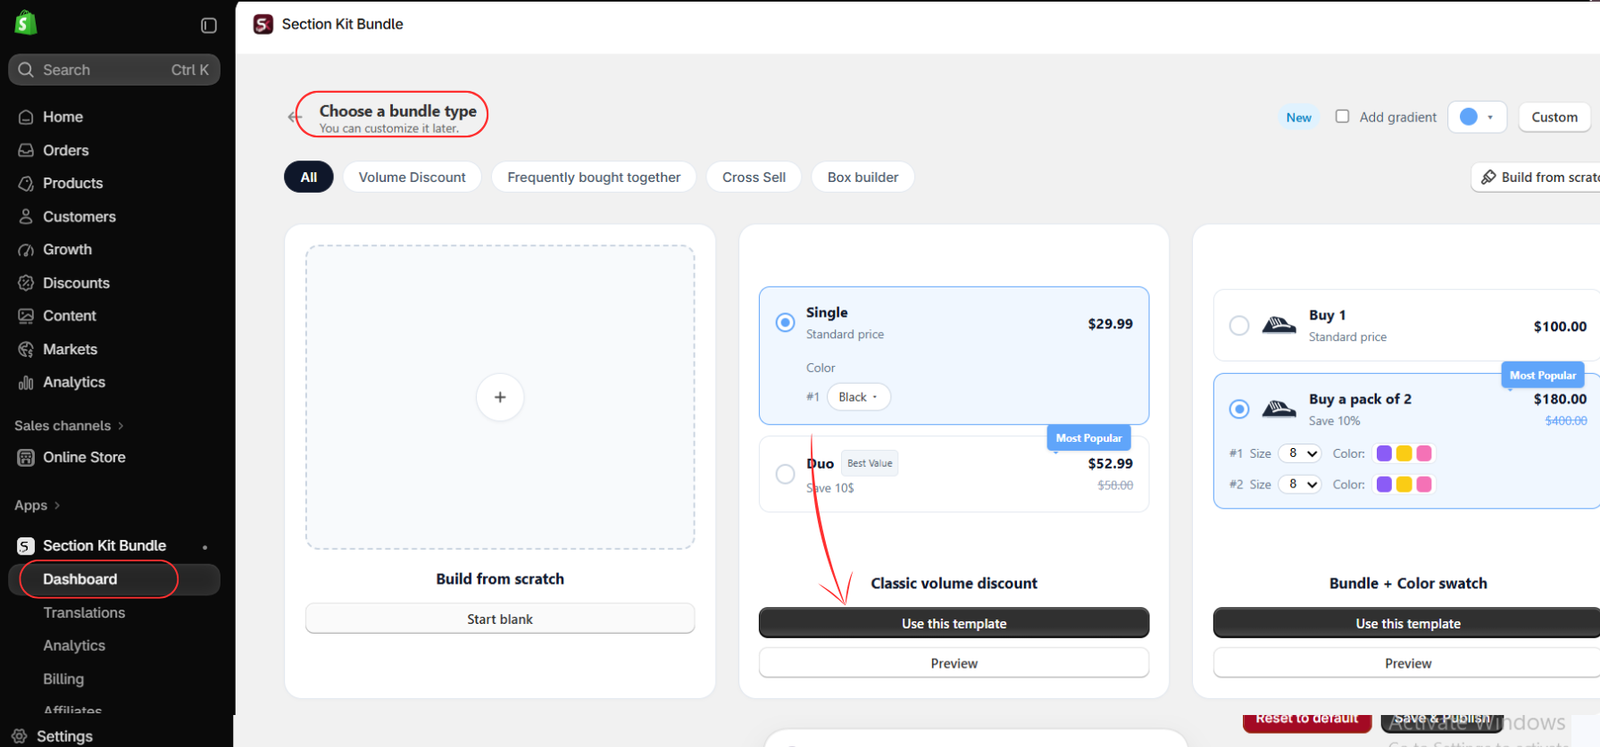
On the Choose a bundle type page, select a layout that suits your offer. For the quantity-based setup shown here, choose Classic volume discount and click Use this template. You can also preview a template before choosing it. A volume discount groups different quantities of the same product; a frequently bought together offer is more suitable when you want to recommend complementary products.
Step 4: Open the offer and check its status
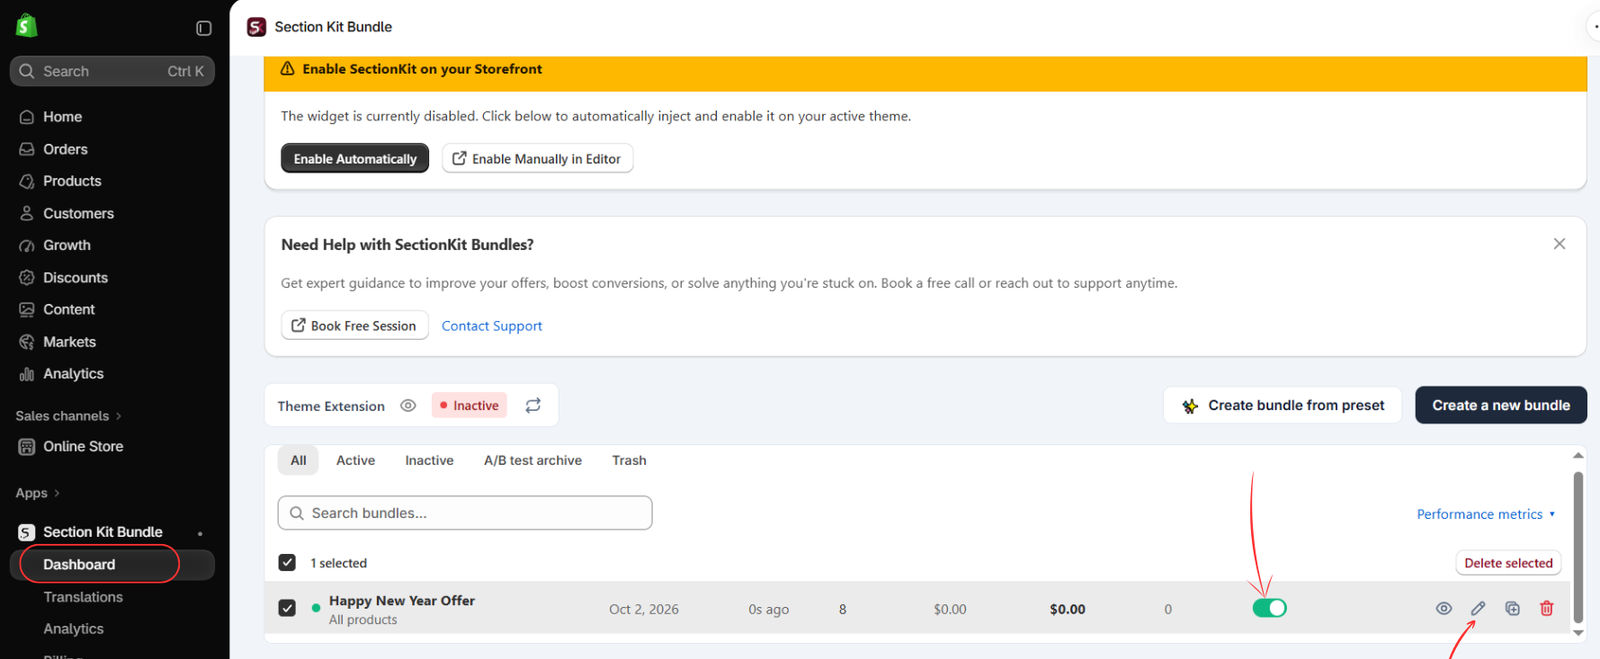
After creating the offer, return to the dashboard. Locate your bundle and use the pencil icon to open its settings. The image shows an offer named Happy New Year Offer with its status toggle switched on. Use your own descriptive campaign name. An enabled offer does not appear on the storefront until the app’s theme integration is also enabled.
Step 5: Customize your bundle and publish it
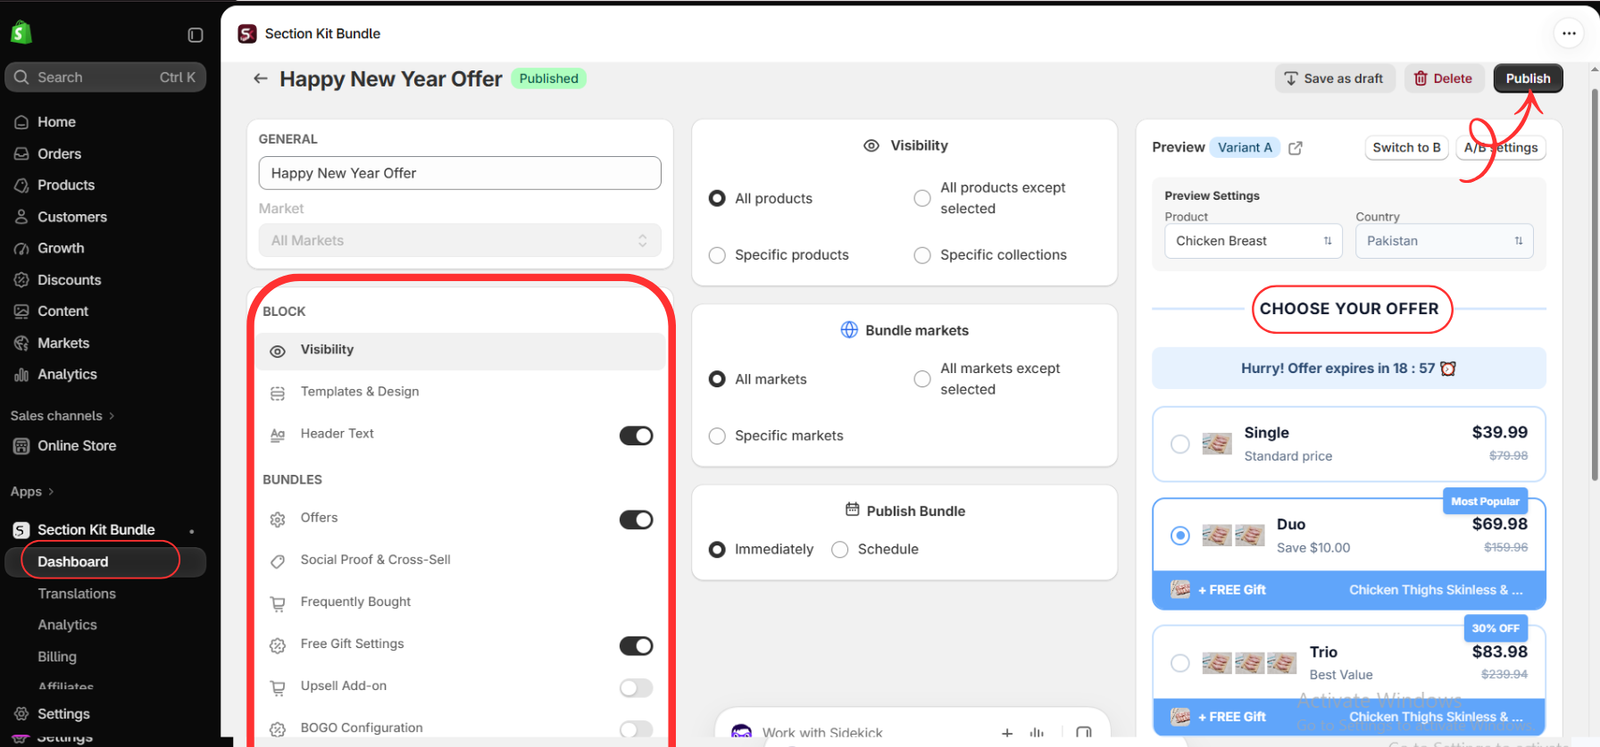
Give the offer a clear name, then work through the settings in the editor. Under Visibility, choose all products, specific products, specific collections, or an exclusion rule. For a first campaign, targeting a small selection of suitable products makes testing easier.
Use Templates & Design to adjust the appearance and Header Text to write a clear heading. Open Offers to configure the quantity options and their prices or discounts. Add free gifts or other optional offer elements only when they support your campaign and are available on your plan.
Choose the appropriate Bundle markets and decide whether to publish Immediately or use Schedule. Review the product preview on the right, then click Publish. The prices, labels, and products in the image are examples: check that your own quantities, savings, and gift conditions agree with one another.
Step 6: Open your Shopify theme editor
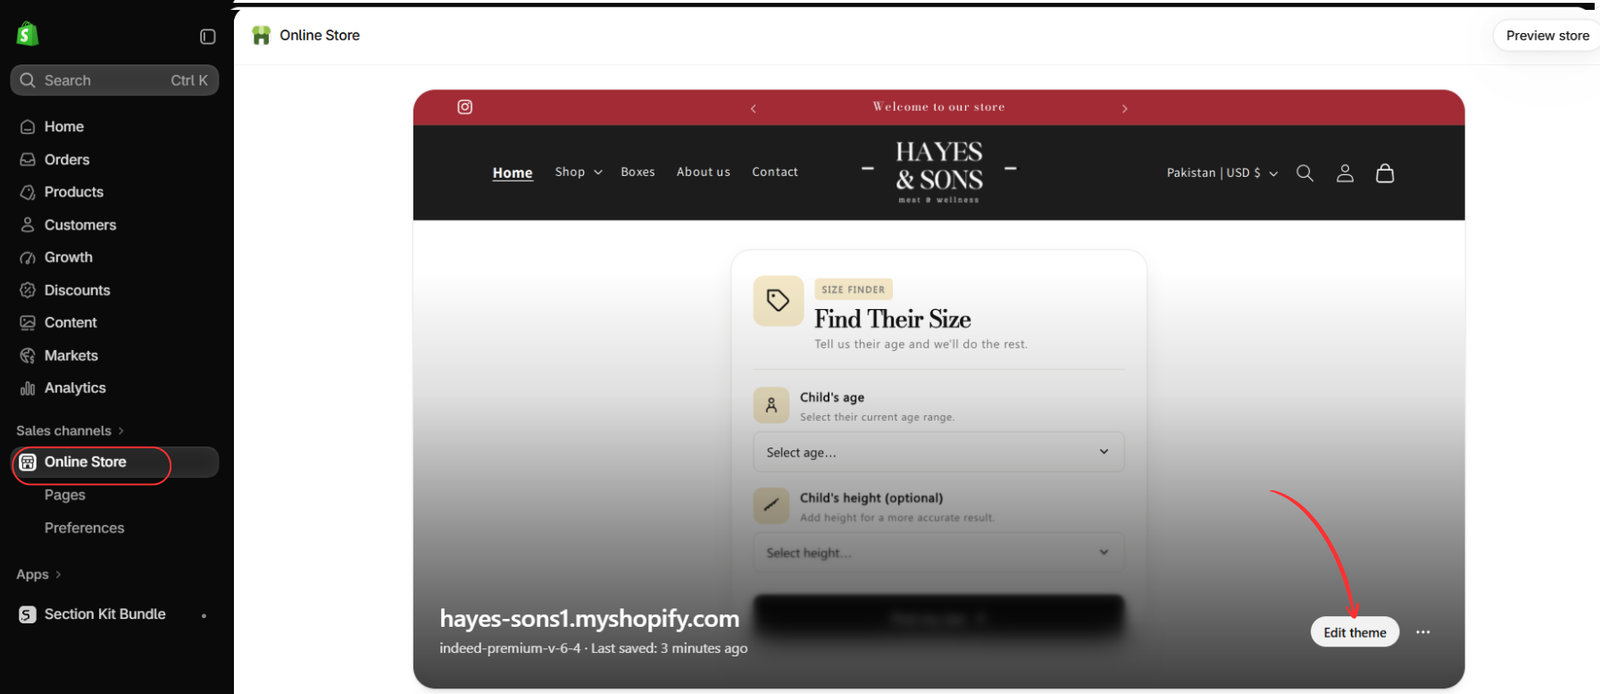
Go to Online Store in your Shopify admin. On the theme you want to use, click Edit theme, as shown in the image. Make sure you are working on the intended storefront theme before saving changes. You can also use the app’s Enable Manually in Editor option when it takes you directly to the relevant editor settings.
Step 7: Enable the app embed and save
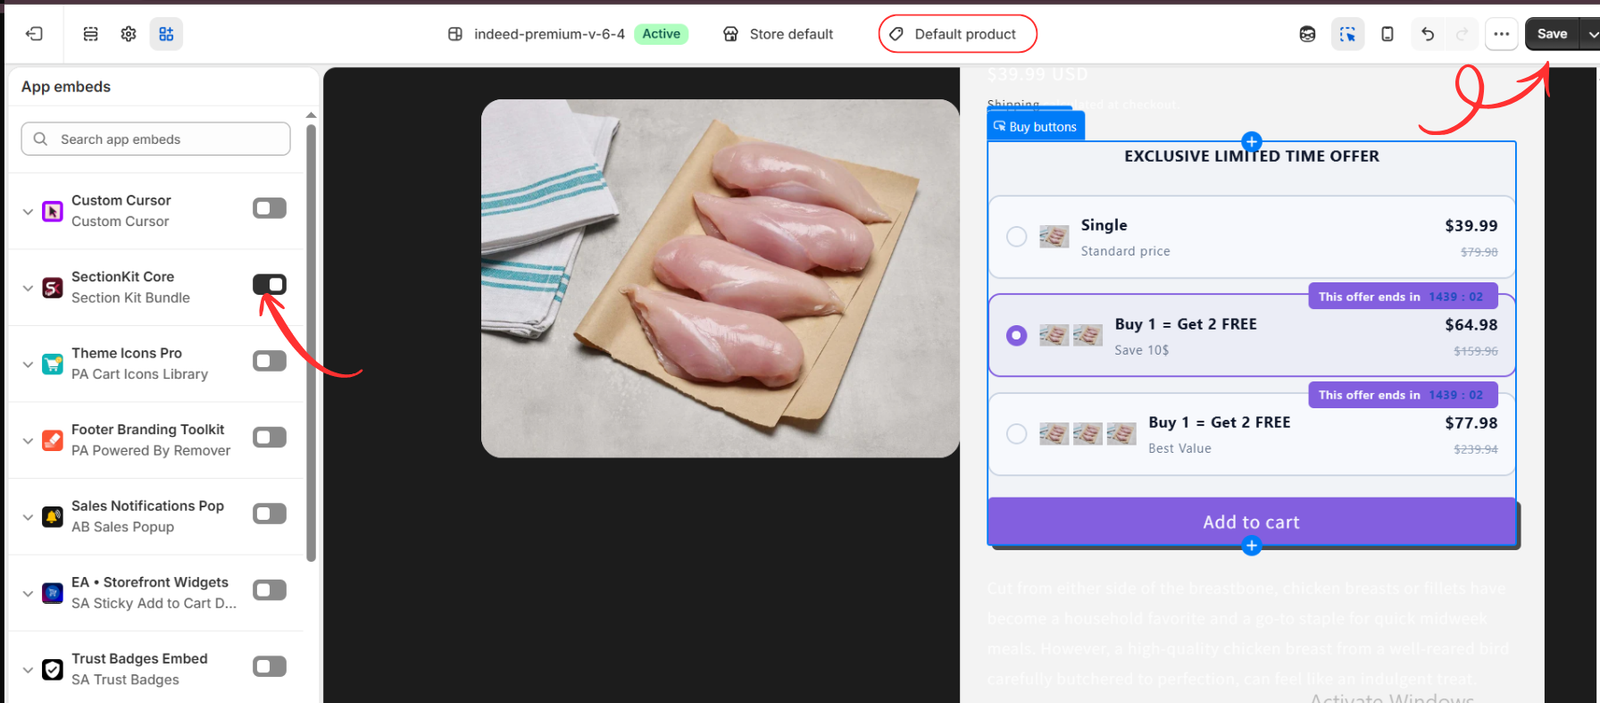
In the theme editor, open a product template such as Default product. Select App embeds in the left panel and switch on SectionKit Core, identified underneath as Section Kit Bundle in the supplied image. Click Save in the top-right corner.
Preview a product that matches the offer’s visibility settings. The bundle choices should now be visible on its product page. If your products use a different template, preview that template too. Finally, check the live product page to confirm the widget appears where customers can use it.
Test the bundle before promoting it
Once the offer is published and the app embed is saved, test the customer journey on desktop and mobile:
- Confirm the offer appears on eligible products and stays off excluded pages.
- Select each quantity option and any available product variants.
- Add the offer to the cart and verify the products, quantities, and prices.
- Check checkout to confirm the expected discount and any gift conditions are applied.
- Review the layout on a smaller screen so the choices and purchase button remain easy to use.
If the widget is missing, check the offer status, product visibility, market selection, and whether SectionKit Core is enabled in the theme customers are viewing. If pricing differs from your expectations, review the offer settings and any other active promotions before sharing the campaign.
Build a clearer product-page offer
Adding product bundles to a Shopify product page gives customers a convenient way to compare a single purchase with a larger offer. With a suitable template, clear pricing, and a properly enabled app embed, you can create a bundle experience that fits your store without manually editing theme code.
Start with one relevant offer, test it thoroughly, and refine it based on how customers respond.
Ready to create your first bundle? Install Section Kit Bundles from the Shopify App Store.




