HOW TO ADD TRUST BADGES TO A SHOPIFY CART PAGE
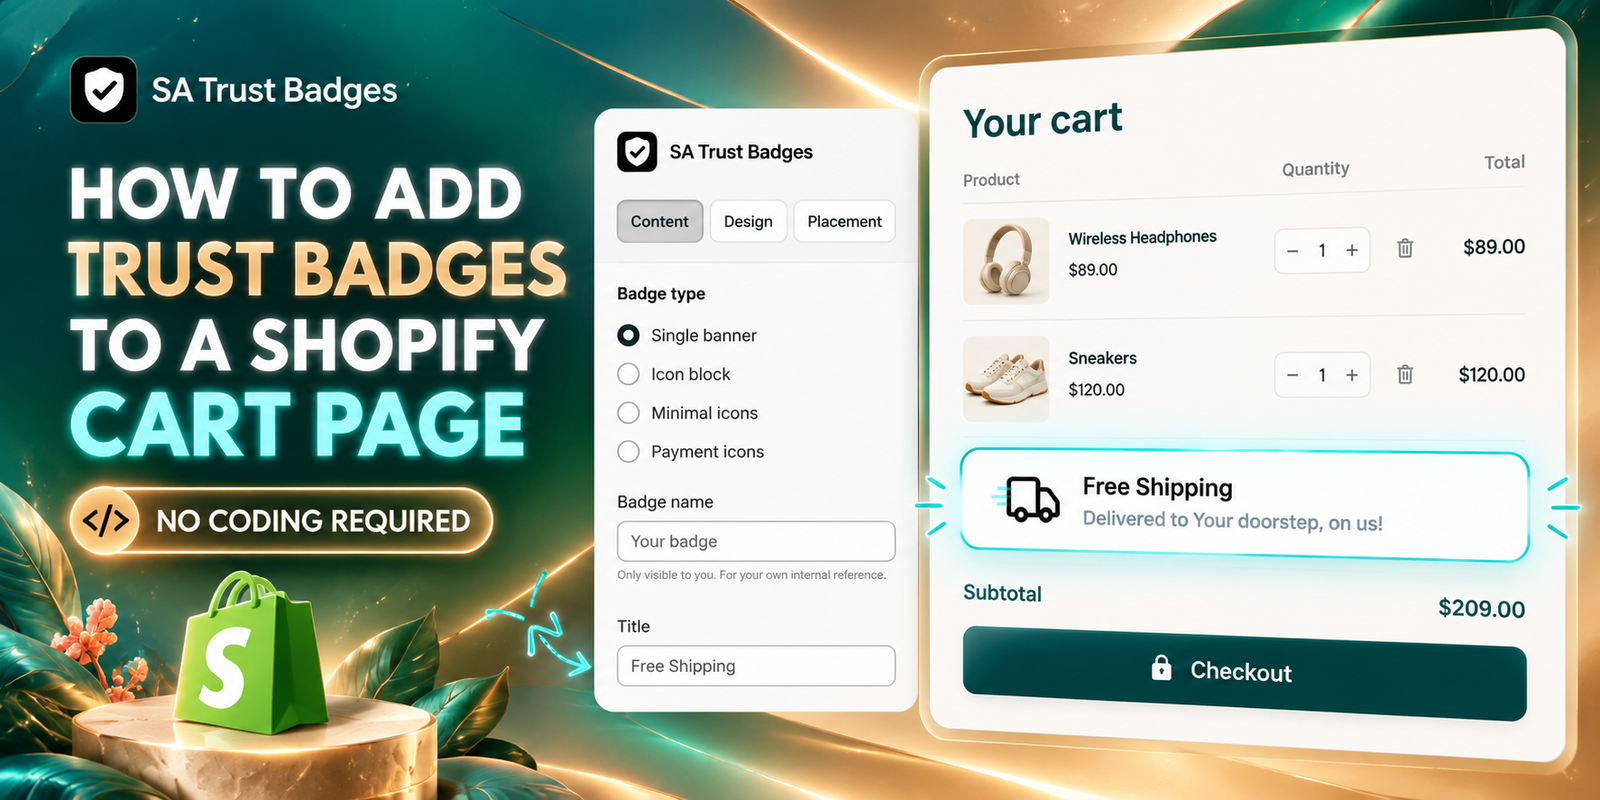
Adding a product to the cart does not always mean a shopper is ready to complete an order. Before continuing to checkout, customers may still have questions about delivery, returns, or payment. A cart page that leaves these questions unanswered can make the final decision feel uncertain.
Trust badges give you a compact way to highlight useful reassurance while shoppers review their order. This guide explains how to add trust badges to a Shopify cart page using SA Trust Badges. Follow the five images below to install the app, configure a cart badge, set its targeting, and enable the theme integration.
The problem: uncertainty before checkout
Your cart page is where customers review the products they have chosen and decide whether to proceed. If shipping information or return conditions are hard to find, shoppers may leave the page to search for answers.
Merchants also need to keep this page simple. Large banners and long policy paragraphs can distract from the order summary. A short trust message can surface essential information without overwhelming the checkout action.
Why use SA Trust Badges?
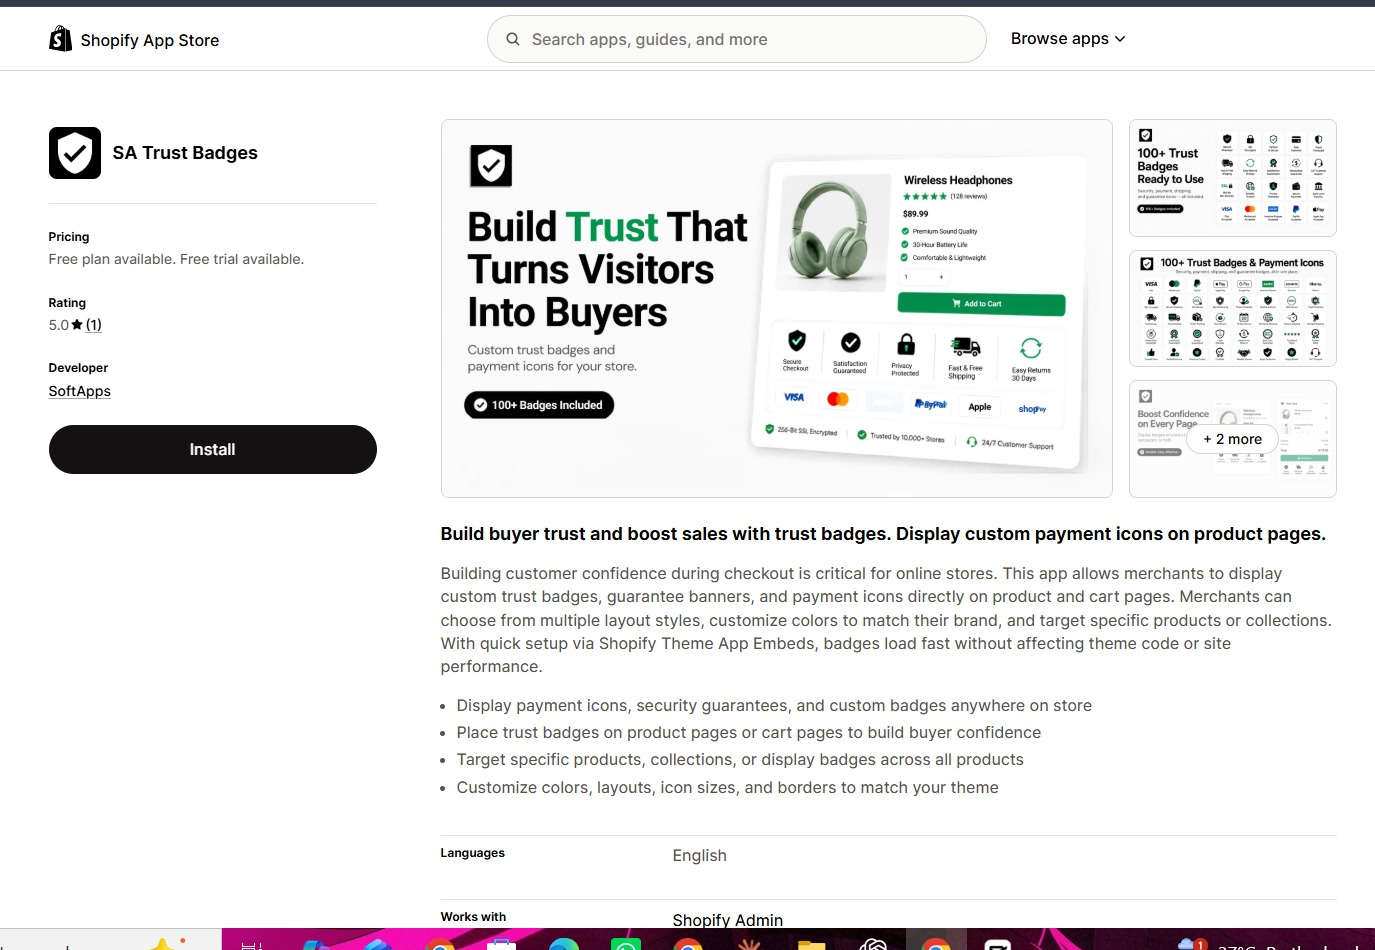
SA Trust Badges supports trust content on product and cart pages. Its official listing describes customizable layouts, colors, icon sizes, borders, and integration through Shopify Theme App Embeds.
The supplied images show a dedicated Create Cart Badge editor with Content, Design, and Placement tabs. This gives you a way to manage the badge without manually inserting theme code.
Check that your current plan includes cart-page badges before proceeding. The supplied editor displays an Essential plan notice, but plan names and access can change. Confirm the current options in the app or its listing rather than relying on the older label in the image.
Why cart trust badges matter
A badge can make relevant shipping, return, or payment information easier to notice as customers review their order. Familiar icons help shoppers scan the message quickly.
Only display claims that match your policies and the order being placed. For example, a Free Shipping badge should reflect any minimum spend, destination, or product exclusions. Displaying a secure-payment icon does not add a new security feature. Trust badges support clear information and reliable service; they do not guarantee more completed orders.
Step 1: Install SA Trust Badges
Visit SA Trust Badges on the Shopify App Store and click Install. Select your store if prompted, review the installation details, and complete setup. Open the app from your Shopify admin.
Step 2: Create and customize your cart badge
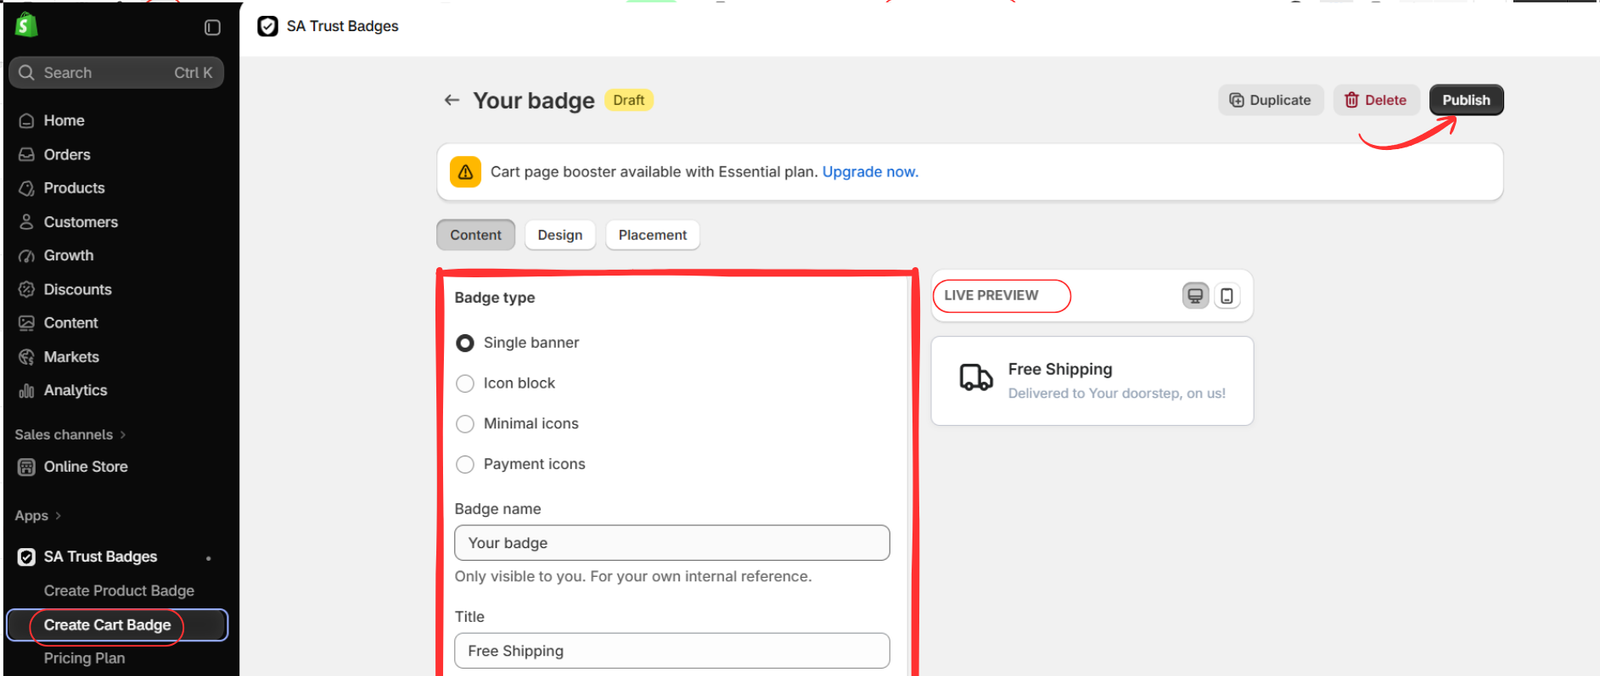
Choose Create Cart Badge in the app menu. In the Content tab, select the format you want to use. The visible options are Single banner, Icon block, Minimal icons, and Payment icons.
The second image uses Single banner to display a Free Shipping message. Give the badge a descriptive internal name, then configure its title, supporting text, and icon using the available content fields.
For a single shipping message, use a truck icon and concise wording that reflects your offer. If you choose an icon block instead, keep each message short. Payment icons should represent payment methods your store actually accepts.
Open Design and adjust the available appearance settings to suit your cart page. Check text contrast, icon size, and spacing in the live preview. Finish placement before clicking Publish.
Step 3: Configure placement and publish
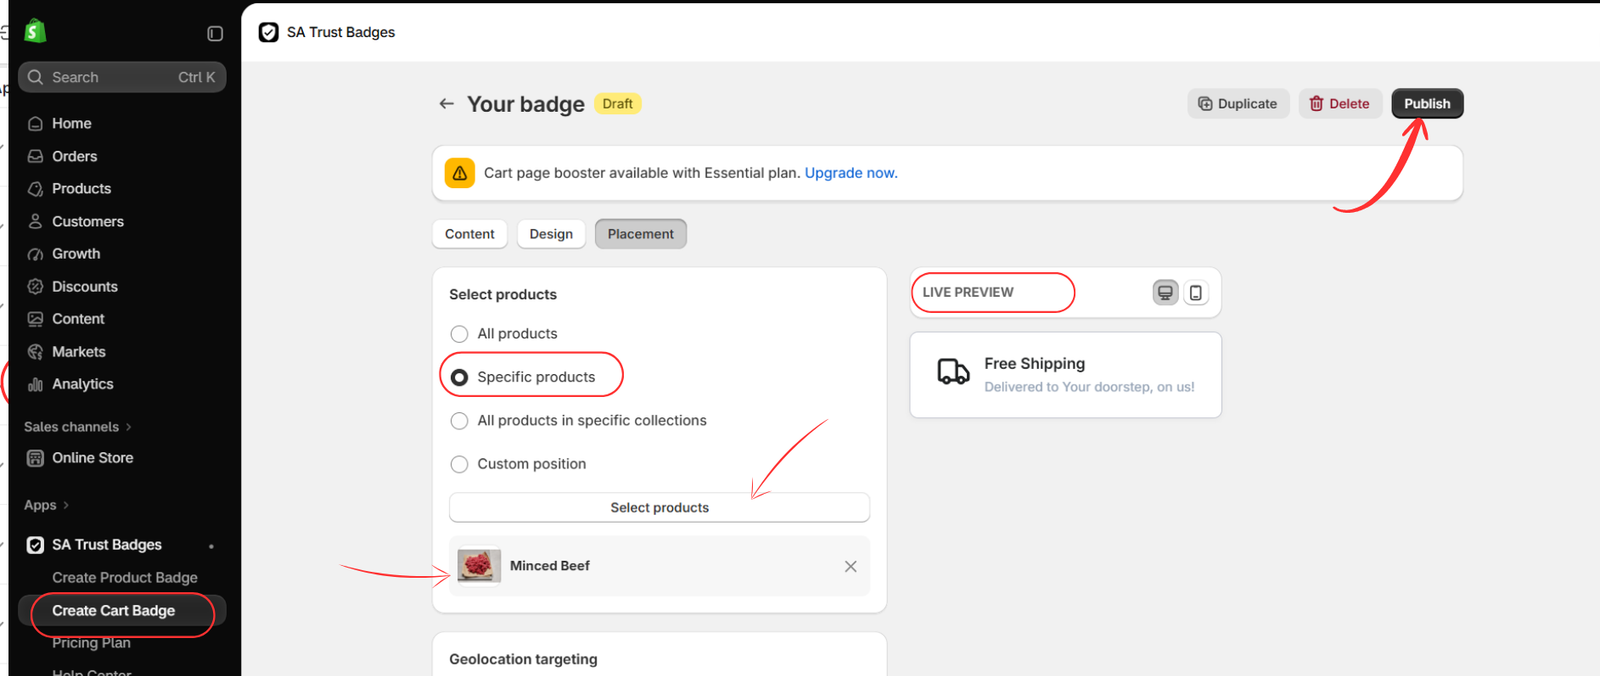
Open the Placement tab. The third image shows Specific products selected and Minced Beef added to the product list.
To follow that example, choose Specific products, click Select products, select the required item in the product picker, and confirm the selection. Review the resulting list before publishing. If your message applies broadly, review the All products option; the editor also shows targeting by specific collections.
For a cart badge, test the targeting with actual cart contents. The image shows the available configuration, but does not establish how every mixed-cart combination is handled. Check carts containing selected items, unselected items, and a mixture of both to confirm the message appears appropriately.
Review any geographic conditions and confirm your plan supports this setup. When content, design, and targeting are ready, click Publish.
Step 4: Open your theme editor
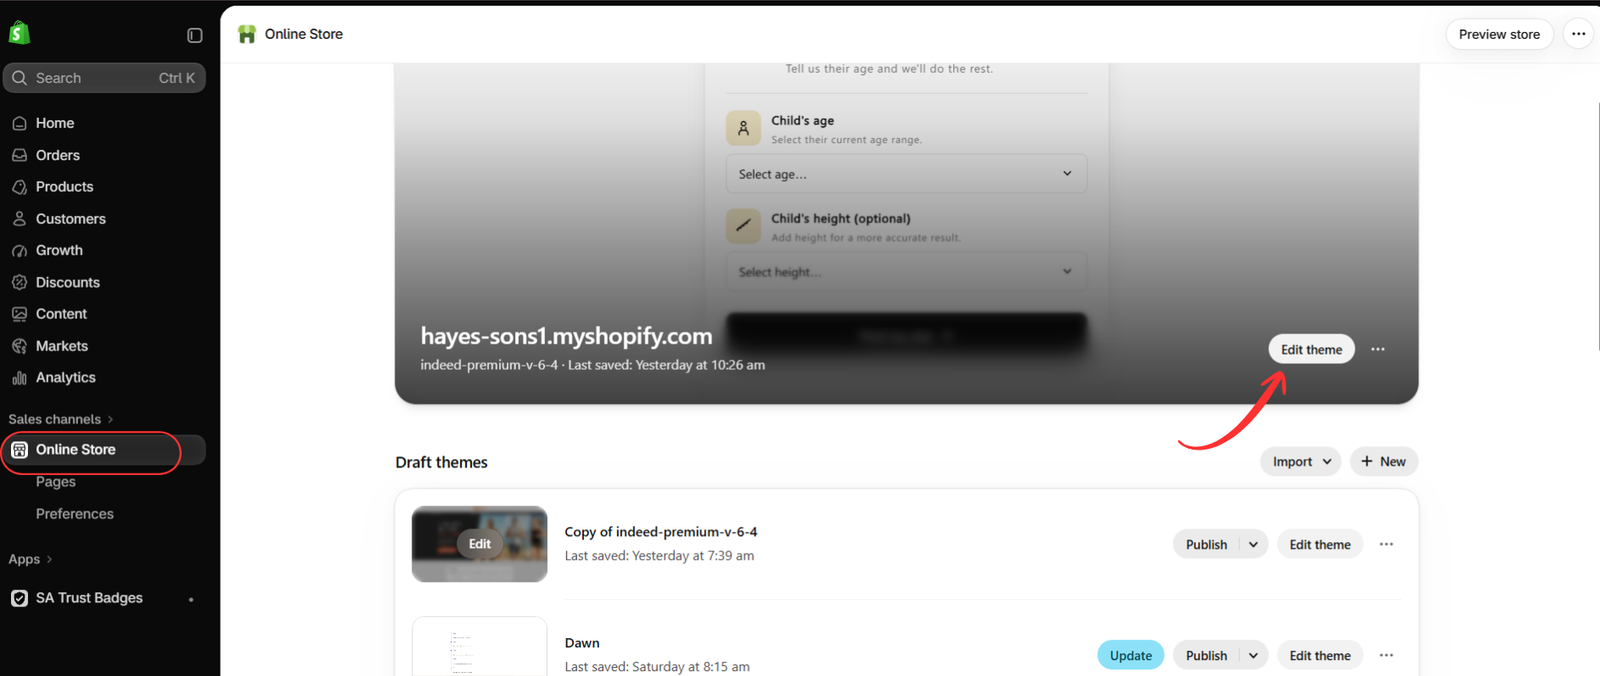
Go to Online Store → Themes. Find the theme where you want to display the badge and click Edit theme, as shown in the fourth image. Your Shopify admin may label this action Customize.
Make sure you are configuring the intended theme. Changes to a draft theme should be reviewed through its preview before expecting them on your live storefront.
Step 5: Enable the app embed and save
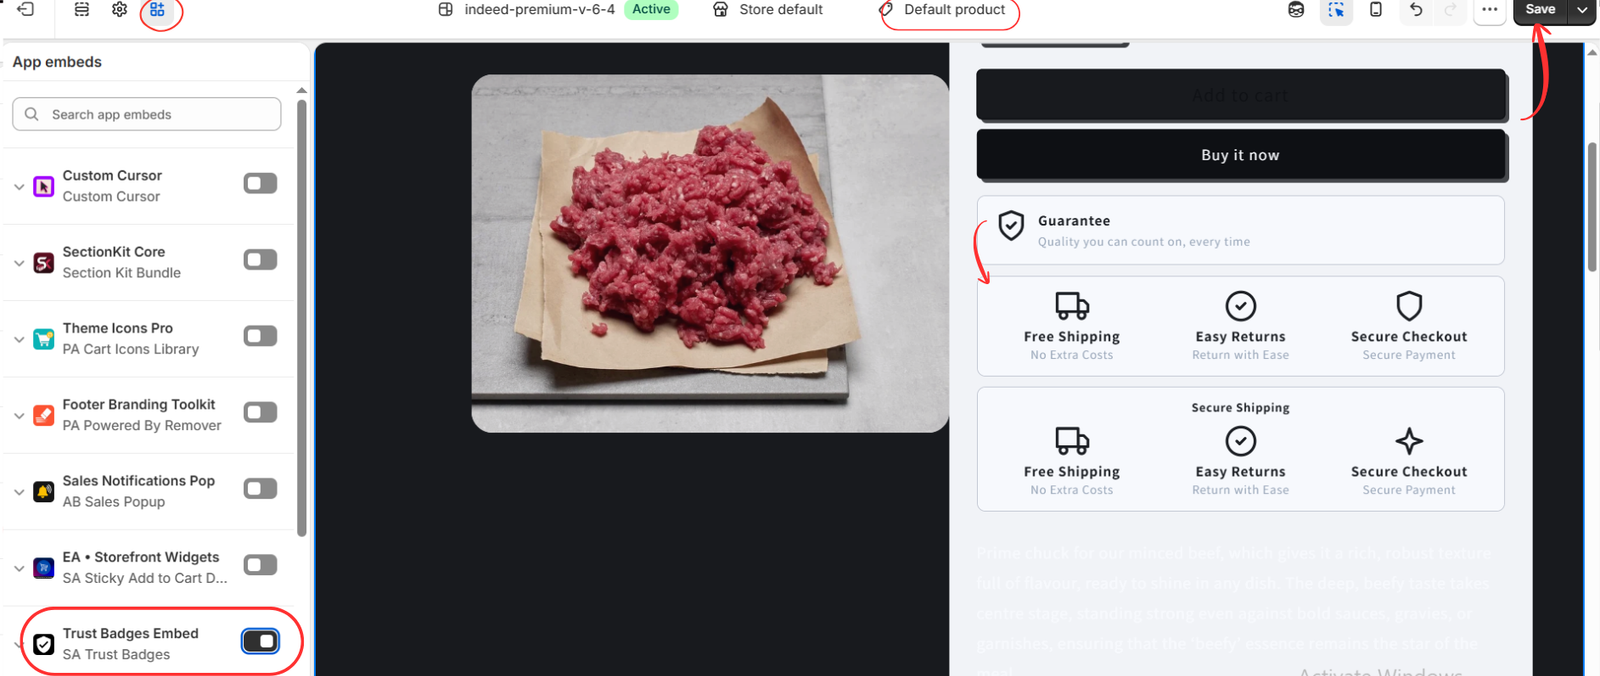
In the theme editor, open App embeds. Locate Trust Badges Embed under SA Trust Badges, turn it on, and click Save.
The fifth image demonstrates the app embed control. Its preview is set to Default product, so it is a product-page example rather than confirmation of a finished cart page. Use it to locate the embed, then open the cart template or your storefront cart to inspect the cart badge.
Add a relevant product to the cart before testing. An empty cart may not demonstrate the badge’s intended placement or targeting.
Check your cart page before finishing
Open the full cart page on your storefront and confirm that the badge is visible where intended. Check that its wording remains accurate for the items in the cart and that it does not overlap quantity controls, totals, or the checkout button.
- Review the cart on desktop and mobile.
- Test selected and unselected products if targeting is enabled.
- Change quantities and remove items to check the updated cart.
- Test mixed carts and relevant shipping conditions.
- Confirm that the checkout button remains easy to use.
If your theme opens a cart drawer, also visit the full cart page. A drawer and a cart page are different layouts; seeing a badge in one does not establish support in the other. This setup concerns the cart page before checkout.
If the cart badge does not appear
Check that the badge is published, your plan includes cart-page functionality, and Trust Badges Embed is enabled in the theme you are viewing. Review product and geographic targeting, then refresh a cart containing an eligible item.
If the badge appears in the wrong position, review the available placement controls and your theme’s cart layout. Contact app support if the integration does not behave as expected. Avoid adding duplicate badges while troubleshooting.
Keep cart reassurance clear
A useful cart badge communicates a relevant promise at the point where customers review their order. Keep the message concise, the design readable, and the supporting policy easy to find.
Start with SA Trust Badges, create your cart badge, configure placement, publish, and enable the app embed. Finish by checking the actual cart page with representative products.
Feature reference: SA Trust Badges official listing. The images follow the supplied order; the final image demonstrates the embed on a product preview.




