How to Add Trust Badges to a Shopify Product Page
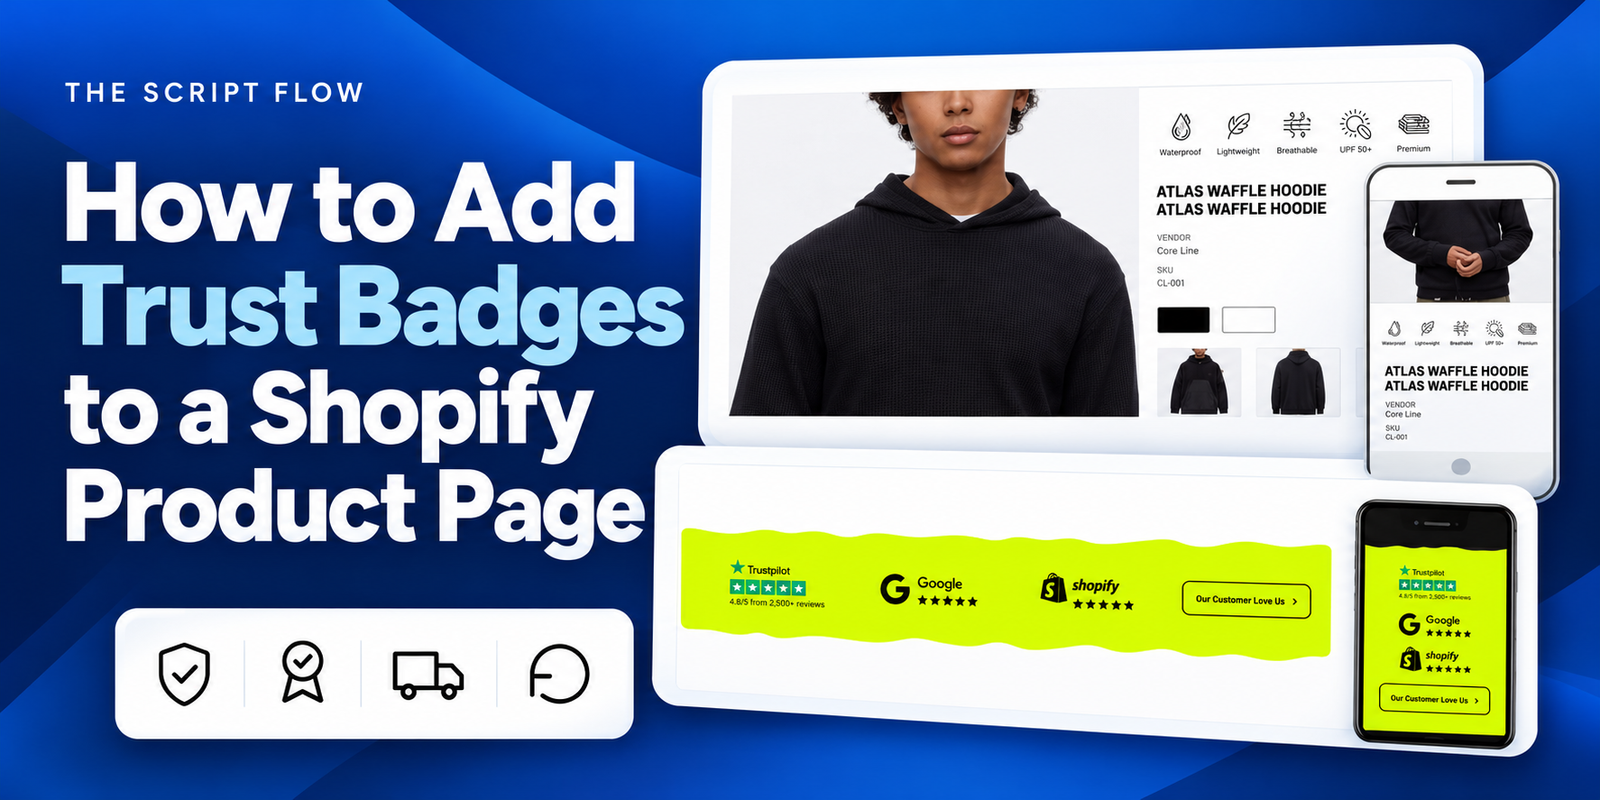
A well-designed Shopify product page does more than showcase a product. It helps customers feel confident about buying from your store. Product images, descriptions, and pricing explain what you sell, but shoppers also want reassurance about delivery, returns, payment security, and product quality.
Trust badges make these details easier to notice. A clear icon paired with a short message can communicate an important benefit without adding another long paragraph to your product page.
In this guide from The Script Flow, you will learn how to add SK Trust Badge sections to a Shopify product page using Section Kit, then customize their appearance in the Shopify theme editor.
The Challenges Shopify Merchants Face
Customers visiting an unfamiliar store often have questions before placing an order. Will their payment be handled securely? Can they return the product? Does the store offer a warranty? When will their order arrive?
Even when merchants provide this information, it may be hidden in footer links, lengthy descriptions, or separate policy pages. Customers then have to leave the product page to find answers.
Merchants also face design challenges. Depending on the theme, adding a polished row of icons and reassurance messages may require custom code or additional design work. Uploaded badge images can look inconsistent, take up too much space, or become difficult to read on mobile.
The goal is to present useful reassurance clearly, while keeping the product page focused on the buying decision.
Why SK Trust Badges Matter
SK Trust Badge sections help merchants present important store policies and product benefits through organized, visual layouts.
Instead of placing reassurance details in a dense paragraph, you can use a badge area to highlight relevant messages such as:
- Secure checkout.
- Free shipping on qualifying orders.
- Returns within your stated return window.
- Warranty coverage.
- Verified product features or certifications.
Only display claims that accurately reflect your products and policies. A badge communicates a promise; your store must be able to deliver on it.
The screenshots show several SK Trust Badge designs, including product-focused blocks and a wider trust badge section. This gives merchants different presentation options depending on their page layout.
A thoughtfully placed badge section can make reassurance easier to find and support a more confident shopping experience. Its effectiveness depends on the message, placement, and credibility of the store as a whole.
How to Add SK Trust Badges to Your Shopify Product Page
Follow the steps below in the same order as they are.
Step 1: Install Section Kit: Theme Sections
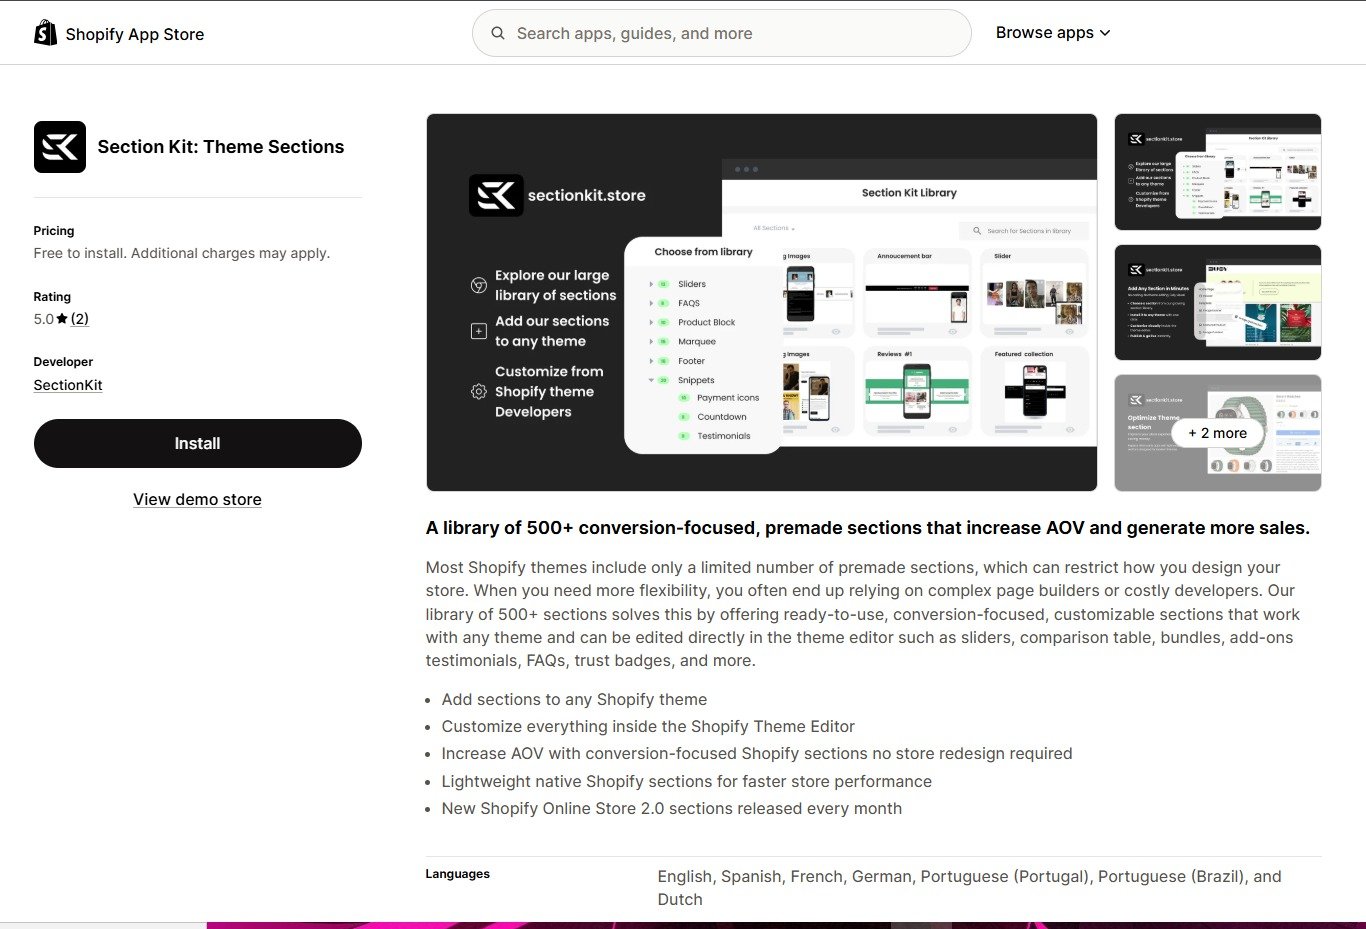
Open the Shopify App Store and find Section Kit: Theme Sections.
Click Install, select your store if prompted, and follow Shopify’s installation instructions. Once installation is complete, open Section Kit from your Shopify admin.
Section Kit is the app shown throughout this tutorial.
Step 2: Search for Trust Badge Designs
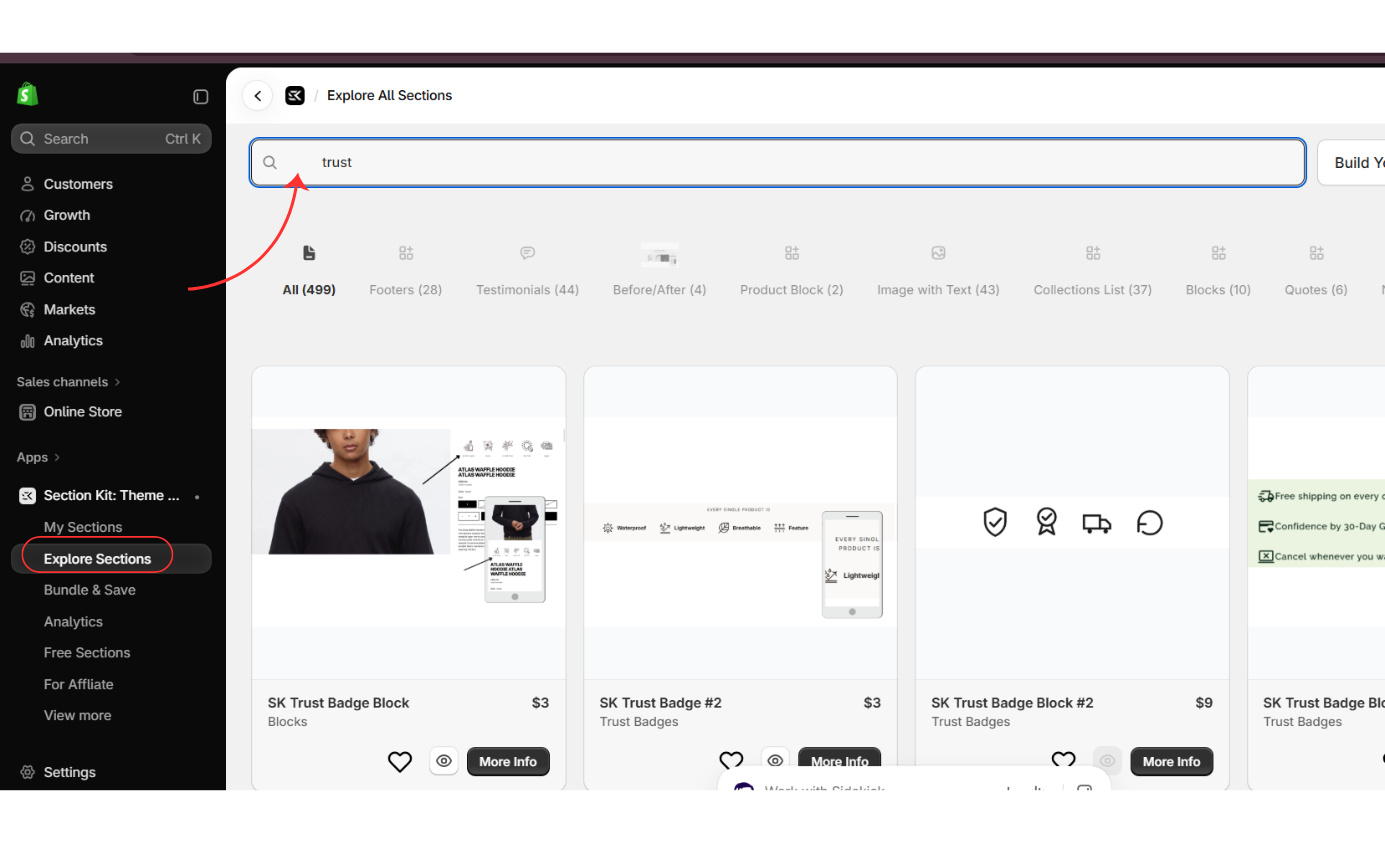
Inside Section Kit, select Explore Sections from the app’s navigation.
Enter trust in the search field to find relevant designs. Review the available results and choose a layout that suits your product page.
Consider whether you need a compact product badge block or a wider section that presents several trust signals together.
Step 3: Review a Paid Trust Badge Option
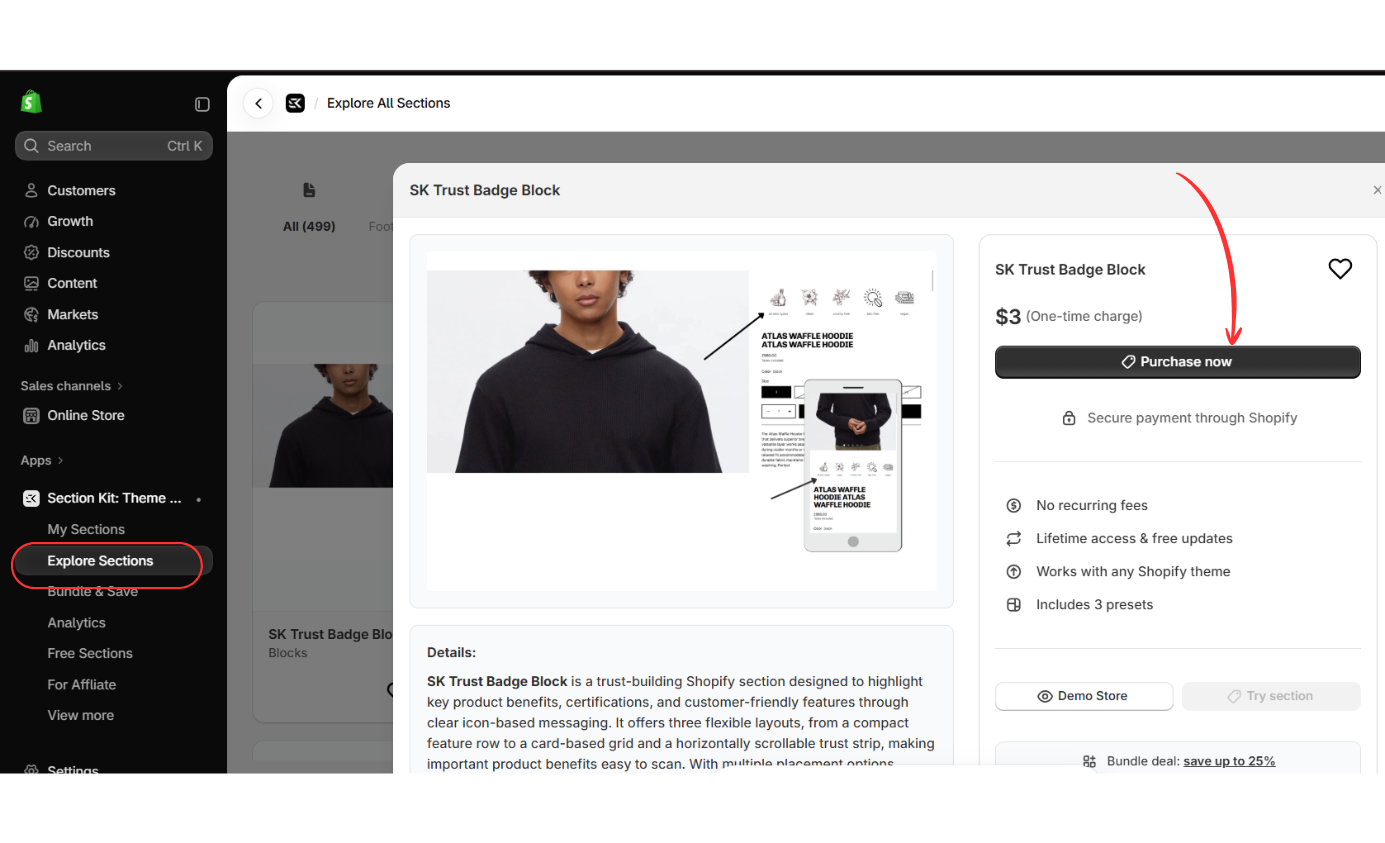
Open a design to view its preview, description, and purchase details.
The example shown is SK Trust Badge Block, with a Purchase now button. Before purchasing, review the current price and the design’s features to confirm that it meets your needs.
If you choose a paid design, complete the purchase process before continuing.
Step 4: Add a Free Trust Badge Section
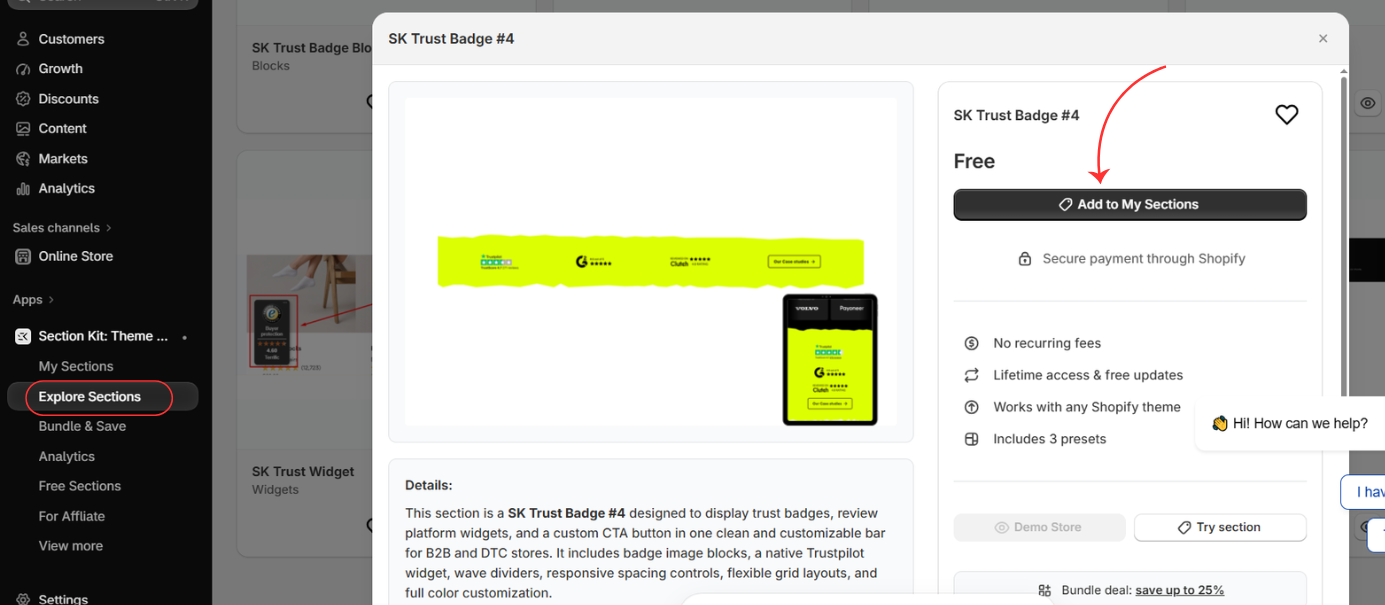
You can also choose a free design where one is available
The next screenshot shows SK Trust Badge #4, marked as Free. Click Add to My Sections to add it to your section gallery.
Steps 3 and 4 show alternative choices. You do not need to purchase the paid block to use the free section demonstrated in the remaining screenshots.
Step 5: Find the Section in My Sections
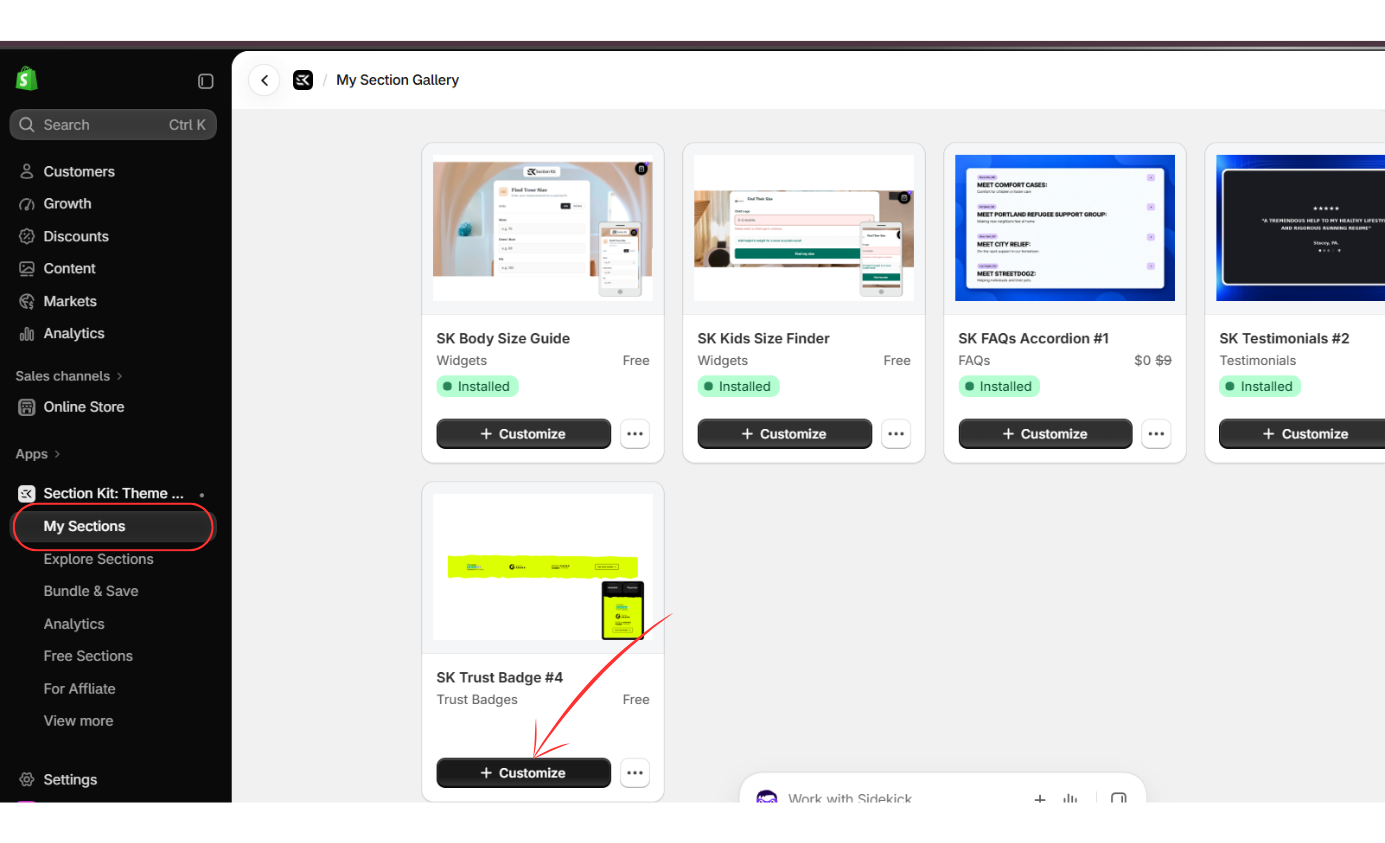
Select My Sections from the Section Kit navigation.
Locate SK Trust Badge #4 in your gallery, then click Customize to begin adding it to your chosen theme.
Step 6: Select Your Theme and Open the Customizer
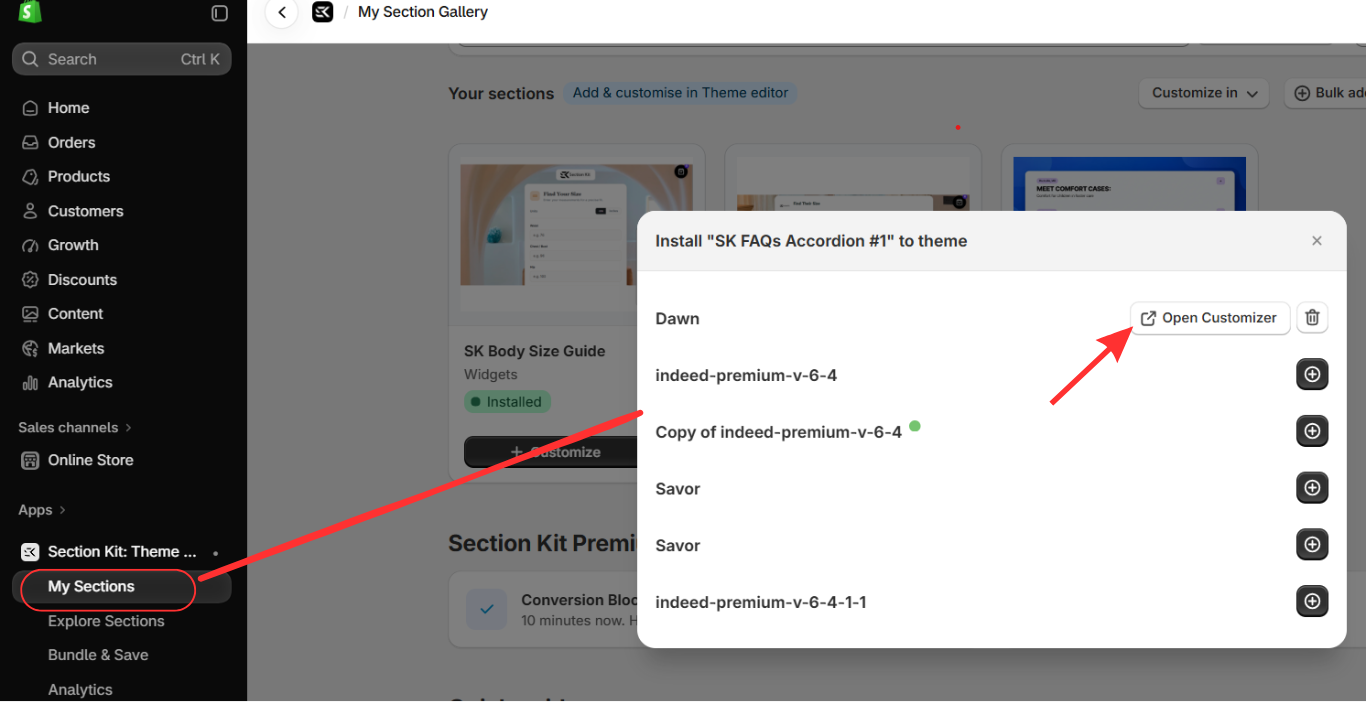
The theme selection window lets you choose where to install or customize your section.
Select the theme you want to edit. If the section is not installed on that theme, use the available installation control first. Once it is installed, click Open Customizer to open the Shopify theme editor.
For this tutorial, perform this action on SK Trust Badge #4. The screenshot illustrates the theme selection window using a different section name.
Step 7: Open the Product Template
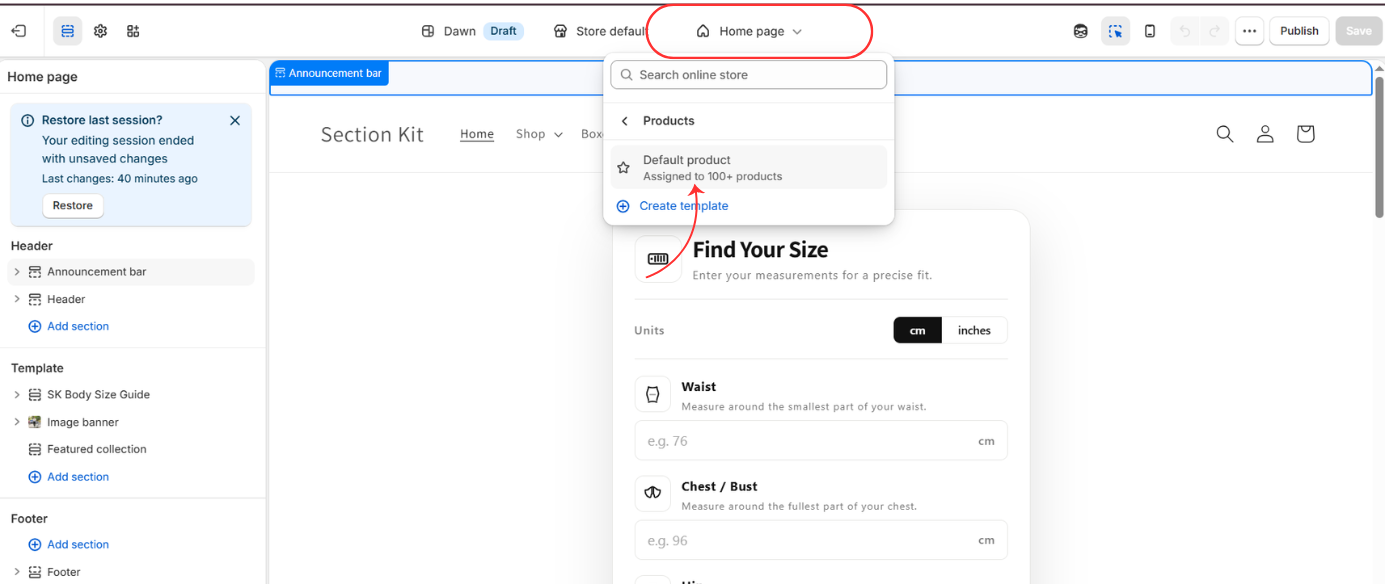
In the Shopify theme editor, click the page selector at the top of the screen.
Select Products, then choose Default product or the product template you want to update.
Check that you are editing the template assigned to your intended products. A change to a shared template can affect every product using that template.
Step 8: Add the SK Trust Badge Section
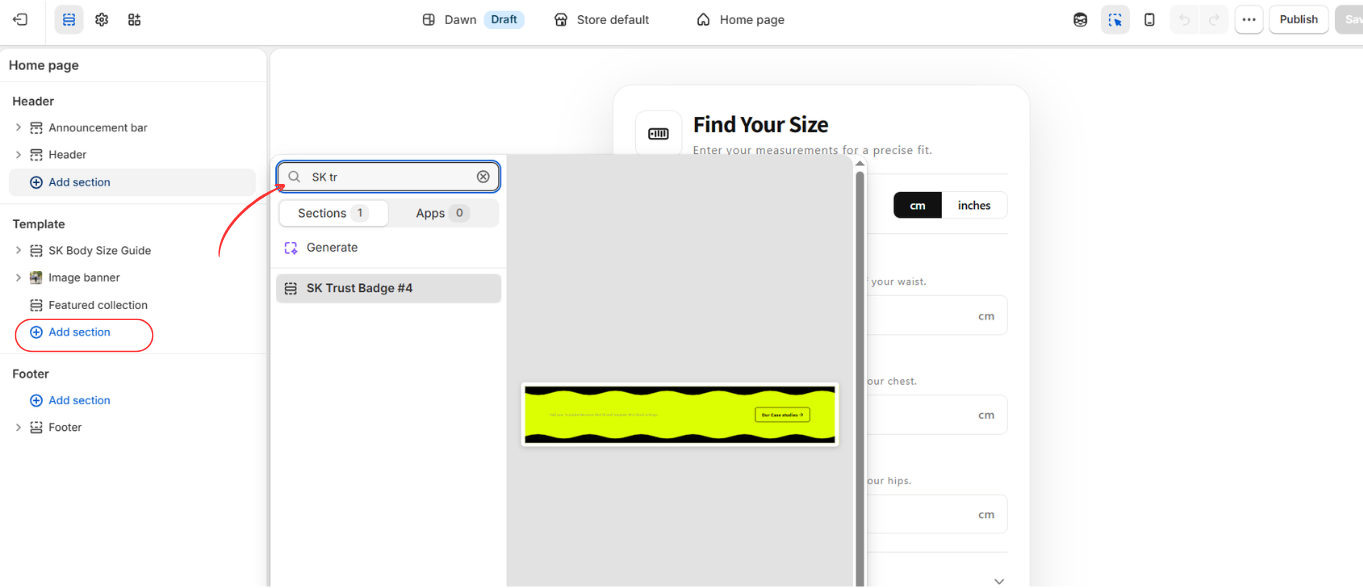
With the product template open, click Add section in the Template area of the left sidebar.
Search for SK Trust Badge, then select SK Trust Badge #4 from the results.
Position the section where customers can easily notice it while reviewing the product. For a standalone section, placing it beneath the main product information can provide useful reassurance without interrupting the purchase controls.
The screenshot shows more than one Add section control. Use the one in the Template area when you want to add the badges specifically to the product template.
Step 9: Customize the Badges and Save
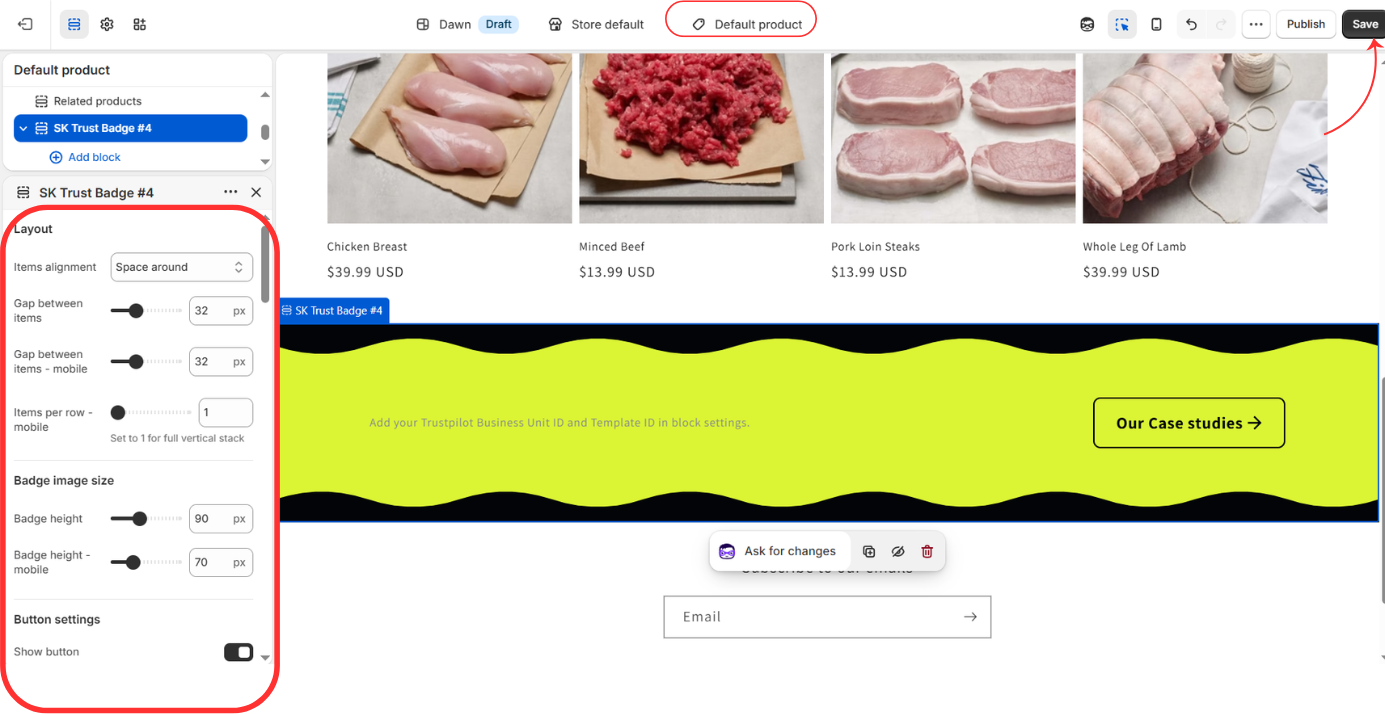
Select SK Trust Badge #4 in the left sidebar to open its settings.
The screenshot shows controls for:
- Item alignment.
- Spacing between items on desktop and mobile.
- Items per row on mobile.
- Badge height on desktop and mobile.
- Button visibility.
Use the section’s Add block control and available block settings to configure the content you want to display. Replace sample content with accurate badges, images, and messages for your store.
If you use a review widget, complete its required configuration before publishing. Remove any unfinished placeholders or elements you do not need.
Adjust the layout to match your brand, then preview the page on desktop and mobile. Check that the badges remain readable and that the section does not create excessive space around the product content.
Click Save when you are satisfied. If you are editing a draft theme, saving updates the draft; publish that theme when it is ready to go live.
Best Practices for Shopify Trust Badges
Keep your messages short and relevant. A few clear badges are easier to understand than a crowded collection of icons.
Choose reassurance that answers your customers’ actual questions. For example, a return policy may be particularly useful for clothing, while warranty information may matter more for electronics.
Keep badge claims consistent with your shipping, return, and warranty policies. Use payment logos only for methods your store accepts, and display certifications only when they apply.
Finally, review the finished page on a mobile device. Badge text, spacing, and placement should remain clear on a smaller screen.
Make Your Product Page More Reassuring
Trust badges help customers find important information while they decide whether to buy. With SK Trust Badge sections in Section Kit, you can add a dedicated reassurance area and customize it through the Shopify theme editor.
Choose a suitable design, add it to the correct product template, and use clear messages that reflect your store’s real policies.
Looking for a dedicated trust badge app? Explore SA Trust Badges on the Shopify App Store. This is a separate option from the Section Kit workflow demonstrated above.




