How to Change a Shopify Theme Layout Without Writing Code
Your Shopify store’s layout shapes how customers discover products, understand your brand, and move toward a purchase. A crowded homepage, an awkward content arrangement, or a section that looks good on desktop but feels difficult to use on mobile can make shopping less straightforward.
You do not always need to write code to improve that experience. Shopify’s theme editor lets you adjust supported sections and blocks visually. When the layout you want goes beyond those settings, AI Theme Code Editor offers a prompt-based way to request theme changes without manually editing theme files.
This guide explains how to approach a layout update, connect your theme to the app, and use the supplied images to follow the editing process.
The Main Challenge: Your Theme Settings Do Not Always Match Your Ideas
Many merchants know what they want their store to look like but struggle to implement it. You might want a wider content area, a cleaner arrangement of images and text, or a brand story presented as an interactive timeline. Your theme may offer only a few preset layouts.
Once those settings run out, even a small design request can involve locating the right theme file, understanding Liquid and CSS, and checking how the change affects mobile devices. Hiring a developer for repeated adjustments also adds coordination and waiting time.
The first step is to identify whether your request is a simple rearrangement or a structural change. Moving an existing section may be possible directly in the theme editor. Creating a layout that your theme does not provide may require additional theme code, even when you use AI to generate it.
When AI Theme Code Editor Can Help
AI Theme Code Editor lets merchants describe changes in everyday language. Its listing supports generating or editing theme code, creating sections and blocks, adjusting layouts, and previewing changes in a sandbox. You provide the instructions; the app assists with the code behind the result.
This can be useful when the visual settings in your current theme cannot produce the arrangement you need. Be specific about the page, the section, and the desired behavior rather than asking the AI to redesign the entire store at once.
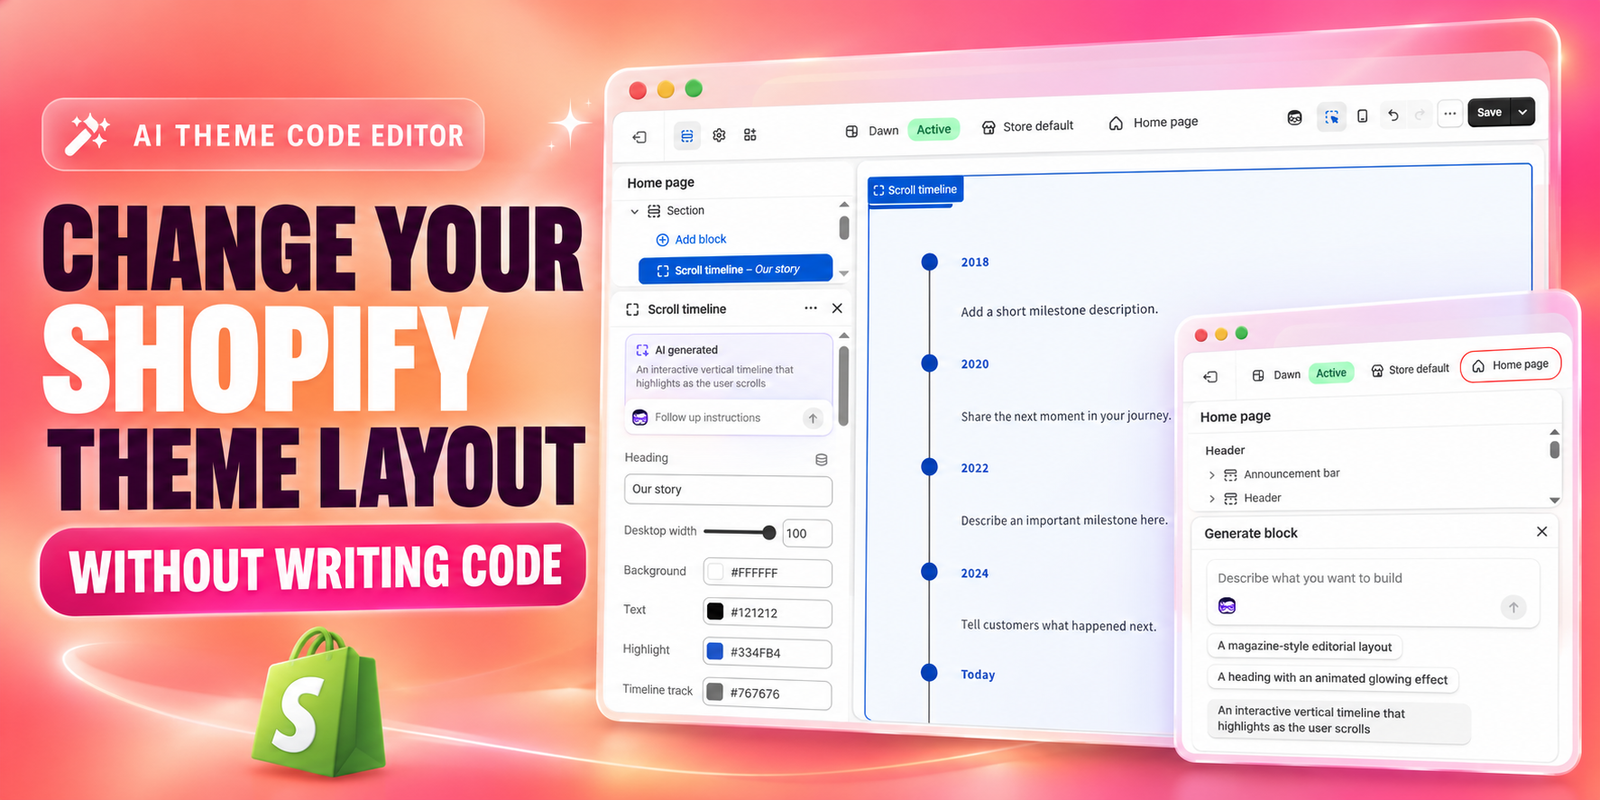
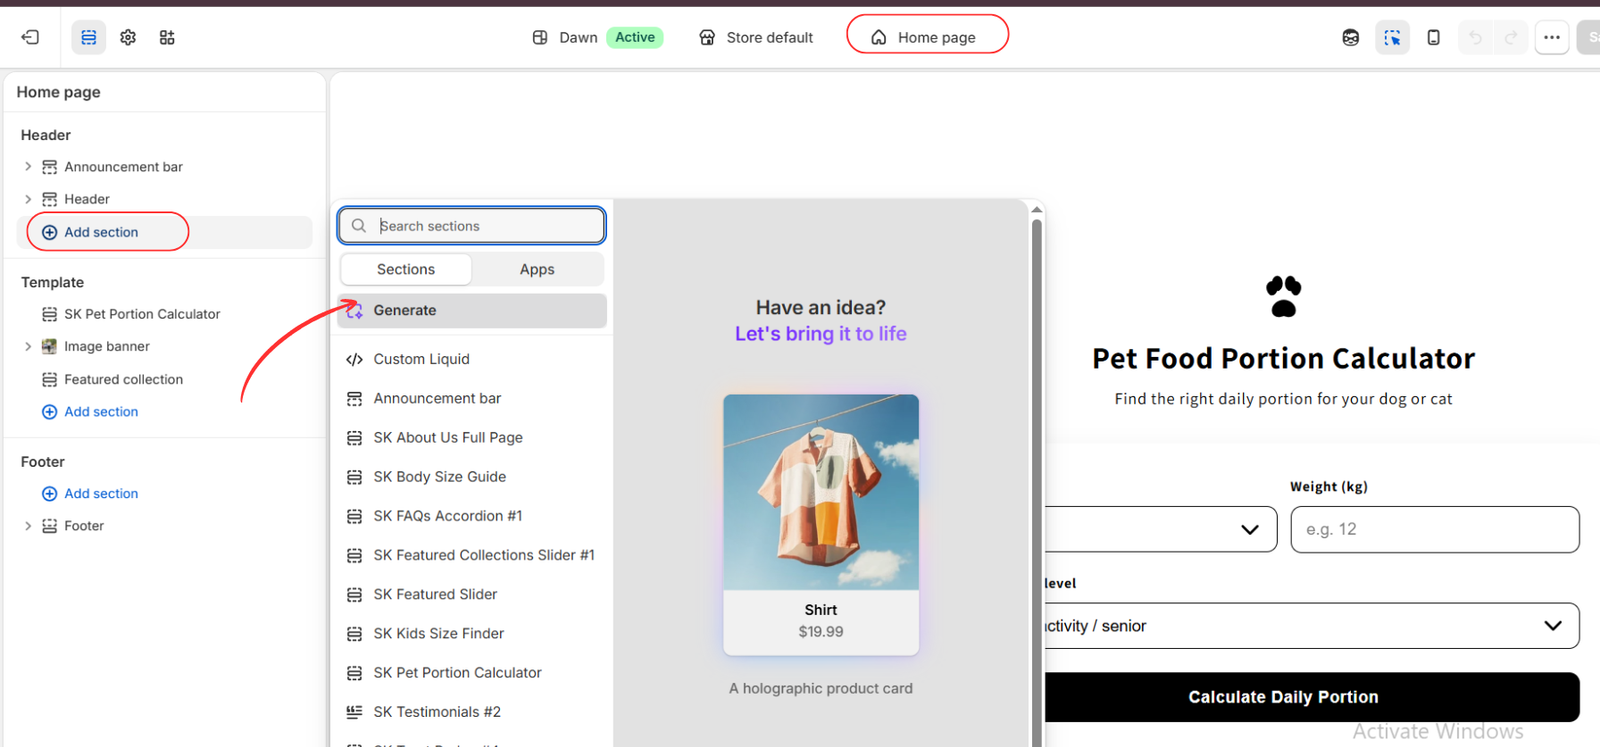
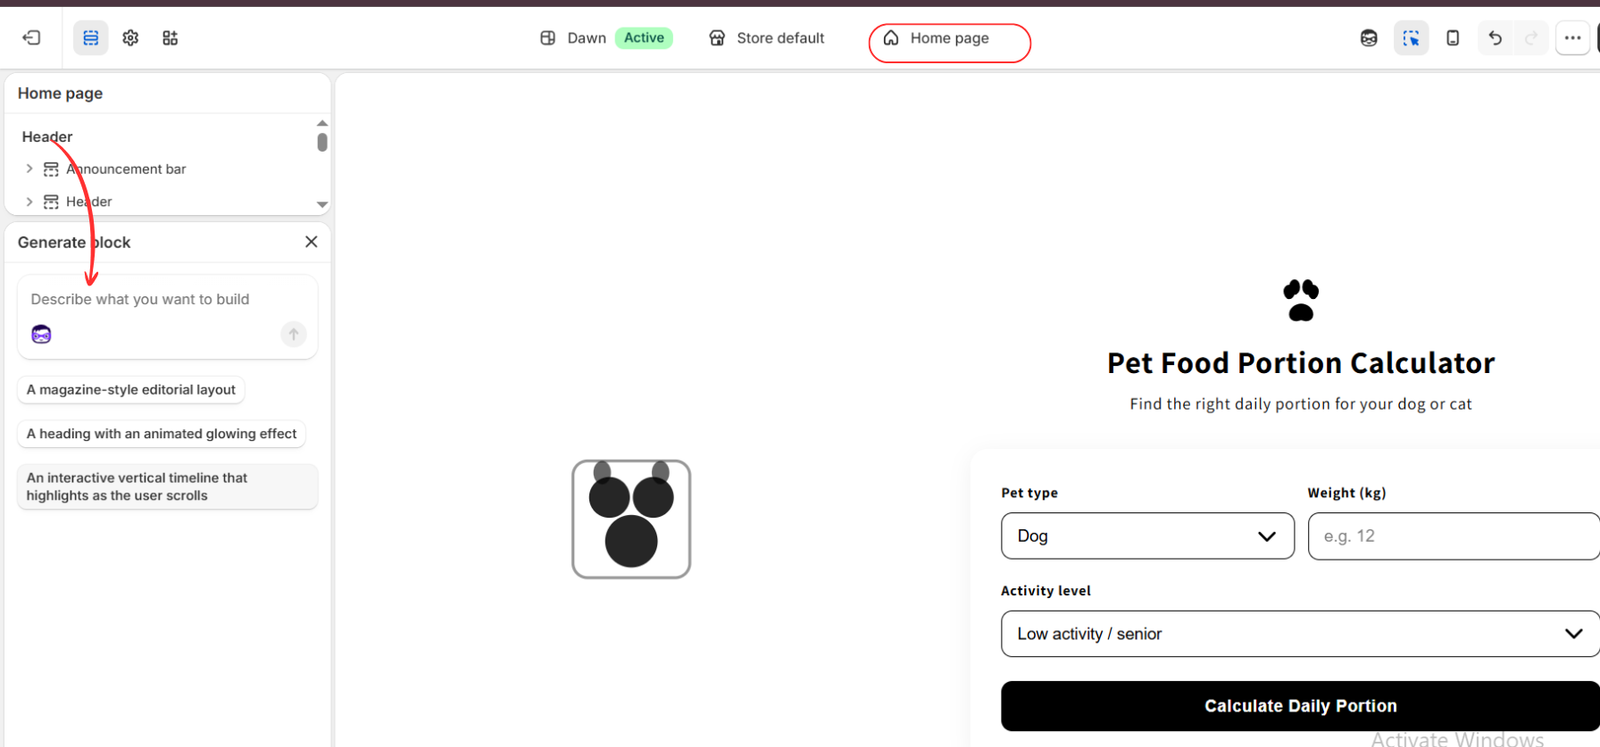
A distinction in the images: the Connected Themes image belongs to AI Theme Code Editor. The images showing Generate, Generate block, and AI generated show Shopify’s native AI block-generation interface. That feature is separate from the app, and its availability depends on eligibility and theme support. Installing the app does not itself guarantee that this native option appears.
Why a Clear Layout Matters
A well-organized page helps customers understand what to look at first and what action to take next. Consistent spacing, readable text, and a sensible content order can make your storefront easier to navigate.
Layout updates also let you adapt an existing theme to new campaigns or content without immediately replacing it. Focus on the customer’s task: finding a product, comparing information, or understanding your brand. Any improvement in sales should be measured rather than assumed.
Before You Begin
Write down one layout change you want to make and choose the page it belongs on. Duplicate your theme before making structural edits, and work on that copy when possible. Keep the existing version available while you review the new design.
Prepare your headings, images, links, and brand colors. A useful starting brief might be: “Add a vertical Our Story timeline to the homepage, with editable milestones, clear spacing, and a stacked layout on mobile.”
Step 1: Install AI Theme Code Editor
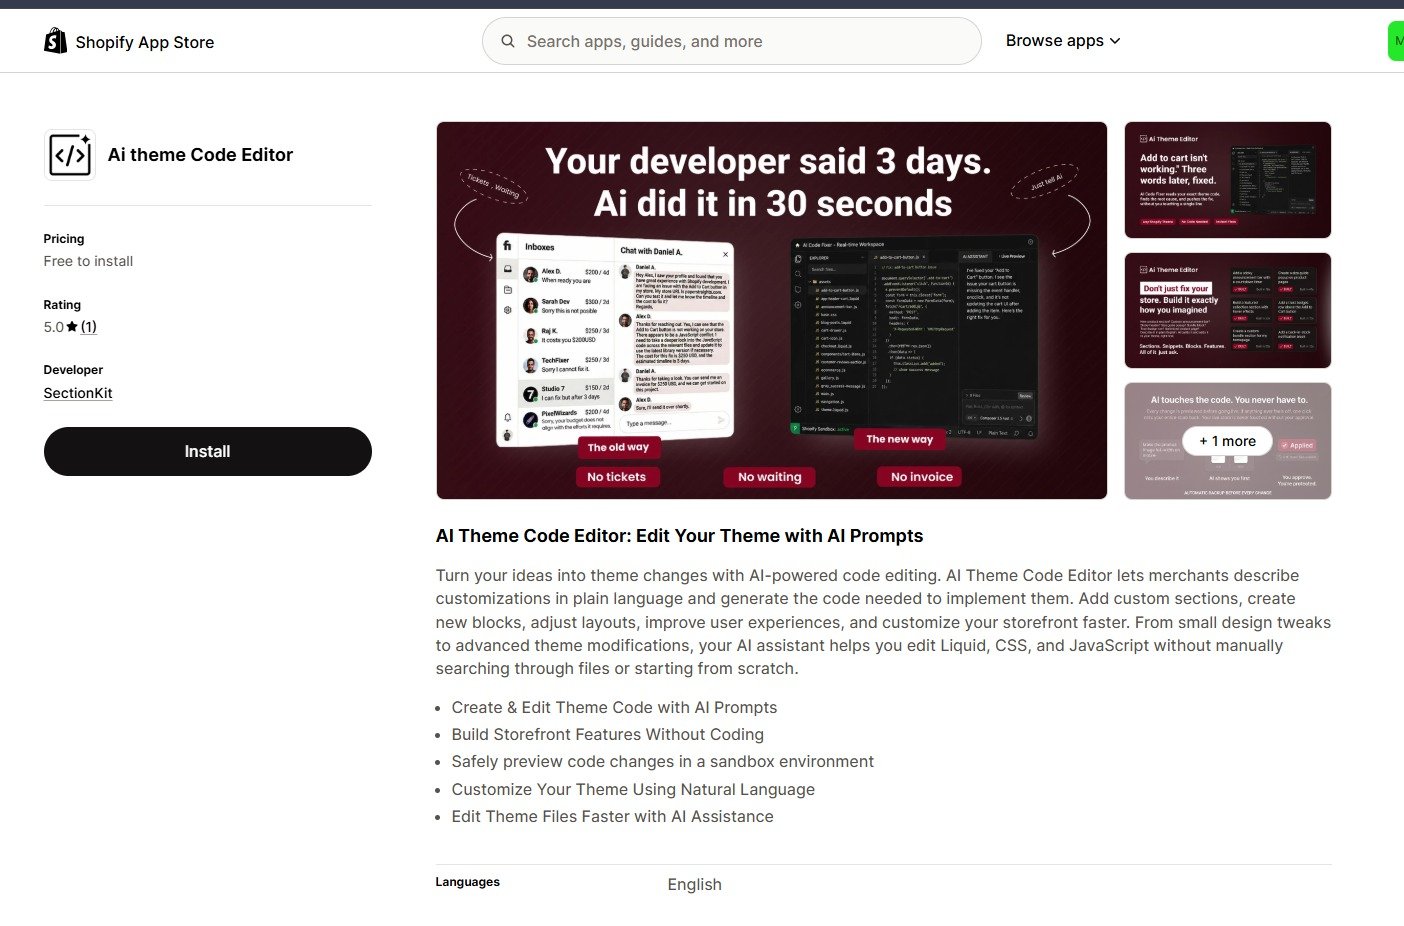
Open the AI Theme Code Editor listing in the Shopify App Store and select Install. Follow Shopify’s installation prompts and review the requested access. Once installation is complete, open the app from your Shopify admin.
The image below identifies the app listing and its Install button. Check the current listing for plan details before choosing the option that fits your work.
Step 2: Connect the Theme You Want to Edit
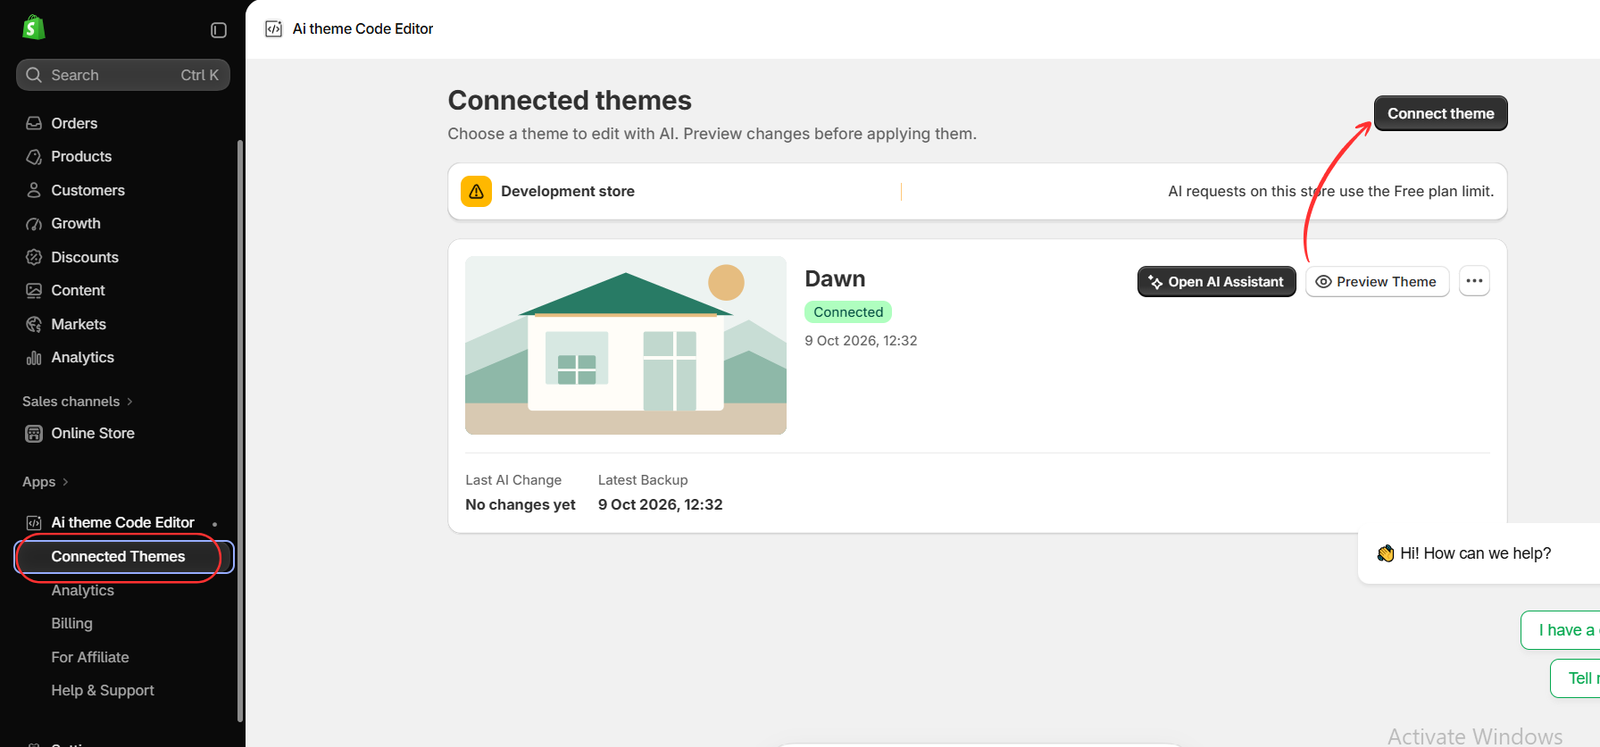
In the app, open Connected Themes and select Connect theme. Follow the app’s theme-selection process and choose the theme intended for your layout update.
After connection, confirm the theme name. The supplied image shows Dawn marked as Connected, alongside Open AI Assistant and Preview Theme. Use Open AI Assistant to request app-based layout changes, and review the result through the available preview before applying it.
Step 3: Open the Shopify Theme Editor
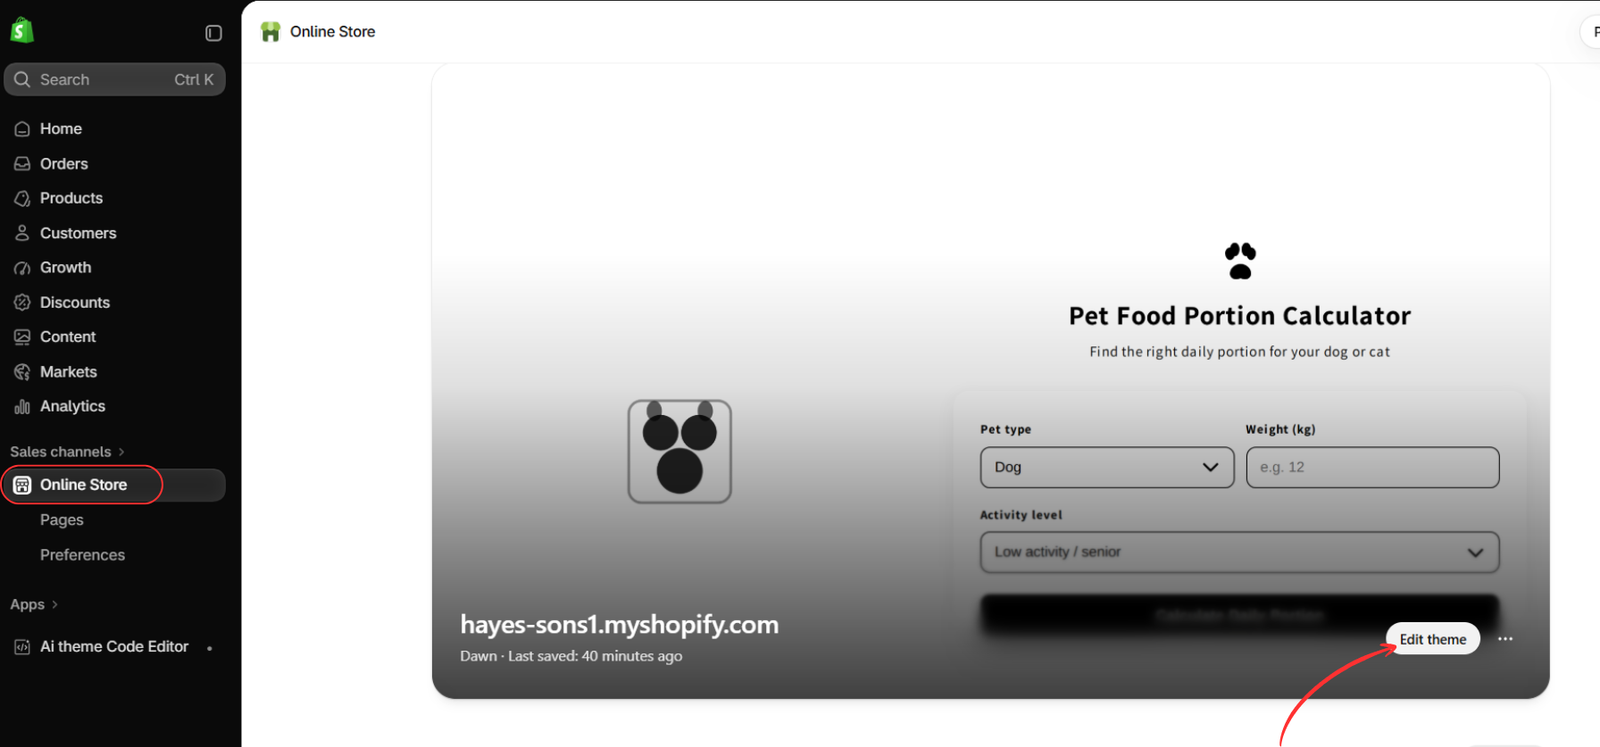
Go to Online Store → Themes in your Shopify admin. Find the theme you intend to work on and open its visual editor using Edit theme or the equivalent editor button shown in your admin.
Select the relevant template from the page selector. For a homepage update, choose Home page. Confirm that you have opened the same theme you intended to edit, particularly if you created a duplicate.
Step 4: Choose the Area for Your New Layout
Review the existing sections in the editor’s left sidebar. If a suitable section already exists, use its settings or reposition it before creating something new.
For the native generation example shown in the supplied image, select Add section in the page’s template area, then choose Generate if that option is available. For an Our Story timeline within the page content, use the template area rather than the global header or footer.
If Generate is unavailable, return to the connected theme in AI Theme Code Editor and request the layout through Open AI Assistant. The native generation option and the app’s assistant are two separate ways to request AI-assisted changes.
Step 5: Describe the Layout in Plain Language
The next image shows Shopify’s native Generate block prompt field. Enter a clear description of the block you want to create. When working through AI Theme Code Editor instead, give your layout request to the app’s AI assistant.
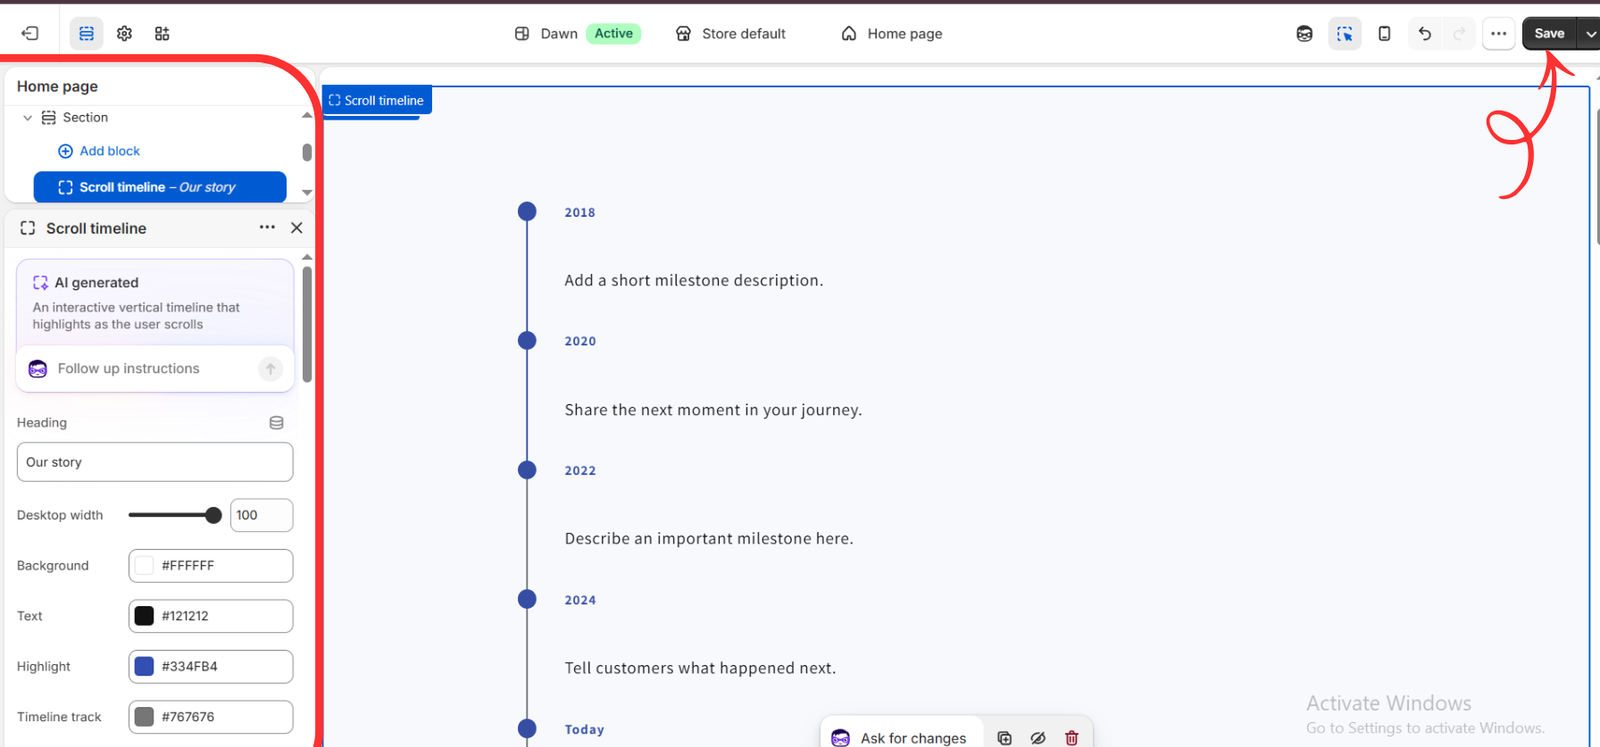
For the timeline demonstrated in the final image, use a prompt such as:
Create an Our Story vertical timeline for the homepage. Include five editable milestones, each with a year and a short description. Use a white background, dark readable text, blue milestone markers, and a vertical connecting line. Highlight milestones as visitors scroll. Make the layout fit mobile screens without horizontal scrolling, and include editable text and color settings.
Specify the structure, content, visual style, mobile behavior, and settings you want to edit later. Submit the request, review the generated result, and ask for focused refinements if needed. For example: “Reduce the gap between milestones on mobile and increase the description text size.”
Step 6: Customize the Result, Preview, and Save
The final image shows a generated Scroll timeline block named Our story. Its visible settings include Heading, Desktop width, Background, Text, Highlight, and Timeline track.
Replace the example milestone descriptions with your actual brand story. Adjust the available settings to match your store’s typography, colors, and page width. Reposition the containing section in the page if needed so the timeline appears where it supports the customer journey.
Check the desktop and mobile previews. Review text wrapping, spacing, scrolling behavior, and the surrounding sections. If the result needs another adjustment, use the available follow-up instructions in the native generator or return to the app’s assistant, depending on the workflow you used.
When you are satisfied, select Save. Saving an unpublished theme does not publish it; preview the full store and publish that theme separately when ready. Changes saved to an active theme can affect the live storefront.
Tips for Better Results Without Manual Coding
- Change one area at a time. A focused request is easier to review and refine.
- Describe the structure. Specify columns, alignment, content order, and mobile stacking.
- Request editable settings. Ask for controls for content and styling you expect to update later.
- Use real content. Replace placeholders before judging the final layout.
- Test the customer journey. Check navigation, product links, and cart behavior after structural changes.
Frequently Asked Questions
Can I change my Shopify theme layout without coding?
Yes. Supported theme settings let you rearrange and customize sections visually. For changes outside those controls, an AI tool can help generate the necessary theme code from a written request.
Do I need to replace my theme?
Not necessarily. Start with the existing theme’s capabilities, then assess whether the specific layout change can be added through settings or AI-assisted editing.
Is Shopify’s Generate option part of AI Theme Code Editor?
No. The Generate block interface shown in the supplied images is Shopify’s native AI feature. AI Theme Code Editor has its own connected-theme and AI-assistant workflow.
Does no manual coding mean no code changes occur?
No. AI-assisted editing can generate or modify theme code even though you do not type it yourself. Review the result before applying it to your live store.
Build a Layout That Fits Your Store
Changing your Shopify theme layout starts with a clear goal. Use the theme editor for supported visual adjustments, and consider AI-assisted editing when your design requires changes beyond the available settings.
AI Theme Code Editor provides a way to describe those changes in plain language and review the generated result. Start with one section, refine its layout, and preview the experience on desktop and mobile before making it live.
Explore AI Theme Code Editor: https://apps.shopify.com/ai-code-fixer
References
AI Theme Code Editor — official app listing
Shopify Help Center — generating theme blocks




