HOW TO CHOOSE PRODUCTS THAT MAKE SENSE IN A SHOPIFY BUNDLE
Introduction
A good Shopify bundle gives customers a useful reason to buy products together. It might complete a routine, provide everything needed for a task, or make stocking up more convenient. The connection between the products should be clear before a discount is added.
Choosing products is therefore the first decision in bundle creation. In this guide, you will learn how to assess relevance, demand, inventory, and profitability, then apply your choices using Section Kit Bundles. The six supplied images appear in their original order and show the setup path from installation to product selection.
The Main Problem: Products Are Grouped Together Without a Clear Purpose
Merchants sometimes combine a bestseller with an unrelated slow-moving item and hope a lower price will make the offer attractive. Customers may want the main product but have no use for the extra item. The discount then becomes the only reason to purchase the bundle.
Other combinations create practical problems: incompatible variants, different replenishment cycles, low stock in one component, or extra shipping costs that remove the profit. A bundle can increase the order total while making the order less worthwhile to fulfill.
The solution is to start with the customer’s goal and check the commercial details before building the promotion. Ask: “Why would this shopper reasonably want these items together today?”
Why Use an App After Choosing the Products?
Once the product logic is clear, an app helps you turn it into a visible offer. Section Kit Bundles supports quantity breaks, BOGO offers, and product bundles, with styling options for the widget. Its official app listing also describes A/B testing analytics.
The supplied images show controls for offer visibility, specific products and collections, and an Add products picker. These controls help you apply an offer to the intended items. The app handles configuration; your product knowledge and store evidence guide which items belong together.
Why Product Selection Matters
Relevant combinations can make shopping easier and help customers discover useful extras. Clear product choices also make the offer easier to explain: “Complete your coffee setup” is more understandable than a collection of unrelated discounted items.
Commercially, sensible product selection helps you control discount costs, reduce fulfillment complications, and avoid promoting items you cannot reliably supply. These benefits depend on execution and demand; bundling does not guarantee higher conversion or profit.
Build a Product Shortlist Before Opening the App
Choose one main product with a clear use case. Review orders, customer questions, product reviews, and your catalog to find items that support that use case. Products frequently purchased together are useful candidates, but verify that the pattern reflects meaningful demand rather than a temporary promotion.
Begin with a small combination—often two or three items—so the benefit is easy to understand. For a quantity offer, use a product customers can reasonably buy in multiples instead of forcing complementary products into the same structure.
| Bundle purpose | Illustrative product choice | Why it makes sense |
|---|---|---|
| Complete a task | Compatible coffee brewer, filters, and coffee | Provides essentials for the same activity |
| Support a routine | Shampoo and a suitable conditioner | Products are commonly used in sequence |
| Stock up | Two or three packs of a regularly used consumable | Extra quantity serves a realistic repeat need |
| Add a useful accessory | A phone case for the exact phone model purchased | Compatibility and usefulness are clear |
| Create a gift set | A coordinated notebook and pen | Forms a complete, understandable gift |
These are examples, not products shown in the app images. Check actual compatibility, preferences, and product suitability in your own catalog.
Check Five Things Before Approving a Combination
Customer relevance: Every item should contribute to the same goal. Compatibility: Confirm sizes, models, materials, or other requirements. Demand: Look for evidence that customers want the combination. Stock: Check each required variant. Profitability: Include the discount and all additional variable costs.
For example, if products normally total $60 and you sell the bundle for $54, then subtract product costs, fees, packaging, and fulfillment. If those variable costs total $35, the remaining contribution is $19 before overhead and other costs. This illustrative calculation does not establish whether the offer is more profitable than selling the products separately.
Check whether the bundle discount simply reduces the price of purchases customers already make. Keep the offer only if the convenience, additional demand, or commercial return justifies it.
Step 1: Install Section Kit Bundles
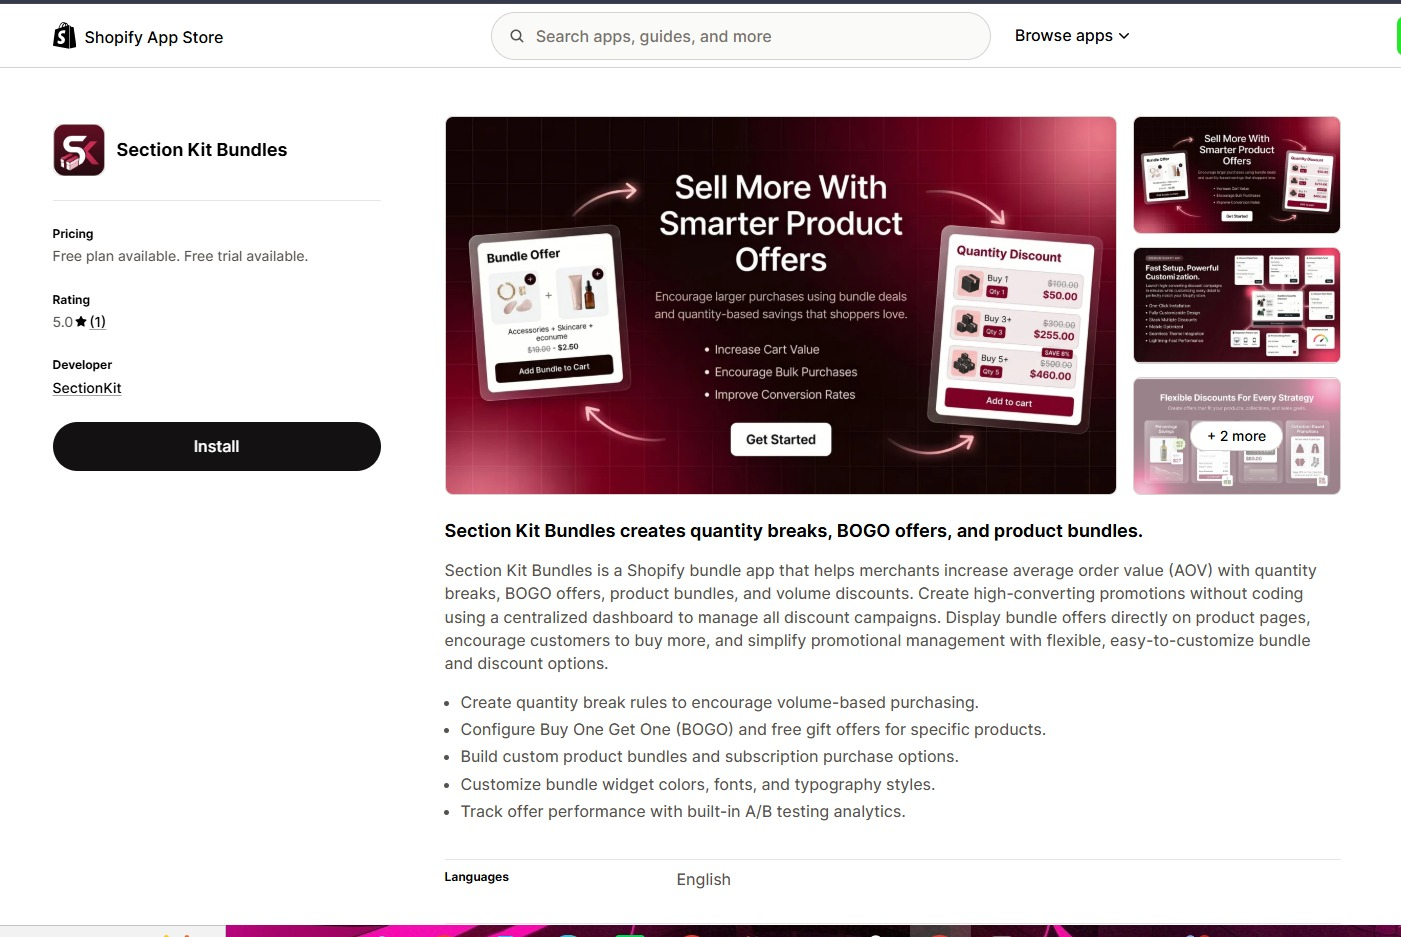
Visit Section Kit Bundles in the Shopify App Store and click Install. Choose your store, review the requested access, and complete the installation. Open the app in Shopify admin. If it is already installed, proceed to the dashboard.
Step 2: Start a New Bundle From the Dashboard
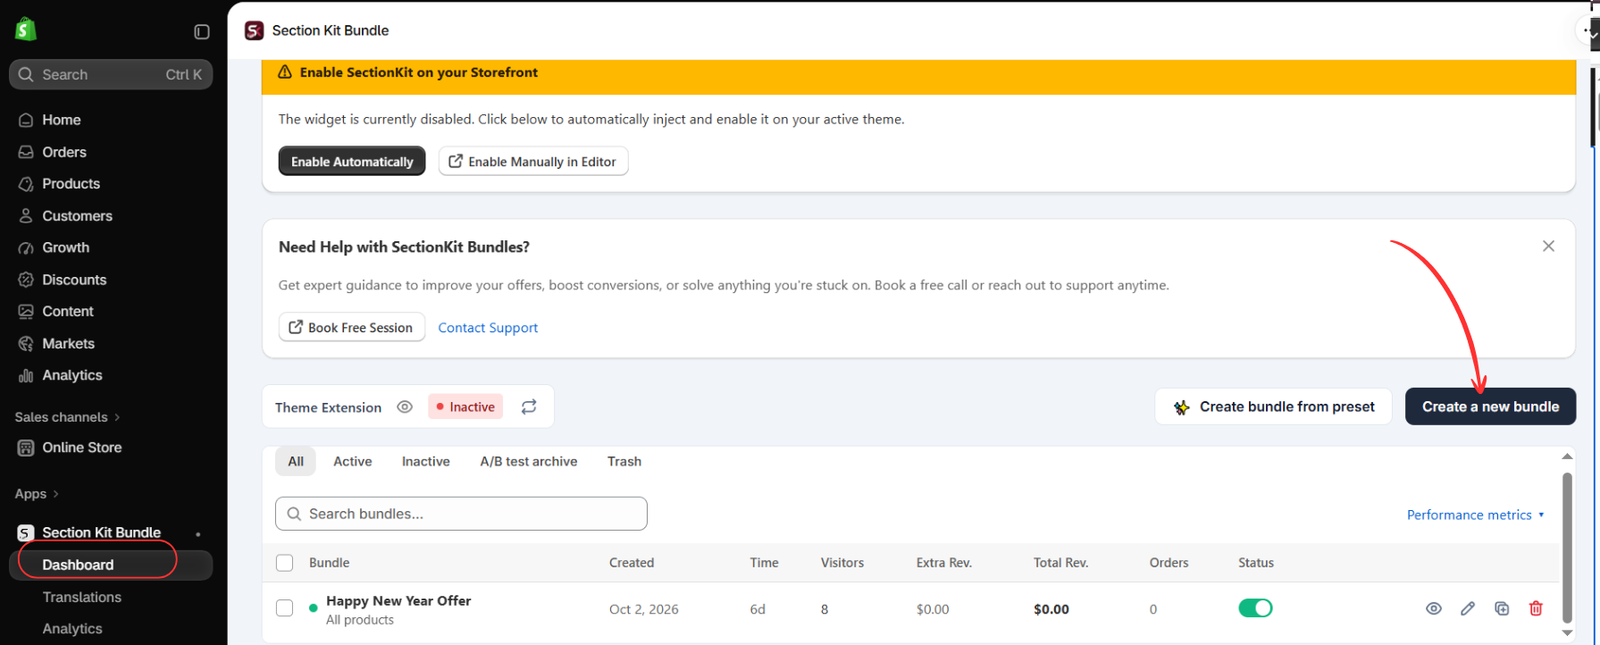
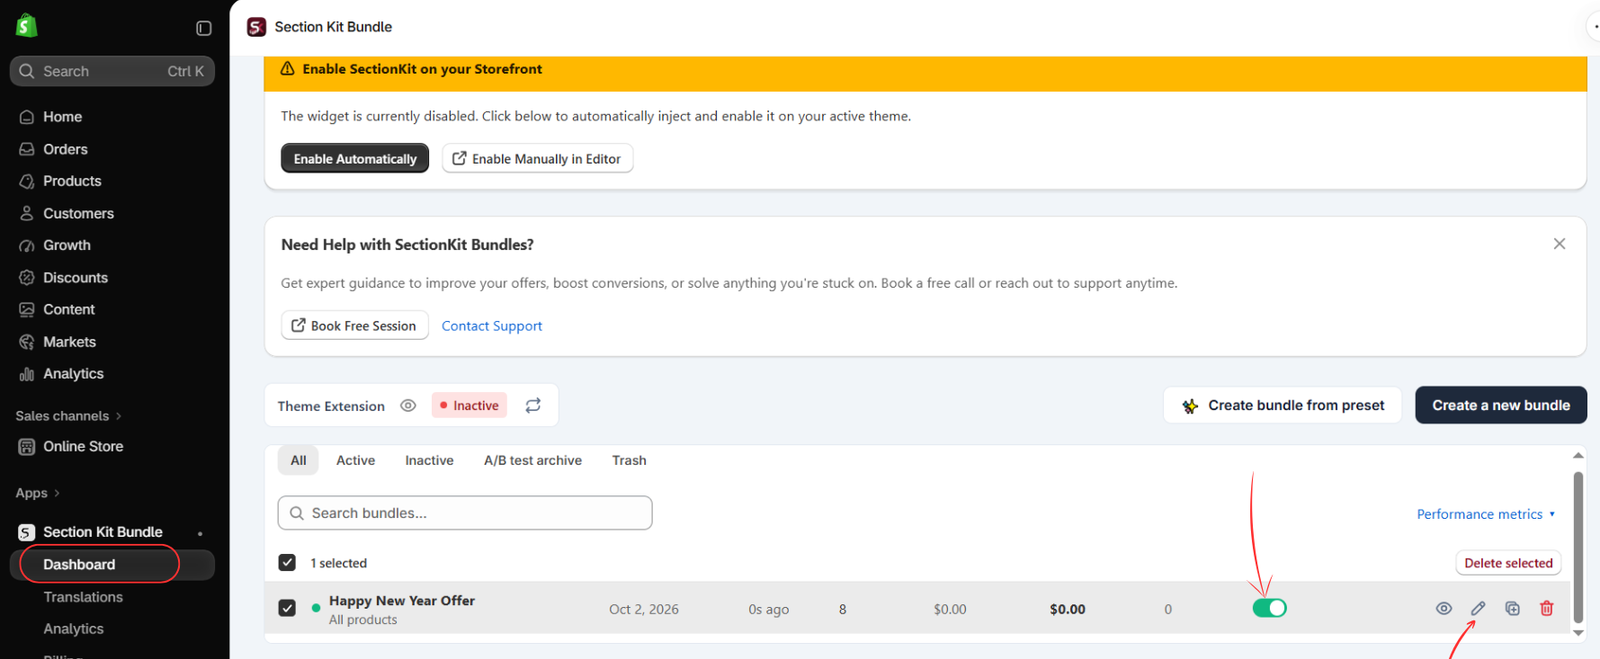
Go to Apps → Section Kit Bundle → Dashboard and click Create a new bundle, as highlighted in Image 2. Use a descriptive offer name that helps you recognize the intended products or purpose.
The dashboard also shows the theme extension status. Image 2 has an Inactive extension, so storefront integration will need attention before the finished offer appears to customers.
Step 3: Choose a Bundle Type That Fits Your Product Logic
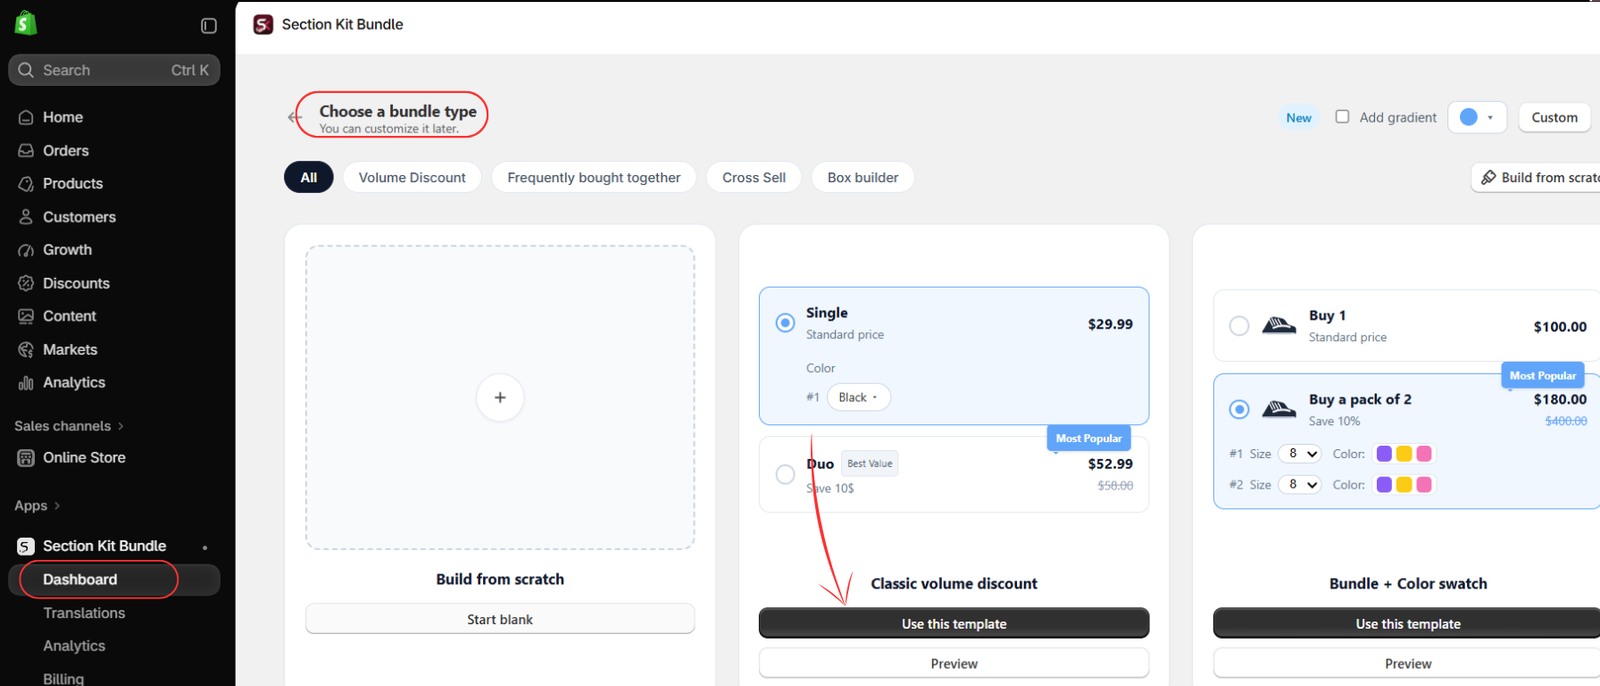
On the Choose a bundle type page, compare the available formats. Image 3 highlights Classic volume discount, which is a suitable starting point when shoppers should buy more units of the same product. Click Use this template if that matches your plan.
For complementary products, inspect the Frequently bought together or Cross Sell categories shown at the top. Choose a template that actually supports your intended combination. A template name or sample preview does not determine which products your customers need.
Use Preview to review the presentation, then configure the required product, quantity, and discount settings in the editor. The supplied image sequence does not show every intervening field.
Step 4: Reopen Your Saved Offer to Refine Its Product Scope
After saving the offer, return to the dashboard and find its row. Click the pencil icon to edit it. Image 4 highlights that icon and the active status switch.
The example row is named “Happy New Year Offer” and shows “All products.” Treat this as the current scope of that example, not a recommendation to apply every bundle across your entire catalog. A product-specific promotion usually needs more focused eligibility.
Keep the offer inactive or in draft while you review its settings. Activate it only after checking the products, quantities, and checkout behavior.
Step 5: Set Where the Offer Should Appear
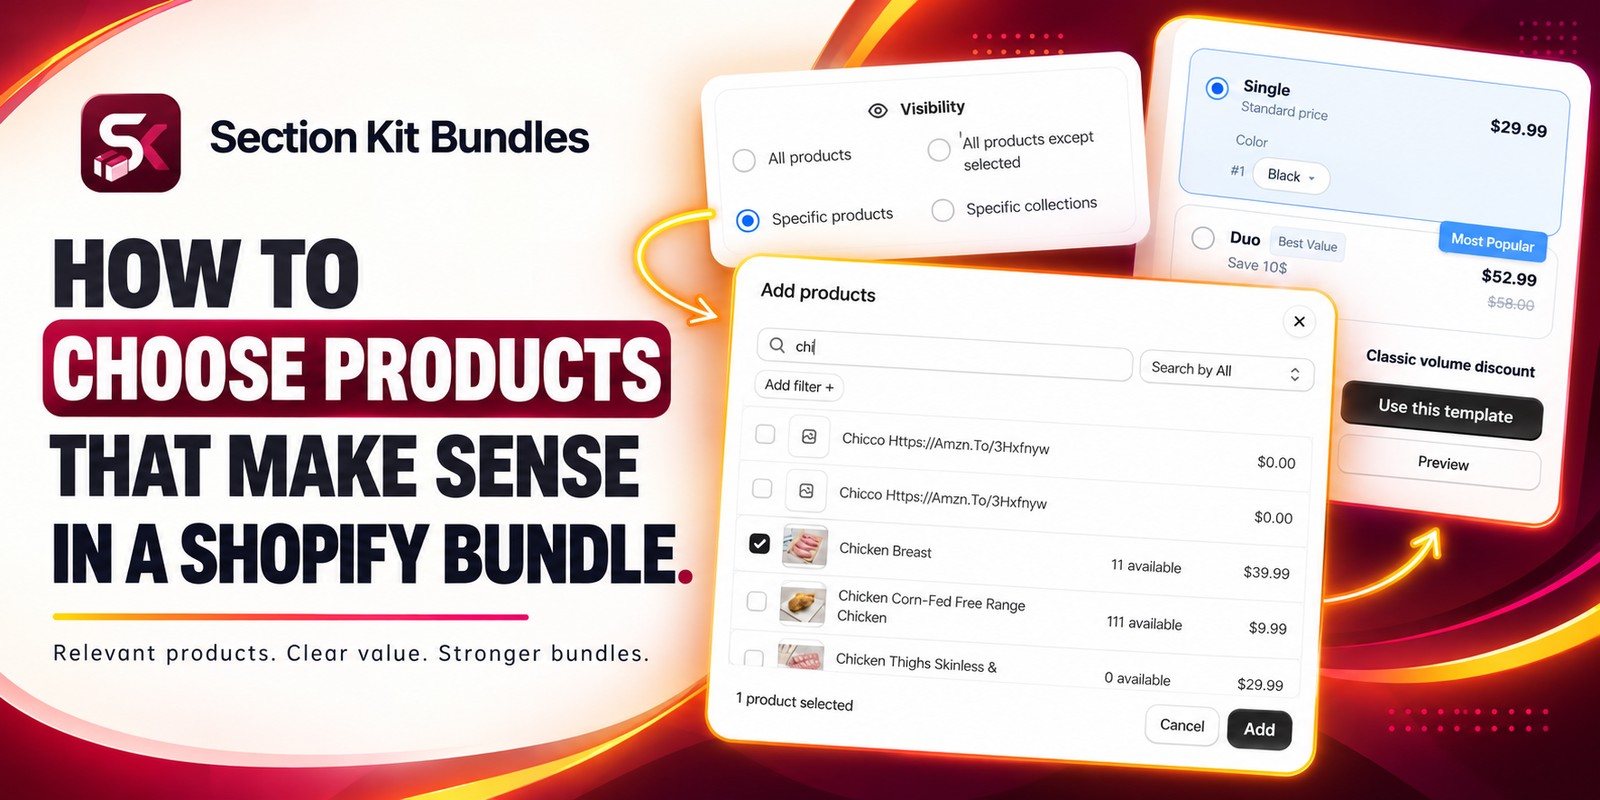
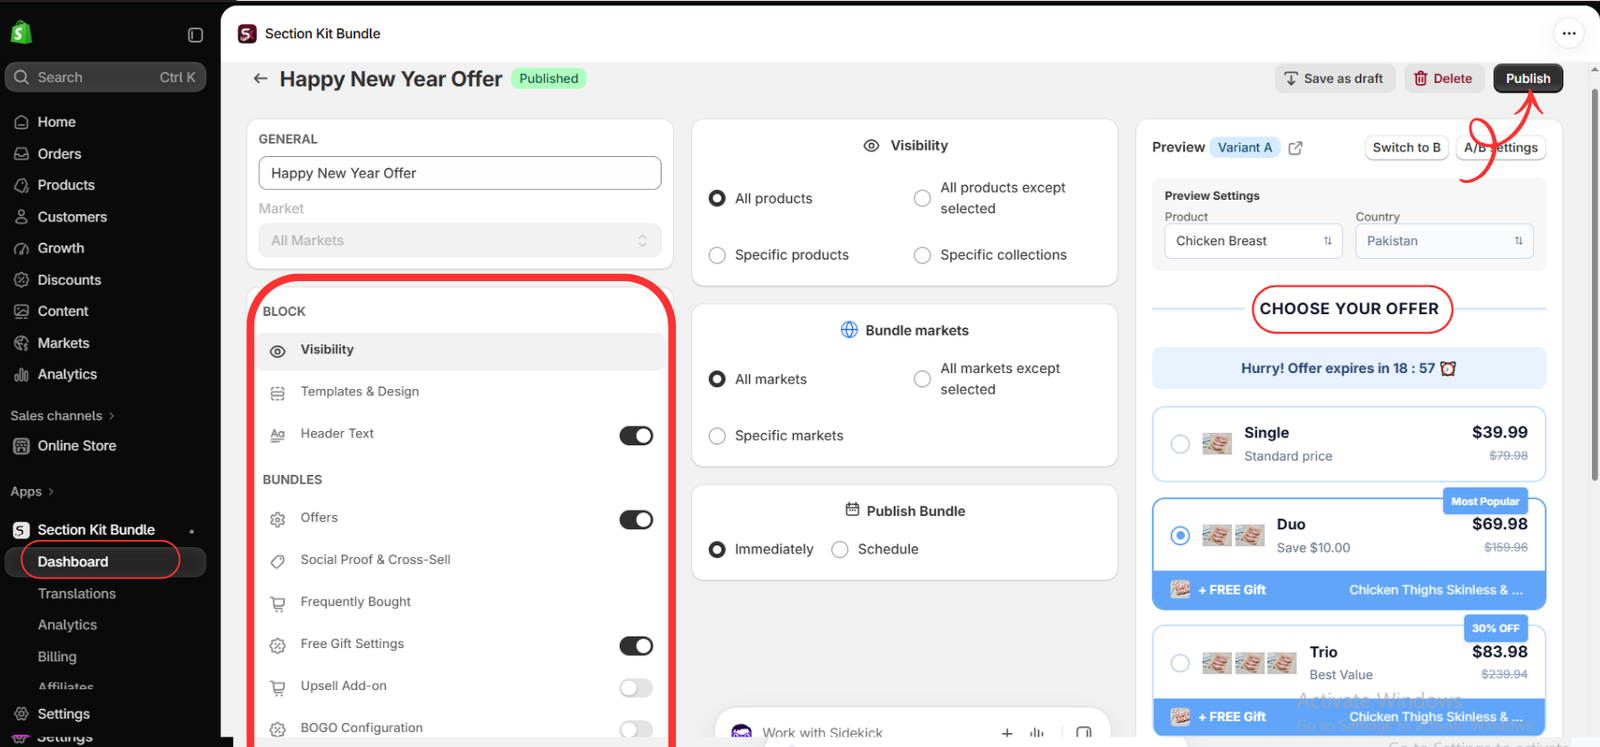
In the editor, open Visibility. Image 5 shows options for All products, All products except selected, Specific products, and Specific collections. Choose the scope that matches your offer.
Use Specific products for a carefully chosen shortlist. Use Specific collections when the offer genuinely applies to a consistent category, then review what happens if products are later added to that collection. Avoid showing a product-specific bundle on unrelated pages.
The image also shows Bundle markets and publishing options. Limit the offer to markets where its products, prices, and fulfillment are suitable. Use the preview to check an eligible product and country.
Visibility is not the same as bundle contents. It controls where the offer is eligible to appear. Review the relevant Offers, Frequently Bought, Cross-Sell, or Free Gift settings to confirm which items the selected promotion actually adds to the cart. Those complete settings are not shown here.
Step 6: Select and Confirm the Intended Products
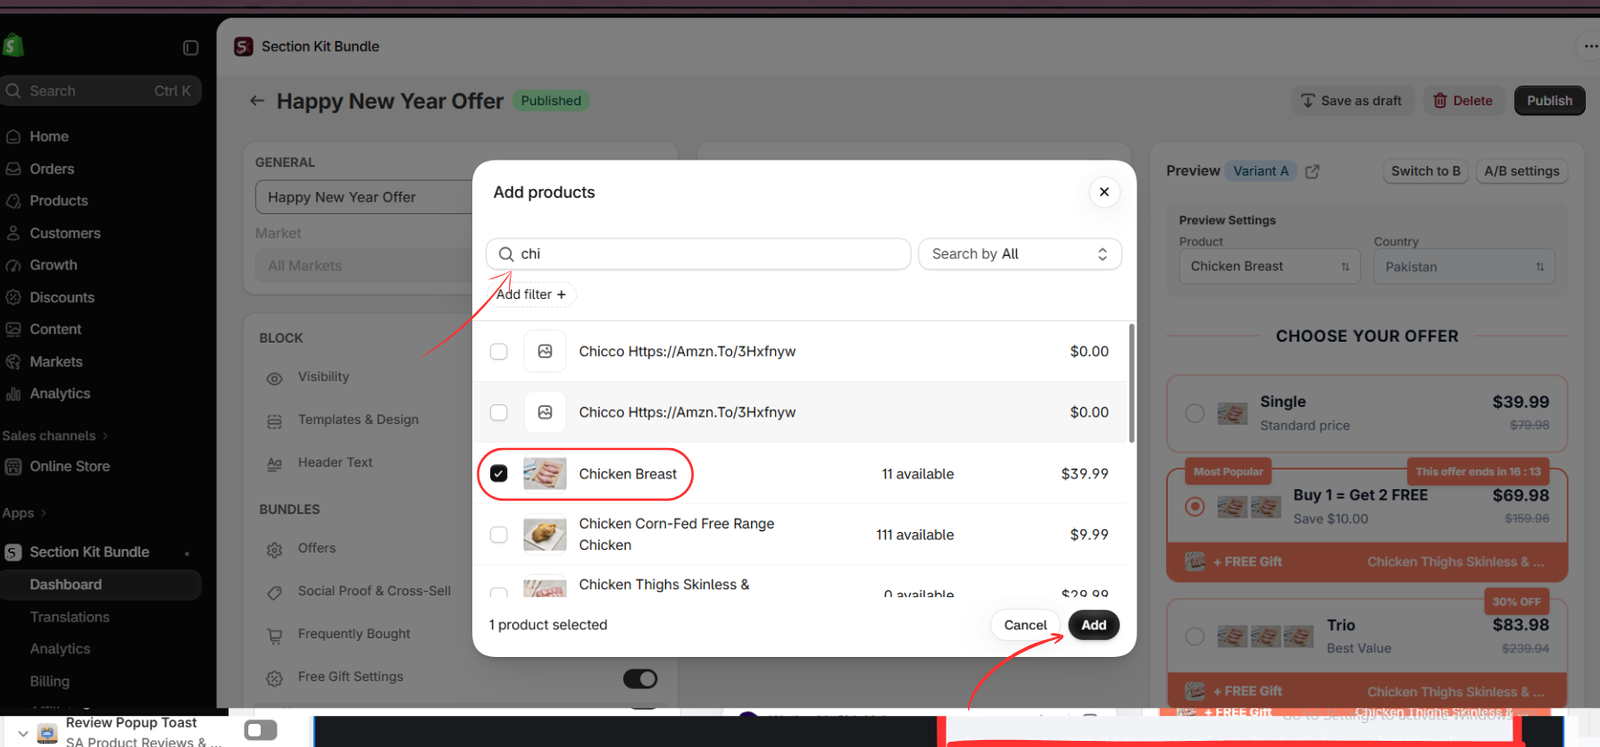
When the relevant selection control opens the Add products window, search for the product by name. Select the matching checkbox and click Add. Image 6 shows a search for “chi” and a selected Chicken Breast product.
Check the exact product rather than choosing the first search result. The image includes similarly matching names and shows stock information; an unrelated product can appear simply because its title contains the same letters. The Chicken Breast row shows 11 available in this example, while another visible item shows zero available. These are example values, so review your current stock before publishing.
Confirm whether the picker is being used for visibility, offer products, or another setting. The image does not identify the control that opened it. After clicking Add, verify the selection in the relevant panel and check the actual bundle contents separately.
If you are offering multiple units of Chicken Breast, assess whether customers can use or store that quantity and whether fulfillment can support it. If you are adding another food product, choose it for a clear meal-planning purpose and confirm its availability. Do not include an out-of-stock item just to complete the visual layout.
Preview, Publish, and Test the Complete Offer
Review the widget’s heading, product names, quantities, variant choices, and total price. Explain what customers receive and how any discount is calculated. If the editor offers immediate publication or scheduling, select the appropriate option and use Publish when the offer is ready.
Check the theme extension. If it is inactive, use the dashboard’s Enable Automatically or Enable Manually in Editor option and save the required integration changes for the intended theme.
Test an eligible product and an ineligible product on the storefront. Add each offer option to the cart, confirm the exact products and variants, and verify the final checkout discount. Check mobile presentation and stock handling as well.
Measure Whether the Products Work Together
After launch, review bundle orders, conversion, average order value, and contribution after relevant variable costs. Look for customer questions or returns that suggest an item is confusing, incompatible, or unwanted.
If the combination performs poorly, revisit its purpose before increasing the discount. Test a more relevant accessory, a simpler set, or a smaller quantity. Use the app’s available A/B testing reporting when comparing alternatives, keeping the product scope and test conditions consistent where possible.
Conclusion
Products make sense in a Shopify bundle when they help the same customer achieve a clear goal. Start with relevance, validate compatibility and demand, and check stock and profitability before creating the offer.
Explore Section Kit Bundles to turn your shortlist into a visible promotion. Choose the right bundle type, control where it appears, and verify exactly what customers receive before publishing.
Feature reference: official Section Kit Bundles Shopify App Store listing. Setup follows the supplied images; controls and feature access may vary with the current app version and plan..




