HOW TO CREATE A BOGO OFFER IN SHOPIFY
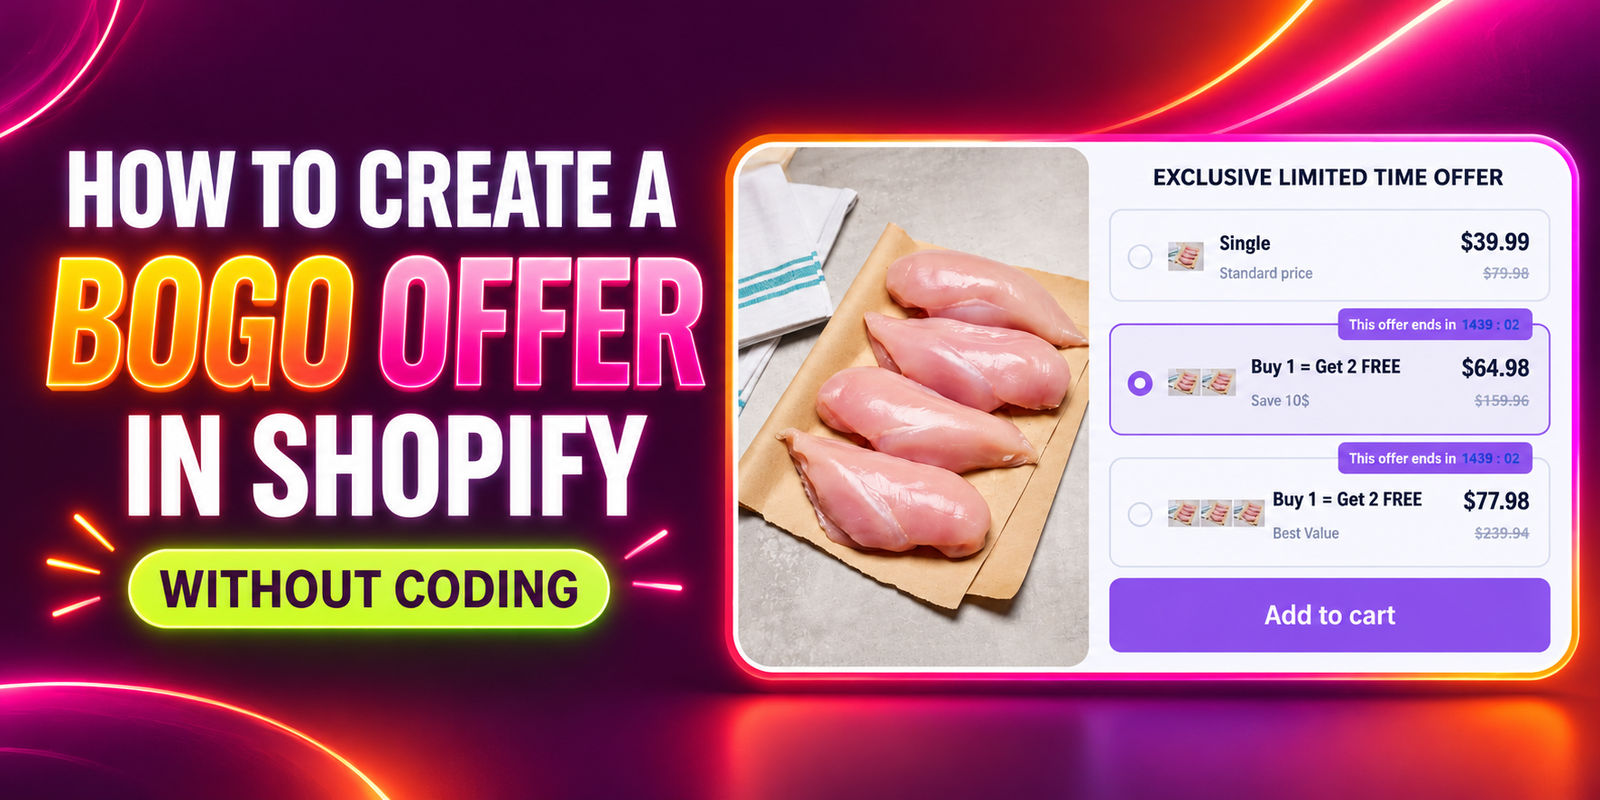
A buy-one-get-one offer gives shoppers a clear incentive to choose your product: buy a qualifying item and receive an additional eligible item free. When the offer is relevant and easy to understand, it can encourage customers to purchase while helping your store promote selected products.
This guide explains how to create a BOGO offer in Shopify using Section Kit Bundles. Follow the six images in order to install the app, select a template, configure the offer, publish it, and enable its product-page display.
The main challenge merchants face
A promotion is only useful when customers understand it and receive the promised benefit. Merchants often need to coordinate the offer message, eligible products, quantities, discount rules, and storefront display. If these parts do not agree, shoppers may see a “free” item advertised but encounter an unexpected total in the cart.
Another common issue is visibility. An offer announced in a banner can be overlooked when customers reach the product page. Merchants need a clear way to show the promotion where shoppers choose their purchase, while keeping campaign setup manageable.
Why use an app for your BOGO offer?
Section Kit Bundles supports BOGO offers, product bundles, quantity breaks, and customizable product-page widgets without coding. It provides a dashboard for managing promotions and a visual offer preview, helping you connect offer setup with its storefront presentation.
For this walkthrough, you will use the BOGO template and the BOGO Configuration option shown in the supplied images. This is useful when you want a visible product-page offer with a layout you can customize.
Why a well-planned BOGO offer matters
- Clear customer value: shoppers can immediately understand what they must buy and what they receive.
- More units per purchase: a relevant offer can encourage customers to try or stock up on a product.
- Product discovery: an eligible complementary reward can introduce customers to another item.
- Focused promotions: you can build a campaign around selected products rather than discounting the entire store.
A BOGO offer does not automatically increase profit or average order value. Giving away a second item at the same paid price may increase units sold without increasing the amount collected. Check product costs, fulfillment costs, and inventory before deciding whether the offer makes sense.
Plan the offer before creating it
Decide what customers must buy, which item they receive free, and how many reward items qualify. For example, buying one eligible skincare product and receiving one matching item free is different from buying one and receiving two free. Write the offer label to match the actual rule.
Choose the eligible products, markets, and campaign timing before you begin. Also decide whether the offer should apply once or multiple times per order, if that option is available in your configuration. This makes testing much easier.
How to create a BOGO offer in Shopify: step by step
Step 1: Install Section Kit Bundles
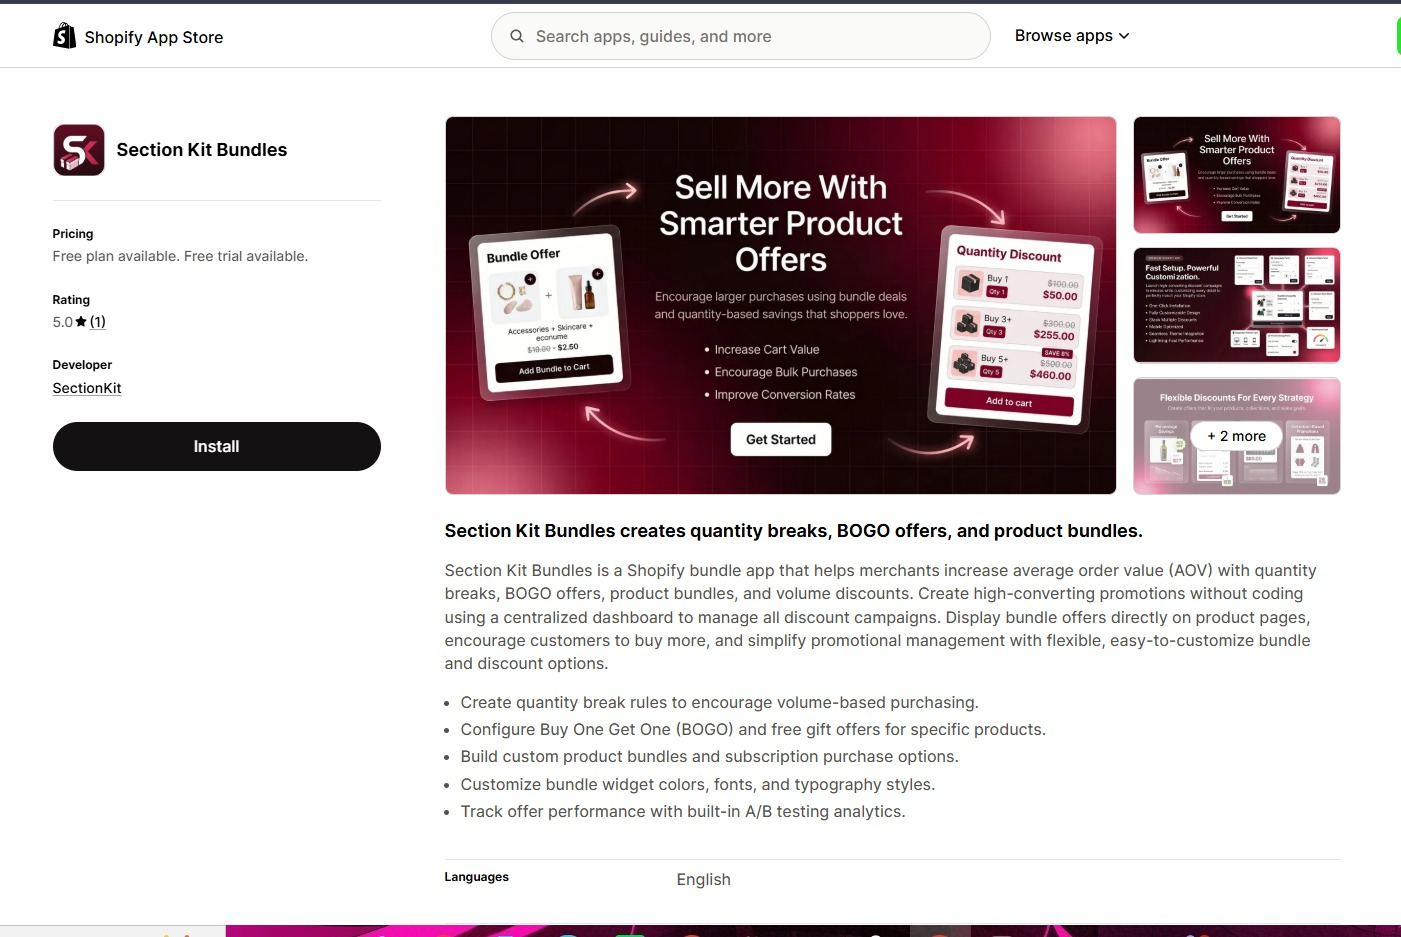
Open Section Kit Bundles in the Shopify App Store and click Install. Select your store if prompted and follow Shopify’s installation instructions. Once installed, open the app from your Shopify admin. Review the available plans and choose one that supports the offer you want to run.
Step 2: Create a new offer from the dashboard
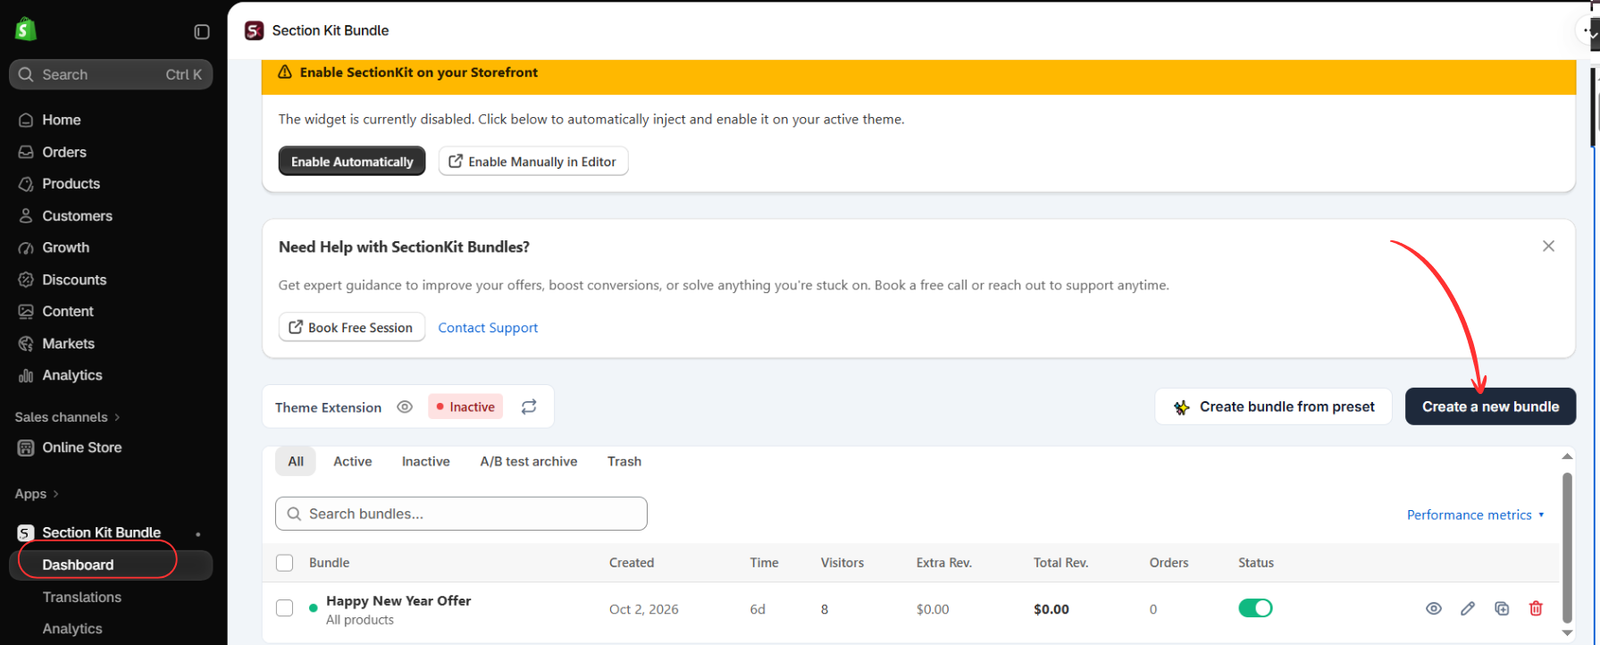
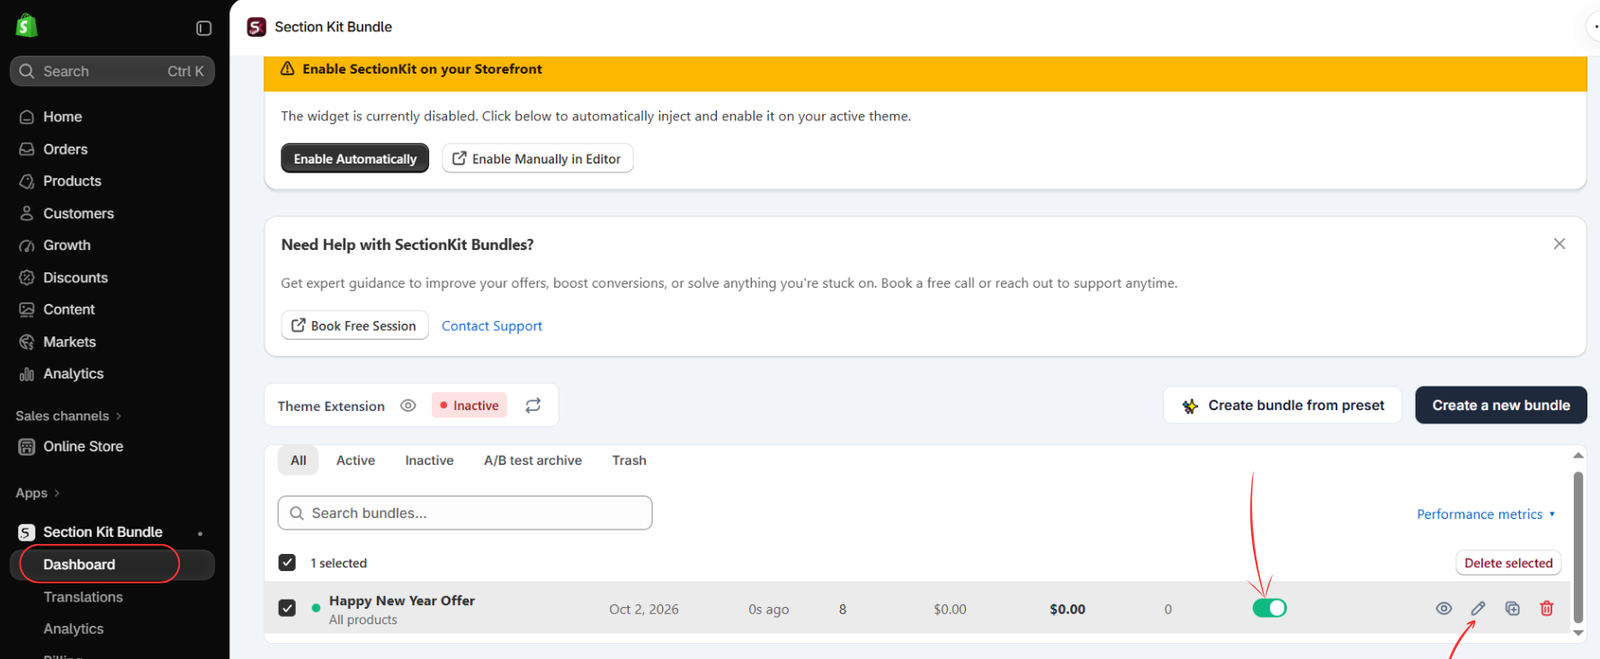
Open Dashboard inside the app, then click Create a new bundle. This begins the offer setup. The image shows an inactive theme extension, so you will also need to enable the app’s storefront integration before shoppers can see the offer.
Step 3: Choose the BOGO template
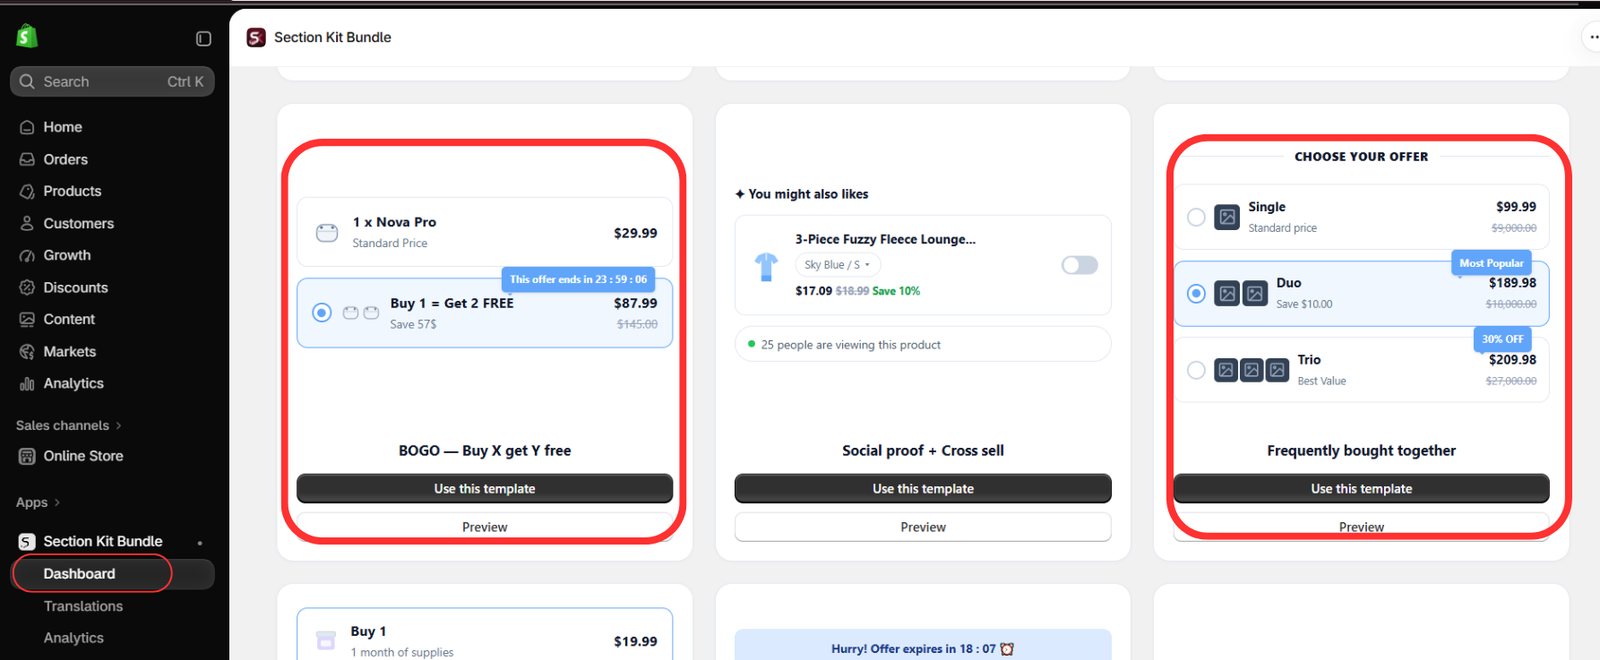
In the template gallery, find BOGO — Buy X get Y free and click Use this template. Use Preview first if you want to inspect the layout.
The image also highlights a Frequently bought together template. For this tutorial, choose the BOGO template on the left. Its example uses “Buy 1 = Get 2 FREE,” but you should configure the quantities for your own campaign. A standard buy-one-get-one-free offer means customers receive two items in total: one paid item and one free item.
Step 4: Open the offer settings and check the status
Locate your new offer on the dashboard and click the pencil icon to edit it. The image shows a sample campaign named Happy New Year Offer, with its status toggle switched on. Give your campaign a descriptive name, such as “Buy One, Get One Free.” Check that the offer is enabled when you are ready to launch it. An enabled status alone does not replace the storefront integration step.
Step 5: Configure the BOGO rule, review the preview, and publish
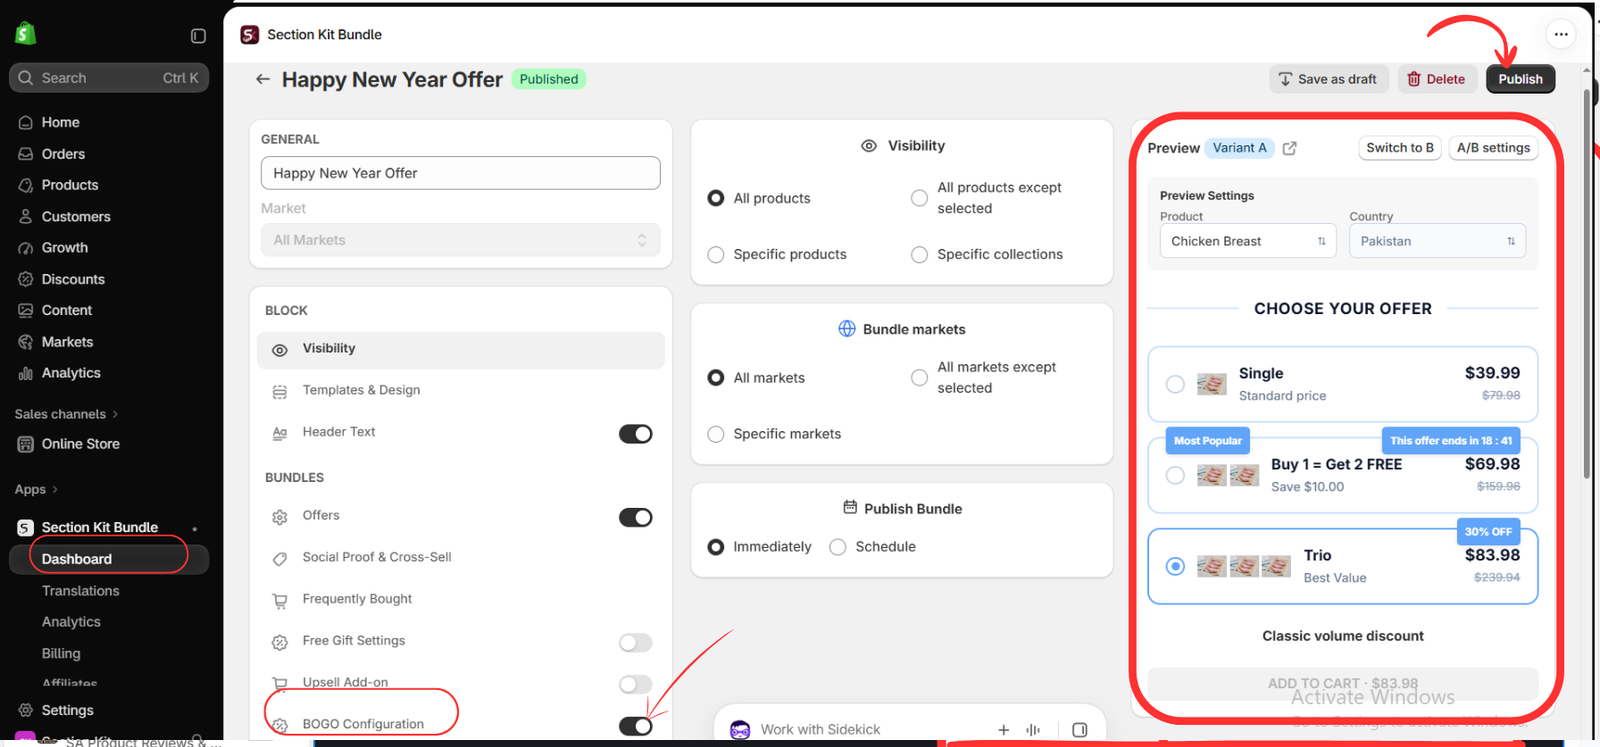
In the offer editor, open and enable BOGO Configuration, highlighted at the bottom-left of the image. Configure the purchase requirement and the free-item quantity in the settings that open. For a standard BOGO promotion, set the rule to buy one qualifying item and receive one eligible item free. Select the qualifying and reward products wherever the configuration asks for them.
Use Visibility to choose which products or collections display the offer. Under Bundle markets, select the markets where it should run. Adjust Templates & Design and Header Text so the offer is easy to understand and matches your store.
Review the preview on the right. The supplied image includes example labels and prices; update your own offer so the displayed claim agrees with the configured rule. Only describe an item as free when its charge is removed as promised. If you use an expiry message, make sure it reflects your actual campaign timing.
Choose Immediately or Schedule under Publish Bundle, then click Publish. The inner BOGO settings are not expanded in this image, so follow the labels shown in your account when entering the exact quantities and eligible items.
Step 6: Enable the app embed and save your theme
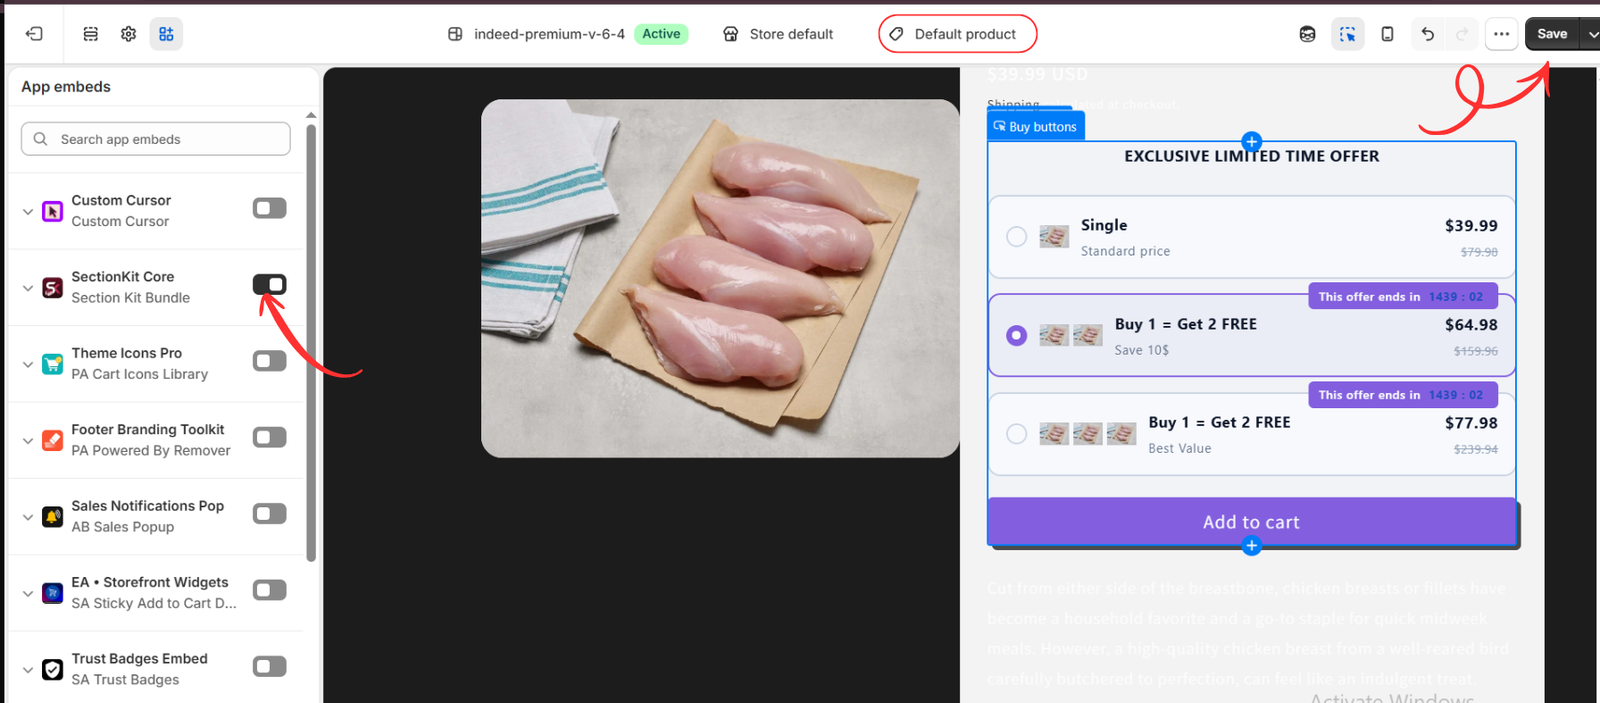
Open your intended theme editor through Online Store, or use the app’s Enable Manually in Editor option. Navigate to the product template used by your qualifying products. The supplied image shows Default product.
Open App embeds and turn on SectionKit Core, identified underneath as Section Kit Bundle. Click Save in the top-right corner. Preview an eligible product to confirm that the offer widget appears. If your store uses multiple product templates, check the relevant templates too.
Test the BOGO offer before announcing it
Open an eligible product page and select the offer as a customer would. Check the experience on desktop and mobile, then verify the following:
- The promotion appears only where you intend it to appear.
- The selected offer adds the correct paid and reward items to the cart.
- Any selected variants match the items customers receive.
- The qualifying reward is free in the cart and at checkout.
- Changing quantities or removing an eligible item updates the discount as expected.
- Other active promotions do not create an unintended discount combination.
Do not assume that every configuration adds the reward automatically. Test your setup to confirm whether shoppers need to select or add it, and make that action clear in the offer text.
If the offer is not showing
Check that the offer is published and enabled, the product meets its visibility rules, and the visitor’s market is included. Confirm that SectionKit Core is enabled and saved in the theme customers are viewing. If the widget appears but the discount is wrong, recheck the BOGO rule and eligible products before promoting the campaign.
Create a BOGO offer customers can trust
A successful BOGO campaign combines a relevant reward, clear wording, and a correctly configured discount. With Section Kit Bundles, you can build the offer from a template, customize its product-page presentation, and manage the campaign from your Shopify admin.
Start with one carefully chosen promotion, test the full purchase journey, and review its effect on sales and margins before expanding it.
Ready to launch your BOGO promotion? Install Section Kit Bundles from the Shopify App Store.




