How to Add a Custom Cursor to a Shopify Store Without Coding
Introduction
Your store’s personality comes through in its product images, colors, typography, and small interactions. A custom cursor is one more detail you can tailor to your brand. Instead of the standard mouse pointer, desktop visitors can see a design that suits your products and visual style.
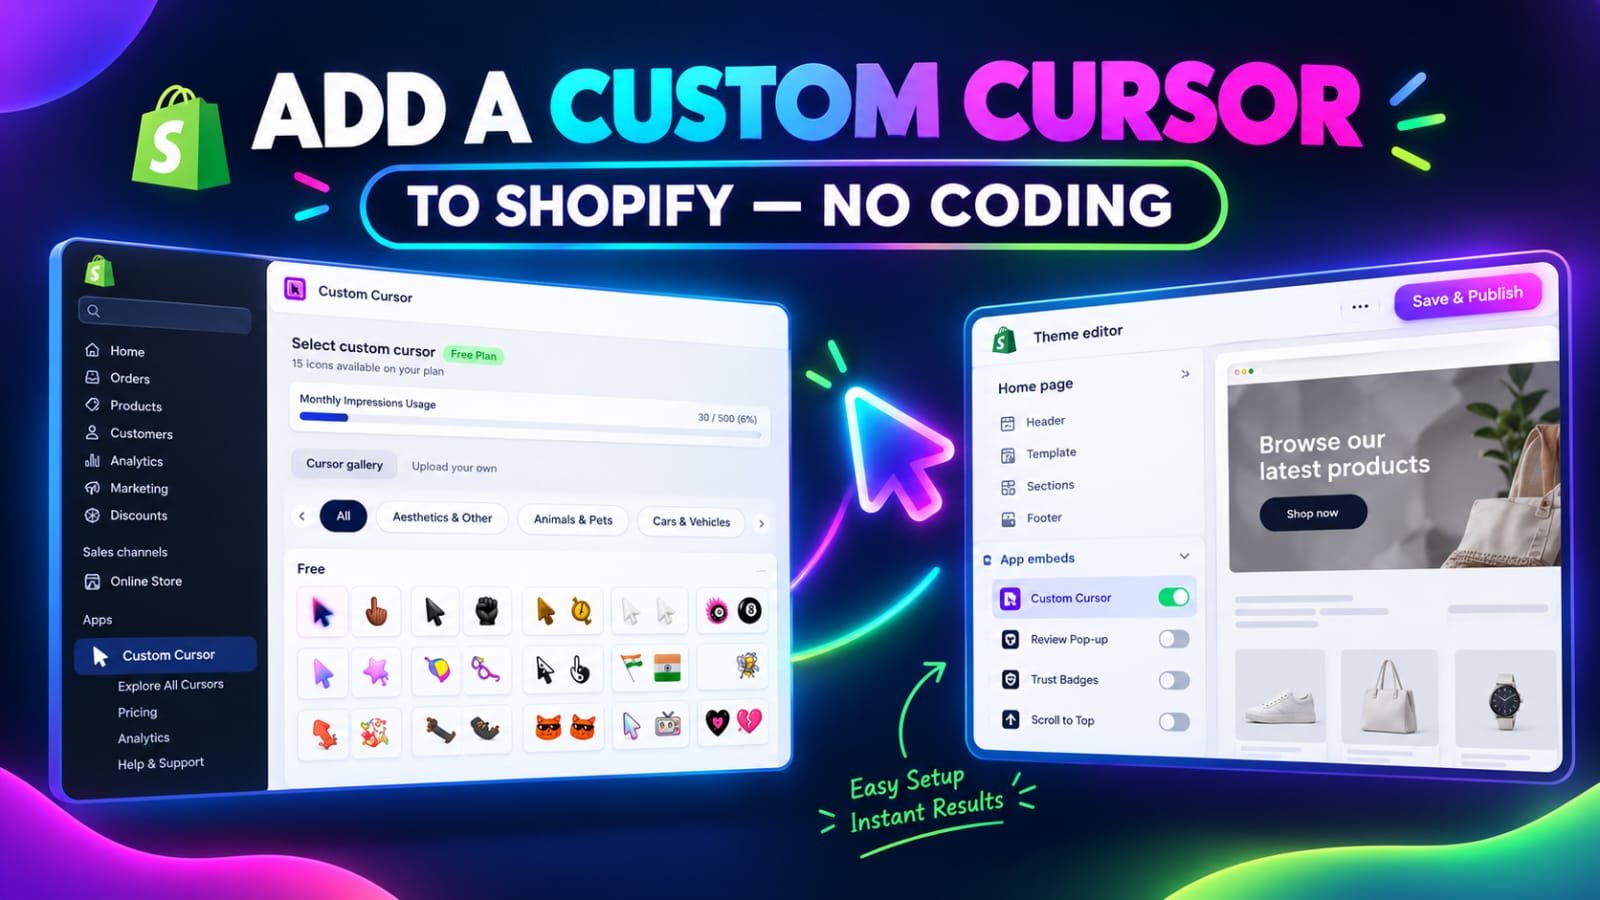
If you want to add a custom cursor to a Shopify store without coding, Custom Cursor provides a visual setup inside Shopify admin. This guide follows the supplied images in order, from installing the app to enabling it in your theme and checking the result.
The Common Headache: A Small Design Change That Requires Theme Code
Many merchants can update banners and products easily but cannot find a cursor setting in their theme editor. Adding one manually can involve uploading an asset, editing CSS, and checking how the pointer behaves over links and buttons. That is extra work for a relatively small design detail.
The challenge is also choosing a cursor that remains clear against different backgrounds. An oversized icon or distracting effect can make browsing less comfortable. Merchants need a straightforward way to choose a design, preview it, and adjust it without searching through theme files.
Why Use the Custom Cursor App?
Custom Cursor brings cursor selection into a visual interface. The app’s listing describes a cursor library, animated designs, hover effects, and custom uploads, with access depending on the selected plan. You can start with a design available on your plan and use the controls shown in the images to preview and publish your choice.
This makes the setup easier to manage: select the cursor in the app, save the configuration, and activate its app embed in Shopify’s theme editor. You do not need to write Liquid, CSS, or JavaScript for the process shown here.
Why a Custom Cursor Can Matter for Your Store
A carefully chosen cursor can add a consistent finishing touch to a branded desktop experience. For example, a playful design may suit a gift store, while a simple colored pointer may fit a more restrained storefront. The goal is to support your existing design and keep navigation clear.
Treat it as a visual enhancement, rather than a guaranteed way to increase sales. Visitors still need readable product information, clear navigation, and easy purchasing. A cursor effect is primarily relevant to people using a mouse or trackpad; ordinary touch browsing does not display a mouse pointer.
How to Add a Custom Cursor to a Shopify Store: Step-by-Step
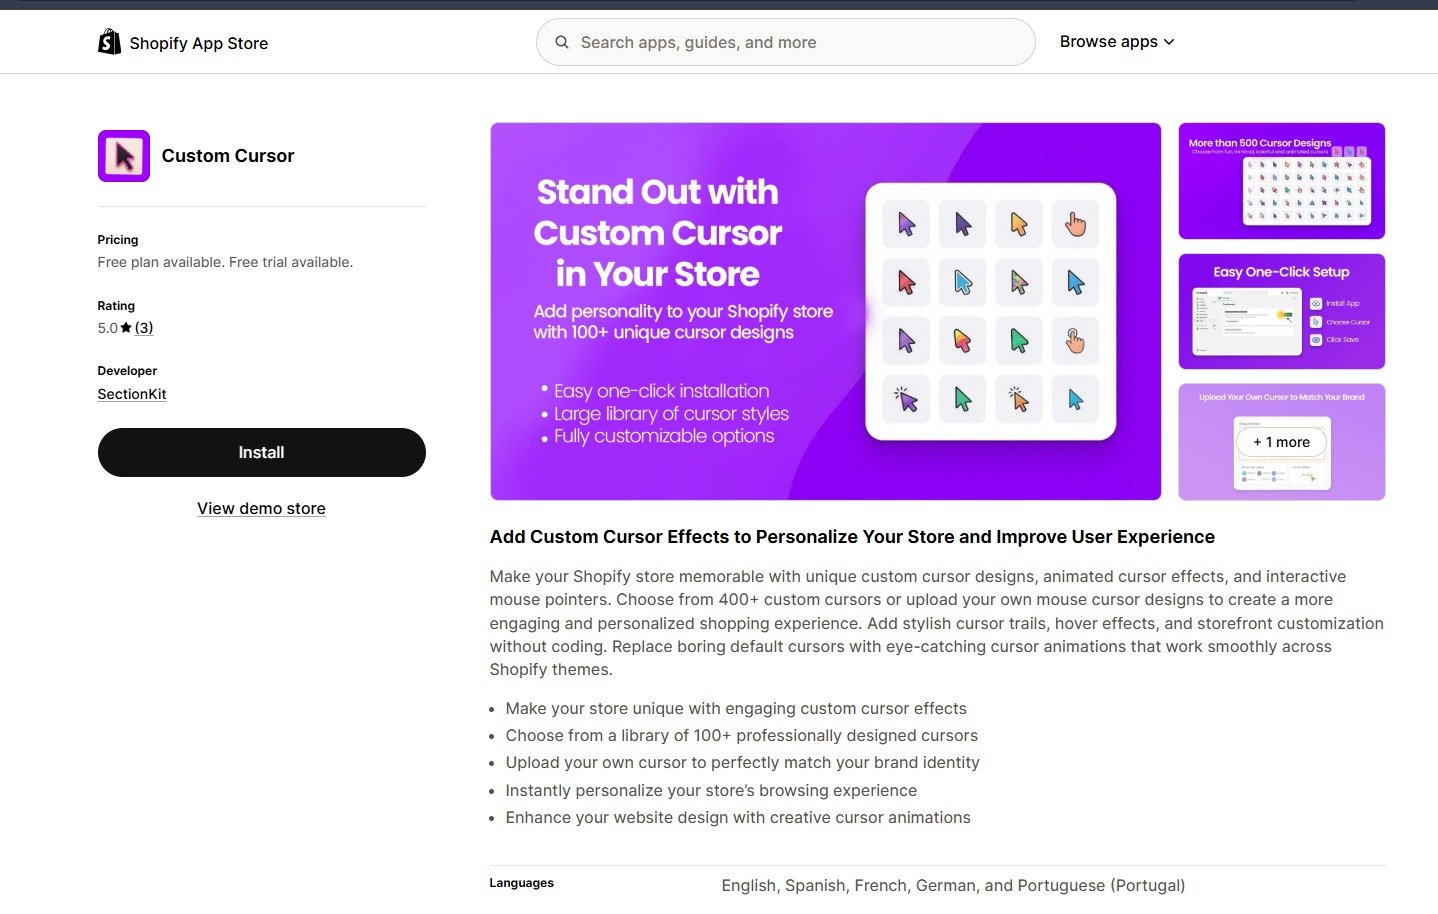
Step 1: Install Custom Cursor from the Shopify App Store
Find Custom Cursor in the Shopify App Store, as shown in the first image. Select Install, sign in if needed, and choose the store where you want to use it. Review the installation details and complete Shopify’s installation process.
Once installed, open the app in Shopify admin. Check the available plan options and usage limits before choosing the setup that suits your store.
Step 2: Explore the Cursor Gallery
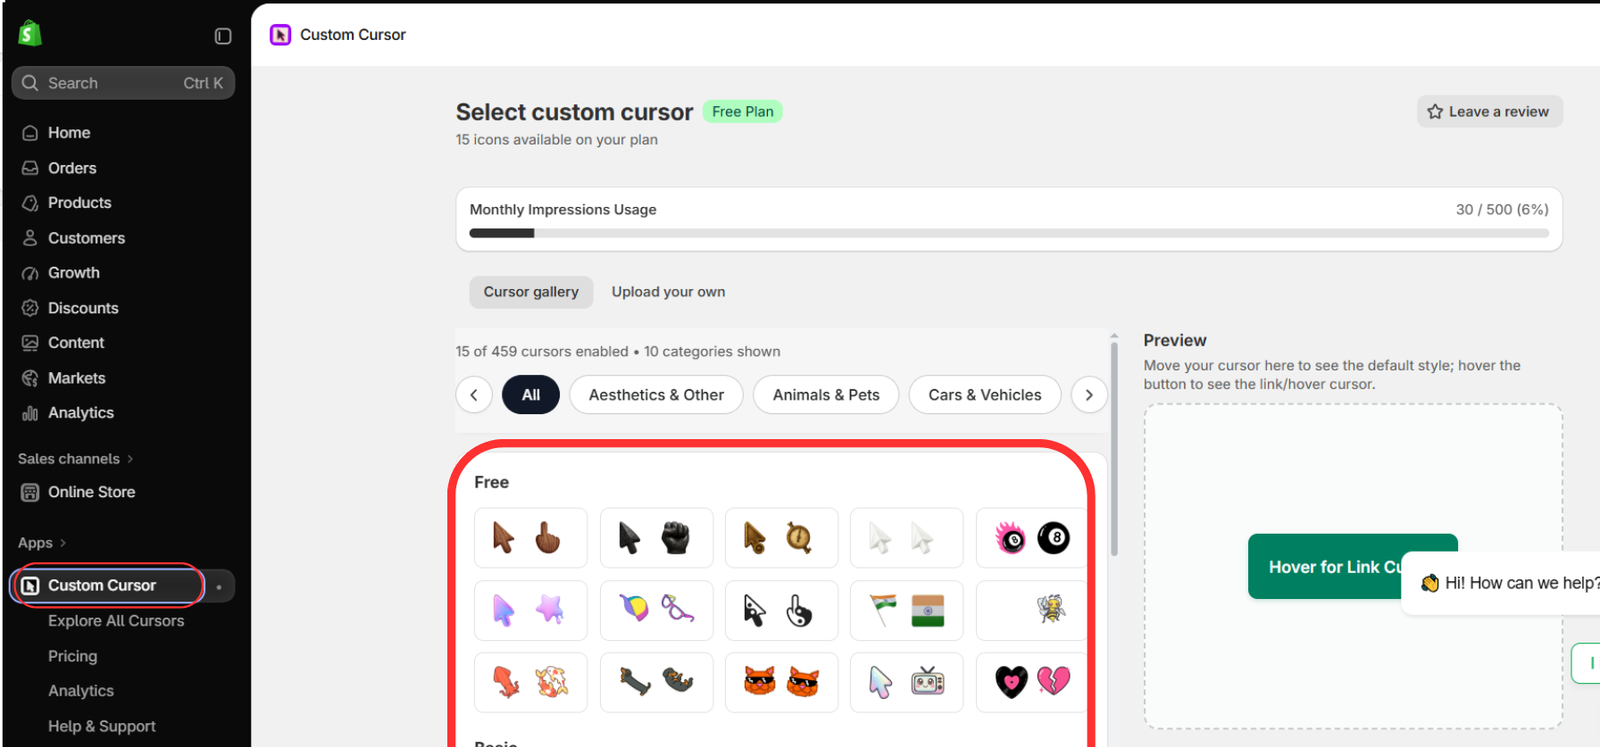
Open Custom Cursor from the Apps area. The second image shows the Cursor gallery tab, category filters, available designs, and a preview area.
Browse the designs enabled for your plan. Choose a style that fits your brand and remains easy to see. The image also shows an Upload your own tab; check your plan’s access if you want to use a custom asset.
Step 3: Select a Cursor, Adjust Its Size, and Publish
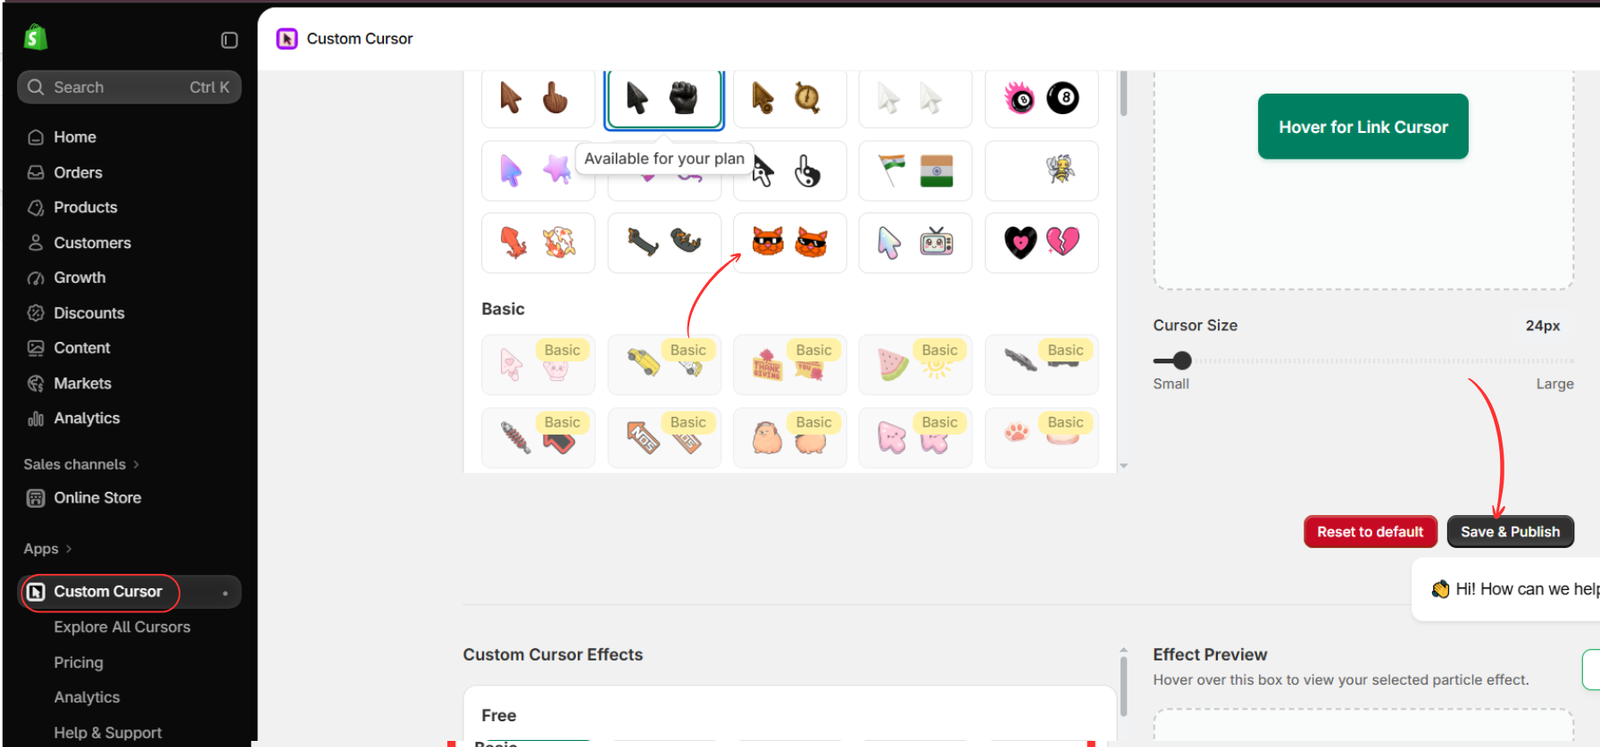
Select your preferred cursor tile. Use the preview area to check the normal pointer and move over the preview button to inspect the link or hover cursor. Adjust the Cursor Size slider so the design is visible without covering important page content.
When you are happy with the selection, click Save & Publish, highlighted in the third image. This saves the app configuration. Continue with the theme embed steps below to make the cursor available on your storefront.
Step 4: Open Your Shopify Theme Editor
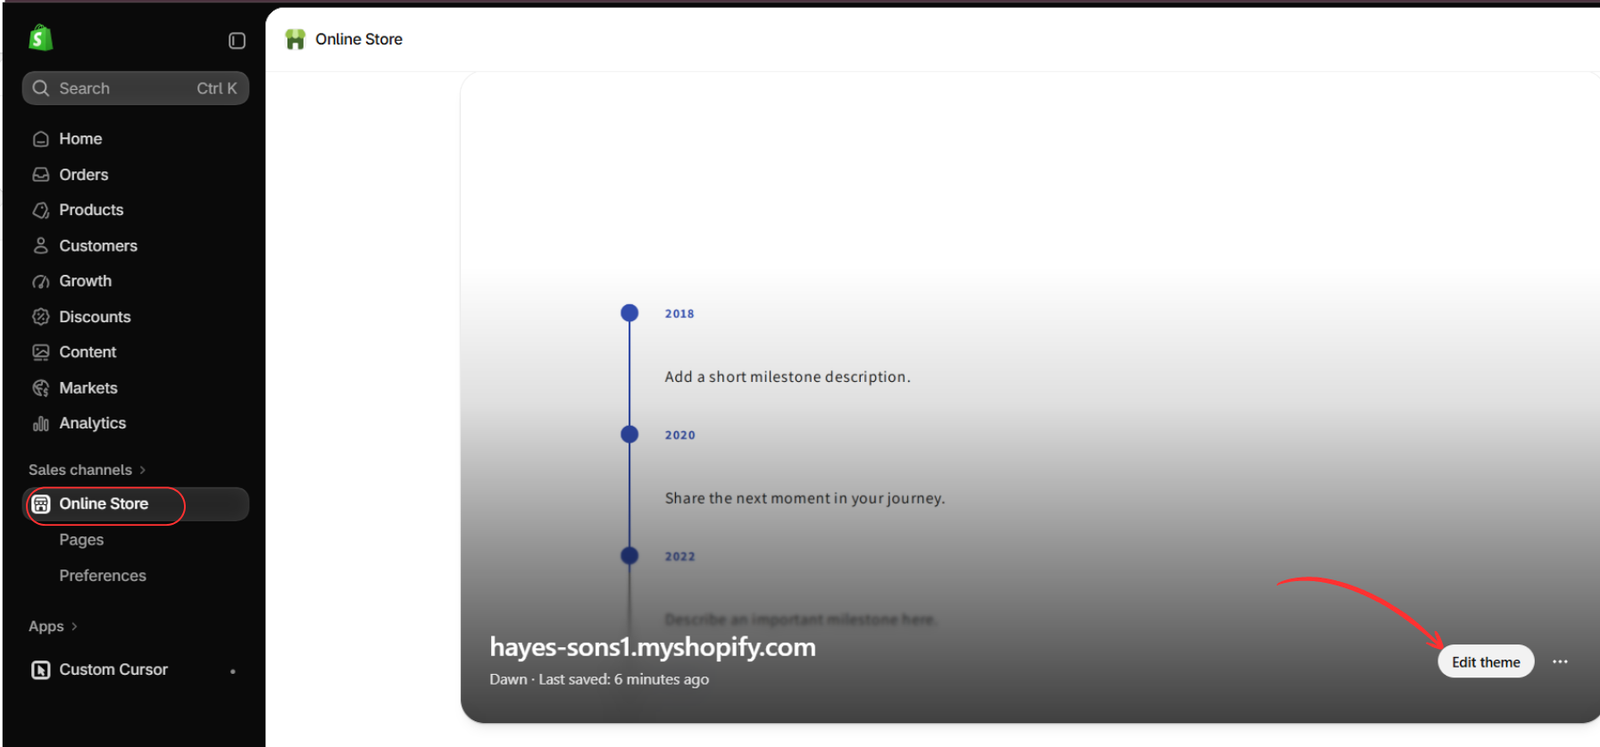
Go to Online Store > Themes in Shopify admin. Locate the theme you want to use and open its visual editor. The fourth image labels this button Edit theme; Shopify may show Customize in another interface version.
For the live store, make sure you are editing the active theme. If you are testing a different theme, you will need to enable the embed in that theme as well.
Step 5: Find the Custom Cursor App Embed
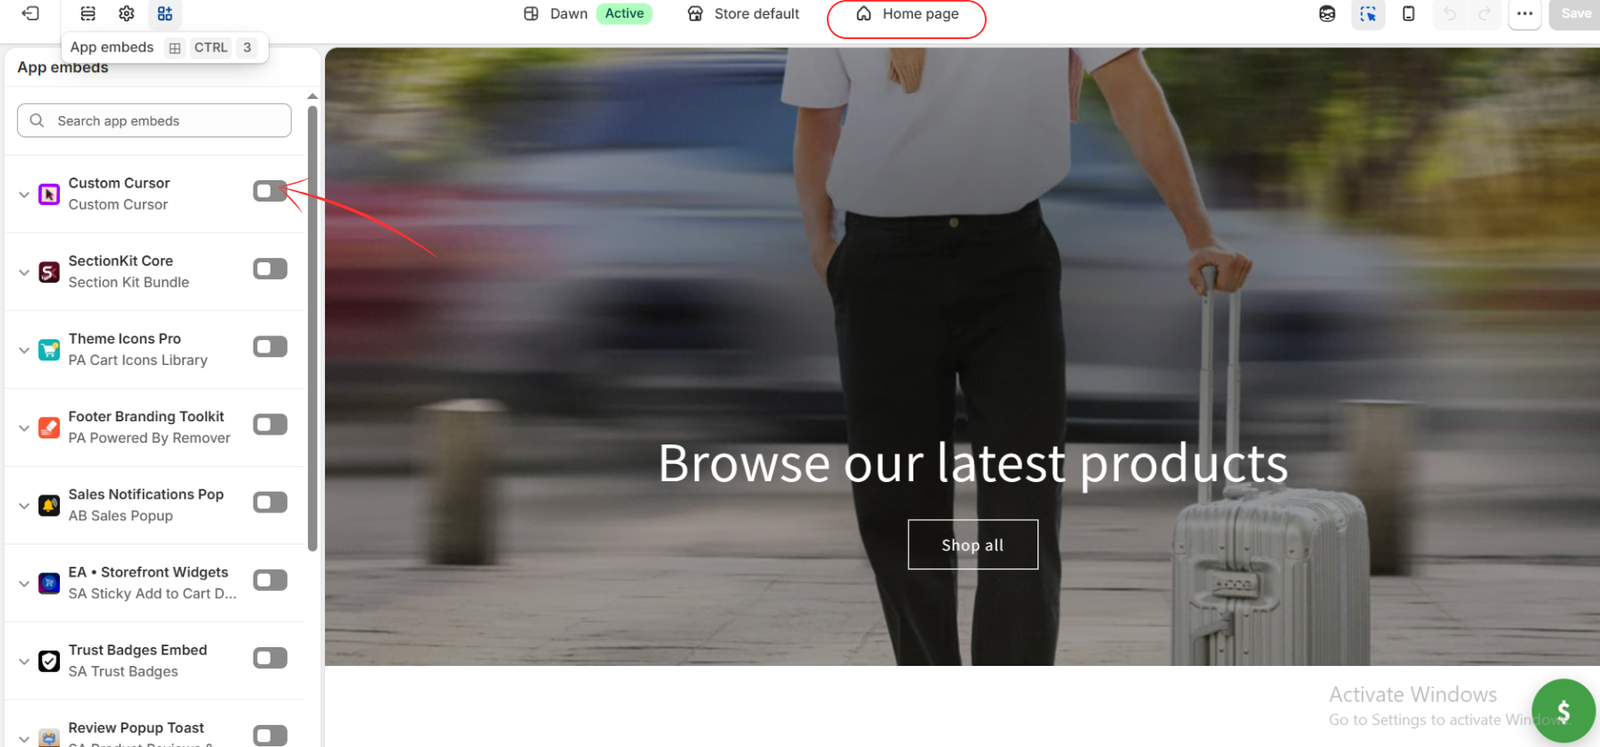
Inside the theme editor, open App embeds from the left toolbar. Find Custom Cursor in the list. You can use the search field if several app embeds are installed.
The fifth image shows the Custom Cursor toggle switched off. Installing the app and saving a cursor selection are separate from enabling its theme embed, so check this setting before testing your storefront.
Step 6: Enable the Embed and Save Your Theme
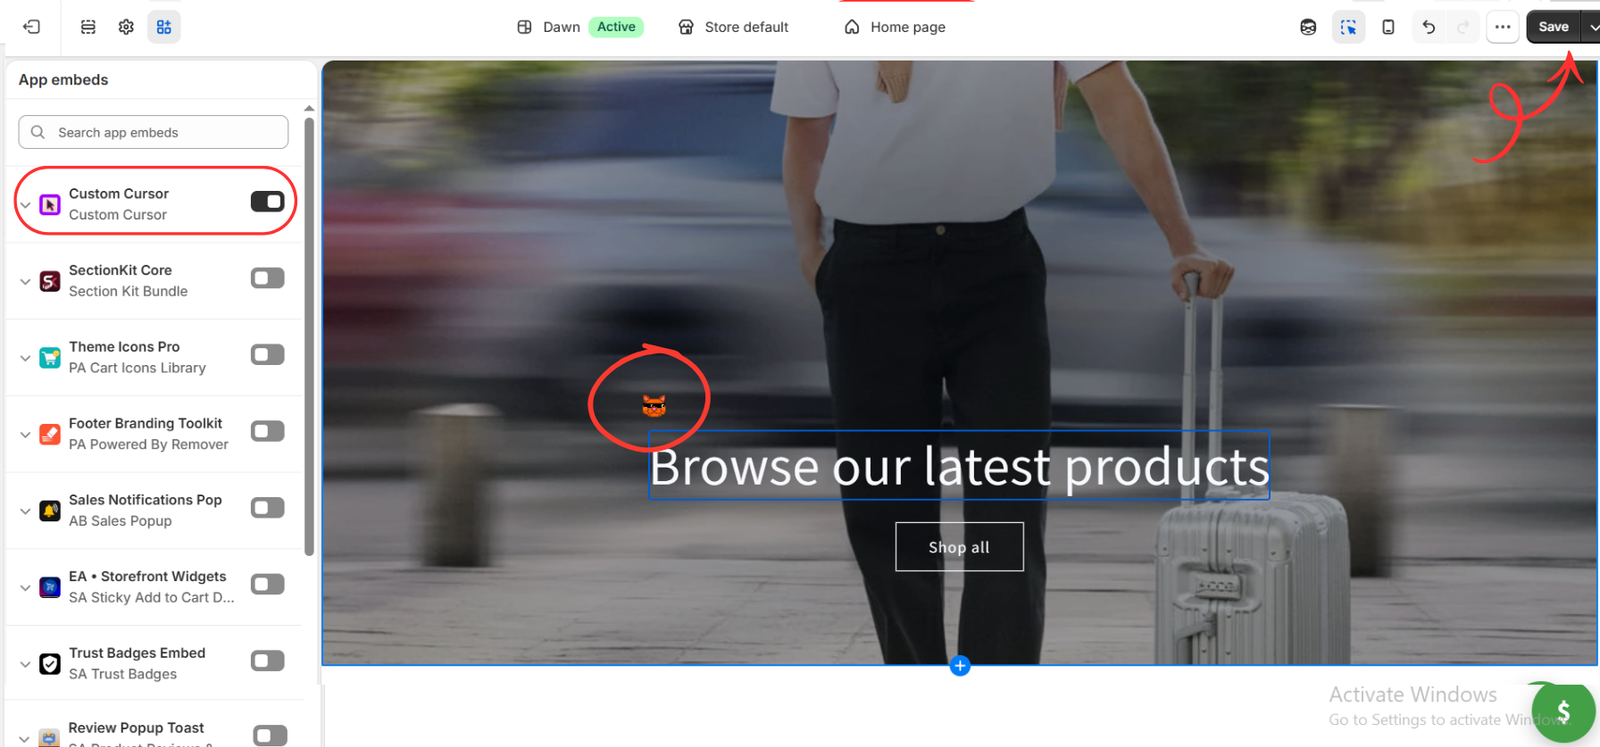
Switch the Custom Cursor toggle on. Move your pointer over the theme preview to check the selected design. The sixth image shows the enabled embed and the custom cursor visible in the preview.
Click Save in the top-right corner of the theme editor. Then open your storefront in a new desktop browser tab, refresh the page, and move over the background, navigation links, and buttons to confirm the cursor behaves as expected.
Keep the Cursor Clear and Consistent
Choose a design that complements your store’s colors and use a moderate size. Check it over both light and dark areas, product images, and clickable elements. If you use animation or extra effects, keep them subtle enough that visitors can still focus on your products.
After changing your theme, revisit the app embed setting and test the cursor again. The supplied images show one store’s setup; design availability, plan limits, and interface details can change.
What If the Custom Cursor Does Not Appear?
First, confirm that you selected Save & Publish inside the app. Next, check that the Custom Cursor embed is enabled in the theme you are viewing and that you clicked Save in the theme editor. Refresh the storefront and test with a mouse or trackpad.
If the issue continues, check your plan’s usage status and test whether another cursor app or theme effect is interfering. Contact the app’s support team with your theme name and a clear description of what happens.
Conclusion
Adding a custom cursor to a Shopify store without coding is a simple visual workflow: install the app, choose a cursor, adjust its size, save the selection, and enable the theme embed. With a design that suits your brand, you can add a distinctive detail while keeping the shopping experience clear and comfortable.
Ready to personalize your store? Explore Custom Cursor on the Shopify App Store.




