HOW TO CUSTOMIZE SALES POPUP PLACEMENT ON A SHOPIFY STORE
Shopify Tutorial | Sales Popup Position | Desktop & Mobile Customization | AB Sales Popup | 2026

Introduction
Sales popups are a useful way to display recent purchase activity and provide social proof on your Shopify store. However, where those notifications appear can make a significant difference to the shopping experience.
Imagine a customer browsing your Shopify product page. They are about to click the Add to Cart button when a large sales notification appears directly over it.
Instead of helping, the popup may interrupt their shopping experience.
This is why sales popup placement matters.
A properly positioned sales notification can display genuine customer activity without covering product images, navigation menus, or important purchasing controls.
With AB Sales Popup, Shopify merchants can customize popup positions for desktop and mobile, select different popup themes, adjust border shapes, control display timing, and choose which products or collections display notifications.
In this tutorial, you’ll learn how to customize sales popup placement on a Shopify store without coding, using the actual AB Sales Popup screenshots you provided.
What Is Sales Popup Placement in Shopify?
Sales popup placement refers to the position where purchase notifications appear on your storefront.
For example, a store might display notifications in the bottom-left corner on desktop while using the bottom-right corner on mobile.
The goal is to keep notifications visible without blocking important shopping elements.
A well-designed placement strategy considers the customer’s screen size, shopping behavior, and the layout of the Shopify theme.
Why Does Sales Popup Placement Matter?
1. Improve the shopping experience
Customers should be able to browse products and interact with the store without interruptions.
2. Keep purchase buttons visible
Poorly positioned popups can overlap Add to Cart buttons, checkout controls, or navigation menus.
3. Improve mobile usability
Mobile screens have less available space, so popups must be positioned carefully.
4. Maintain a professional storefront design
Consistent popup placement makes notifications feel like a natural part of your store.
5. Make social proof easier to notice
A correctly positioned notification can communicate authentic customer activity without dominating the page.
Common Problems With Shopify Sales Popup Placement
Shopify merchants may encounter several challenges when configuring sales notifications.
Some popups appear in inconvenient locations, overlap navigation elements, or remain visible for too long.
Others may work properly on desktop but interfere with the shopping experience on mobile devices.
Merchants may also want to display notifications only on selected product pages or avoid showing them during checkout-related interactions.
These challenges make it important to have control over popup placement, duration, and display rules.
Introducing AB Sales Popup
AB Sales Popup is a Shopify application that helps merchants display real purchase notifications and other storefront engagement elements.
It includes customizable sales popups, visitor counters, sold counters, stock countdowns, and promotional timers.
Its Sales Notifications feature provides controls for popup design, customer information, timing, desktop and mobile placement, and product targeting.
Key Features
- Desktop and mobile popup positioning.
- Festive, Basic, and Custom popup themes.
- Light Mode and Dark Mode.
- Custom background, text, accent, and border colors.
- Rounded and Capsule popup shapes.
- Dynamic customer and product information.
- Initial popup delay.
- Notification display duration.
- Delay between notifications.
- Product and collection targeting.
- Advanced notification display settings.
- Verified order data support.
App link: Install AB Sales Popup on Shopify
Step-by-Step Guide: How to Customize Sales Popup Placement on Shopify
Step 1: Find AB Sales Popup in the Shopify App Store
Open Google and search for Shopify App Store.
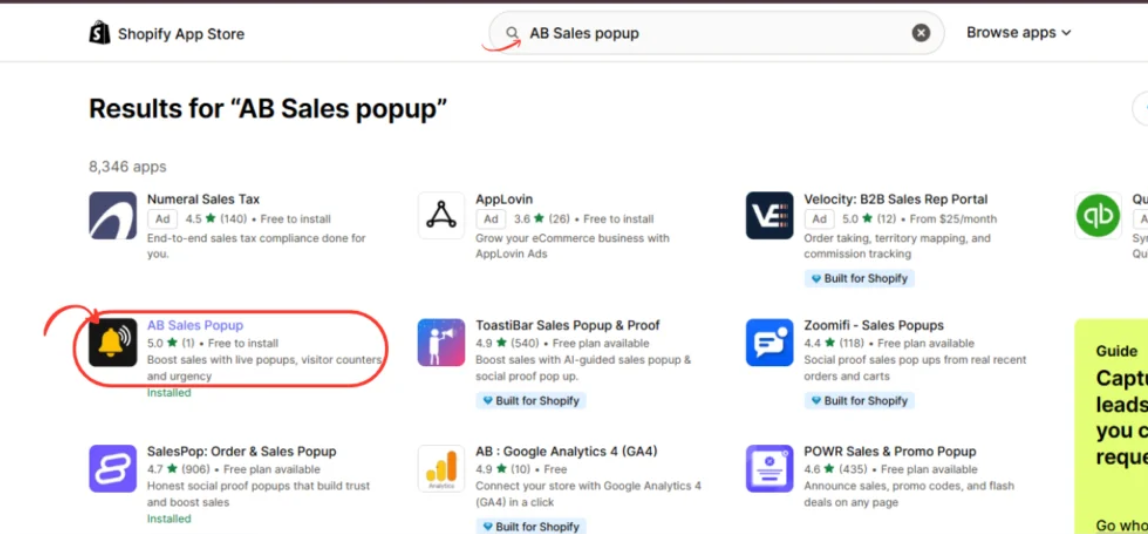
Visit the official Shopify App Store and search for AB Sales Popup.
Look for the app with the black-and-yellow notification bell icon.
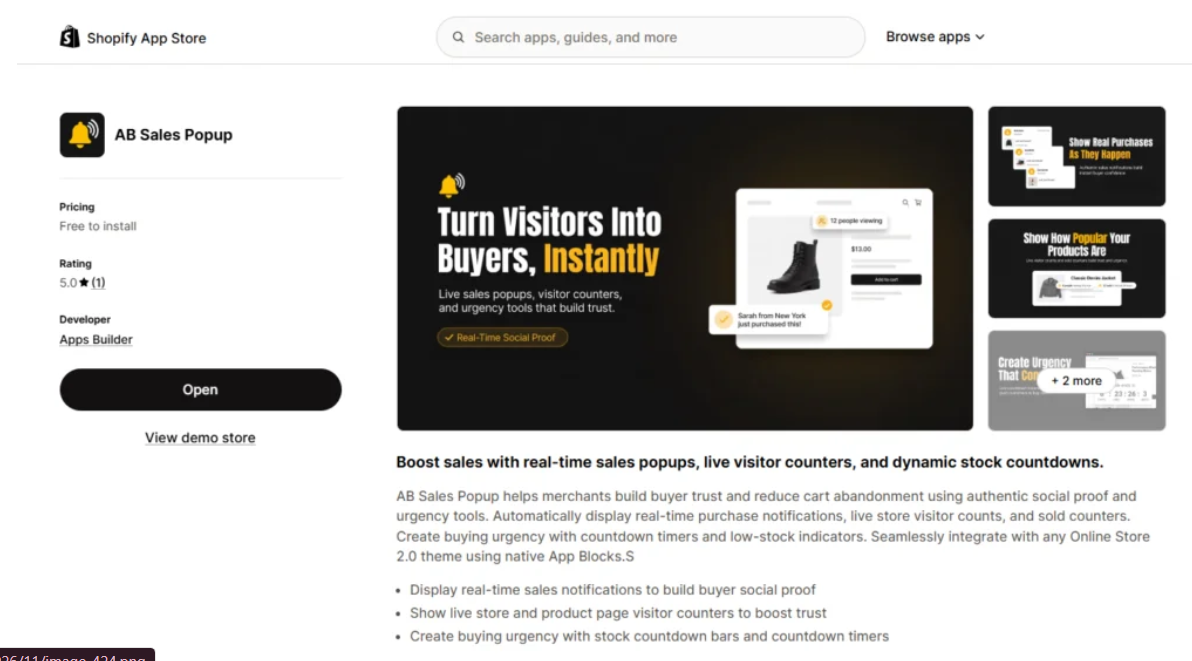
Open its listing and click Install if you haven’t installed it already.
If the app is installed, select Open.
Step 2: Open Sales Notifications
Navigate to:
Shopify Admin → Apps → AB Sales Popup → Sales Notifications
The Sales Notification settings page will open.
SalesPush ‑ Sales Popup – Engage Shoppers with Live Sales Popups & Social Proof | Shopify App Store
Illustrative visual reference. Use the original app screenshot immediately below for the actual settings.
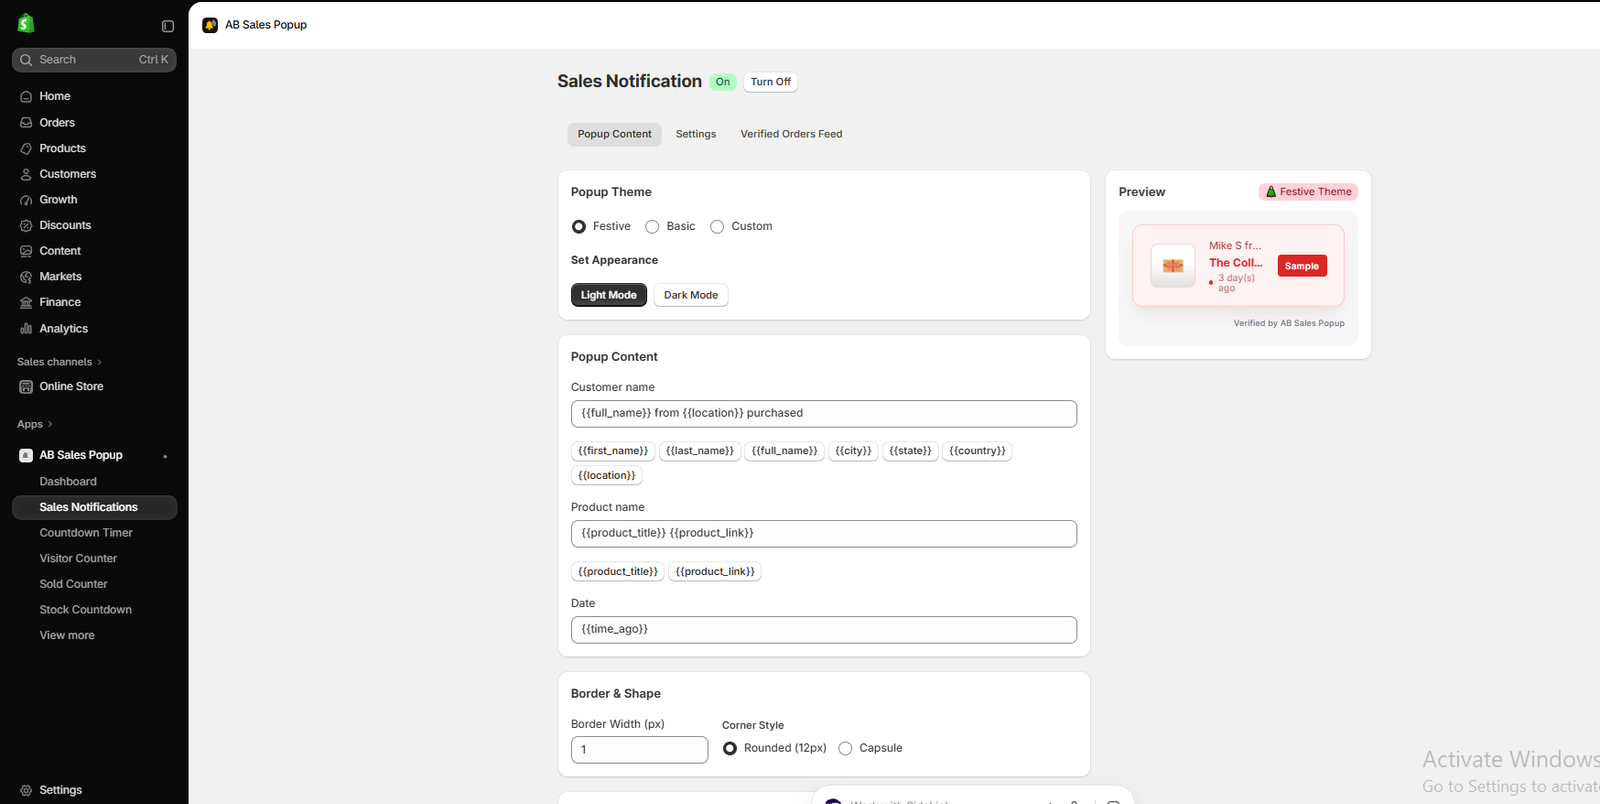
Image 1: Sales Notifications settings showing popup themes, appearance options, dynamic purchase information, and preview.
Image explanation: Your screenshot shows the Sales Notification feature enabled.
At the top of the page, three tabs are visible: Popup Content, Settings, and Verified Orders Feed.
Under Popup Theme, merchants can select Festive, Basic, or Custom.
The screenshot shows Festive selected, with Light Mode enabled.
A Preview panel on the right demonstrates how the notification will appear.
Before adjusting the popup position, choose the overall appearance that best suits your Shopify store.
Step 3: Choose Your Popup Theme and Appearance
AB Sales Popup provides different popup themes for different storefront styles.
Image 2: Selecting the Basic popup theme with Light Mode and reviewing the notification preview.
Image explanation: In this screenshot, the Basic theme is selected.
The Preview panel shows a simple sales notification with a customer name, product information, purchase time, and a Sample label.
You can switch between Light Mode and Dark Mode depending on your store’s design.
The Basic theme is suitable for merchants who prefer simple and minimal notifications.
Step 4: Customize Popup Colors for Your Shopify Brand
If you want more control over the popup’s appearance, select Custom under Popup Theme.

Image 3: Customizing popup background, text, accent, and border colors with the Custom theme.
Image explanation: Your screenshot shows the Custom theme selected.
Under Custom Color Palette, the app provides four color settings:
| Setting | Screenshot value |
|---|---|
| Background | #FFFFFF |
| Text Color | #000000 |
| Accent / Link Color | #000000 |
| Border Color | #E5E7EB |
These controls allow you to match the sales notification to your Shopify theme.
For example, a minimalist clothing store might use a white background with dark text, while a luxury store could use a darker palette with subtle accent colors.
Use colors with sufficient contrast so customers can read the notification easily.
Step 5: Customize Popup Content, Border, and Shape
Scroll down to the Popup Content and Border & Shape sections.

Image 4: Editing customer and product information, choosing popup border width, and selecting Capsule shape.
Image explanation: Your screenshot shows several configurable fields.
Under Popup Content, you can customize the customer information using supported dynamic variables such as {{full_name}} and {{location}}.
The product name field also supports {{product_title}} and {{product_link}}.
The Date field includes {{time_ago}} to describe when the purchase occurred.
Below this, the Border & Shape section allows you to adjust the border width and corner style.
Your screenshot shows:
- Border Width: 1px
- Corner Style: Capsule
A Capsule-shaped popup has more rounded corners, while the Rounded option provides a more traditional notification appearance.
Use real purchase information and avoid revealing more customer-identifying details than necessary.
Step 6: Customize Sales Popup Placement on Desktop and Mobile
In the same settings area, scroll down to Position.
The position controls are visible in the lower part of Image 4.
Under Desktop, the app displays four placement options represented by small position indicators.
Under Mobile, two placement options are available in the screenshot.
The selected desktop placement is the first option, while the second mobile option is selected.
To customize placement, choose a desktop position that doesn’t overlap important store elements, then select an appropriate mobile position.
Both Desktop and Mobile display checkboxes are shown enabled.
Recommended approach: Place the popup near a lower corner of the screen, then test whether it overlaps the Add to Cart button, cookie banner, mobile navigation, or chat widget. The best corner depends on your theme.
Step 7: Configure Notification Display Timing
Once you’ve selected the position, open the Settings tab.

Image 5: Configuring initial delay, display duration, delay between notifications, and product targeting.
Image explanation: Your screenshot shows the following Display settings:
| Setting | Example value |
|---|---|
| Initial delay | 2 seconds |
| Display duration | 5 seconds |
| Delay between notifications | 5 seconds |
| Randomize delay | Off |
| Random notification order | Off |
The Initial delay determines how long the app waits before showing a notification.
Display duration controls how long the notification remains visible.
Delay between notifications determines the spacing between successive notifications.
These controls are useful when you want notifications to appear naturally without distracting shoppers.
Avoid displaying notifications so frequently that they interrupt normal browsing.
Step 8: Select Where Sales Popups Should Appear
Scroll to Show Notification On.
Your screenshot shows Product and Collection targeting options, along with a product selection interface.
You can use the product picker to select eligible products.
Examples visible in the screenshot include Gift Card, The Archived Snowboard, and The Complete Snowboard.
Choose the products or collections that should display purchase notifications.
This lets you control which storefront experiences include sales popups rather than displaying them indiscriminately.
Step 9: Configure Advanced Popup Settings
Continue scrolling to Advanced Settings.

Image 6: Advanced notification settings for cart page visibility, close button behavior, branding, and UTM tracking.
Image explanation: Your screenshot shows four advanced options:
Disable popups on cart page: This setting can prevent notifications from interrupting the shopping cart experience.
Hide the close button: Your screenshot shows this option enabled. For a less intrusive experience, consider allowing visitors to dismiss notifications.
Remove branding: The interface marks branding removal as a plan-dependent feature.
Enable UTM code: This option is available for configuring UTM tracking parameters.
Choose the advanced settings that best support your store’s design and user experience.
Step 10: Save Your Popup Settings
After configuring the position, design, timing, and targeting, click Save at the top-right of the settings page.
If your storefront app embed hasn’t been enabled, return to the AB Sales Popup dashboard and select Enable App Embed for Sales Notifications.
In the Shopify theme editor, enable the AB Sales Popup sales notification app embed and save the theme.
Step 11: Preview Sales Popups on Your Shopify Store
Open your Shopify storefront and test the placement on both desktop and mobile.
Confirm that the popup appears in your chosen position and does not cover product controls, menus, or other important information.
Also check that notification content reflects genuine purchase data, that the timing settings behave as expected, and that the popup can be dismissed where appropriate.
Best Sales Popup Placement for Shopify Stores
| Placement | Recommended use |
|---|---|
| Bottom-left | Desktop stores with clear space on the left |
| Bottom-right | Stores without a chat widget or competing floating buttons |
| Top-left | Layouts with unobstructed navigation and header space |
| Top-right | Stores with sufficient space away from account and cart icons |
| Mobile lower corner | Compact notifications that don’t cover purchasing controls |
For most Shopify stores, start with a bottom-corner position and test it across product pages, collection pages, and mobile devices.
Best Practices for Customizing Sales Popup Placement
Keep popups away from Add to Cart buttons
Your notification should never prevent a customer from completing a purchase.
Use compact popup designs
Smaller notifications are generally easier to accommodate on mobile screens.
Choose appropriate display delays
Give customers enough time to understand the page before showing a notification.
Display genuine purchase information
Use authentic orders and accurate timestamps. Avoid fabricated customer activity.
Avoid conflicting widgets
Check whether your popup overlaps live chat, cookie consent banners, sticky carts, or other storefront elements.
Test both desktop and mobile
A position that works well on desktop may be unsuitable on a smaller mobile screen.
Frequently Asked Questions
1. Can I change sales popup placement in Shopify without coding?
Yes. AB Sales Popup provides visual desktop and mobile positioning controls.
2. Can I set different popup positions for desktop and mobile?
Yes. The Position section includes separate controls for both devices.
3. Can I customize the popup shape?
Yes. Choose between Rounded and Capsule corner styles.
4. Can I change sales popup colors?
Yes. The Custom theme provides background, text, accent, and border color settings.
5. Can I control how long a popup appears?
Yes. The Settings tab includes initial delay, display duration, and delay between notifications.
6. Can I hide sales popups on the cart page?
Yes. The Advanced Settings section includes a Disable popups on cart page option.
7. Can I display notifications only for selected products?
Yes. The app provides product and collection targeting options.
8. Can I customize the customer information shown in popups?
Yes. The app supports dynamic placeholders for customer information, product details, and purchase timing.
Conclusion
Customizing sales popup placement is an important part of creating a professional Shopify shopping experience.
When sales notifications are positioned correctly, they can communicate genuine customer activity without distracting shoppers or interfering with important storefront controls.
With AB Sales Popup, merchants can customize desktop and mobile positions, select themes, adjust popup colors and shapes, control display timing, and choose which products or collections display notifications.
For the best results, choose a position that works naturally with your Shopify theme, use accurate purchase information, and test the final layout on different devices.
Ready to customize your Shopify sales popups without coding?Install AB Sales Popup on Shopify