HOW TO CUSTOMIZE A SHOPIFY SECTION IN THE THEME EDITOR
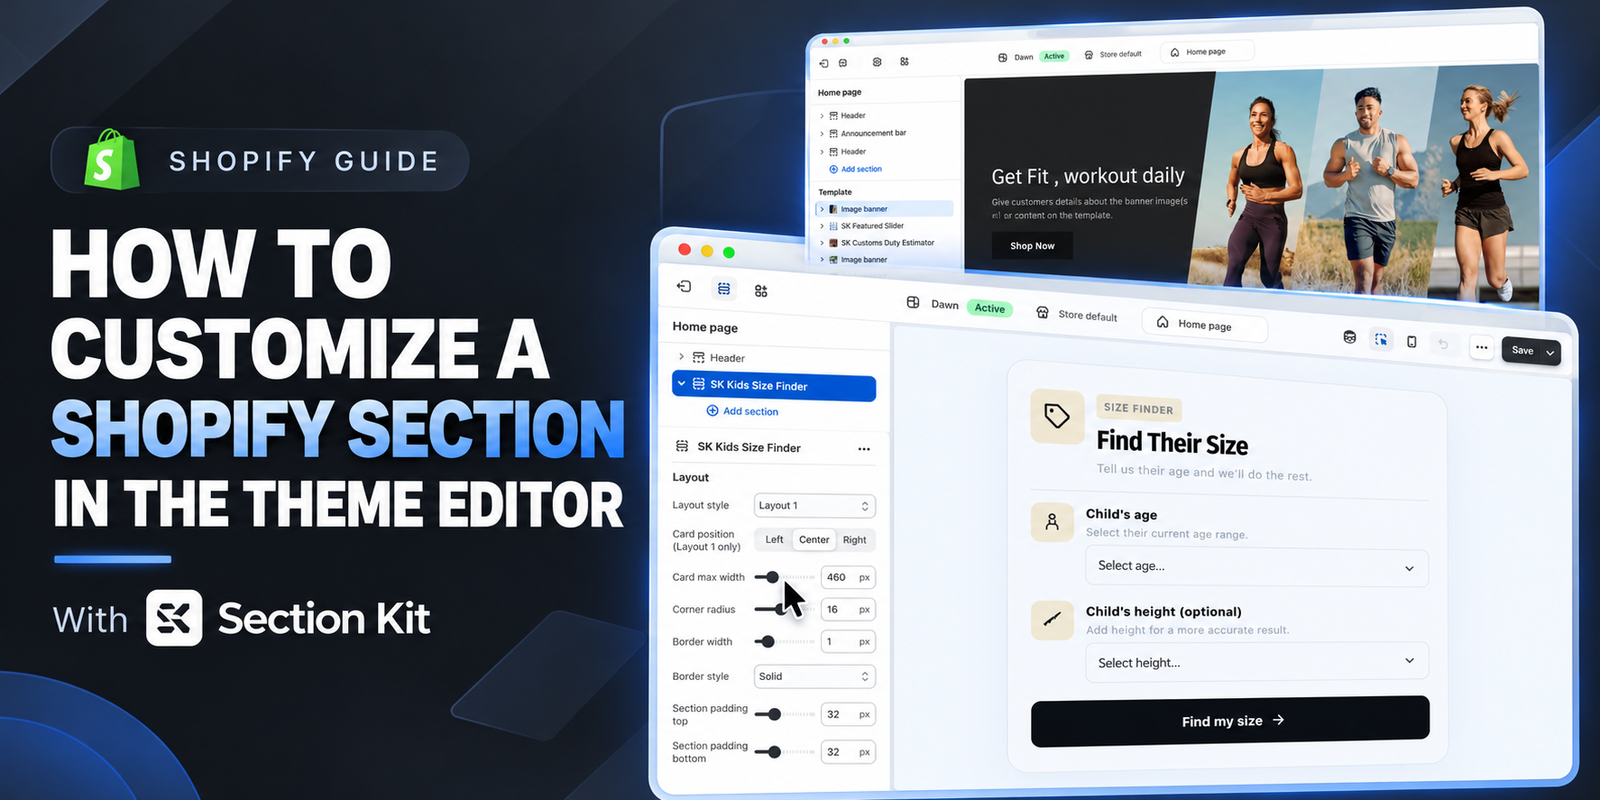
A professional Shopify storefront needs more than attractive products. Its sections should present information clearly, match your brand, and make it easy for customers to browse and shop.
Shopify’s theme editor lets you personalize sections through a visual interface. Depending on the section, you can adjust its content, layout, spacing, and other design settings without editing code.
This guide follows the screenshots in the exact order you shared: installing Section Kit, opening the theme editor, adding a section, and customizing its settings.
The Main Challenge Merchants Face
Many Shopify merchants want to improve their storefront but find that their theme does not include the section or layout they need.
A section might look appealing but offer limited controls. Another might provide the right content but have spacing, alignment, or styling that does not fit the store. These limitations can turn a simple design improvement into a developer request, increasing costs and delaying updates.
The theme editor can only customize the settings built into a section. To gain more flexibility, merchants need sections that provide both suitable functionality and useful editing controls.
Why You Need Section Kit
Section Kit: Theme Sections provides a library of more than 500 premade sections that merchants can customize within Shopify’s theme editor. The library includes options such as sliders, testimonials, FAQs, comparison tables, and trust badges.
Instead of redesigning your entire storefront, you can add a section for a specific purpose and personalize it to suit your existing store.
For example, the screenshots in this guide show an SK Kids Size Finder section. Its layout controls allow you to adjust the card’s position, width, borders, rounded corners, and surrounding spacing.
Why Customizing Your Sections Matters
A premade section gives you a starting point. Customization helps it become a natural part of your storefront.
Consistent layouts and spacing make your pages easier to browse. Clear headings help customers understand each section’s purpose, while properly configured content makes interactive features more useful.
For a size finder, appearance is only part of the process. The sizing information also needs to match your products so customers receive appropriate guidance.
Step 1: Install Section Kit: Theme Sections
Begin by opening the Section Kit: Theme Sections listing in the Shopify App Store.
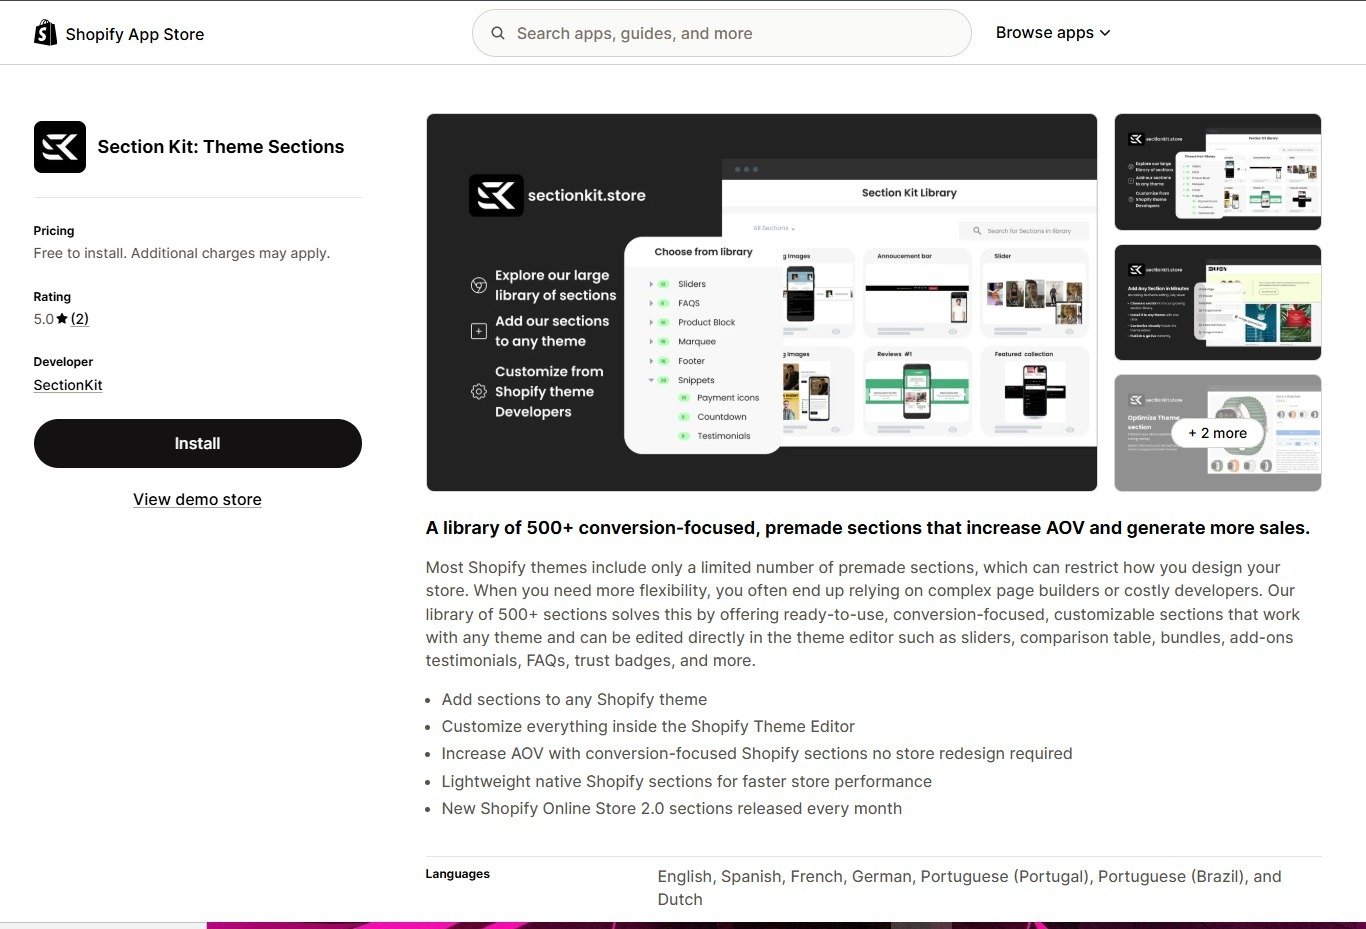
Follow these steps:
- Click Install, as shown in the first image.
- Follow Shopify’s prompts to complete the installation.
- Open Section Kit from your Shopify admin.
- Browse the library and choose the section you want.
- Follow the app’s instructions to add that section to your chosen theme.
If you have already installed the app and added your section to the theme, continue to Step 2.
Pricing note: Section Kit is free to install, with free sections and premium sections available for one-time charges. Review the selected section’s price before proceeding.
Step 2: Open the Shopify Theme Editor
Once your section is available in the theme, open the editor to customize it.
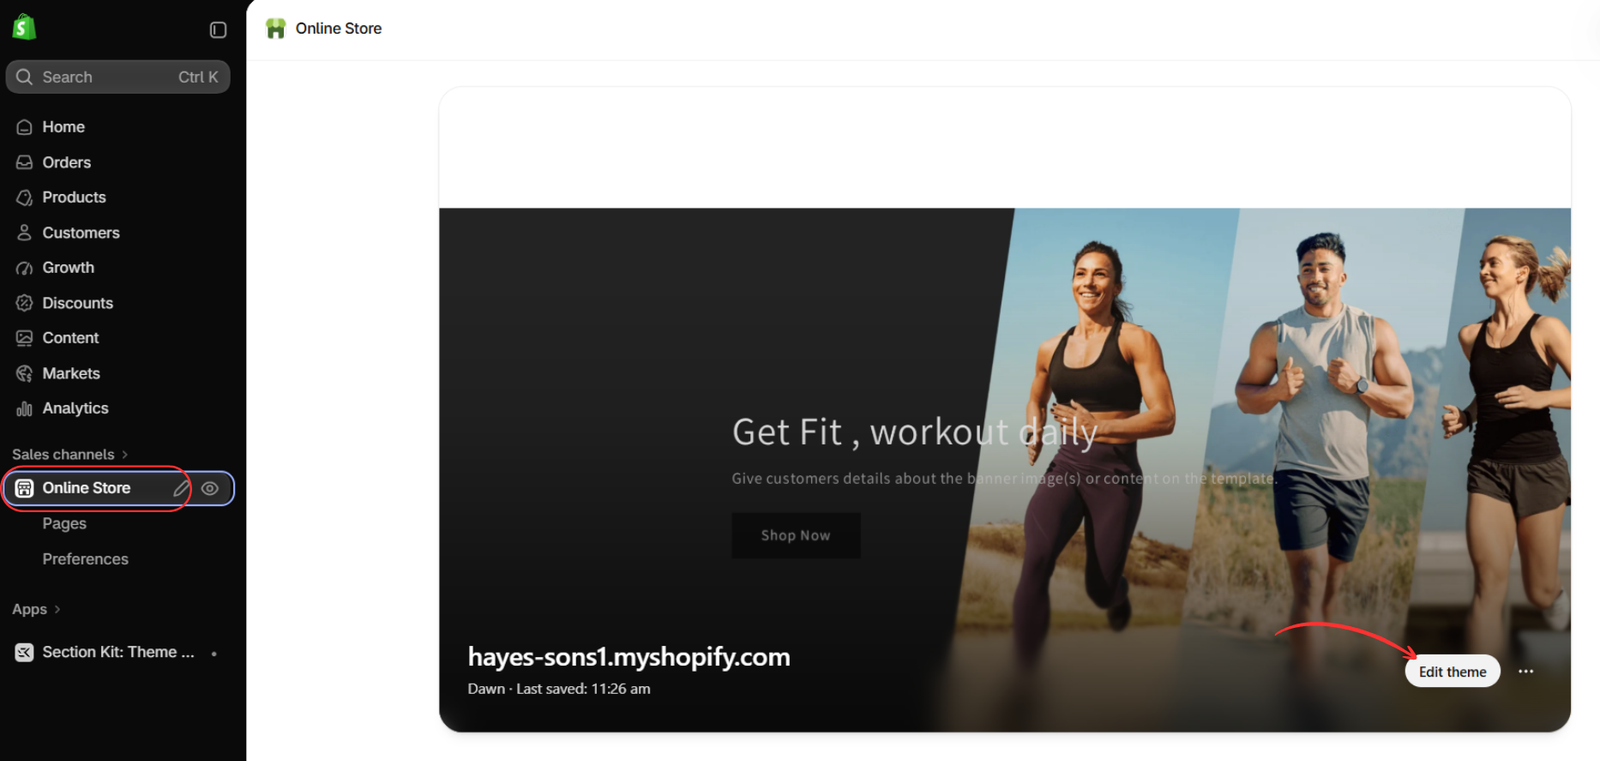
As shown in the second image:
- Open your Shopify admin.
- Click Online Store in the sidebar.
- Locate the theme you want to edit.
- Click Edit theme.
Make sure you open the same theme to which you added your Section Kit section.
Step 3: Choose the Page and Add Your Section
The third image shows the Shopify theme editor with Home page selected at the top.
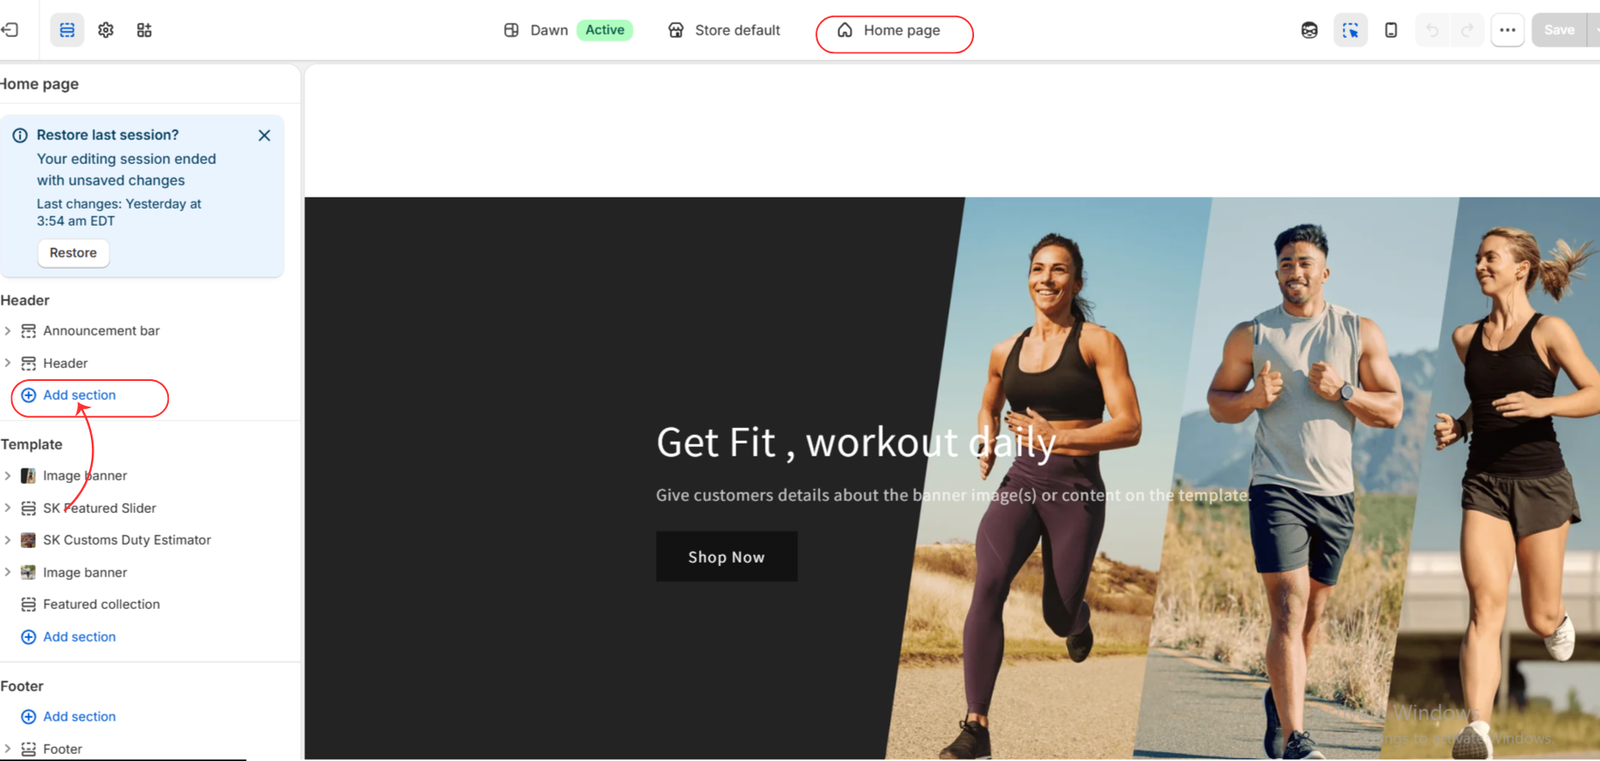
To add your section:
- Use the top template selector to choose the page you want to customize.
- Find the appropriate area in the sidebar.
- Click Add section.
- Select your Section Kit section from the available options.
- Adjust its position within the page where reordering is supported.
Choose the correct area: The image highlights an Add section button under Header. For a section intended for the main homepage content, use the Add section button under Template, which is also visible in the screenshot.
If the section is already on the page, select its name in the sidebar to open its settings.
Step 4: Customize the Section Layout
The fourth image shows SK Kids Size Finder selected, with its layout settings open.
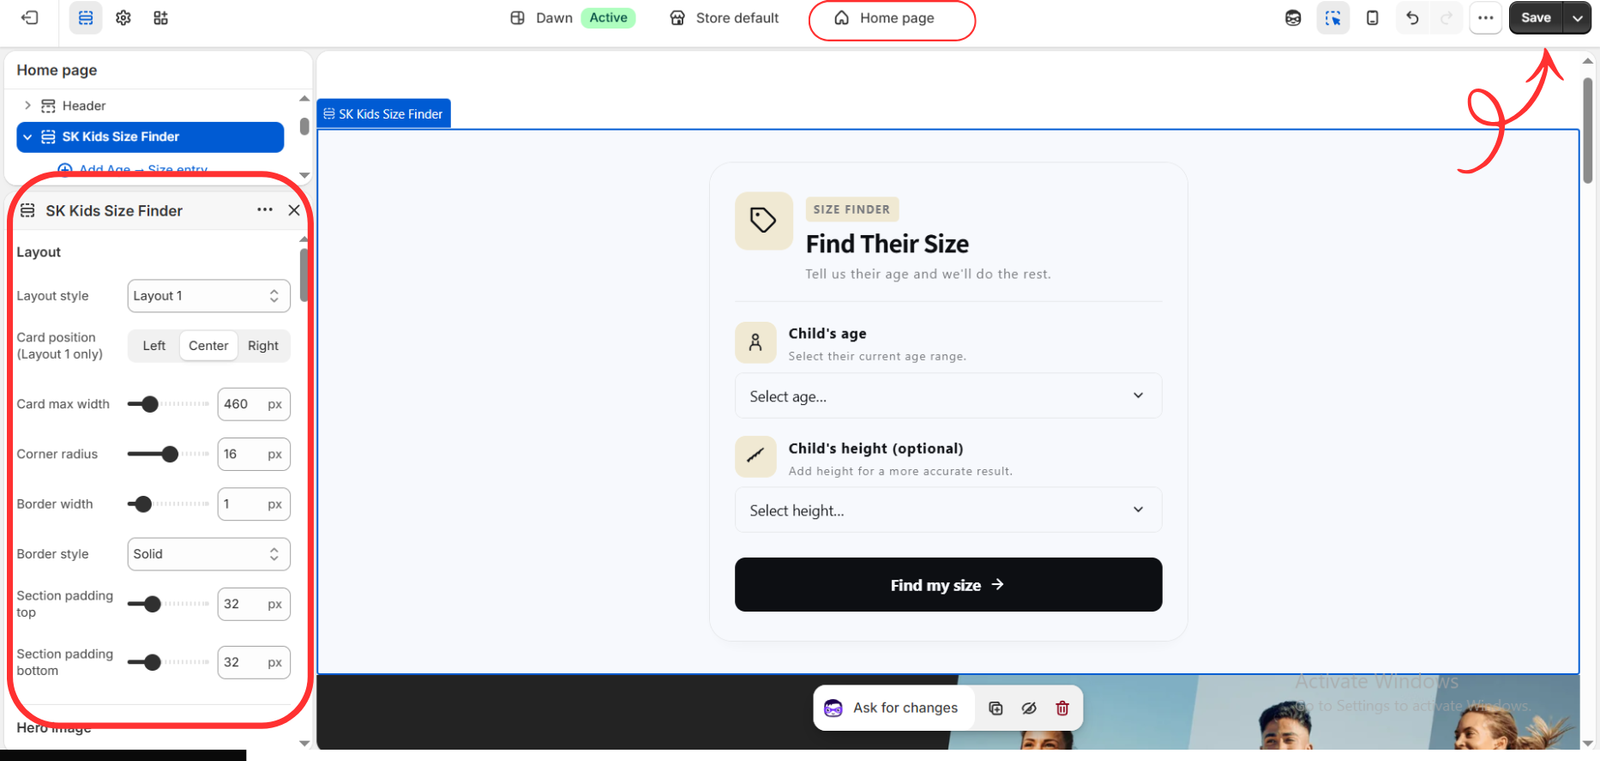
Use the visible controls to personalize the section:
| Setting | What it changes |
| Layout style | Selects an available section layout |
| Card position | Aligns the card left, center, or right for Layout 1 |
| Card max width | Adjusts the card’s maximum width |
| Corner radius | Changes how rounded the corners appear |
| Border width | Adjusts the thickness of the card’s border |
| Border style | Changes the border’s appearance |
| Section padding top | Adjusts space above the section |
| Section padding bottom | Adjusts space below the section |
The example uses a centered card, a 460 px maximum width, 16 px rounded corners, a 1 px solid border, and 32 px of top and bottom padding.
These values are a starting point. Adjust them to suit your page, reviewing the preview after each change.
Configure the Content
Next, review the section’s other available settings and blocks.
For the Kids Size Finder, configure the age-to-size entries using your store’s sizing information and test the results. For other sections, edit the available headings, images, links, or buttons to match your products and brand.
Customization options vary by section, so review the controls provided by the section you selected.
Step 5: Preview and Save Your Changes
Before finishing, review the section in desktop and mobile previews. Check that its content is readable, the spacing looks balanced, and any interactive features work correctly.
Click Save in the upper-right corner, as highlighted in the fourth image. Follow any publishing action your editor requires to apply the changes. Saving an unpublished theme does not make that theme live.
Conclusion
Customizing a Shopify section helps you create a storefront that feels consistent with your brand and gives customers a clearer shopping experience.
With Section Kit, you can choose a premade section, add it to your theme, and adjust its available settings through Shopify’s theme editor. Follow the steps above, configure your content carefully, and review the finished section before making it live.
Explore the app: Section Kit: Theme Sections




