How to Edit a Shopify Theme with an AI Prompt
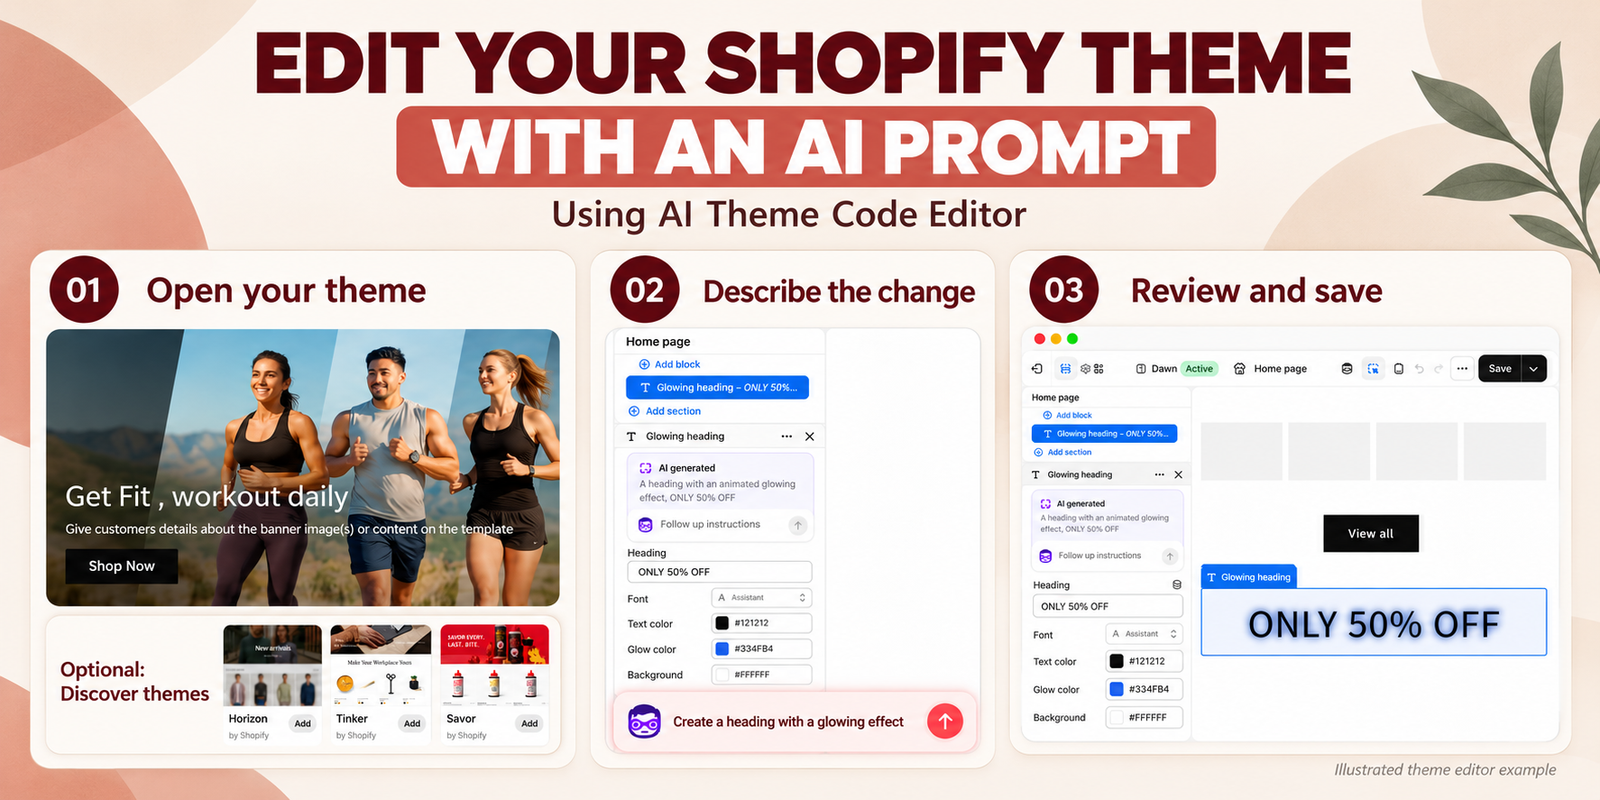
Introduction
A Shopify theme gives your store its foundation, but its default settings may not include every design idea you have in mind. Perhaps you want a glowing promotional heading, a different content layout, or a custom block that makes an offer stand out. Turning that idea into a working storefront element can feel difficult when you do not know how to write theme code.
AI prompts offer a more accessible starting point. Instead of manually building every element, you describe the result you want in plain language, review what the AI creates, and refine it to match your brand. This guide explains how to approach prompt-based customization with AI Theme Code Editor, from installing the app to describing and reviewing a theme change. The supplied images also illustrate a separate glowing-heading example in Shopify’s native theme editor.
The Main Challenge Shopify Merchants Face
Merchants often know what they want to change but struggle to implement it. The theme editor may offer controls for text, colors, and spacing while leaving a specific animation or custom layout outside its built-in settings.
At that point, even a small change can require understanding Liquid, CSS, or JavaScript, finding the relevant theme files, and checking that the result works on mobile. Hiring a developer is an option, but explaining each change and waiting for revisions can slow down routine storefront updates. Editing unfamiliar code yourself can also introduce layout or functionality problems.
Why an AI Theme Editing App Can Help
AI Theme Code Editor is a separate Shopify app designed to translate plain-language customization requests into theme code changes. Its listing describes support for custom sections and blocks, layout adjustments, and edits involving Liquid, CSS, and JavaScript. It can be useful when your request goes beyond the settings already available in your theme.
Understand the two workflows: the first image shows the AI Theme Code Editor app listing. Images 4–6 show Shopify’s built-in theme-editor Generate feature, rather than the app’s own editing interface. Installing the app is not a prerequisite for Shopify’s built-in generation feature. The instructions below preserve your image order while keeping that distinction clear.
Why AI-Prompt Customization Matters
Prompt-based editing helps merchants describe a design goal more directly and experiment with custom storefront elements. It can reduce the manual work involved in an initial draft and make subsequent changes easier to explain.
The quality of the result still depends on the request and the review. A precise prompt gives the AI useful direction; checking the generated element helps you confirm that it fits your store, remains readable, and behaves as expected. Treat the first result as a draft to evaluate before making it part of your live storefront.
How to Edit a Shopify Theme with an AI Prompt by Using AI Theme Code Editor: Step by Step
Step 1: Install AI Theme Code Editor for App-Based Theme Changes
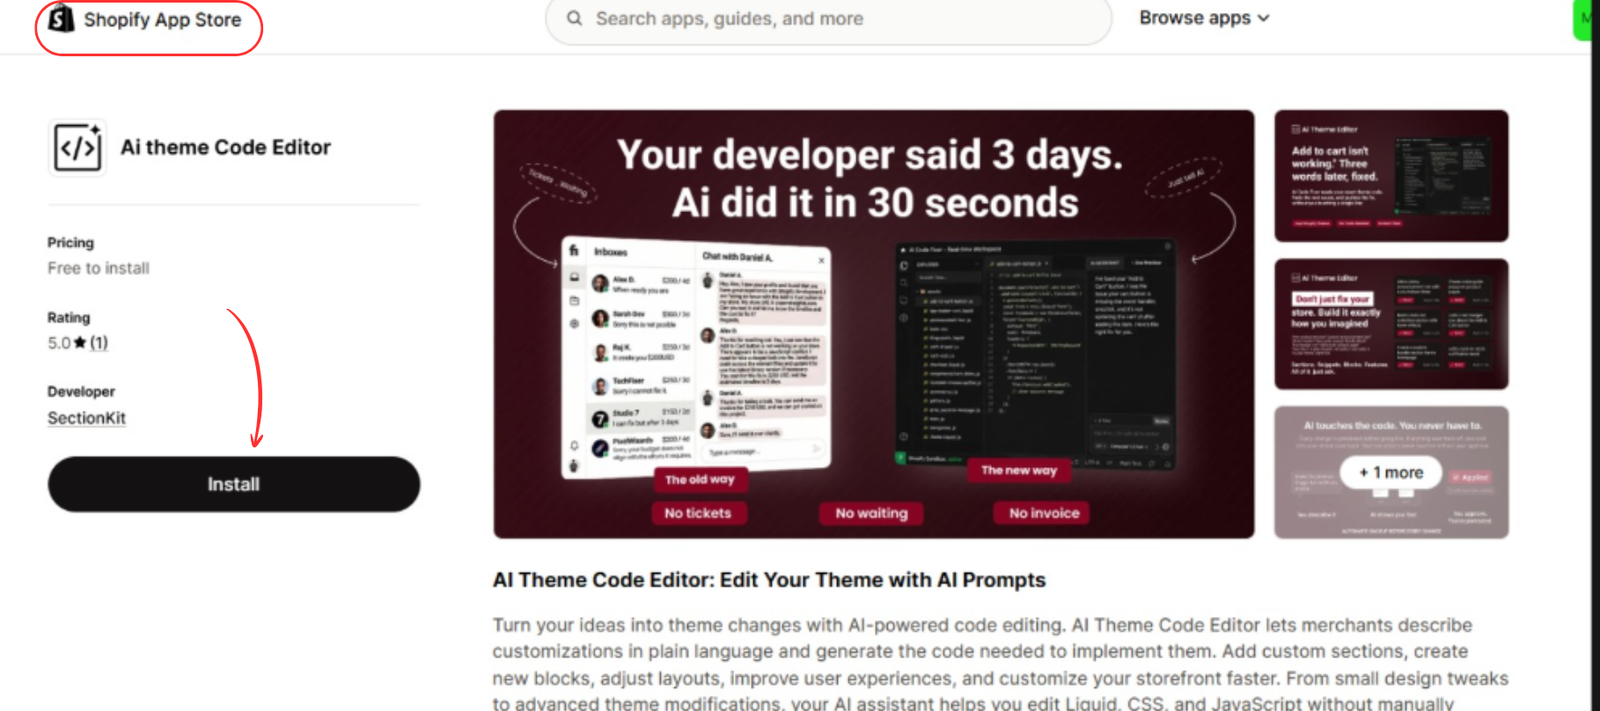
To use the separate app-based workflow, open the AI Theme Code Editor listing in the Shopify App Store. Click Install, select the appropriate store if prompted, and review the requested access before completing installation.
The image below identifies the app and its installation button. Once installed, you can open the app from your Shopify admin for its own theme-editing workflow. For the built-in glowing-heading example shown in the remaining images, continue in the Shopify theme editor.
Step 2: Open the Theme You Want to Customize
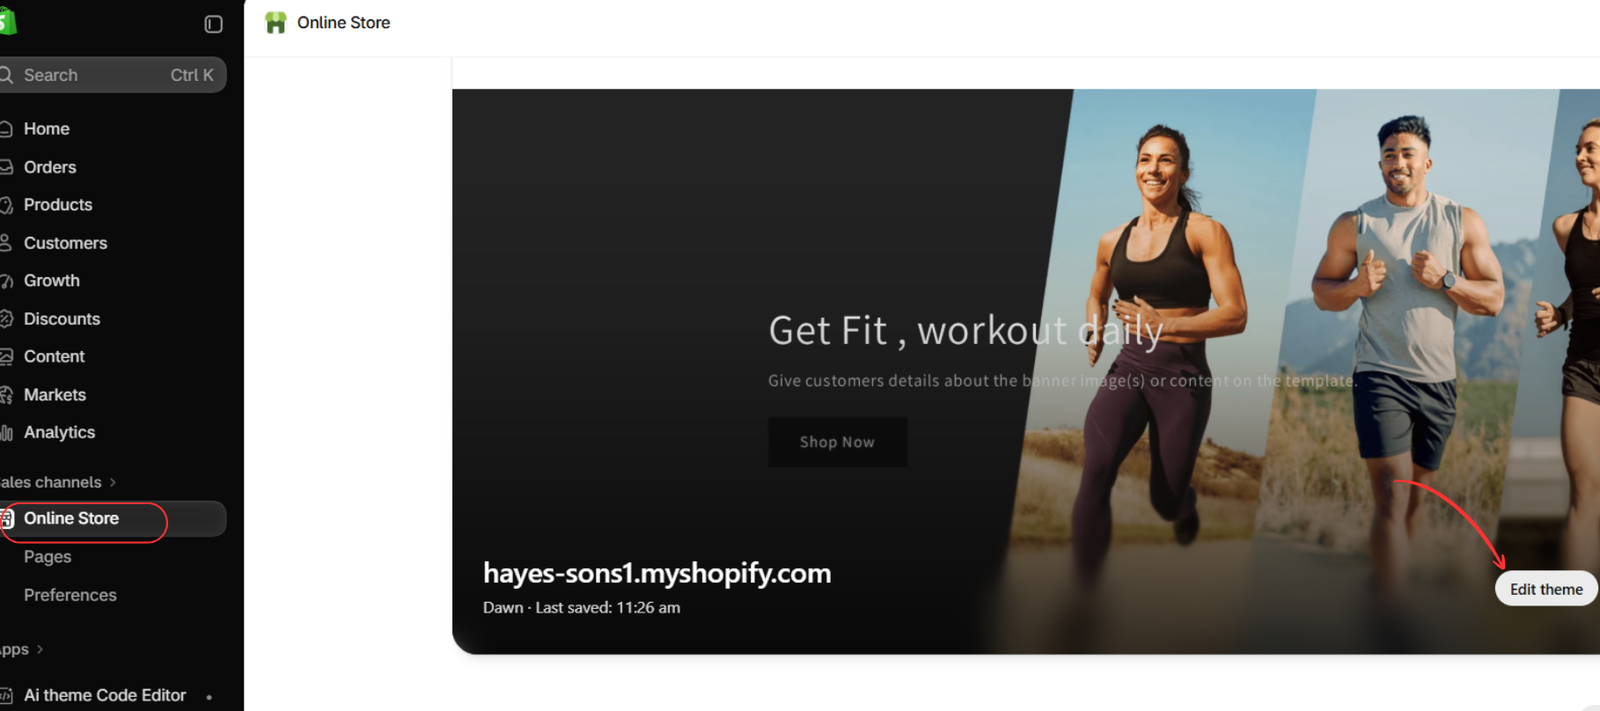
In your Shopify admin, go to Online Store → Themes. Find the theme you want to edit and open its editor. In the supplied image, the button is labeled Edit theme and the theme is Dawn.
For a substantial change, duplicate your theme and work on the copy first. This gives you a place to review the result before applying it to the storefront customers use.
Optional: Add More Themes from Discover Themes
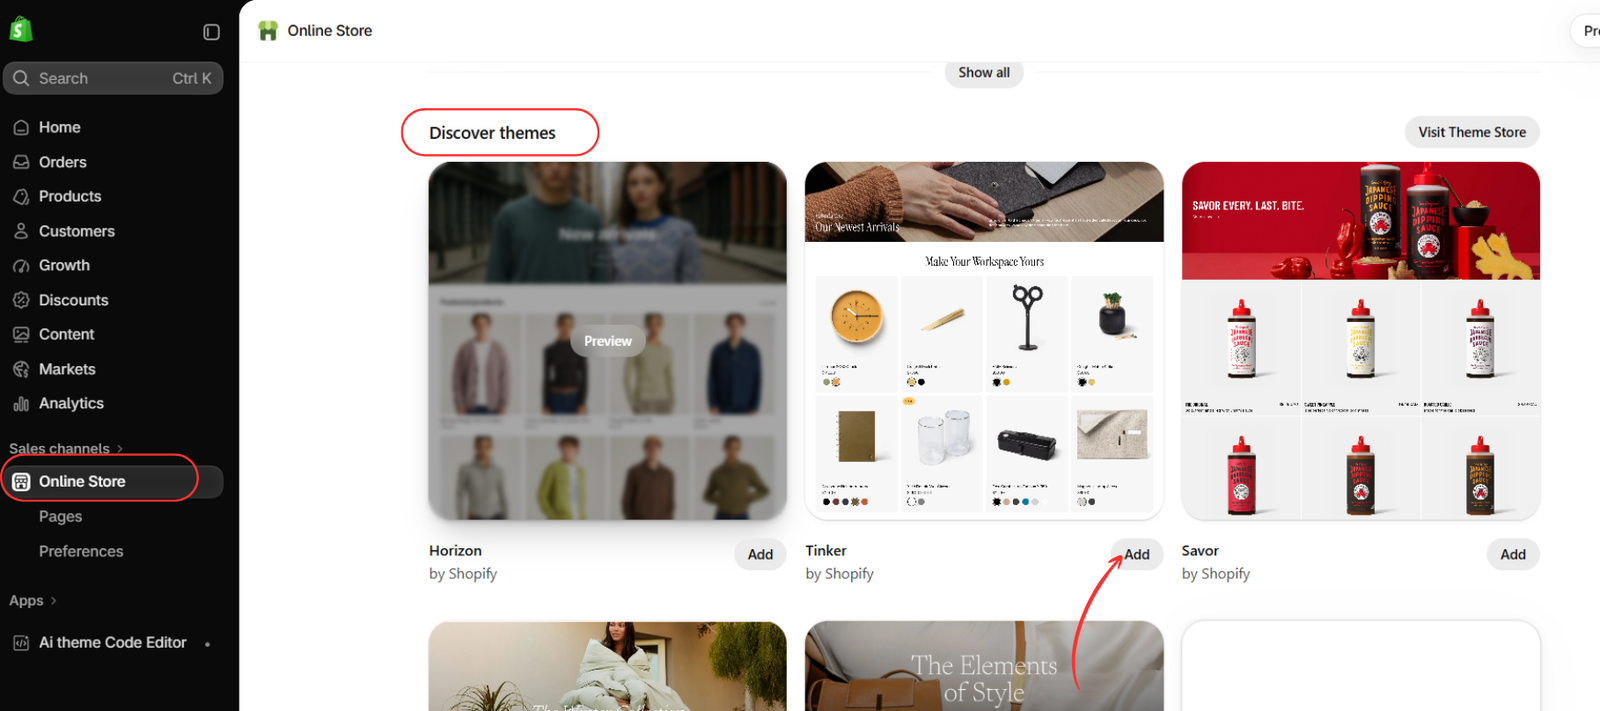
You do not need to change your theme to follow this guide. If you want to explore another starting design, scroll to Discover themes on the Themes page. The image shows options such as Horizon, Tinker, and Savor, with an Add button beside each.
Adding a theme places another option in your theme library; it does not automatically replace your current storefront theme. This image is an additional reference for merchants who want to explore more themes.
Step 3: Describe Your Theme Change in AI Theme Code Editor
Open AI Theme Code Editor from the Apps area of your Shopify admin. Follow the app’s current interface to choose the theme you intend to work on, and describe the change you want in its prompt or chat area. Confirm the theme and page before applying a change.
A useful prompt names the target page, identifies the element, describes its appearance, and sets limits on what should change. For example:
On the homepage, create a centered promotional heading reading “ONLY 50% OFF” with a subtle blue animated glow and a white background. Make the heading text, font, text color, glow color, and background editable in the theme editor. Keep it readable on mobile and leave the existing header, product grid, and footer unchanged.
Review the app’s proposed output and use its available preview or testing controls before applying the result. The supplied images do not show this app interface, so the next illustrated steps describe the separate native-editor example rather than the app’s buttons.
Step 4: Understand the Native Generate Example Shown in the Image
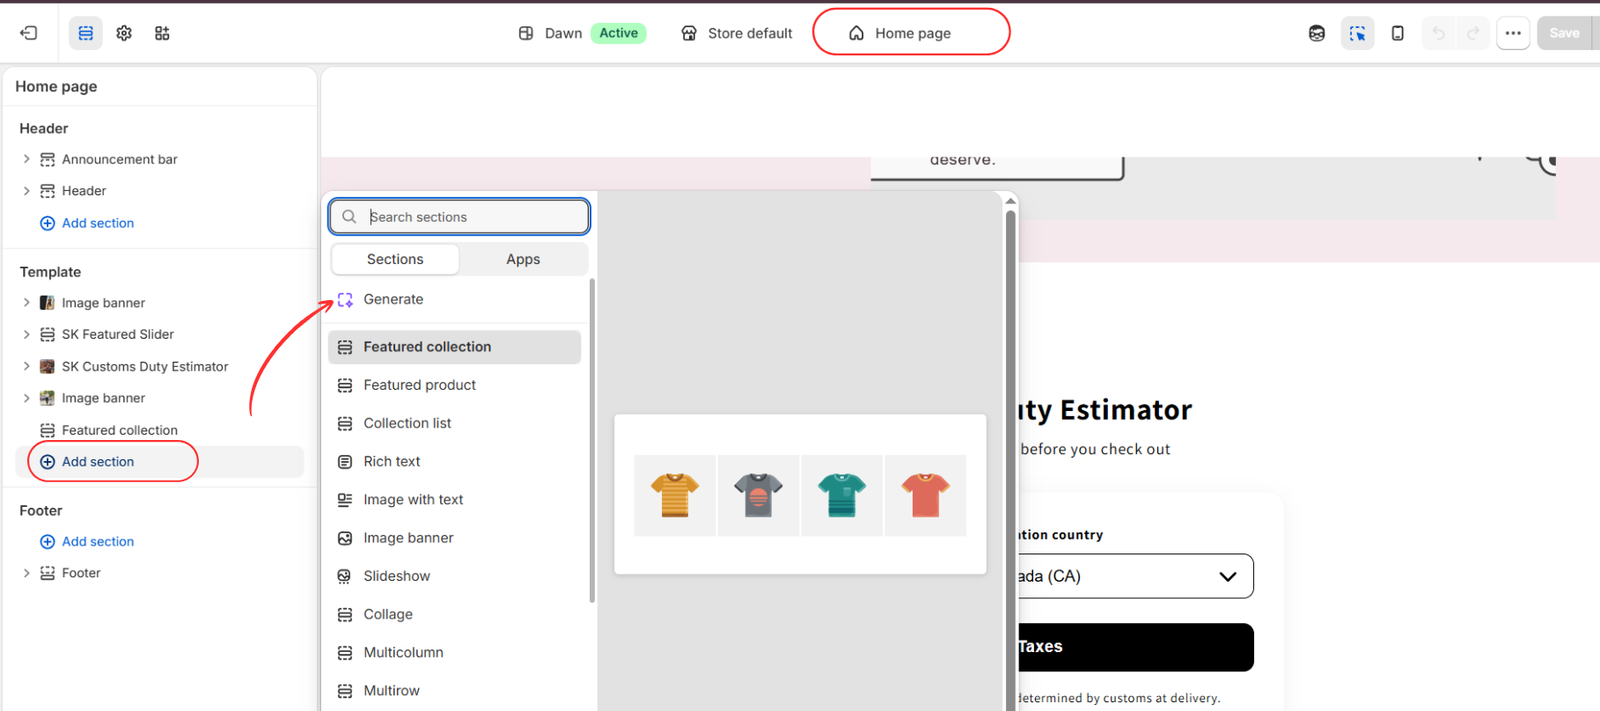
Inside the theme editor, select the template you want to customize. The supplied image shows Home page. In the relevant template area, click Add section, then select Generate from the menu shown.
This opens Shopify’s built-in AI block-generation workflow. Availability and the exact menu placement can depend on your theme and editor interface. If Generate is unavailable, check your theme’s compatibility and Shopify’s current guidance instead of assuming that installing the separate app will enable this menu.
Step 5: Review the Illustrated Prompt and Initial Result
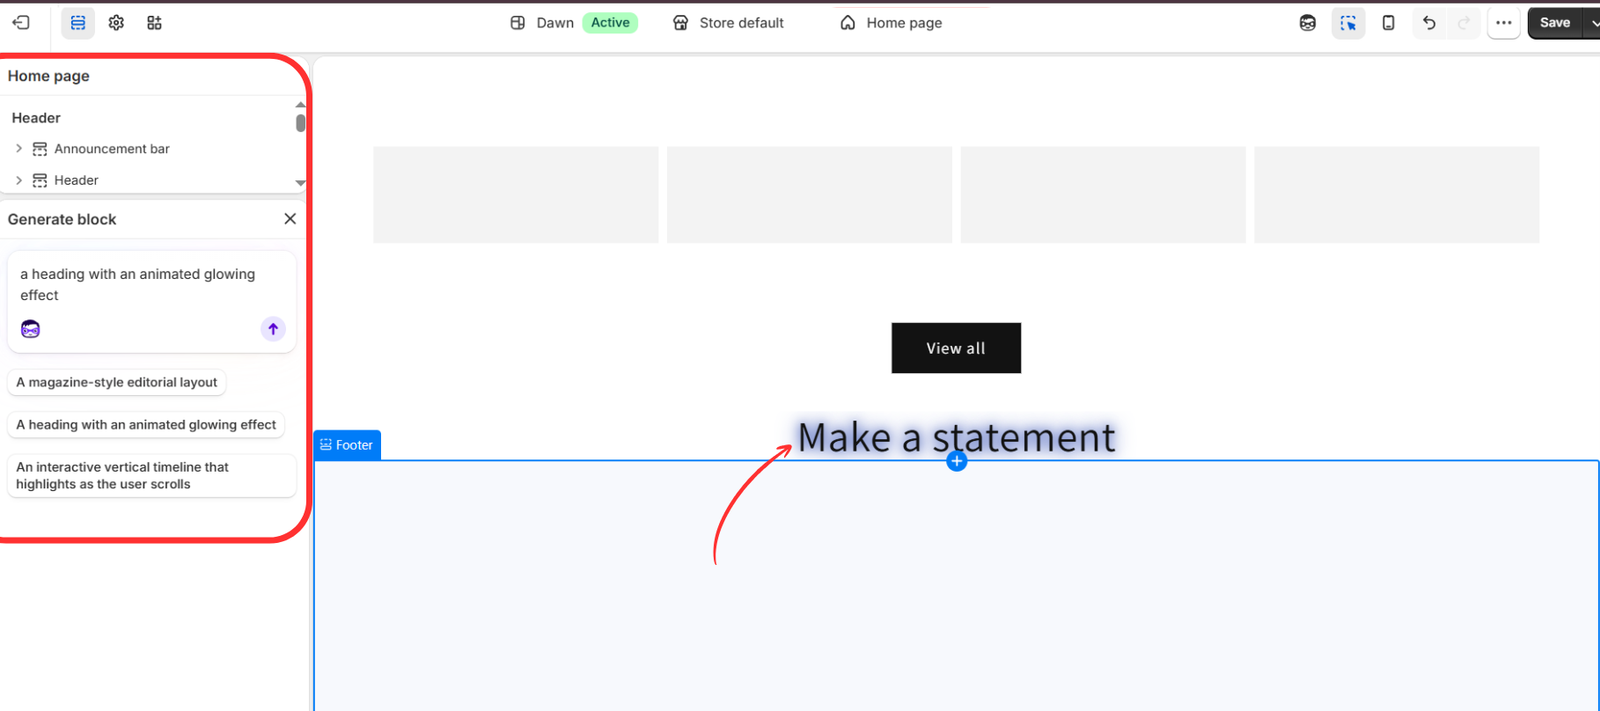
In the Generate block panel, enter a clear description. The example in the supplied image uses this prompt:
A heading with an animated glowing effect.
Submit the prompt using the arrow button and review the generated preview. In this image, the initial heading reads Make a statement with a glow around the text.
For a more specific starting point, you could write:
Create a centered promotional heading that says “ONLY 50% OFF,” with a subtle blue animated glow, dark text, and a white background. Include editable settings for the heading, font, text color, glow color, and background. Keep the text readable on mobile.
Include the content, visual style, placement, and editable controls you need. A promotional heading displays your message; it does not create a Shopify discount. Use offer text that accurately reflects a discount you have separately configured.
Step 6: Refine the Result, Review the Page, and Save
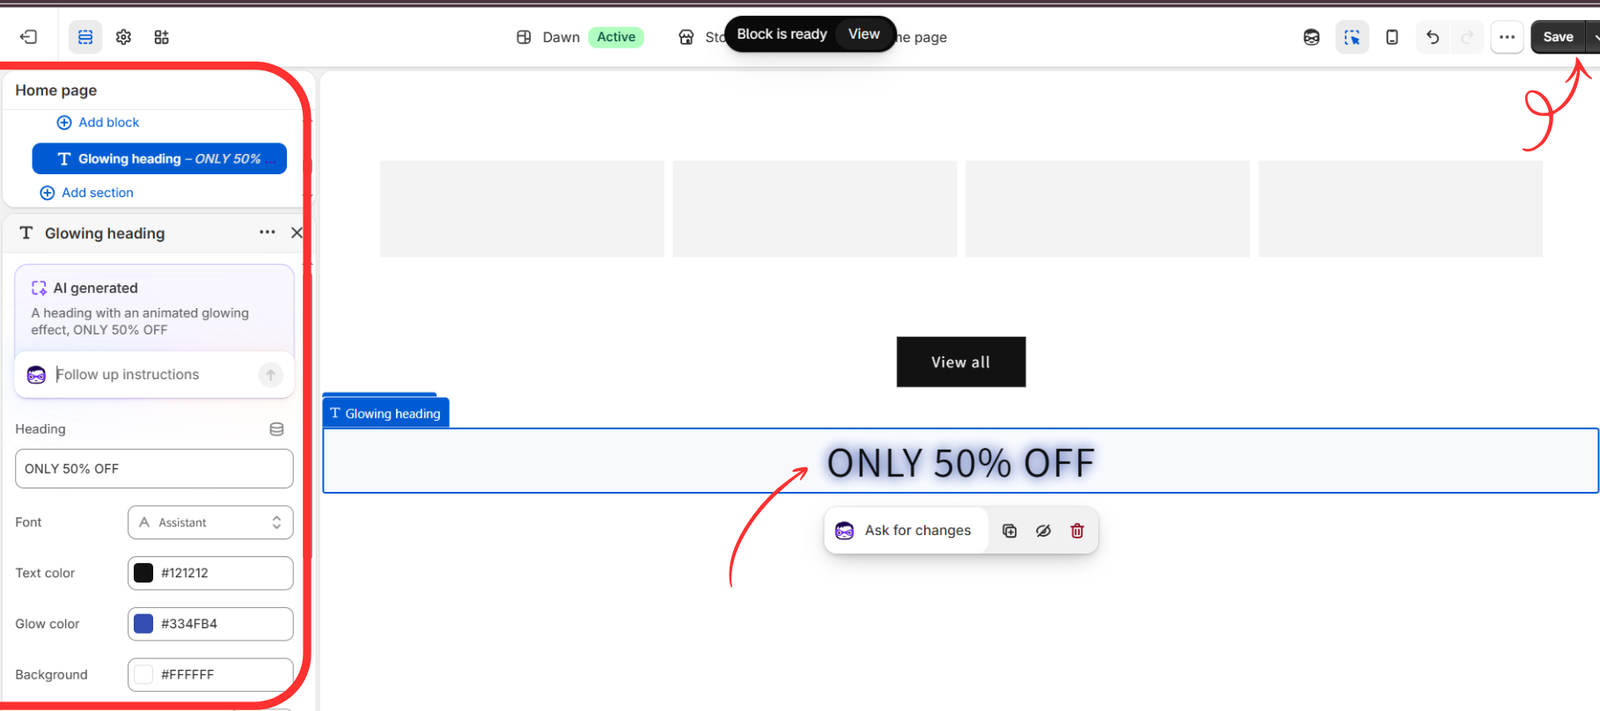
After generation, select the new Glowing heading block. The final image shows controls for Heading, Font, Text color, Glow color, and Background. Use the available controls to match the element to your brand.
In the example, the heading has been changed to ONLY 50% OFF. If the result needs another adjustment, use Follow up instructions or Ask for changes, as shown in the image. Request one clear refinement at a time, such as reducing the glow intensity or adjusting the heading size on mobile.
Review the page on desktop and mobile, check the surrounding content and spacing, and then click Save. Saving an active theme can affect the live storefront. If you are working on a theme copy, saving keeps those changes in the copy; publishing it is a separate action.
Tips for Writing Better AI Theme Prompts
- Name the element: specify a heading, banner, product block, or other component.
- Explain the design: describe colors, alignment, spacing, and the effect you want.
- Include exact content: provide the heading text or button label instead of leaving it to the AI.
- Request editable settings: identify the controls you want to adjust later.
- Describe mobile behavior: explain how the element should fit smaller screens.
- Refine deliberately: review each result and make focused follow-up requests.
Using the App for Follow-Up Changes
When working in AI Theme Code Editor, return to its prompt interface to request focused refinements. Explain what needs adjusting and what should stay the same. For example: “Reduce the heading’s glow intensity and make the mobile font size smaller. Keep the wording and desktop alignment unchanged.” Follow the app’s current review and apply process for each change.
Check the actual storefront result as well as any preview. Confirm that navigation, product options, add-to-cart actions, and other elements near the change still work. If you edited a theme copy, publish it only after you are satisfied with the result.
Final Thoughts
Editing a Shopify theme with an AI prompt starts with a clear description and ends with a careful review. The glowing-heading example shows how a simple idea can become an editable storefront block without manually writing its initial code.
Shopify’s built-in generation feature is one route for creating blocks in the theme editor. AI Theme Code Editor provides a separate app-based approach to describing and implementing theme changes. Start with a precise prompt, review the output, and refine it until the result fits your store.
Explore AI Theme Code Editor: https://apps.shopify.com/ai-code-fixer




