How to Edit Shopify Theme CSS with AI Assistance
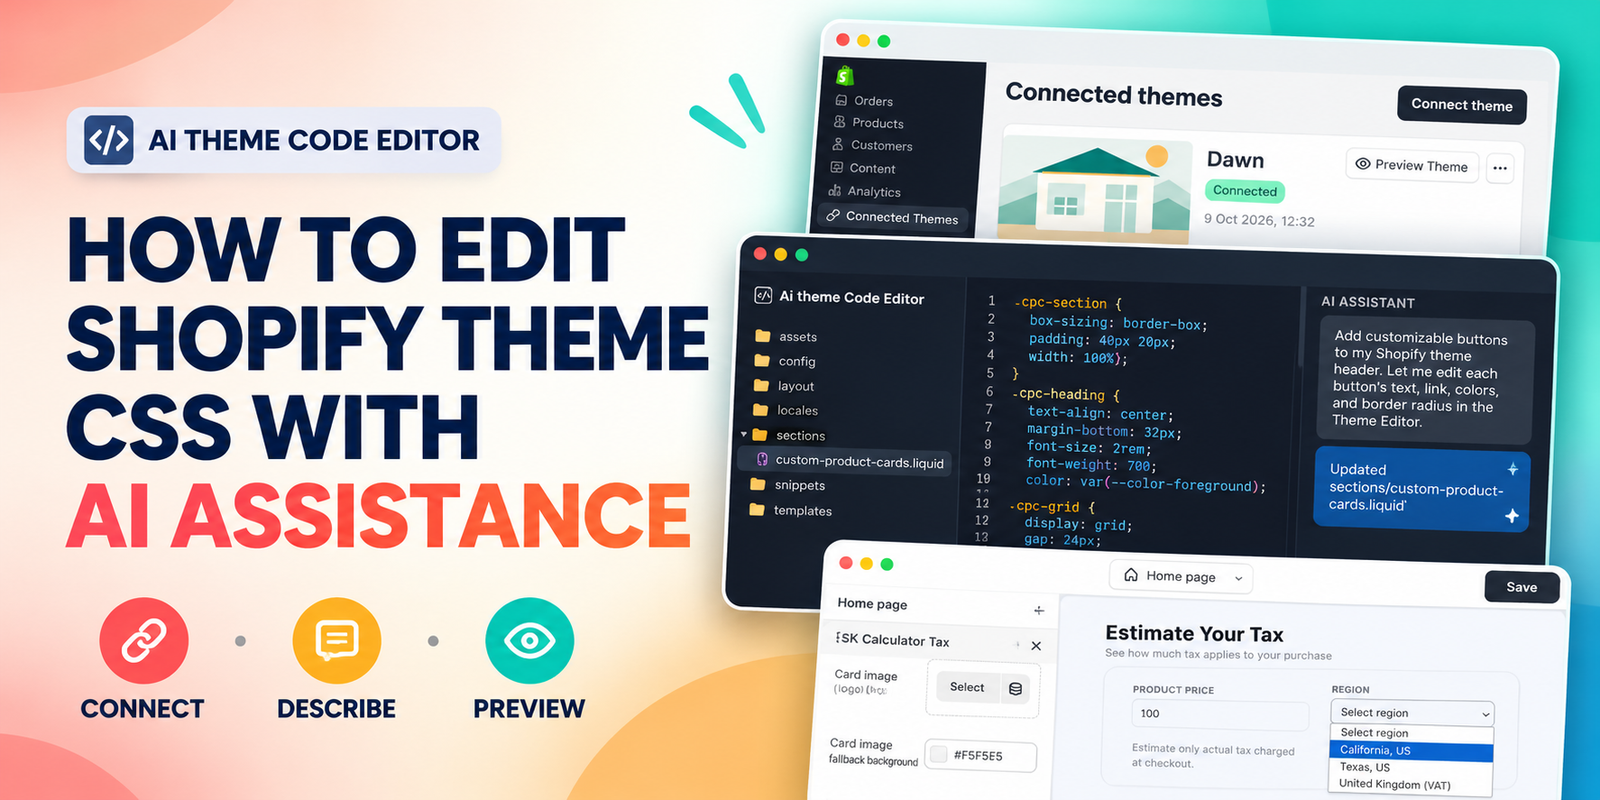
Introduction
A Shopify theme gives your store a starting point, but the small visual details determine how closely it matches your brand. A button might feel too narrow, product cards might sit too close together, or a heading might look oversized on mobile. These adjustments often involve CSS, the styling language that controls colors, typography, spacing, borders, and responsive layouts.
For merchants who do not work with code every day, even a simple styling change can become a slow process. You know what you want the page to look like, but translating that idea into the right selector and CSS rule is another task entirely. AI assistance can help bridge that gap by turning a clear design request into proposed theme code changes.
This guide explains how to edit Shopify theme CSS with AI assistance using AI Theme Code Editor. You will learn how to connect a theme, describe the styling change, review the proposed edits, and check the result before making it available to customers.
The Main Headache: Simple Design Changes Can Be Difficult to Implement
Theme settings are useful, but they do not always include the exact control you need. You may be able to change the overall color scheme while having no setting for one button’s padding. A section may offer a desktop layout option without enough flexibility to improve its appearance on a smaller screen.
When merchants move beyond the available settings, several challenges appear. First, they need to locate the correct styling code. A theme can contain multiple stylesheets and styles embedded inside section files. Second, they need to understand which rule controls the element. A selector that looks correct may be overridden by another rule or may affect more parts of the store than expected.
Copying a generic CSS snippet can create further confusion. Code written for another theme may use different class names or rely on a different page structure. A change that looks good on a desktop can also cause clipped text, overflowing cards, or cramped navigation on mobile. The difficulty is rarely just typing a few lines of CSS; it is applying those lines to the right place and checking their effect.
Why Use AI Theme Code Editor?
AI Theme Code Editor provides an AI-assisted workflow for generating and editing Shopify theme code from plain-language instructions. Its app listing describes support for Liquid, CSS, and JavaScript changes, along with a sandbox preview workflow. For a styling task, this gives merchants a way to communicate the desired appearance without starting by manually writing every CSS rule.
The value is practical: you can explain which element needs attention, how it should look, and which screen sizes matter. The assistant can then propose changes in the context of the connected theme. You still need to review the result, but the initial task becomes easier to express.
Check the current plan details before starting. The listing distinguishes general theme editing from full CSS and JavaScript fixes, which are listed with paid-plan features. Choose a plan that supports the work you intend to perform rather than assuming every task is included in the free allowance.
Why Thoughtful CSS Editing Matters
Consistent styling makes a storefront easier to navigate and understand. Clear heading sizes create a readable hierarchy. Comfortable spacing separates product information from supporting content. Buttons with suitable padding and visible focus states make the page easier to use with a mouse, touch screen, or keyboard.
CSS changes should support those goals. Changing colors alone does not guarantee better sales, and an attractive desktop layout is incomplete if it becomes difficult to use on mobile. A focused improvement, such as fixing a crowded product grid or making a key button easier to read, is easier to evaluate than changing many unrelated design elements at once.
Before You Start: Define One Styling Goal
Write down the page, section, and element you want to change. Include useful details such as the desired color, corner radius, spacing, or mobile behavior. Use an existing theme setting when it already solves the problem; request code changes when the available settings do not provide the control you need.
Keep a recoverable copy of the theme before editing, and work on a duplicate or preview version where your workflow allows it. Record the current appearance so you can compare the result. Also distinguish styling from functionality: rounding an existing button is a CSS task, while adding a new button with editable text and links may require Liquid and theme settings as well.
Step 1: Install and Open AI Theme Code Editor
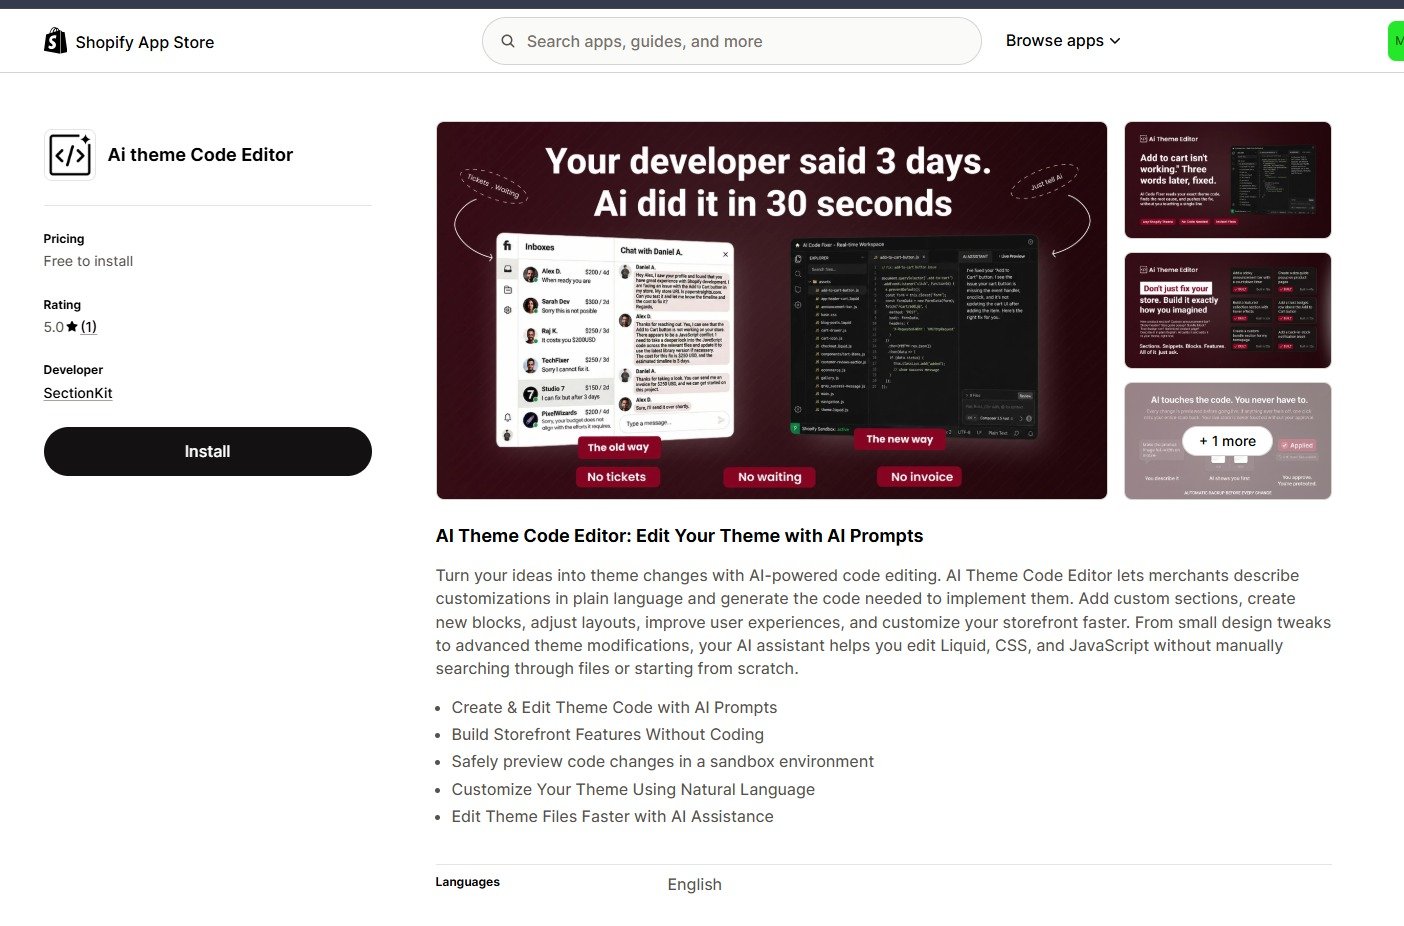
Find AI Theme Code Editor in the Shopify App Store, review its features and plan information, and use the install option to add it to your store. Review the requested access during installation, then open the app from your Shopify admin.
The first image shows the app listing and its theme-editing positioning. It is the starting point for the workflow, before you select a theme or ask the assistant to change styling.
Step 2: Connect the Theme You Want to Edit
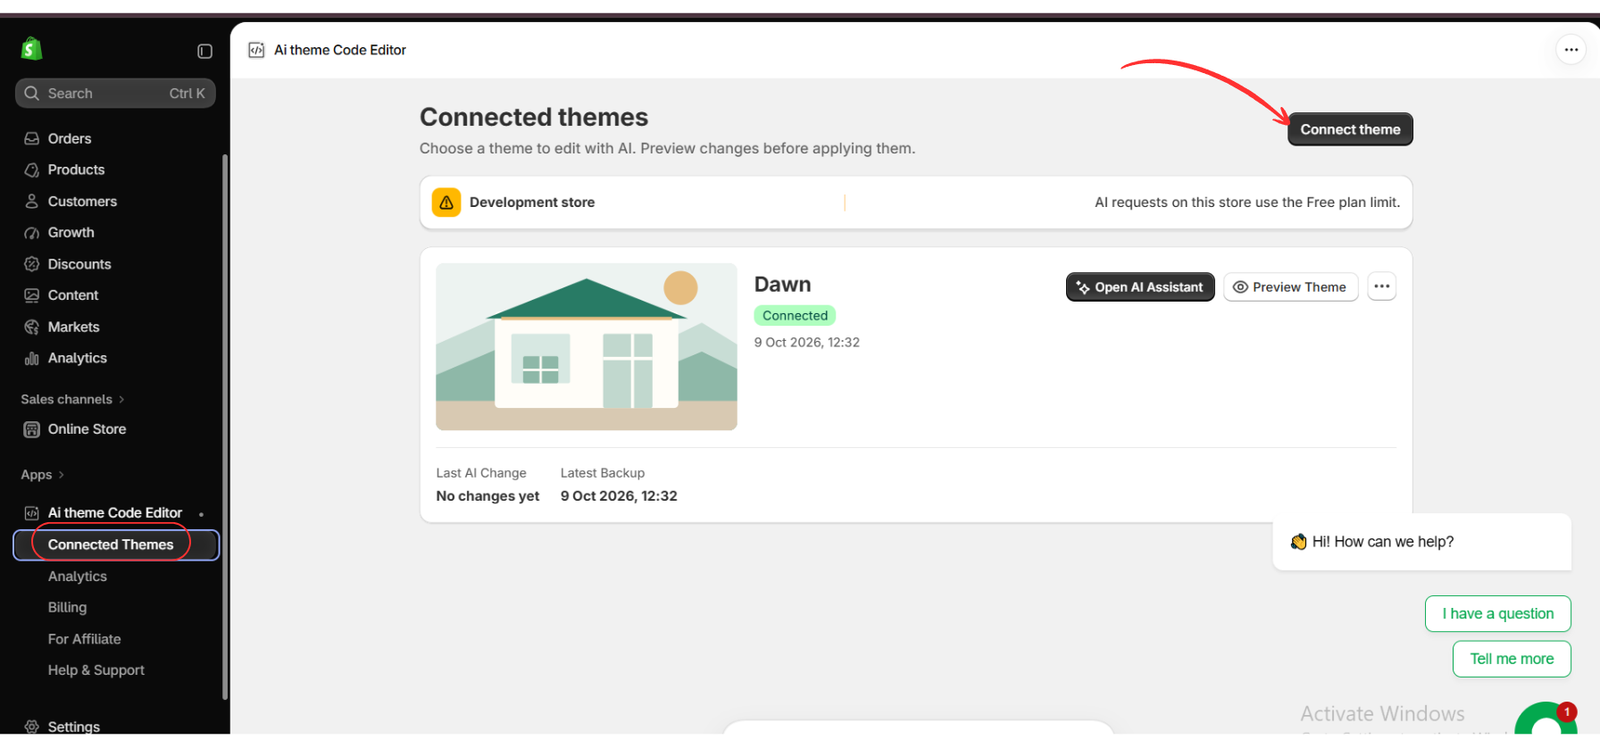
Open Connected Themes in the app and use Connect theme to choose the theme you want to work with. Confirm the theme name carefully, especially if your store contains both a published theme and development copies.
The second image shows the Connected Themes screen with a Dawn theme marked as connected. The theme card also displays backup information. Check the available backup and recovery options in your own account before proceeding; the presence of a backup label does not replace checking which version you can recover.
Step 3: Open the AI Assistant for the Connected Theme
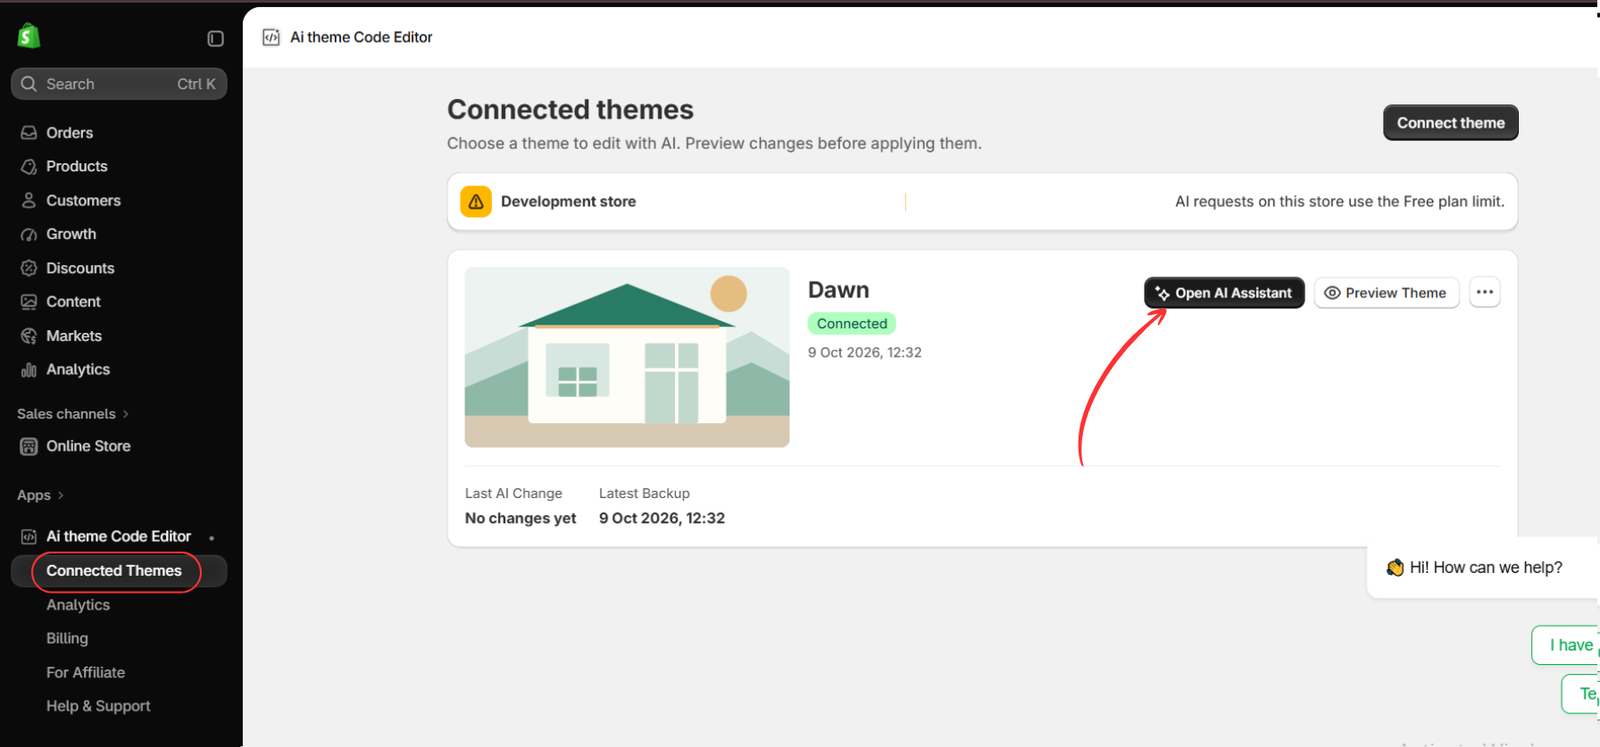
Locate the correct theme card and select Open AI Assistant. This opens the editing workspace for that connected theme. Before entering a request, verify that the workspace belongs to the intended theme and that you understand whether edits are being staged or applied to a live version.
The third image highlights the Open AI Assistant button. Keeping the theme selection correct is essential: an accurate styling request still needs to be applied to the right theme.
Step 4: Describe the CSS Change in Plain Language
Enter a focused request in the assistant’s message field. Name the element, explain the desired appearance, and specify the scope. Avoid requests such as “make the website better,” which leave too many design decisions open.
For an existing header button, you could use this prompt:
Update the CSS for the existing header button only. Use a dark navy background, white text, an 8px corner radius, and comfortable padding. Keep its current text and link. Make sure it fits beside the header icons on desktop and does not overflow on mobile. Preserve visible keyboard focus styling and leave other buttons unchanged.
The fourth image shows the prompt-entry area and an example request to add customizable header buttons. That example includes functionality and theme settings, so it is broader than a CSS-only edit. For this guide, use it to identify where to enter your own styling prompt rather than treating its text as the required CSS request.
For a section spacing issue, another suitable request would be:
Adjust only the CSS of the homepage product card section. Increase the spacing between cards to 24px on desktop and 16px on mobile. Keep product images proportional, prevent horizontal overflow, and preserve the existing product content and links.
Specific instructions help you judge whether the result matches your goal. If the first attempt is close but incomplete, ask for a small refinement: “Reduce the heading size on mobile only” is easier to assess than restarting with a completely different design request.
Step 5: Review the Proposed Code and Preview Before Publishing
Read the assistant’s response and inspect which files it changed. Ask it to explain unfamiliar edits in plain language. For a styling request, look for changes that relate to your goal: spacing rules for a spacing issue, color rules for a color update, or responsive rules for a mobile layout problem.
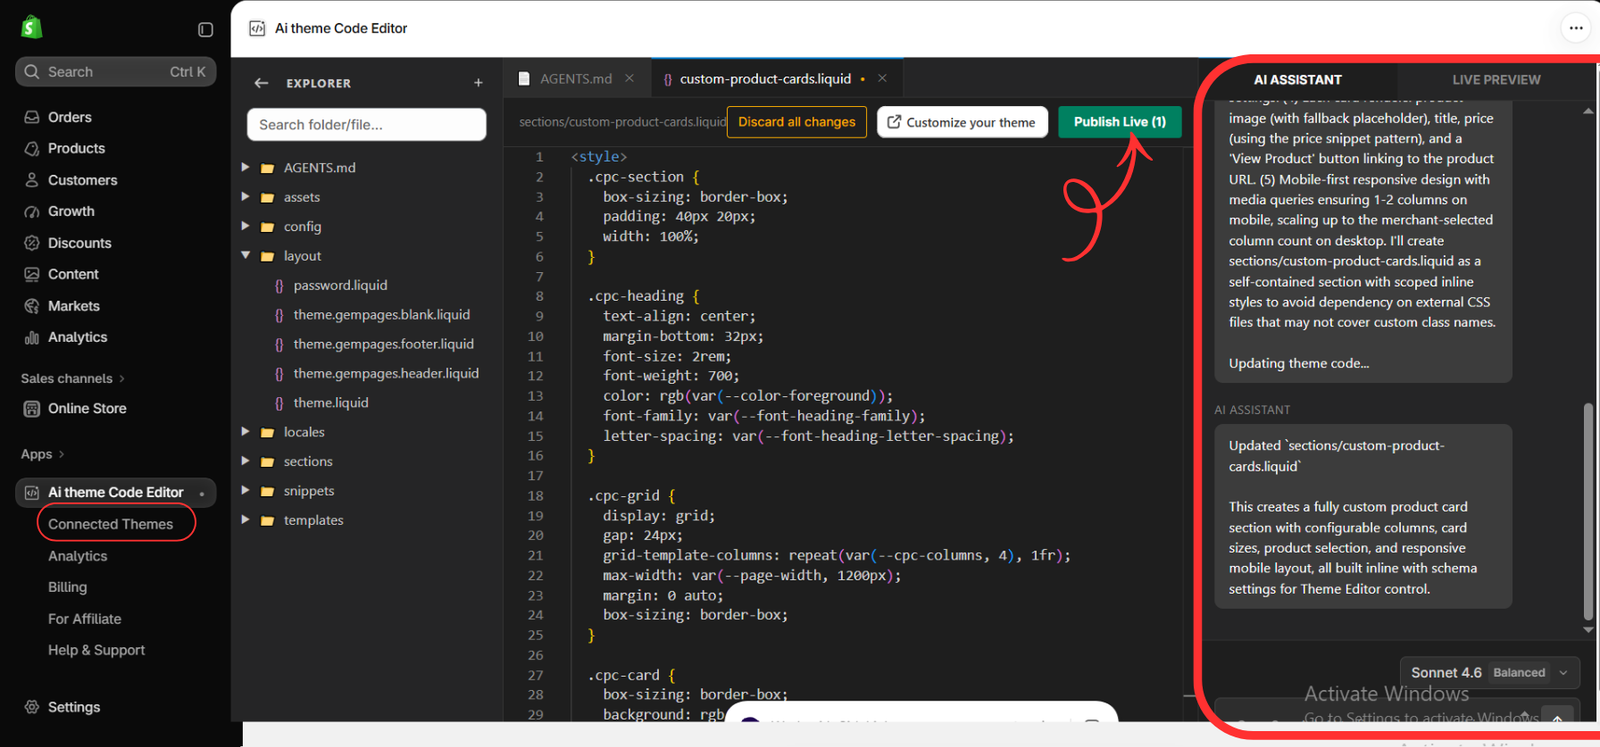
The fifth image shows CSS inside a product card section file, an assistant response, and a Publish Live button. It demonstrates that styling can live inside a section file rather than only in a standalone stylesheet. The image also refers to creating a custom product card section, so it illustrates the editing interface rather than proving the result of the header prompt in the previous image.
Use the available preview workflow to check the change before publishing. Compare desktop and mobile views, inspect nearby elements, and test any buttons or links involved. If the result affects unrelated sections, ask the assistant to narrow the CSS to the intended component.
Once the result is satisfactory, use the publishing or apply action appropriate to your selected theme. In the supplied image, the action is labeled Publish Live, so treat it as a step that can affect the storefront rather than a preview control.
Step 6: Check the Theme Editor and Save Relevant Settings
Open the theme editor and navigate to the page or section involved in your change. Confirm that the styling appears as intended in its actual page context. If the assistant added configurable settings, review those settings and save any adjustments you make in the theme editor.
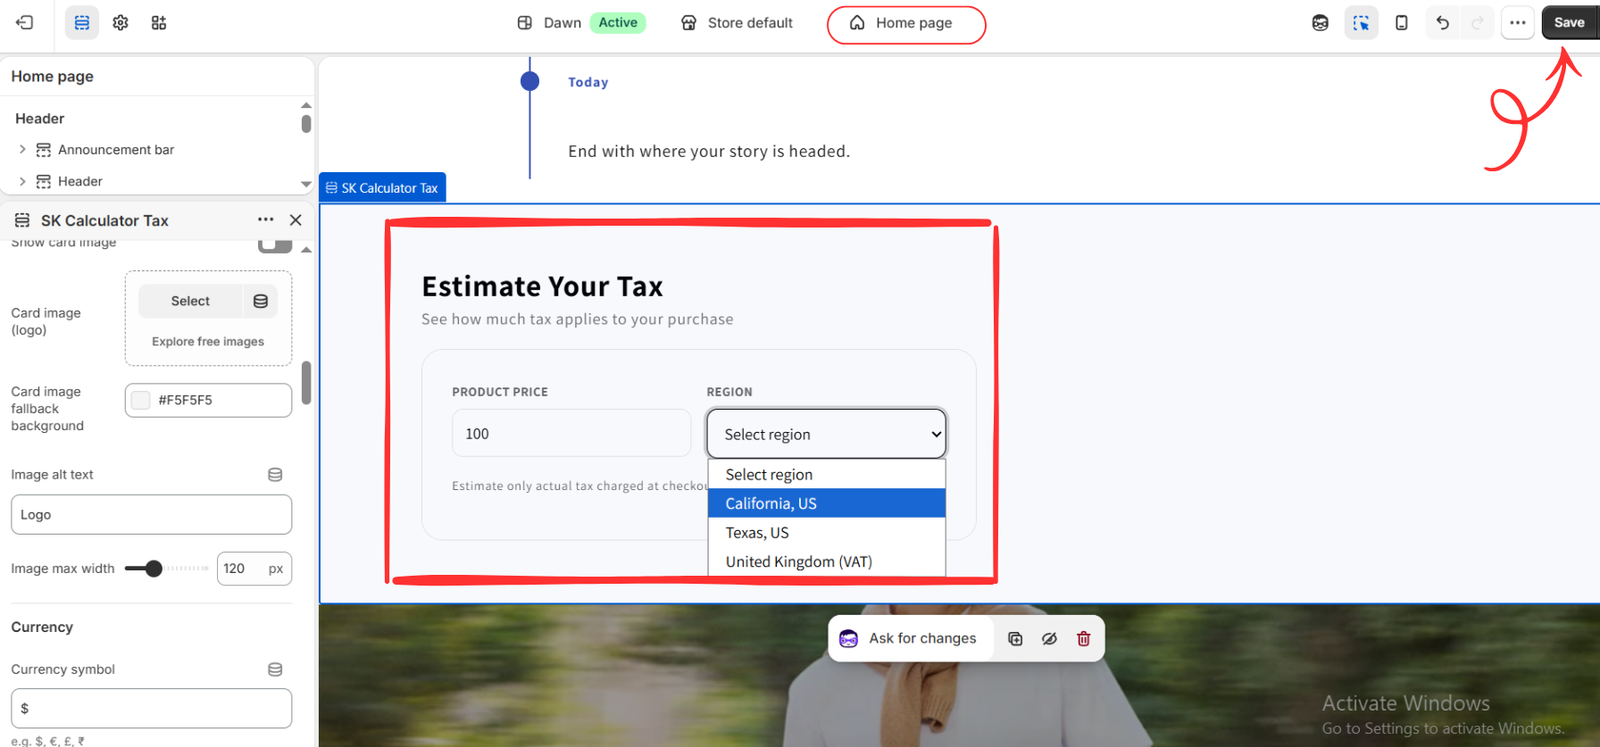
The sixth image shows a homepage tax calculator section with the Save button highlighted. It illustrates where to review a section and save editor settings. It is not a before-and-after result of the earlier CSS requests. If you are styling a calculator like this one, check its field spacing, label readability, dropdown visibility, and mobile fit without assuming that a visual change also updates its calculation logic.
Saving theme editor settings and applying theme code changes are distinct actions. Complete the actions your workflow requires, then view the storefront again to confirm that the intended change is visible.
How to Get Better Results from Your CSS Prompts
A strong prompt combines context, scope, and a measurable outcome. Tell the assistant which page and element need attention, what should change, and what should remain consistent. Mention mobile behavior when relevant, and include hover or keyboard focus states for interactive elements.
If a rule fails to take effect, describe what you still see. For example: “The product card spacing changed on desktop, but cards still touch on mobile. Check the mobile styling for this section and adjust it without affecting other grids.” This gives the assistant a concrete symptom to investigate.
Work in small iterations. Combining typography, navigation, product cards, footer spacing, and animation into one request makes it harder to identify which change caused a problem. One focused task at a time produces a clearer review process and an easier comparison with the original design.
Final Checks Before Considering the Work Complete
Check the affected page at desktop, tablet, and mobile widths. Long product titles and translated text can reveal layout problems that short demo content hides. Confirm that text remains readable, interactive controls remain usable, and no horizontal scrolling appears unexpectedly.
Also inspect another page that shares the same components. A header style can affect the entire store, while a narrowly scoped section style should affect only that section. Keep a note of your custom changes so you can review them again after future theme updates.
Conclusion
Editing Shopify theme CSS with AI assistance starts with a clear description of the result you want. Connect the correct theme, request a focused styling change, review the proposed code, and test the result across screen sizes before applying it.
AI Theme Code Editor can make that workflow more accessible by helping translate plain-language requests into theme edits. With careful prompts and a consistent preview process, merchants can improve spacing, typography, buttons, and section layouts without beginning every adjustment from an empty code file.
Explore the app and review its current features and plans: AI Theme Code Editor on the Shopify App Store.




