How to Add Customer Testimonials to a Shopify Homepage
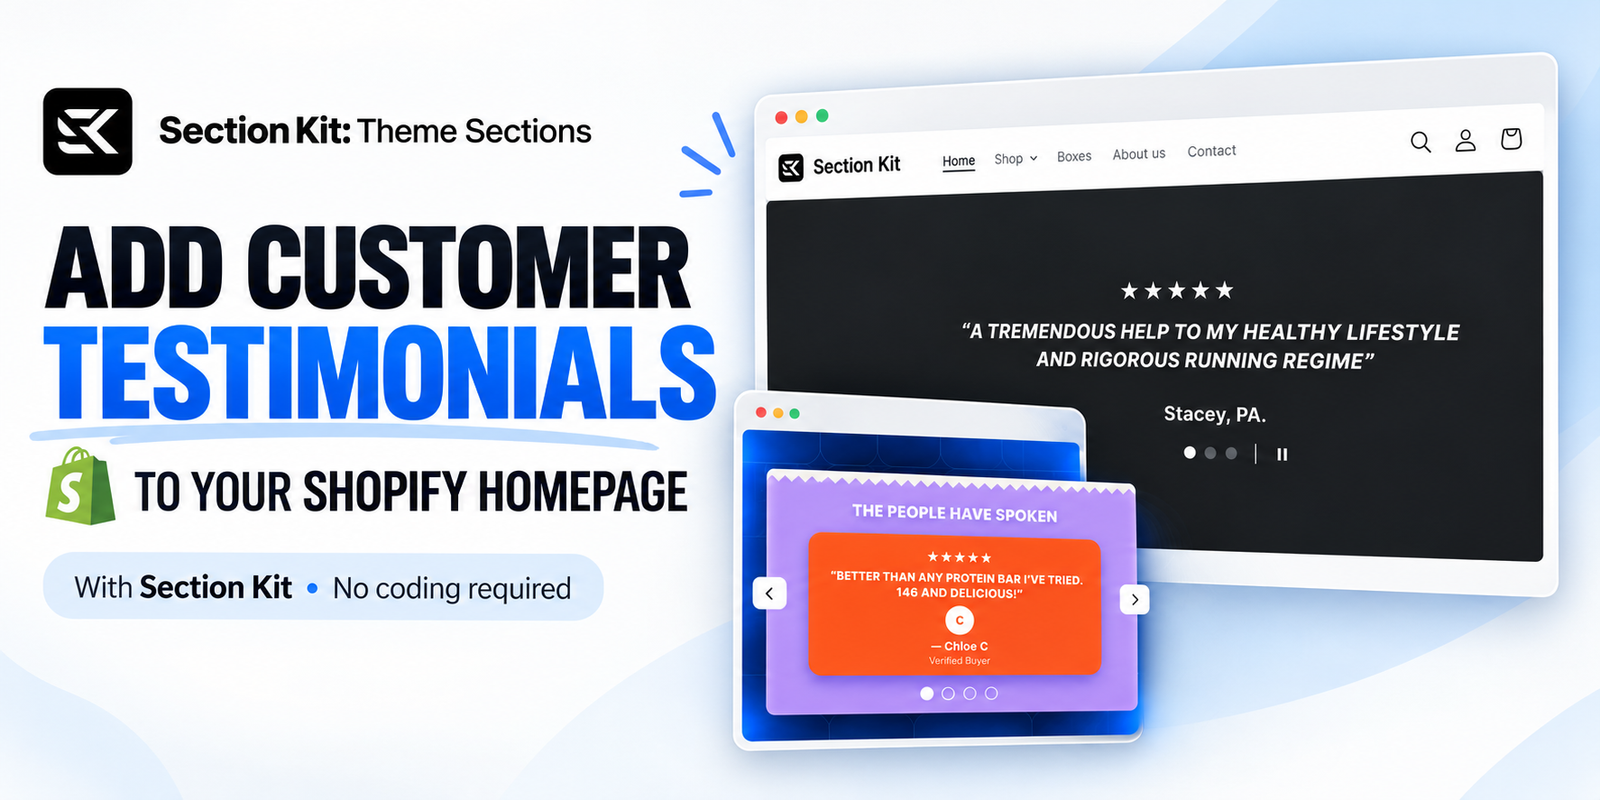
A well-designed Shopify homepage introduces your products, explains your brand, and gives visitors a reason to shop. However, first-time customers may still wonder whether your products will meet their expectations.
Customer testimonials help answer that question. By sharing genuine feedback from previous buyers, you give visitors another perspective on your products and the shopping experience.
In this guide, you will learn how to add customer testimonials to your Shopify homepage using Section Kit: Theme Sections, then customize the section directly in the Shopify Theme Editor.
The Problem with Adding Testimonials to Shopify
Some Shopify themes include a testimonial section, while others offer limited options or do not include the layout you want.
You might want a centered quote slider, customer photos, star ratings, or a carousel that matches your brand. Building that layout manually can require Liquid, CSS, and JavaScript. A page builder is another option, although it may introduce a separate editing workflow when you only need one additional section.
Why Use Section Kit for Homepage Testimonials?
Section Kit offers premade sections that you can add to your existing theme and customize in Shopify’s native editor. Its library includes testimonial designs alongside other homepage and product-page s
ections.
Why Customer Testimonials Matter on Your Homepage
Your product descriptions explain what you offer. Testimonials show how customers experienced it.
A useful testimonial can address a specific concern, such as product quality, fit, ease of use, or delivery. For example, a genuine review explaining how a product fits into a customer’s daily routine can be more informative than a general statement that the product is excellent.
Placing these experiences on your homepage can help you:
- Build trust with visitors who are discovering your brand.
- Answer common questions through real customer experiences.
- Give shoppers context before they explore your products.
- Bring a human voice to your storefront.
Testimonials can support purchase decisions, but their value depends on the quality and authenticity of the feedback.
Which Method Should You Choose?
| Method | When it makes sense | Main consideration |
| Built-in theme section | Your theme already includes a suitable testimonial layout | Design options depend on your theme |
| Custom development | You need a highly specific design or integration | Requires development and ongoing maintenance |
| Page builder | You want to create broader custom page layouts | May require a separate editor and subscription, depending on the app |
| Section Kit | You want a premade testimonial section within your existing theme | Available settings and pricing depend on the section |
Section Kit is free to install, with free sections and premium sections available for one-time charges. Check the selected section’s current price before adding it.
Before You Start
Prepare a few genuine customer testimonials. For each one, collect the review text, the customer’s approved display name, and any photo or rating you have permission to publish.
Keep the wording faithful to the original feedback. Only display a star rating if the customer supplied one, and only use a “Verified Buyer” label when you can verify the purchase.
For this tutorial, the screenshots show SK Testimonials #2, a free testimonial section, as the example used in the theme editor.
Step 1: Install Section Kit: Theme Sections
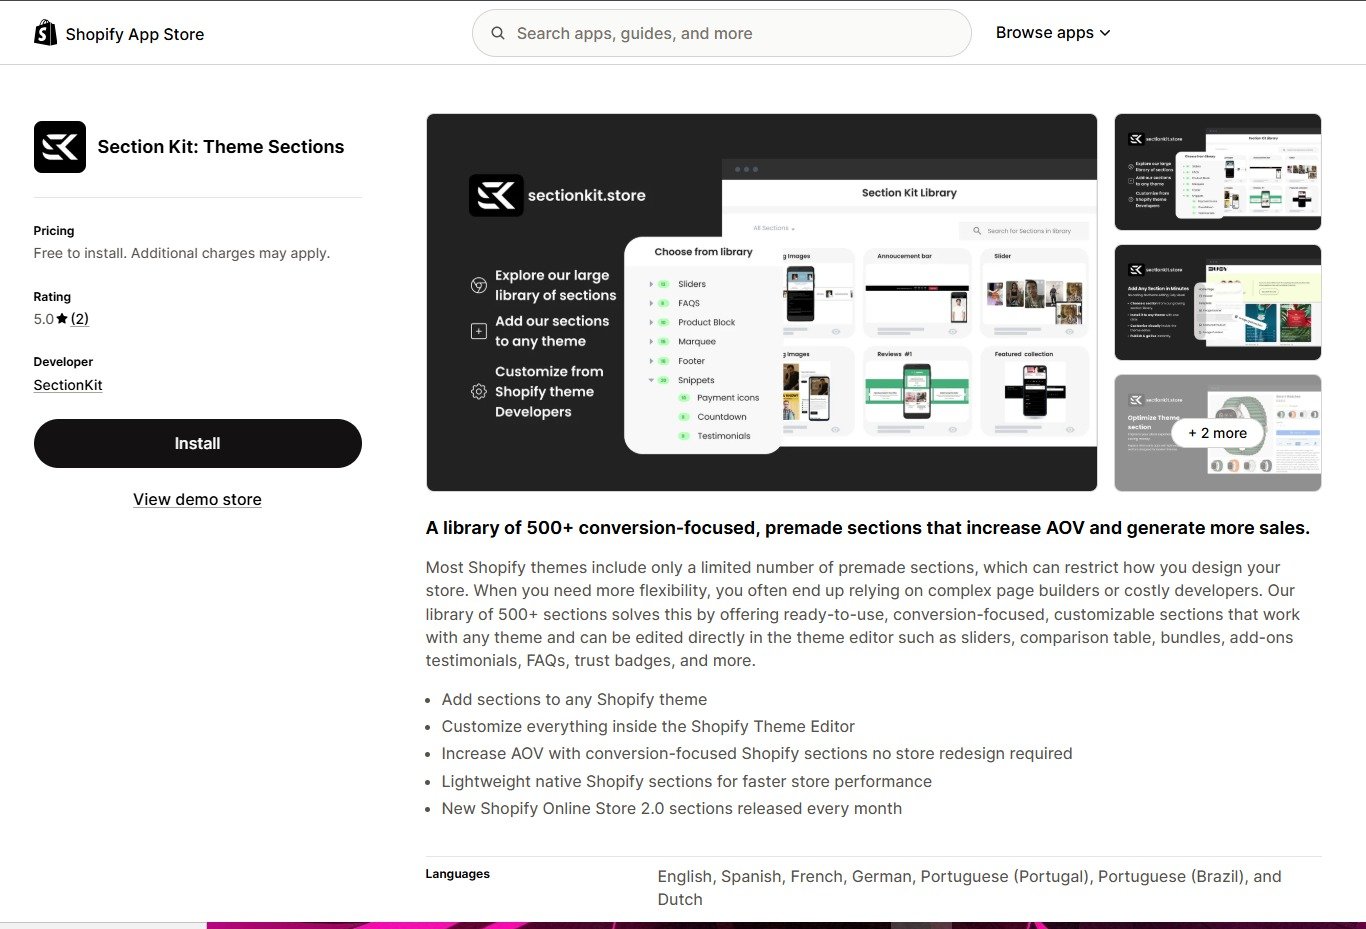
Open the Section Kit: Theme Sections listing in the Shopify App Store and click Install.
Follow Shopify’s installation prompts, then open the app from your Shopify admin.
Installing the app gives you access to its section library. You still need to select a section, install it to your chosen theme, and add it to the homepage.
Step 2: Find the Testimonial Sections
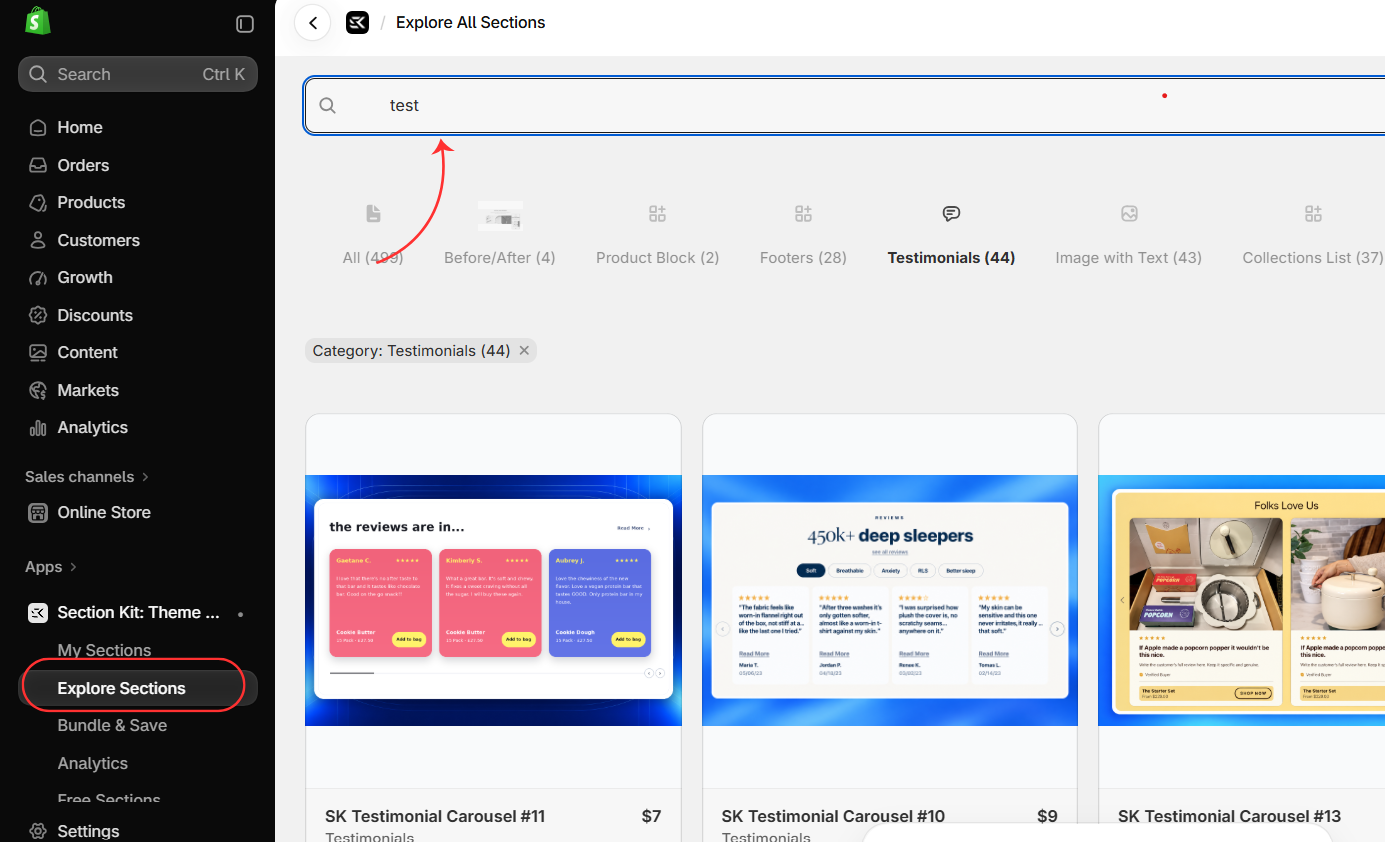
Inside Section Kit, click Explore Sections in the left navigation.
Select the Testimonials category or use the search bar to find testimonial designs. In the screenshot, the search field contains “test,” and the Testimonials category is selected.
Browse the available designs and open a section to inspect its preview. Choose a layout that suits your store’s style and the content you have available.
A simple quote slider works well for short written reviews. If you have customer photos or videos, look for a section designed to display that type of content.
Step 3: Add a Free Section or Purchase a Premium Design
The images demonstrate two options.
Free testimonial section
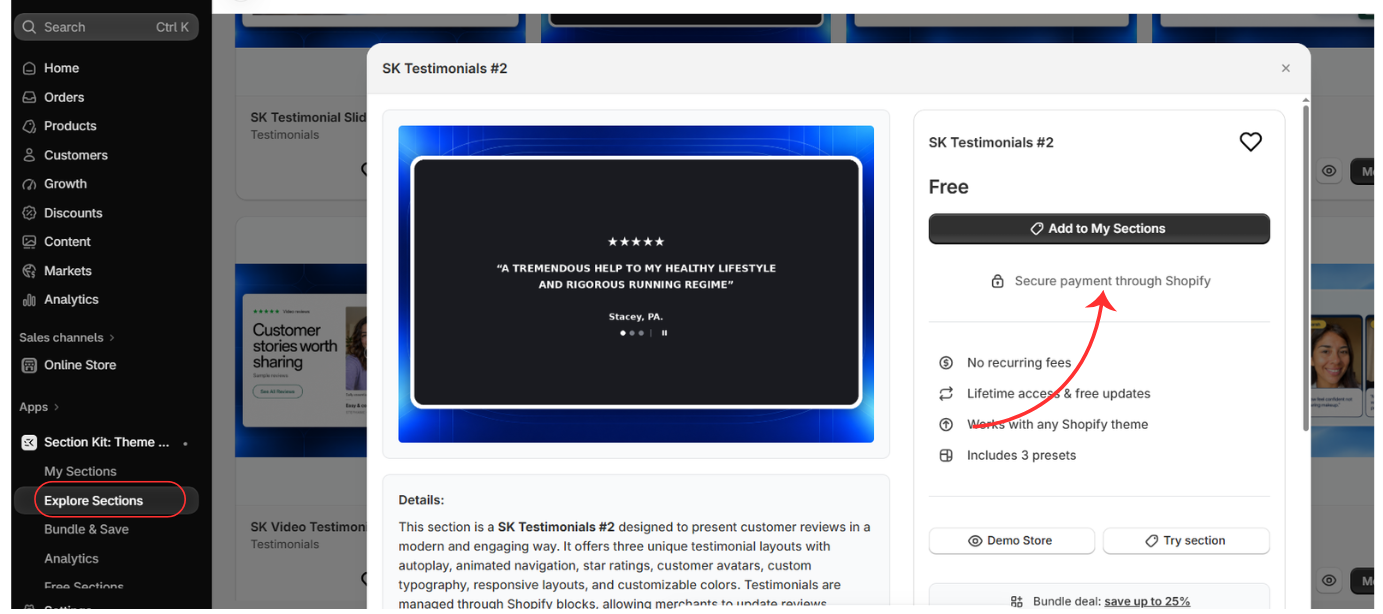
Open SK Testimonials #2. In the supplied screet, its price is listed as Free.
Click Add to My Sections to add it to yourn library.
Premium testimonial section
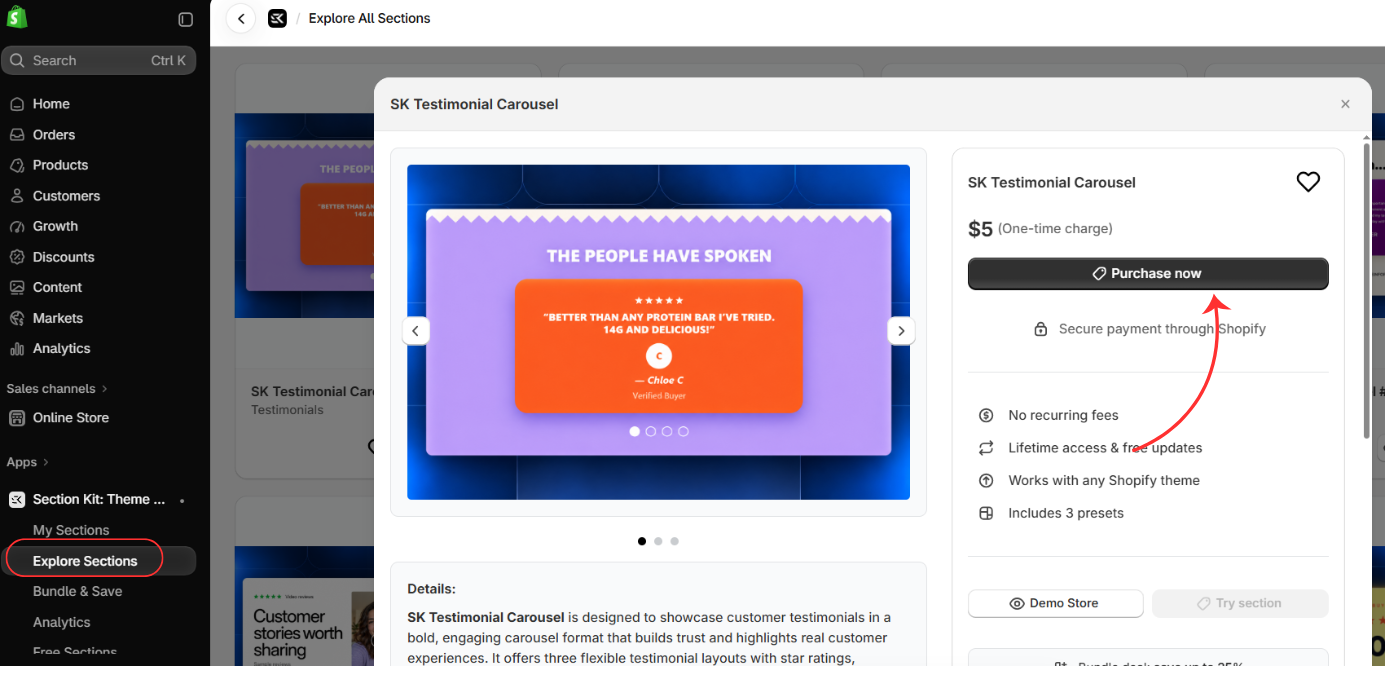
The SK Testimonial Carousel screenshot shows a paid design with a Purchase now button and a one-time charge.
If you prefer a premium design, review its preview, included presets, and current price. Click Purchase now and complete the purchase prompts.
You do not need to purchase a premium section to follow the remaining steps with the free example.
Step 4: Install the Section to Your Chosen Theme
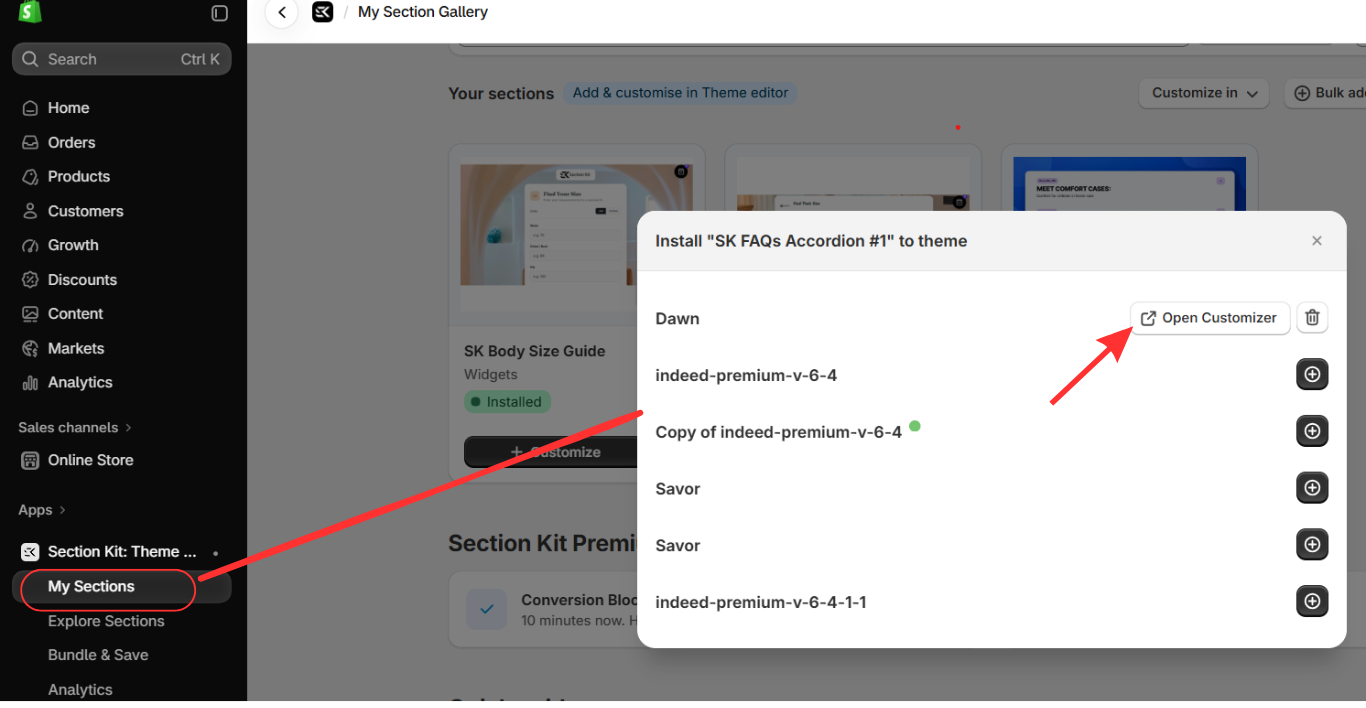
Go to My Sections and find the testimonial section you added.
Use the section’s installation or customization control to open the theme selection window. Choose the theme you want to edit, then install the section if it has not already been installed.
The theme selection screenshot shows a plus button beside themes available for installation and Open Customizer beside an installed theme.
Once your testimonial section is installed, click Open Customizer for that theme.
The supplied installer screenshot displays an FAQ section. It illustrates the theme selection workflow; for this tutorial, select your testimonial section instead.
Step 5: Add the Testimonial Section to the Homepage
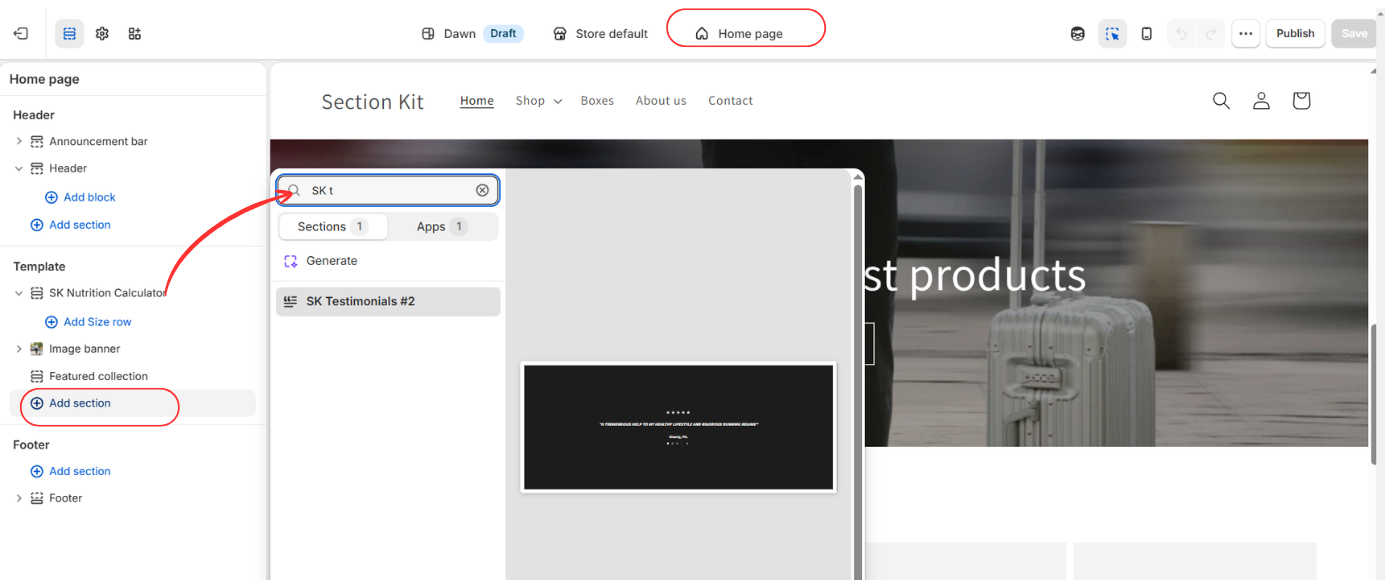
In the Shopify Theme Editor, select Home page from the page selector at the top.
In the left sidebar, click Add section within the Template area. This places the testimonials in the homepage content rather than in a shared header or footer.
Search for the installed section. The screenshot shows SK Testimonials #2 appearing after a search beginning with “SK t.”
Click the section name to add it to your homepage.
You can then drag the section into position. A useful starting point is below a featured collection or product benefits section, where customer feedback can support what visitors have just seen.
Expand SK Testimonials #2 in the left sidebar and click Add Testimonial.
Open each testimonial block and replace the demonstration content with your own customer feedback. Complete the fields available in your chosen layout, such as the quote, customer name, rating, or image.
Repeat the process for additional testimonials.
Step 6: Customize the Design and Save
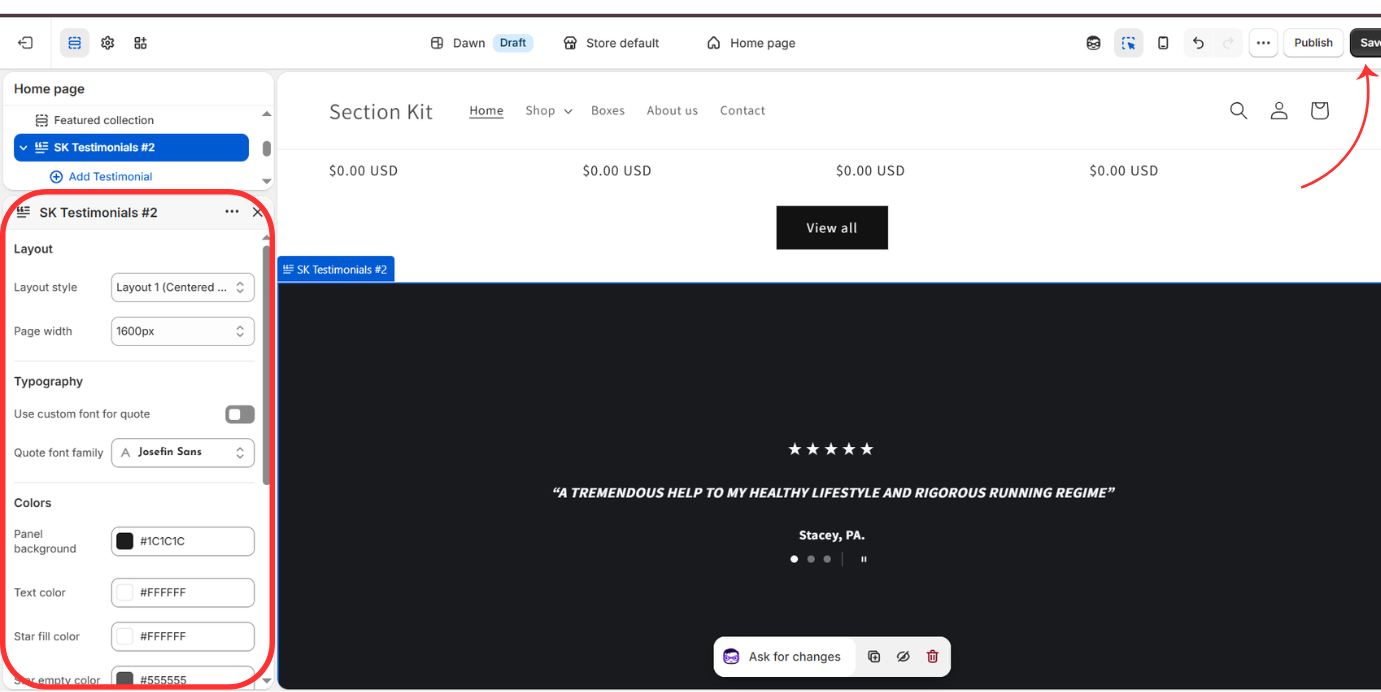
Click the testimonial section to open its settings.
The supplied Image shows controls for:
- Layout style: Choose the presentation that suits your homepage.
- Page width: Adjust the width of the section.
- Typography: Customize the quote font using the available controls.
- Panel background: Match the section background to your brand.
- Text color: Keep testimonial text easy to read.
- Star colors: Adjust the filled and empty star colors.
Settings vary by section, so use the controls available in the design you selected. Keep quotes readable and avoid making text too small simply to fit more content.
Preview the homepage on desktop and mobile before finishing.
Click Save, as shown in the final screenshot.
The images show a theme marked Draft. Saving a draft theme preserves your edits, but does not make that theme your live storefront. Publish the theme when you are ready to use it. If you are editing your current published theme, saving applies the changes to that theme.
Finally, open your storefront and confirm the testimonials appear in the intended position.
Tips for Better Homepage Testimonials
Choose feedback that explains something useful about your products or service. Specific comments help shoppers understand what to expect.
Keep quotes concise without changing their meaning. Use customer photos only with permission, and select testimonials that reflect your current products and shopping experience.
Give the section a clear place in the homepage journey. Testimonials should support your product information while leaving visitors an easy route to continue shopping.
Frequently Asked Questions
Can I add testimonials without coding?
Yes. With a premade Section Kit testimonial section, you can add the section and edit its available settings through the Shopify Theme Editor without manually writing theme code.
Can I add a testimonial section for free?
The supplied screenshots show SK Testimonials #2 as a free option. Section availability and pricing can change, so check the app before selecting a design.
Can I change the colors and fonts?
Yes. The example shows controls for layout, page width, quote typography, background color, text color, and star colors. Other designs may offer different settings.
Will saving the section publish a draft theme?
No. A draft theme must be published before it becomes your live storefront.
Give Your Customers a Voice on Your Homepage
Adding customer testimonials gives visitors a way to learn from people who have already purchased from your store.
With Section Kit, you can choose a testimonial design, install it to your theme, add it to the homepage, and customize it in Shopify’s editor. Use genuine customer feedback and a readable layout to make the section useful to your shoppers.
Explore the available sections here: Section Kit: Theme Sections.




