HOW TO ADD TRUST BADGES TO SHOPIFY PRODUCT PAGES
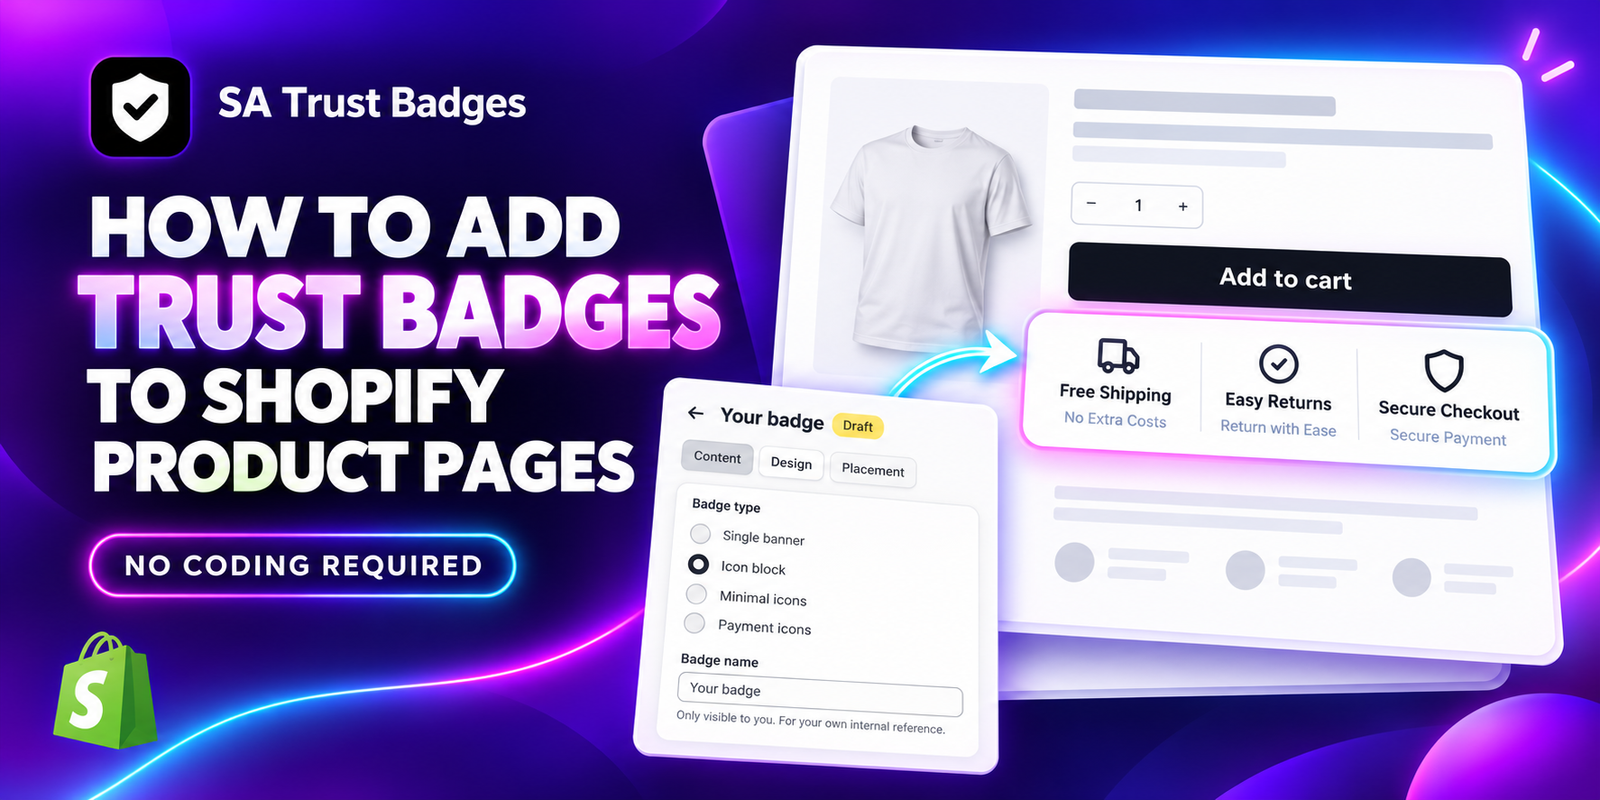
A shopper can like your product and still hesitate before clicking Add to Cart. They may want to know whether payment is secure, how delivery works, or what happens if the item does not meet their expectations. When these answers are difficult to find, even a well-designed product page can leave customers uncertain.
Adding trust badges to Shopify product pages helps you present key information close to the buying decision. In this guide, you will learn how to use SA Trust Badges to create a badge block, customize its appearance, and display it through your theme’s app embed without manually editing theme code.
The problem: shoppers need reassurance
Product photos and descriptions explain what you sell, but they do not always answer the practical questions customers ask before ordering. Important details may be buried in a footer policy page or separated from the purchase buttons.
- Will there be additional shipping costs?
- Can I return the product, and under what conditions?
- Which payment methods can I use?
- Where can I find the store’s guarantees or support information?
This is especially relevant when visitors are buying from your store for the first time. A concise badge row can make your shipping, returns, and payment information easier to notice while keeping the product page tidy.
Why use a trust badge app?
Manually adding badge artwork means arranging icons, aligning text, and checking how the result looks on different screen sizes. Repeating that work across product templates can also make future updates harder to manage.
SA Trust Badges supports product and cart badges, payment icons, adjustable layouts, and styling controls. Its listing also describes product and collection targeting and integration through Shopify Theme App Embeds. These options give merchants a central place to manage their badge presentation. Feature access depends on the selected plan; check the current listing before choosing one.
Why badge placement matters
Badges work best when they communicate something useful at the point where a customer needs it. A compact row near the purchase controls can highlight delivery and return information without making shoppers search elsewhere.
Choose messages that accurately reflect your store. For example, use “Free Shipping” only where your shipping policy supports it, and make any return conditions easy to find. A secure-checkout icon communicates reassurance; displaying an icon does not create a new security feature or certification. Badges complement clear policies, reliable service, and a usable checkout, and do not guarantee an increase in sales.
Step 1: Install SA Trust Badges
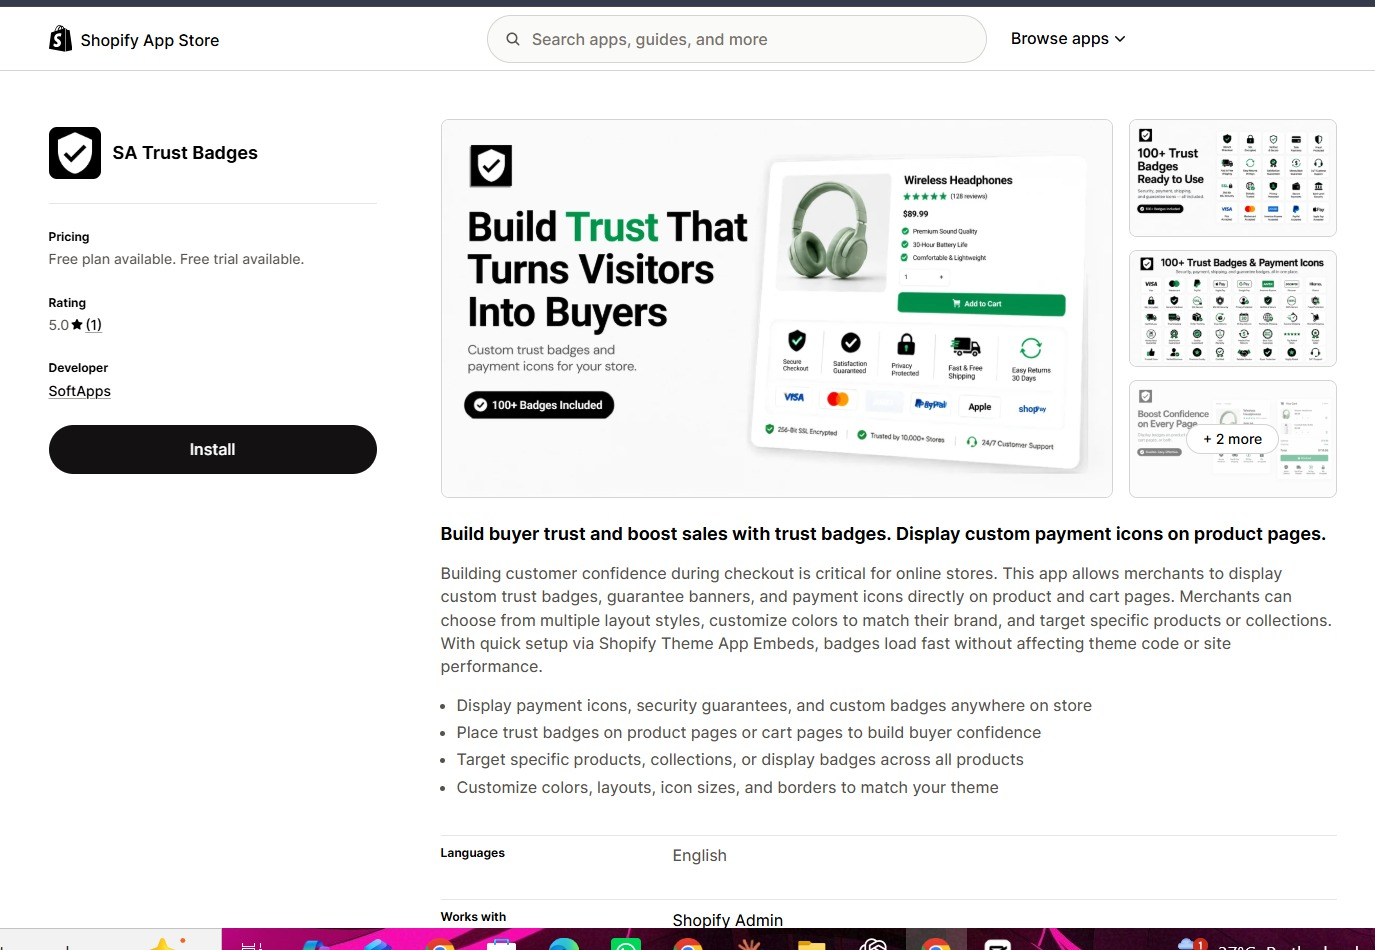
Open the SA Trust Badges Shopify App Store listing. Click Install, select your store if prompted, and review the installation details. After completing installation, open the app from your Shopify admin.
Check the available plan and usage limits against your store’s needs. Product-page badges are the focus of this tutorial; cart badges are an optional addition.
Step 2: Review the badge options
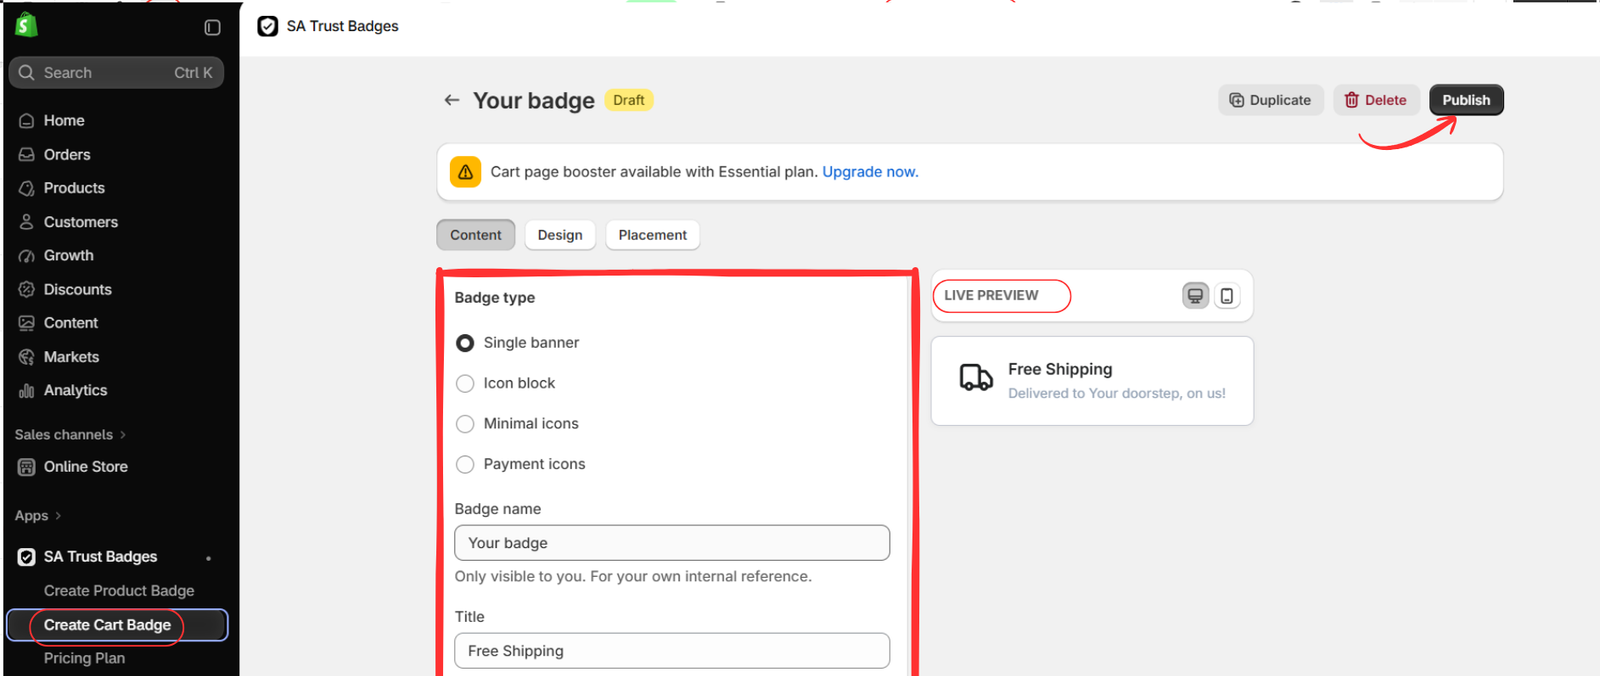
The second image shows Create Cart Badge. This is an optional cart-page setup, rather than the product-page editor used in the next step. It is included here in the supplied image order so you can see how the badge options are organized.
The visible badge types are Single banner, Icon block, Minimal icons, and Payment icons. A single banner highlights one message, while an icon block groups several short messages. In this example, the single banner displays “Free Shipping” in the live preview.
If you also want a cart badge, enter an internal badge name, add appropriate customer-facing content, review the Design and Placement settings, and publish when ready. The image contains a plan notice for cart functionality; confirm current eligibility in your app. You can skip creating a cart badge and continue directly to the product badge below.
Step 3: Create and publish your product badge
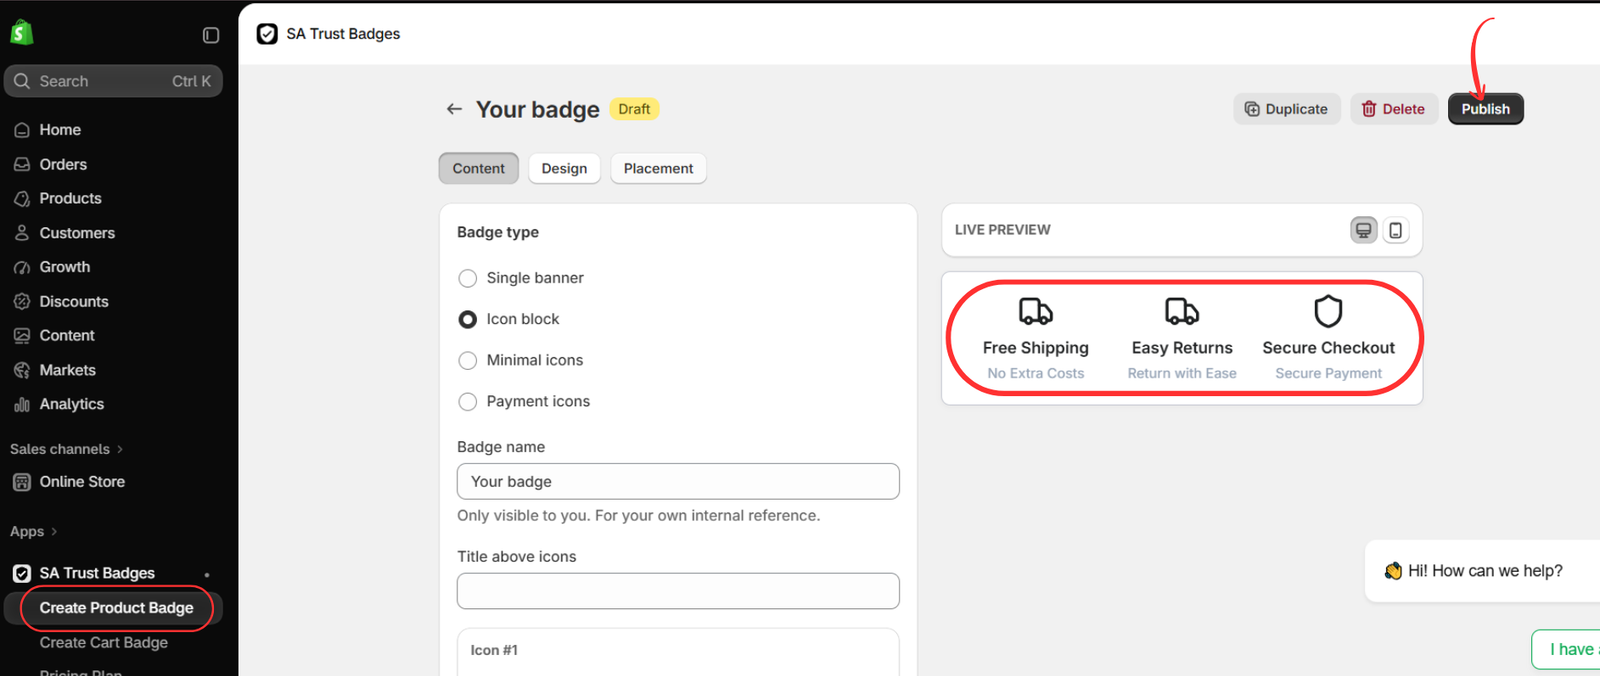
Select Create Product Badge in the app menu. Choose Icon block to create a row like the one shown in the third image. Give the badge a clear internal name so you can recognize it later.
Add the icons and short messages you want to display. The example preview contains three items: Free Shipping, Easy Returns, and Secure Checkout. Adjust these messages to match your actual store policies, and choose icons that clearly represent each one.
- Complete the icon content and supporting text in the Content tab.
- Open Design and adjust the available styling settings to suit your theme.
- Open Placement and configure the product-page display using the available controls.
- Review the desktop and mobile previews.
- Click Publish when the badge is ready.
Publishing the badge in the app is one part of setup. You must also enable the app embed in the theme where you want it to appear.
Step 4: Open your theme editor
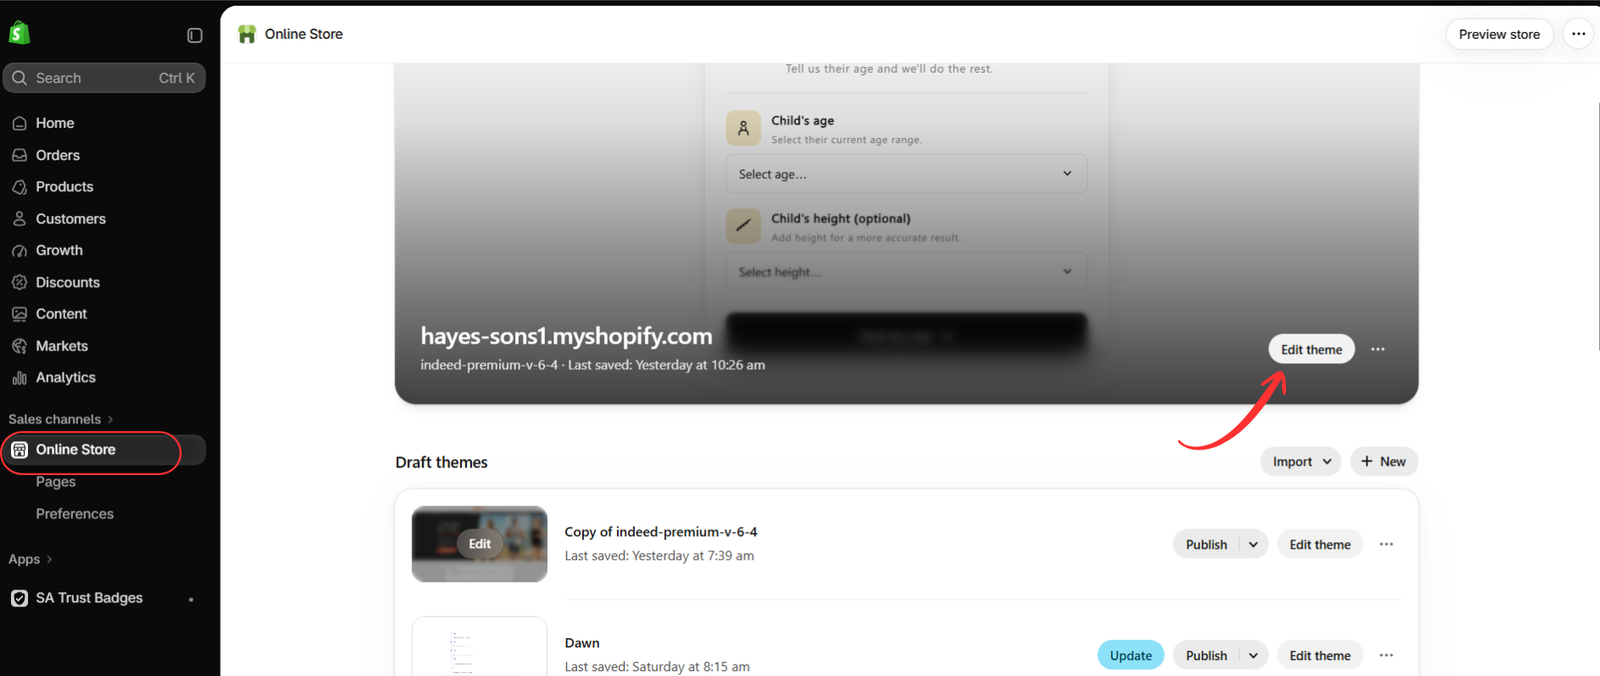
In Shopify admin, go to Online Store → Themes. Find the theme where you want to display your badges and select Edit theme, as shown in the fourth image. Depending on your admin interface, the button may be labeled Customize.
Check that you are editing the intended theme. If you configure a draft theme, review the result in that theme’s preview before expecting the badge to appear on your live storefront.
Step 5: Enable the embed and save
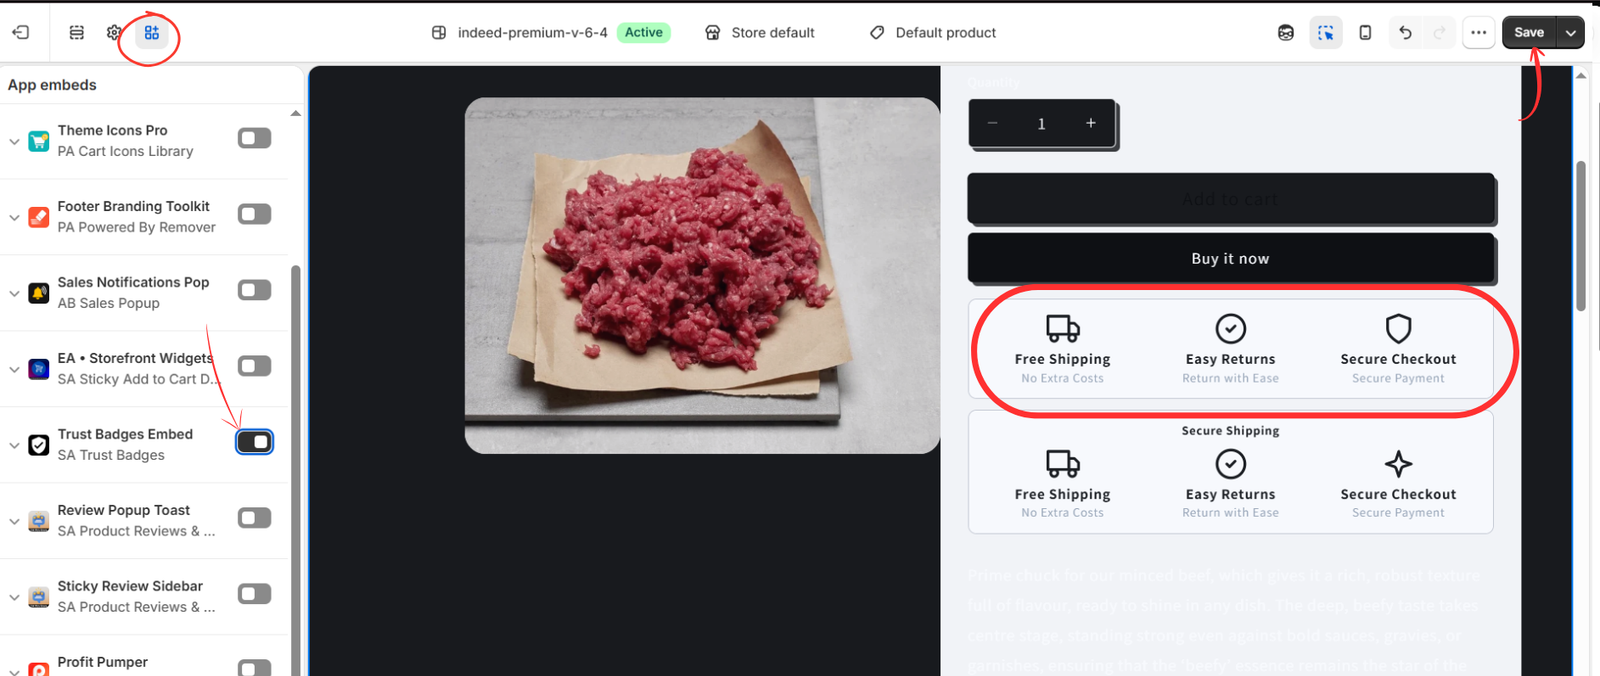
In the theme editor, open App embeds. Find Trust Badges Embed under SA Trust Badges and turn it on. Open a product-page preview to check the placement, then click Save.
The fifth image shows the trust badge row beneath the product purchase buttons. Confirm that your icons and text remain readable on both desktop and mobile and that the badge does not overlap other product information.
Check the finished product page
Open a relevant product on your storefront and refresh the page after saving. Check the messages, spacing, and visibility on a phone as well as a desktop. If you use several product templates or target selected products, review representative pages rather than checking only one item.
If the badge does not appear, confirm that it is published in the app, the embed is enabled in the correct theme, and the placement settings include the product you are viewing. Also check your plan limits. If you see duplicate badge rows, review existing badges and other theme content to keep the page clean.
Make trust information easy to find
Trust badges can give shoppers a quick overview of your store’s delivery, returns, and payment information. Keep the wording concise, choose a design that fits your product page, and support each message with clear policies.
To begin, visit SA Trust Badges on the Shopify App Store and follow the image sequence above to create, publish, and display your product-page badge.
App feature reference: SA Trust Badges official listing. Interface examples follow the supplied images; labels and plan availability may change.




