How to Create a Custom Shopify Theme from Scratch
So you want to build a custom Shopify theme from scratch. Maybe you’re tired of your store looking like every other Shopify store out there. Maybe a client asked you to build something unique. Or maybe you just want full control over how your store looks, feels, and performs.
Whatever your reason, I’m going to walk you through this the same way I’d explain it to a friend over coffee no jargon heavy textbook talk, just real, practical steps.
By the end of this guide, you’ll understand exactly what goes into Shopify theme development, how the file structure works, what tools you need, and how to actually build and launch your own custom Shopify theme without losing your mind.
Let’s get into it.
Why Build a Custom Shopify Theme in the First Place?
Before we dive into the “how,” let’s quickly talk about the “why,” because it matters.
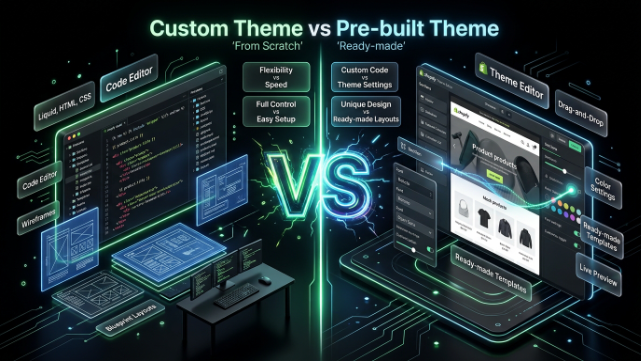
Shopify’s theme store has hundreds of ready made themes. Some are free, some cost a hundred bucks or more. So why bother learning how to create a custom Shopify theme when you could just buy one and slap your logo on it?
Here’s the thing:
- Uniqueness A custom theme means your store doesn’t look like the other 10,000 stores using the same template.
- Performance Pre built themes often come loaded with features you’ll never use, which slows your site down. A custom built theme only has what you actually need.
- Full control You decide exactly how every section, every button, and every page behaves. No fighting with someone else’s code structure.
- Scalability As your business grows, a custom theme grows with you instead of forcing you into someone else’s limitations.
- Branding Your store becomes a true reflection of your brand identity, not a copy paste template with your colors swapped in.
If any of that sounds appealing, you’re in the right place. Let’s talk about what you actually need before starting.
What You Need Before You Start Building a Shopify Theme
You don’t need to be a coding wizard, but you do need some basics in place. Here’s your starter checklist:
- A Shopify account (a development store works great for testing Shopify gives these out free through the Partner Dashboard).
- Basic knowledge of HTML, CSS, and JavaScript. You don’t need to be an expert, but you should be comfortable reading and writing simple code.
- Shopify Liquid this is Shopify’s own templating language. It’s what connects your design to your store’s actual data (products, collections, cart, etc.).
- Shopify CLI a command line tool that makes theme development way faster and easier.
- A code editor like VS Code (free and works great for Shopify projects).
- Git (optional but recommended) for version control, especially if you’re working with a team.
If you’re missing some of these skills, don’t worry. You’ll pick up a lot just by doing this project. Think of this as learning by building, not learning by watching tutorials forever.
Understanding Shopify’s Theme Architecture
This part trips up a lot of beginners, so let’s slow down here.
Every Shopify theme whether it’s a free one from the theme store or something built completely from scratch follows the same basic folder structure. Once you understand this, everything else becomes much easier.
Here’s what a typical Shopify theme folder looks like:
- /layout Contains the main
theme.liquidfile, which is basically the skeleton every page is wrapped inside. Think of it as the master template. - /templates These control individual page types like product pages, collection pages, the cart, and the homepage.
- /sections Reusable, customizable blocks of content (like a hero banner, featured products, testimonials, etc.) that store owners can add, remove, or rearrange in the theme editor.
- /snippets Small reusable pieces of code you can call from multiple places, like a product card or a star rating snippet.
- /assets This is where your CSS, JavaScript, images, and fonts live.
- /config Contains
settings schema.json, which powers the customizable settings in the Shopify theme editor (colors, fonts, layout options, etc.). - /locales Translation files for multi-language stores.
Once this structure clicks in your head, building a custom Shopify theme stops feeling overwhelming and starts feeling like assembling building blocks.
Step 1: Set Up Your Development Environment
First things first get your tools ready.
- Install Node.js (needed to run Shopify CLI).
- Install the Shopify CLI by running this in your terminal:
npm install g @shopify/cli @shopify/theme - Log into your Shopify Partner account and create a development store if you don’t already have one. This gives you a safe sandbox to build and test without affecting a live store.
- Connect Shopify CLI to your store using:
shopify theme dev --store=your store name.myshopify.com
This command actually spins up a live preview of your theme locally, so you can see changes in real time as you code. It’s honestly one of the best parts of modern Shopify theme development no more uploading files manually and refreshing the page over and over.
Step 2: Decide Your Starting Point Truly From Scratch or Using Dawn?
Here’s something a lot of guides don’t tell you clearly: “from scratch” doesn’t always mean starting with a completely blank folder.
Shopify actually recommends starting with Dawn, their official free reference theme, and stripping it down to build your own custom design on top of it. Why? Because Dawn already follows Shopify’s best practices for speed, accessibility, and the newer Online Store 2.0 features (like flexible sections on every page, not just the homepage).
You have two real options:
Option A: Start completely blank. You create your own folder structure manually, write every Liquid file from zero. This gives you total control but takes much longer and it’s easy to miss important Shopify conventions.
Option B: Start from Dawn and strip it down. You clone Dawn, delete the sections and styles you don’t need, and build your custom design using its solid foundation. This is faster, safer, and still results in a fully custom theme once you’re done because you’ll be rewriting the templates, sections, and styling anyway.
Most professional Shopify developers actually go with Option B. It’s not cheating it’s smart. Even “custom” doesn’t mean reinventing wheels that Shopify already built well, like cart AJAX functionality or accessibility features.
To clone Dawn:
git clone https://github.com/Shopify/dawn.git my-custom-theme
cd my custom theme
shopify theme dev
Step 3: Plan Your Design Before Writing Code
I know it’s tempting to just start coding right away, but trust me on this one sketch out your homepage, product page, and collection page layout first. Even a rough wireframe on paper or in Figma will save you hours of back and forth later.
Ask yourself:
- What sections does my homepage need? (Hero banner, featured collections, testimonials, newsletter signup?)
- How should the product page be laid out? (Image gallery position, size chart, related products?)
- What’s my color palette and typography going to be?
- Will this be a minimal design or something bold and image-heavy?
Having this figured out before touching code makes the actual Shopify theme customization process so much smoother.
Step 4: Build the Layout File (theme.liquid)
The theme.liquid file in your /layout folder is the backbone of your entire theme. It includes your <head> tag, meta information, your header, footer, and a special tag called {{ content_for_layout }} where all your page-specific content gets injected.
A simplified version looks something like this:
<!doctype html>
<html>
<head>
  {{ content_for_header }}
  <title>{{ page_title }}</title>
</head>
<body>
  {% section 'header' %}
  <main>
    {{ content_for_layout }}
  </main>
  {% section 'footer' %}
</body>
</html>
Every single page on your store home, product, cart, blog flows through this file. Get this right, and everything else fits together nicely.
Step 5: Build Your Templates and Sections
This is where the real fun begins.
With Online Store 2.0, Shopify lets you build templates using JSON files that reference multiple sections. This means merchants (or you) can drag, drop, and rearrange sections without touching code which is a huge deal for flexibility.
For example, your templates/index.json (homepage) might reference sections like:
hero bannerfeatured collectionimage with texttestimonialsnewsletter
Each of these lives as its own .liquid file inside /sections, and each one can have its own settings schema, allowing store owners to change text, images, and colors right from the Shopify theme editor without needing a developer every time.
This modular approach is honestly the smartest way to build a custom Shopify theme today, because it keeps your code organized and makes future edits so much easier.
Step 6: Style Everything with CSS
Now it’s time to make it look good.
You can either write your own CSS from scratch inside the /assets folder, or use a preprocessor like Sass if you’re comfortable with build tools. Shopify doesn’t force any particular CSS framework on you that’s part of the beauty of custom theme development.
A few tips here:
- Keep your CSS organized by component (buttons, cards, headers) rather than one giant messy file.
- Use CSS variables for colors and fonts so your design stays consistent and easy to update later.
- Make sure everything is mobile responsive from the start don’t treat mobile as an afterthought. Most Shopify traffic today comes from phones.
Step 7: Add Interactivity with JavaScript
Not everything needs JavaScript, but some things definitely do things like:
- Mobile navigation menus
- Product image galleries and zoom
- Add-to-cart animations
- Quick view popups
- Filtering on collection pages
Keep your JavaScript lightweight. Avoid unnecessary libraries that bloat load times. A fast-loading store isn’t just nice to have it directly affects your search rankings and conversion rates.
Step 8: Set Up Theme Settings (settings schema.json)
This file is what powers the customization panel merchants see inside the Shopify admin under “Customize Theme.” It’s what lets you (or your client) change colors, fonts, and layout options without touching code.
A basic setting might look like this:
{
  "name": "Colors",
  "settings": [
    {
      "type": "color",
      "id": "color_primary",
      "label": "Primary Color",
      "default": "#000000"
    }
  ]
}
This is a small detail, but it’s what separates a truly professional custom Shopify theme from a hardcoded, rigid one.
Step 9: Test, Test, and Test Again
Before you even think about launching, go through this checklist:
- Test on multiple browsers (Chrome, Safari, Firefox, Edge)
- Test on real mobile devices, not just browser resize
- Check page load speed using tools like Google PageSpeed Insights
- Test your checkout flow end to end
- Check accessibility proper alt text, contrast ratios, keyboard navigation
- Validate your Liquid code for errors using
shopify theme check
This step is boring, I know, but skipping it is how stores end up with broken buttons and angry customers.
Step 10: Publish Your Custom Shopify Theme
Once everything checks out, it’s time to go live. You can publish your theme directly from the Shopify admin under Online Store > Themes, or push it live using the CLI:
shopify theme push --live
Take a deep breath — you just built a fully custom Shopify theme from scratch.
Common Mistakes to Avoid
Let me save you some pain by pointing out mistakes I see all the time:
- Ignoring mobile first design. Most shoppers are on phones. Design for small screens first, then scale up.
- Overloading the homepage with sections. More isn’t always better — it slows load time and overwhelms visitors.
- Skipping SEO basics. Use proper heading structure, alt text on images, and clean URLs.
- Not using a development store for testing. Never build directly on a live store.
- Forgetting about page speed. Heavy images and unnecessary apps kill performance fast.
- Not planning the design before coding. This leads to constant rework and wasted time.
Final Thoughts
Learning how to create a custom Shopify theme from scratch isn’t something you master overnight, but it’s absolutely doable even if you’re not a full-time developer. Start with the structure, lean on Dawn as a smart foundation, plan your design before coding, and test relentlessly before launch.
The payoff is worth it: a store that’s fast, unique, fully branded, and built exactly the way you want it not squeezed into someone else’s template.
Take it one section at a time, be patient with the learning curve, and before you know it, you’ll have a custom Shopify theme you’re genuinely proud of.
Good luck with your build you’ve got this.