HOW TO CREATE VOLUME DISCOUNTS FOR SHOPIFY PRODUCTS
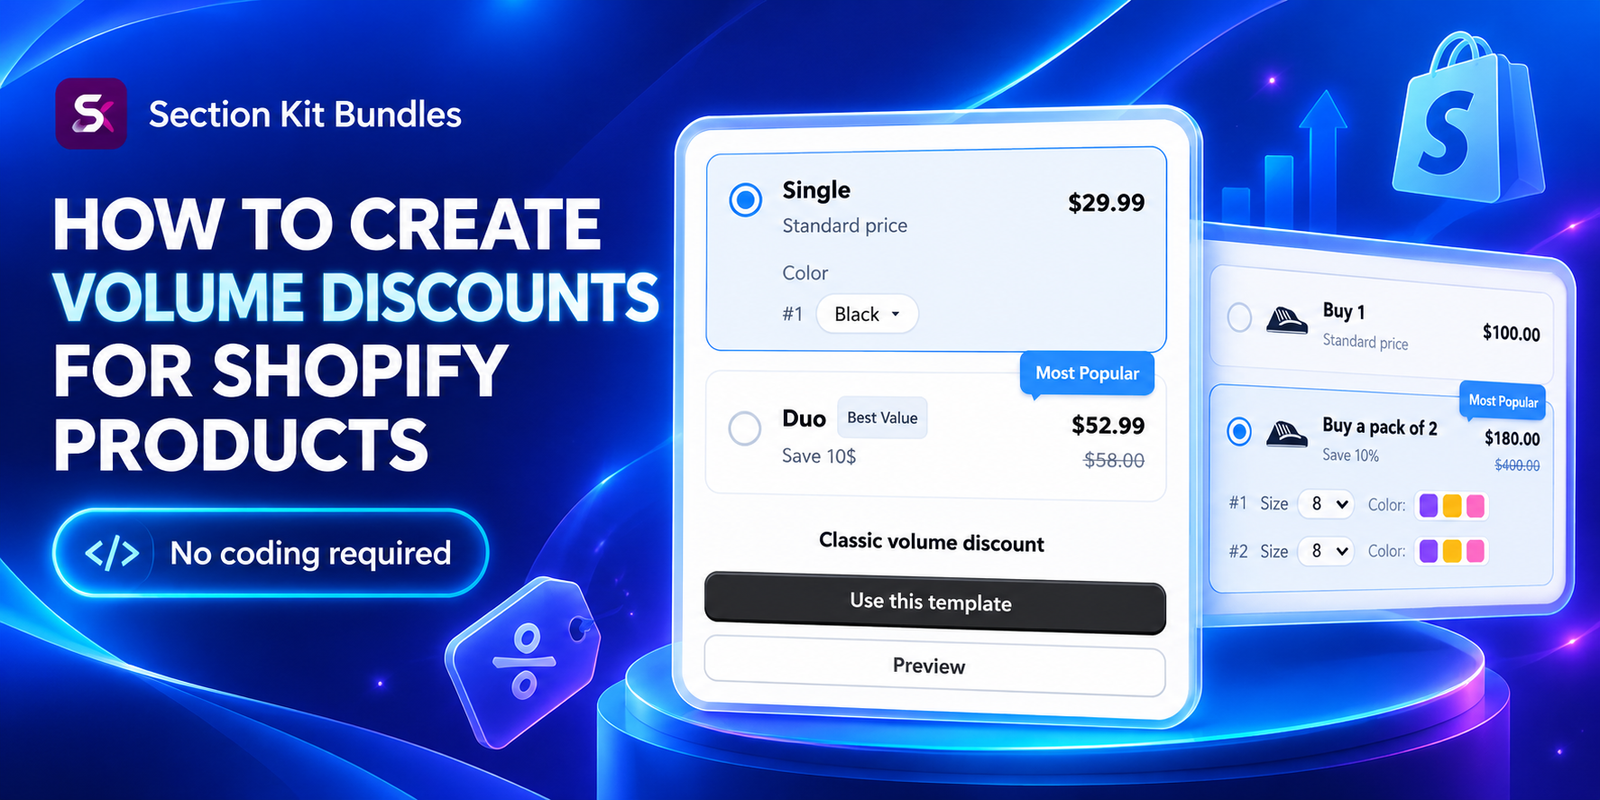
When shoppers have a reason to buy more than one unit, a volume discount can turn that interest into a larger purchase. A clear offer lets customers compare quantities and savings directly on the product page instead of calculating the benefit themselves.
This guide explains how to create volume discounts for Shopify products using Section Kit Bundles. You will learn how to plan your tiers, select a template, publish the offer, and enable it on your storefront. The seven images appear in the exact order supplied.
The Merchant Challenge: Small Orders and Unclear Offers
Attracting visitors costs time and money. If customers usually purchase only one item, acquisition and fulfillment costs can consume much of the order margin. Offering a discount on every purchase may lower profit without encouraging a larger basket.
The presentation can create another problem. A promotion hidden in a banner or explained only at checkout may be overlooked. Customers need to understand what quantity qualifies, what they will pay, and how much they save. Merchants also need consistent pricing rules that work through the product page, cart, and checkout.
What Is a Volume Discount?
A volume discount rewards customers for purchasing a larger quantity. You define quantity tiers and assign savings to qualifying tiers. For example, one item can remain at the regular price, two items can receive 10% off, and three items can receive 15% off.
| Quantity | Illustrative discount | Price per unit | Order total |
|---|---|---|---|
| 1 | None | $20 | $20 |
| 2 | 10% | $18 | $36 |
| 3 | 15% | $17 | $51 |
These numbers illustrate the calculation; they are not the prices in the app images. Set your own tiers based on product costs, customer demand, and fulfillment expenses.
Why Use Section Kit Bundles?
Section Kit Bundles supports volume discounts and quantity breaks, alongside BOGO offers and product bundles. Its product-page widgets help present the available offers, and merchants can customize colors and typography without coding. The app also offers campaign management and performance tools.
For this workflow, choose the Volume Discount category and a suitable template. A dedicated widget helps keep the quantity choices and pricing together where customers make their purchasing decision.
Why Volume Discounts Matter
- Make larger purchases worthwhile: clearly show the savings available at a higher quantity.
- Support higher average order value: customers who need multiple units can choose a larger order.
- Serve repeat-use products: replenishment items can suit multipack offers.
- Improve offer clarity: show quantities, totals, and savings in one place.
The result depends on the product and the economics of the offer. Measure profit after discounts, shipping, and fulfillment rather than assuming that a higher order total is automatically better.
Plan Your Discount Tiers
- Choose products that customers have a practical reason to purchase in multiples.
- Start with a small number of easy-to-compare tiers.
- Check stock and variant availability for the quantities offered.
- Calculate margin after the proposed discount and any extra fulfillment cost.
- Decide which products, collections, and markets should see the promotion.
Keep a written record of the intended quantity, discount, total price, and savings for each tier. This makes it easier to catch pricing or label mistakes during the preview and checkout test.
Step 1: Install Section Kit Bundles
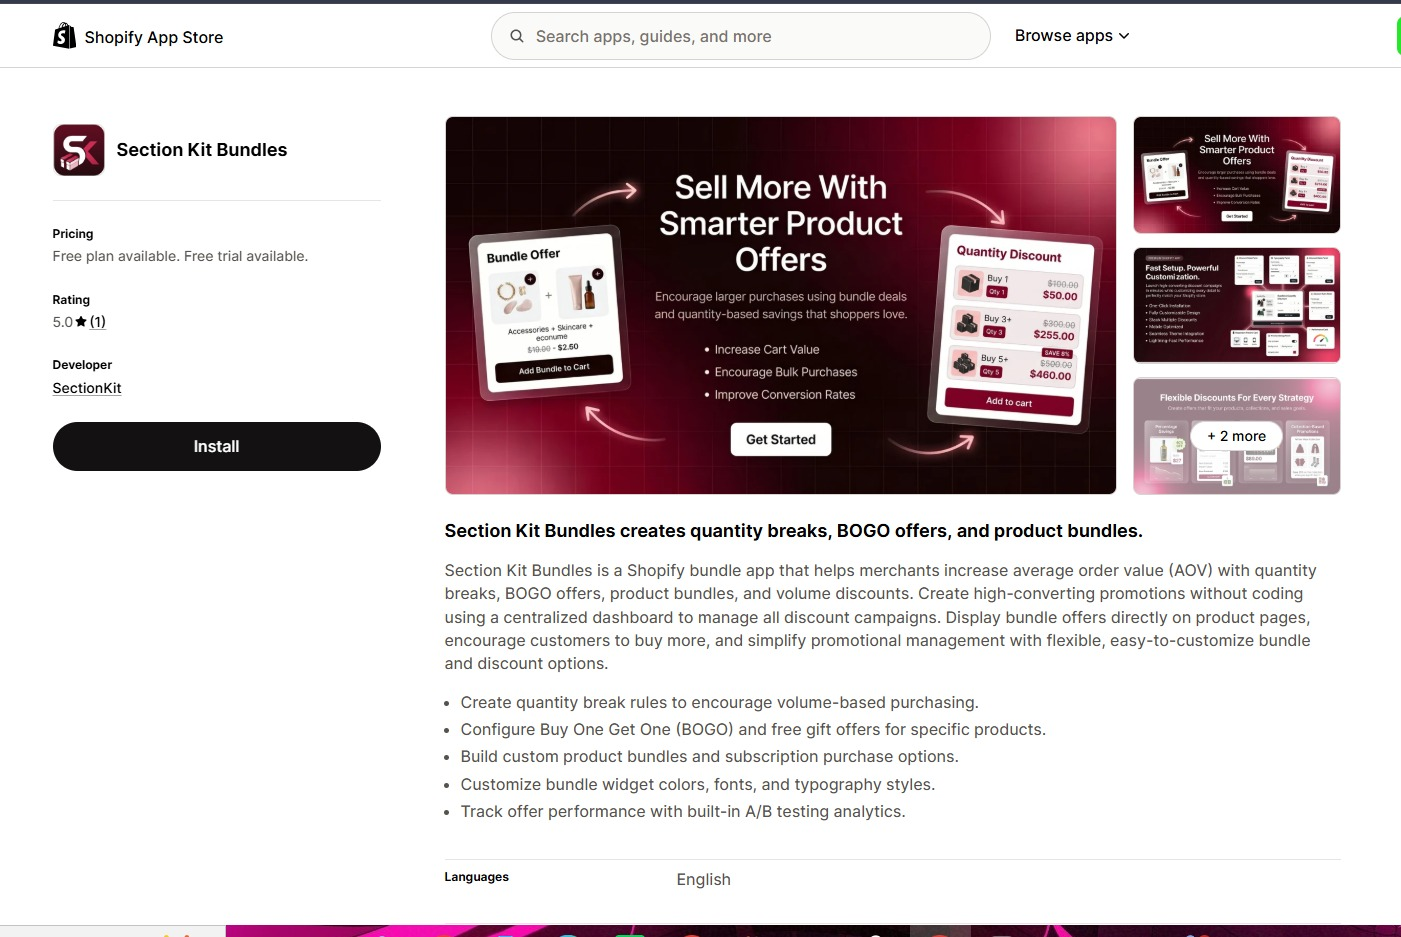
Open the Section Kit Bundles Shopify App Store listing and click Install. Select the appropriate store if prompted, review the requested access, and complete installation. Open the app from Shopify admin.
Step 2: Create a New Bundle
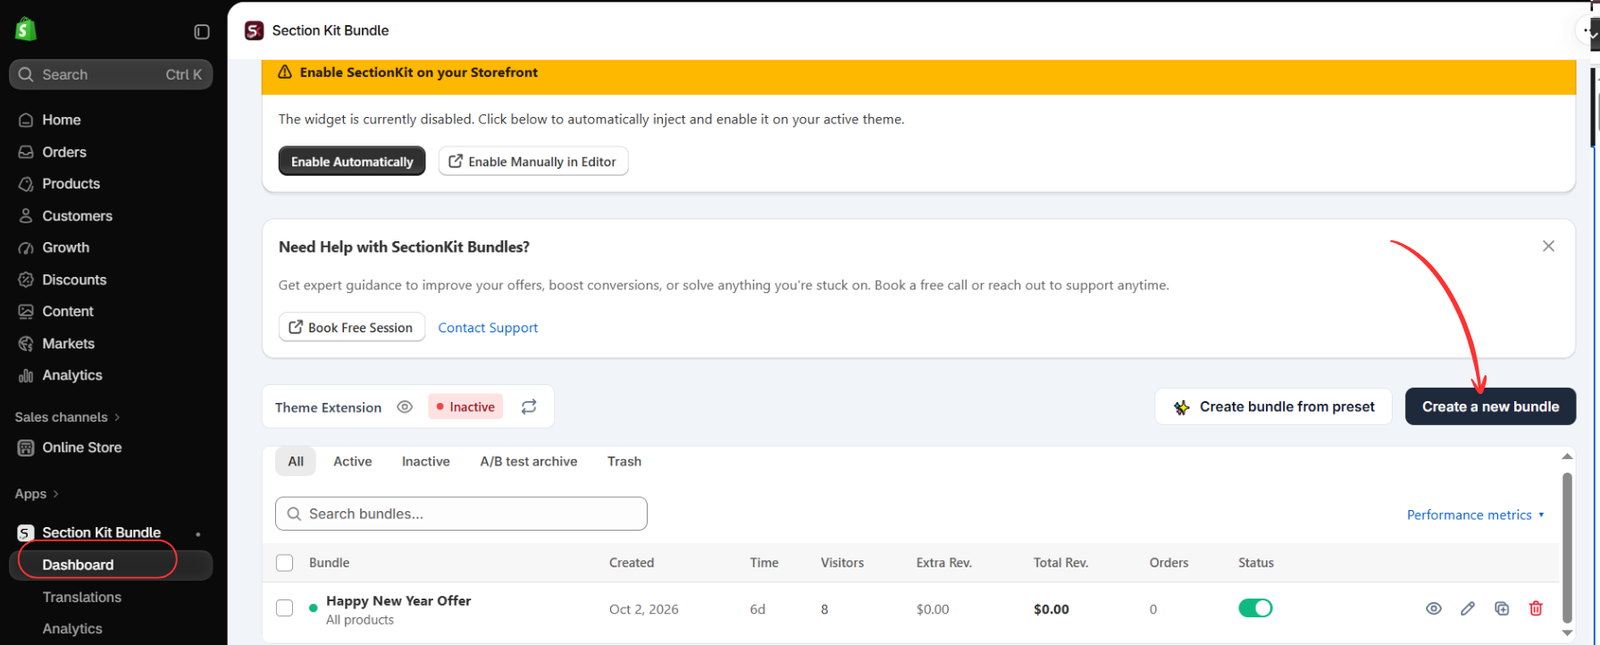
Navigate to Apps → Section Kit Bundle → Dashboard. Click Create a new bundle, highlighted in the image, to begin the setup process.
The dashboard also shows that the theme extension is inactive. You will need to enable the storefront integration before customers can see the widget. The last two images show how to open the theme editor and save the app embed.
Step 3: Choose a Volume Discount Template
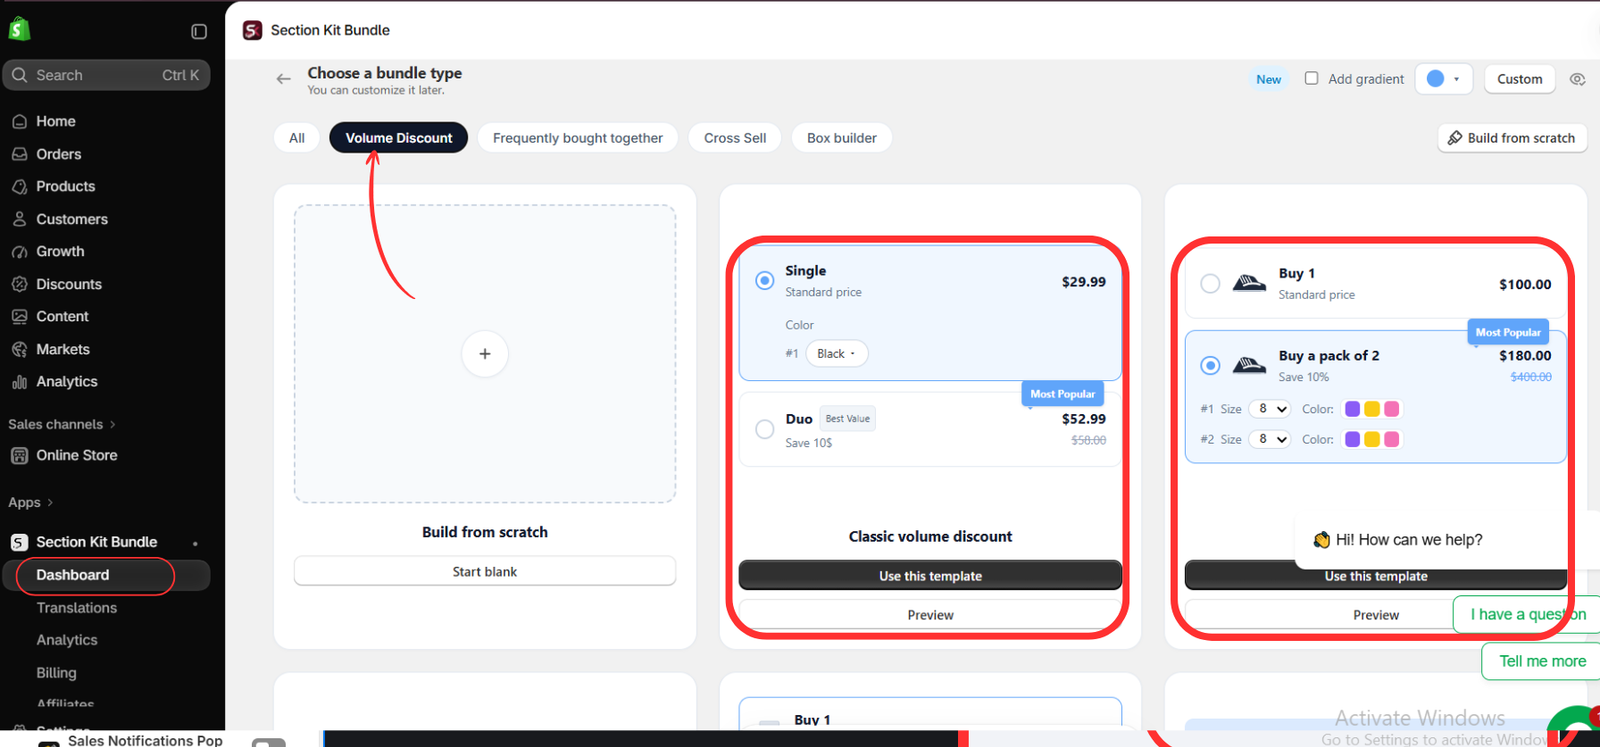
Select the Volume Discount category. The image highlights Classic volume discount and another layout with a pack-of-two offer and color swatches. Choose the layout that suits your product and click Use this template. Classic volume discount is a straightforward starting point.
In the editor, open the offer controls and configure the quantity and pricing for each tier. Enter your planned values, then verify the resulting totals in the preview. The supplied image shows template selection rather than the detailed pricing fields, so follow the actual controls available in your editor.
Use labels that explain the purchase, such as “Buy 1,” “Buy 2 — Save 10%,” and “Buy 3 — Save 15%.” Check whether a price field or label represents a per-unit amount or the total tier price. The template previews contain example values; calculate and verify your own savings before using them.
Step 4: Locate the Offer and Open Its Editor
The fourth image shows a created campaign in the dashboard. Locate your offer and click the pencil icon to edit it. The green status toggle indicates that the example offer is enabled.
Review the campaign before leaving it active. An enabled dashboard toggle does not by itself activate an inactive theme extension. Confirm both the offer status and the storefront integration before launch.
Step 5: Set Visibility, Customize the Widget, and Publish
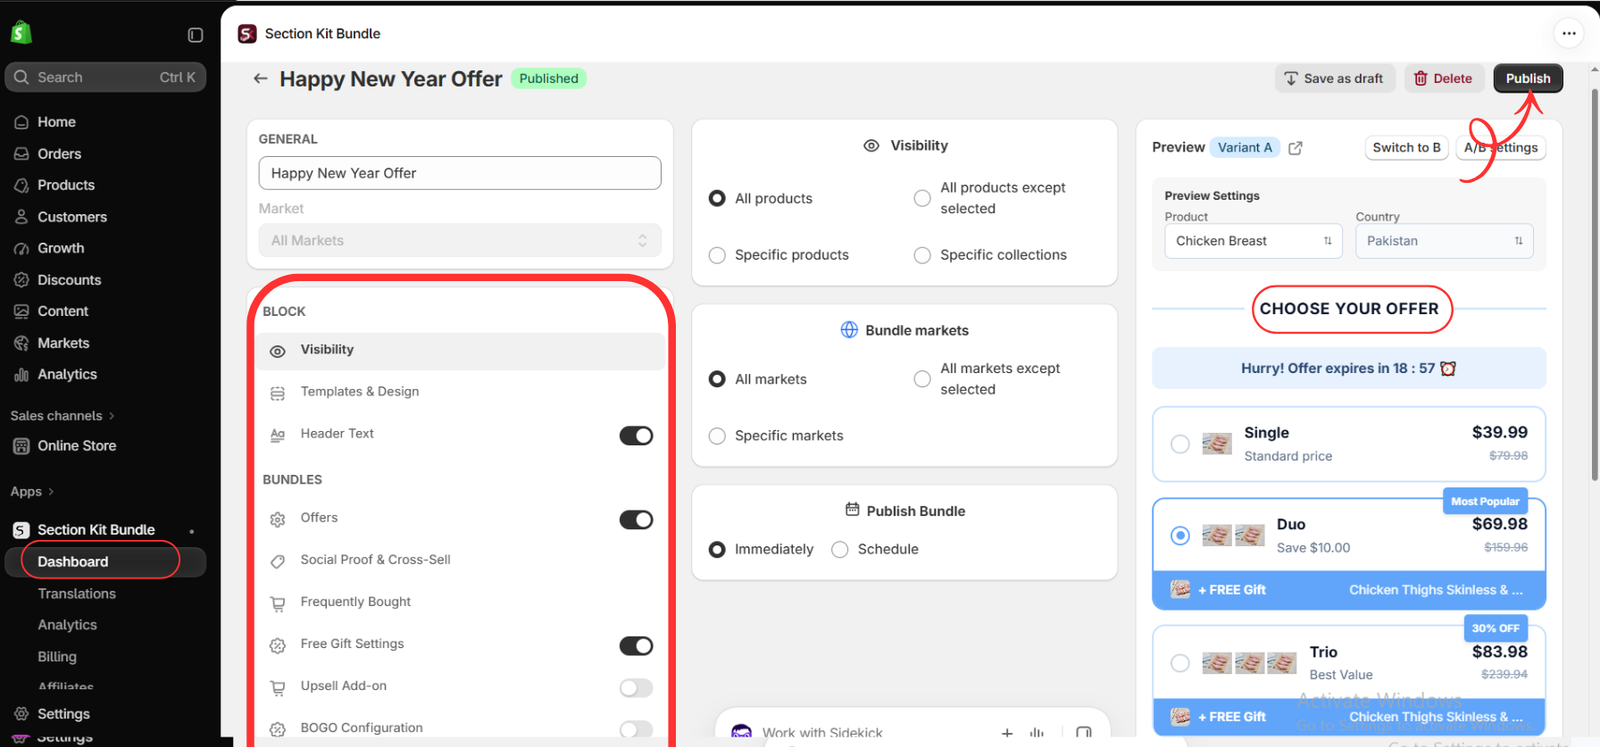
Give your offer a clear internal name. Under Visibility, select the appropriate scope: all products, specific products, specific collections, or exclusions. Under Bundle markets, select the intended markets.
Use Templates & Design and Header Text to make the widget readable and consistent with your store. Confirm that Offers is enabled. Under Publish Bundle, choose Immediately or Schedule as appropriate, then review the product and country selected in the preview.
The image includes optional free-gift components. A basic volume discount does not require these. Keep only the components that belong to your campaign, verify the configured tiers, and click Publish.
Step 6: Open Your Theme Editor
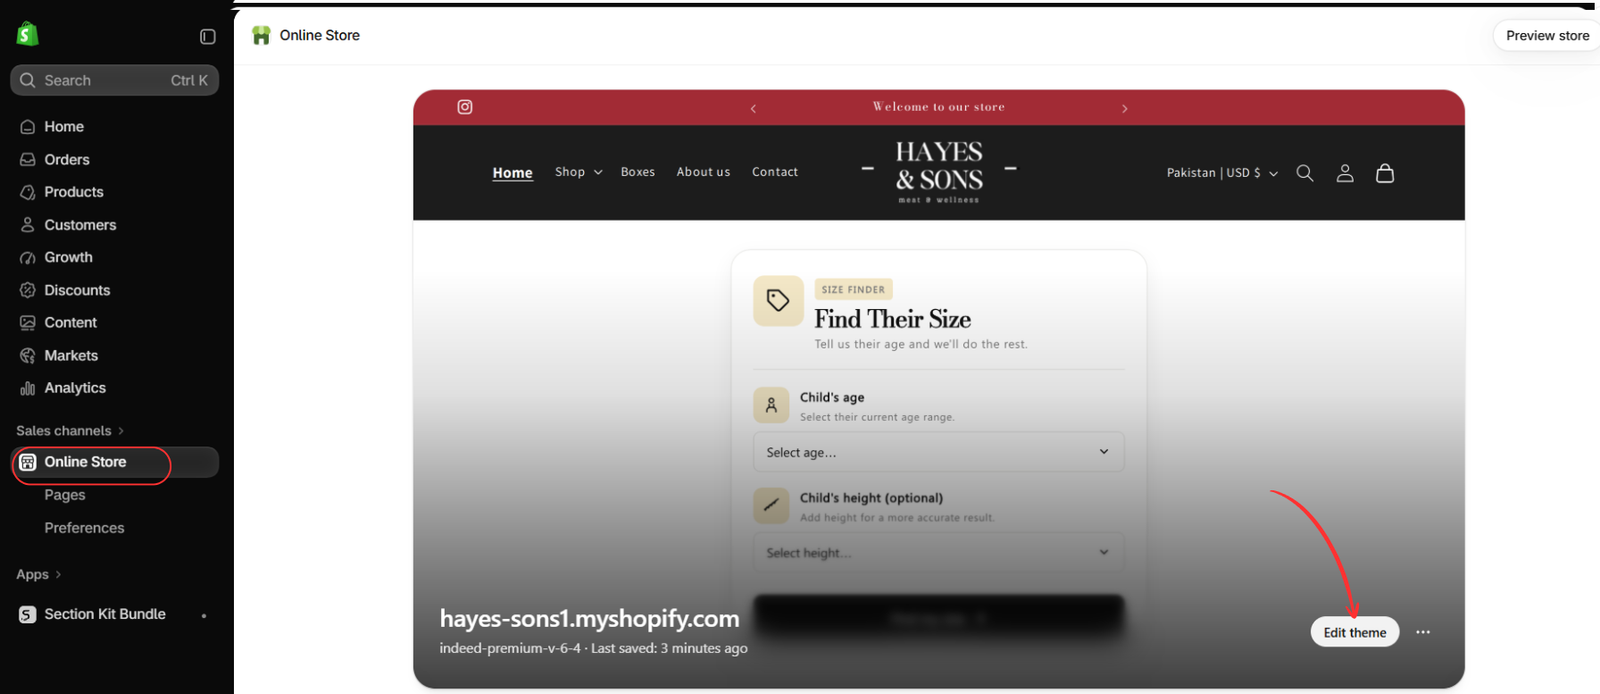
In Shopify admin, open Online Store and locate the relevant theme. Click Edit theme, as highlighted in the sixth image. This takes you to the theme editor, where you can check the app integration and product-page presentation.
Make sure you are editing the theme where you intend to display the campaign. The homepage preview in this image is simply the route to the editor; it is not the volume-discount widget.
Step 7: Enable the App Embed and Save
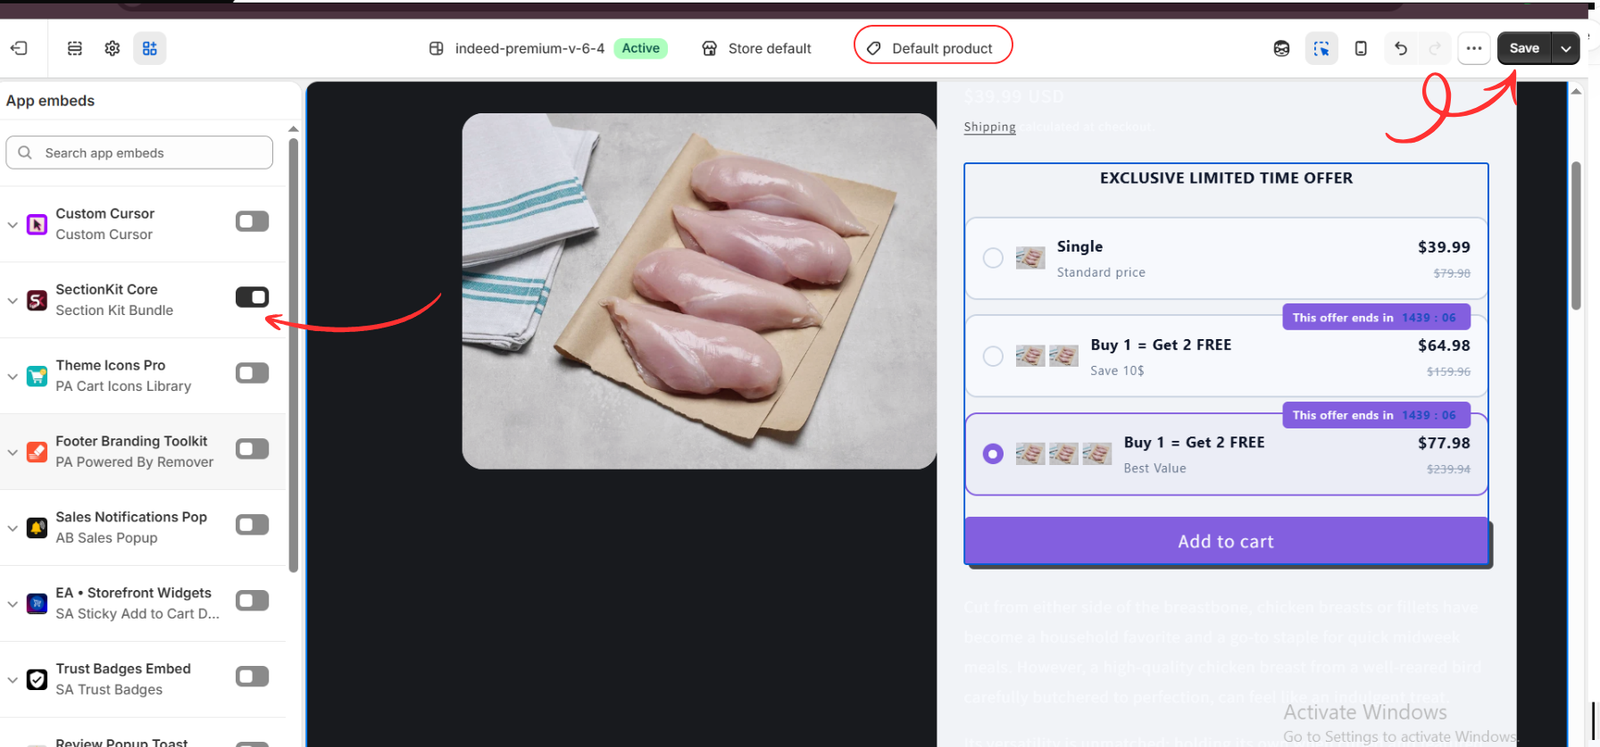
In the theme editor, open App embeds. Locate SectionKit Core — Section Kit Bundle and turn it on. View the relevant product template; the image highlights Default product. Click Save to retain the change.
Check the product-page offer on desktop and mobile. The final image includes BOGO wording in its example tiers and prices that differ from the earlier preview. For a volume-discount campaign, replace unrelated labels with your actual quantity and savings information. Use your configured rules as the reference and confirm the resulting cart and checkout totals.
Test Every Tier Before Launch
- Choose each offer tier and confirm that the correct quantity and variants reach the cart.
- Verify the actual discount and final total at checkout.
- Reduce the quantity and check that pricing follows the configured eligibility rules.
- Test a product outside the campaign scope to confirm targeting.
- Check the offer with other active promotions and discount codes.
- Confirm mobile readability and behavior when a variant is unavailable.
A preview helps assess the layout, but it does not replace a complete purchase-flow test. If the widget is visible but pricing is incorrect, review the offer settings and use the app’s support options before promoting the campaign.
Common Setup Issues
- The widget is missing: check publication, the offer toggle, product and market targeting, and the saved app embed.
- The savings do not match the price: recalculate the tier total and update the displayed labels.
- The offer describes free items: remove unrelated BOGO wording or settings from a simple volume-discount campaign.
- The discount reduces profit too much: revisit the percentage or qualifying quantity using actual costs.
Monitor and Improve the Offer
After launch, track average order value, units per order, discount cost, and profit per order. Compare results with a relevant earlier period and consider changes in traffic or seasonality when interpreting the numbers.
Adjust one meaningful element at a time, such as the second-tier discount or the quantity needed for the best value. Where your plan supports the relevant analytics or A/B testing tools, use them to evaluate the change. Keep an offer only when it is useful to shoppers and commercially worthwhile.
Conclusion
To create volume discounts for Shopify products, plan profitable quantity tiers, choose a volume-discount template, configure the offer, and publish it to the right products and markets. Enable the app embed, save your theme, and test the full buying flow before launch.
Explore Section Kit Bundles on the Shopify App Store to build a clear product-page offer that rewards customers for purchasing more.




