How to Customize Your Shopify Theme: A Beginner’s Guide
So you’ve picked a Shopify theme, maybe even paid for a premium one, and now you’re staring at it wondering how to actually make it look like your brand instead of every other store using the same template. This is where most beginners freeze up. Theme customization sounds technical, and honestly some of it can be, but a huge chunk of it is far more approachable than people assume.
This guide walks through everything from the basics of the theme editor to when you actually need custom code, written specifically for someone who’s never touched Shopify’s backend before.
Understanding What Shopify Theme Customization Actually Means
Before diving into the how, it helps to understand what you’re working with. A Shopify theme is essentially the visual template that controls how your store looks and feels. It handles your layout, colors, fonts, product page design, homepage structure, and navigation.
Customization can mean a lot of different things depending on how deep you want to go. On one end, you’ve got simple changes like swapping colors, uploading your logo, and rearranging homepage sections. On the other end, you’ve got custom coded sections, unique product page layouts, and functionality that didn’t come with the theme at all. Most beginners should start at the simple end and work their way up as they get comfortable.
Getting Familiar With the Shopify Theme Editor
Everything starts in your Shopify admin under Online Store, then Themes. From there you’ll see your current live theme along with any other themes you’ve installed but haven’t published yet. Click Customize on your active theme, and you’re inside the theme editor, which is where the majority of beginner friendly customization happens.
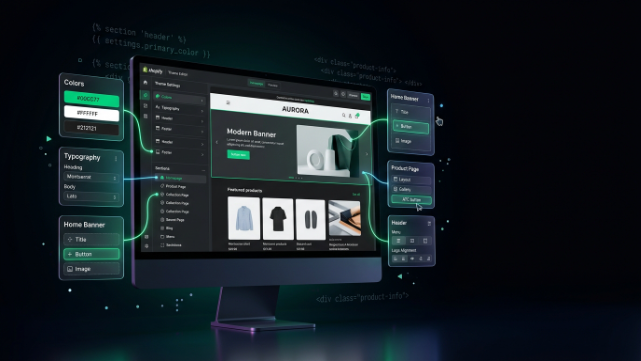
The theme editor works with a drag and drop style interface. On the left side, you’ll see a list of sections that make up your current page, things like your header, a featured collection block, an image banner, and your footer. Click on any section and you’ll get a panel of settings specific to that section, letting you change text, images, colors, and layout options without touching a single line of code.
Spend some time just clicking around here before making changes. Get a feel for how sections work, what settings are available, and how changes preview in real time on the right side of your screen. This alone will make you far more comfortable with everything that follows.
Start With Your Brand Basics
The very first customization most beginners should tackle is getting their brand basics locked in. This means uploading your logo, setting your brand colors, and choosing your fonts. Most Shopify themes have a dedicated Theme Settings section, usually found at the bottom of the left sidebar in the editor, where these global settings live.
Your logo should be uploaded here rather than added individually to each page, since this ensures consistency across your entire store. Same goes for your color palette. Most themes let you set primary colors, secondary colors, background colors, and button colors from one central location. Get these right first, because they affect how every other customization looks once you start adjusting individual sections.
Font selection matters more than people expect. Shopify themes typically offer a library of web safe fonts you can choose from without needing any technical setup. Pick something that matches your brand personality, whether that’s clean and modern or bold and playful, and stick with just two or three fonts maximum across your entire store to keep things looking cohesive rather than chaotic.
Customizing Your Homepage Layout
Your homepage is usually built from a stack of sections, and this is where drag and drop editing really shines. Most themes come with sections like a hero banner, featured collections, testimonials, image with text blocks, and newsletter signup forms.
You can reorder these sections simply by dragging them into the order that makes sense for your store. If you’re a print on demand business, you might want your featured collection higher up. If storytelling matters more for your brand, a bigger emphasis on an about section with images might come first.
Don’t feel locked into using every section your theme provides either. If a section doesn’t serve a purpose for your specific store, remove it. Cluttered homepages with too many competing sections tend to hurt conversion rates rather than help them. Beginners often make the mistake of keeping everything the theme came with just because it’s there, when a cleaner, more focused homepage usually performs better.
Customizing Product Pages
Product pages deserve extra attention since this is where purchase decisions actually happen. Inside the theme editor, navigate to a product page template to see what sections are available. Common customizable elements include image gallery layout, product description formatting, size or variant selectors, and trust badges.
If your theme supports it, consider adding sections like shipping information, size guides, or frequently asked questions directly on the product page. Reducing the number of questions a customer has to ask before purchasing directly improves conversion rates.
Image display matters a lot here too. Most themes let you choose between different gallery styles, like a grid layout, a carousel, or thumbnails beside a main image. Test a few options and see what actually showcases your products best, since this varies depending on whether you’re selling clothing, electronics, or something more visually complex.
Working With Sections and Blocks
Once you’re comfortable with the basics, it’s worth understanding the difference between sections and blocks, since this vocabulary comes up constantly in Shopify customization. A section is a larger structural piece of a page, like a full width banner or a collection grid. A block is a smaller element that lives inside a section, like an individual testimonial within a testimonials section, or a single image within an image gallery section.
Most themes let you add multiple blocks within a section and reorder them freely. This is incredibly useful for things like FAQ sections where you’re adding individual question and answer blocks, or a features section where each block represents a different selling point.
Understanding this structure helps you customize more efficiently because you’ll know exactly where to click when you want to add, remove, or rearrange specific pieces of content rather than guessing around the editor.
When to Consider Custom CSS
At some point, beginners often hit a wall where the built in theme editor doesn’t quite let them achieve the exact look they’re picturing. This is where custom CSS comes in. CSS controls the finer visual details, spacing, hover effects, specific color adjustments, that go beyond what the standard settings panel offers.
You don’t need to become a full developer to use basic CSS. Many small adjustments, like changing a button’s border radius or adjusting spacing between sections, involve fairly simple CSS snippets that are well documented online or available through Shopify’s own theme documentation.
That said, if you’re not comfortable editing code, this is a reasonable point to bring in a developer for smaller, focused tasks rather than trying to learn everything at once. A one time CSS adjustment doesn’t require hiring someone for a full project, just a quick focused task.
Understanding Liquid Without Fear
Liquid is Shopify’s templating language, and it’s what powers the more dynamic parts of your theme, things like displaying product prices, looping through collections, or showing conditional content based on inventory status. Beginners often hear “Liquid” and immediately assume it’s beyond their skill level, but understanding even the basics can be genuinely useful.
You don’t need to write Liquid from scratch to benefit from knowing what it is. Many customizations involve copying a small Liquid snippet from Shopify’s documentation or a trusted tutorial and placing it in the right spot in your theme code. Knowing roughly how Liquid works, that it pulls dynamic data and displays it based on conditions you set, helps you follow along with tutorials and troubleshoot small issues without feeling completely lost.
Mobile Optimization Deserves Its Own Pass
A mistake beginners make constantly is customizing their store entirely on desktop and never properly checking how it looks on mobile. Given that most shoppers browse and buy from their phones, this is a critical step, not an optional one.
After making any significant customization, switch the theme editor’s preview to mobile view and actually scroll through your store as if you were a customer. Check that text isn’t overlapping, that buttons are large enough to tap comfortably, and that images aren’t awkwardly cropped. Many sections that look perfect on desktop need separate adjustments for how they behave on smaller screens, and most themes do provide mobile specific settings within each section if you look for them.
Apps Versus Theme Customization
Not every feature you want needs to come from theme code. Shopify’s app ecosystem covers an enormous range of functionality, from countdown timers to product bundles to advanced review displays. Before diving into custom code for a specific feature, it’s worth checking if a reliable app already solves the problem.
That said, apps aren’t free of tradeoffs. Too many apps can slow down your store’s load speed, and site speed directly affects both conversion rates and SEO rankings. A good rule of thumb for beginners is to only install apps that solve a genuine need, and periodically review your installed apps to remove ones you’re not actively using.
Common Beginner Mistakes to Avoid
A few patterns show up again and again with beginners customizing their first Shopify theme. Overloading the homepage with too many sections is one of the most common, since it’s tempting to showcase everything at once rather than guiding customers toward a clear path.
Ignoring load speed is another common issue. Adding too many high resolution images without compression, or stacking too many apps, slows your store down significantly. Shopify has built in image optimization tools worth using rather than uploading massive uncompressed files directly from your camera or design software.
Inconsistent branding is another trap, where colors, fonts, and spacing feel slightly different from page to page because customizations were made piecemeal without stepping back to look at the whole store together. Regularly reviewing your entire store as a cohesive experience, rather than customizing one page at a time in isolation, helps catch this before it becomes a bigger issue.
A Note for Pakistani Shopify Store Owners
If you’re building or customizing a Shopify store for the Pakistani market, a few extra customization considerations are worth keeping in mind. Make sure your checkout customization clearly displays cash on delivery as a payment option if that’s relevant to your audience, since COD remains a heavily used payment method locally and customers should see it clearly without digging for it.
Currency display customization matters too. Confirm your theme is showing PKR pricing properly formatted rather than defaulting to a currency format that feels unfamiliar to local shoppers. Some themes need a small tweak here depending on your setup.
If you’re integrating local couriers or payment gateways like JazzCash or Easypaisa, these often come with their own branded checkout elements or badges you may want to display prominently, since trust signals matter a lot for conversion in markets where online payment habits are still developing trust over time.
Building Confidence Step by Step
The biggest shift for beginners usually happens once they realize theme customization isn’t one big overwhelming task, it’s a series of small manageable changes. Start with your brand basics, move on to homepage layout, refine your product pages, check everything on mobile, and only reach for custom code when the built in editor genuinely can’t achieve what you’re picturing.
Give yourself permission to experiment too. Shopify’s theme editor lets you preview changes before publishing them live, so there’s very little risk in trying something and undoing it if it doesn’t work. This safety net is exactly why theme customization is far more beginner friendly than people initially assume.
Final Thoughts
Customizing your Shopify theme is genuinely one of the more rewarding parts of building your store, since it’s where your brand actually starts to feel real rather than looking like a generic template. Take it step by step, don’t be afraid of the editor, and know that reaching for help with custom code or more advanced functionality is a completely normal part of the process rather than a sign you’ve done something wrong.