HOW TO MAKE YOUR SHOPIFY FOOTER LOOK MORE PROFESSIONAL: A COMPLETE CHECKLIST
Introduction
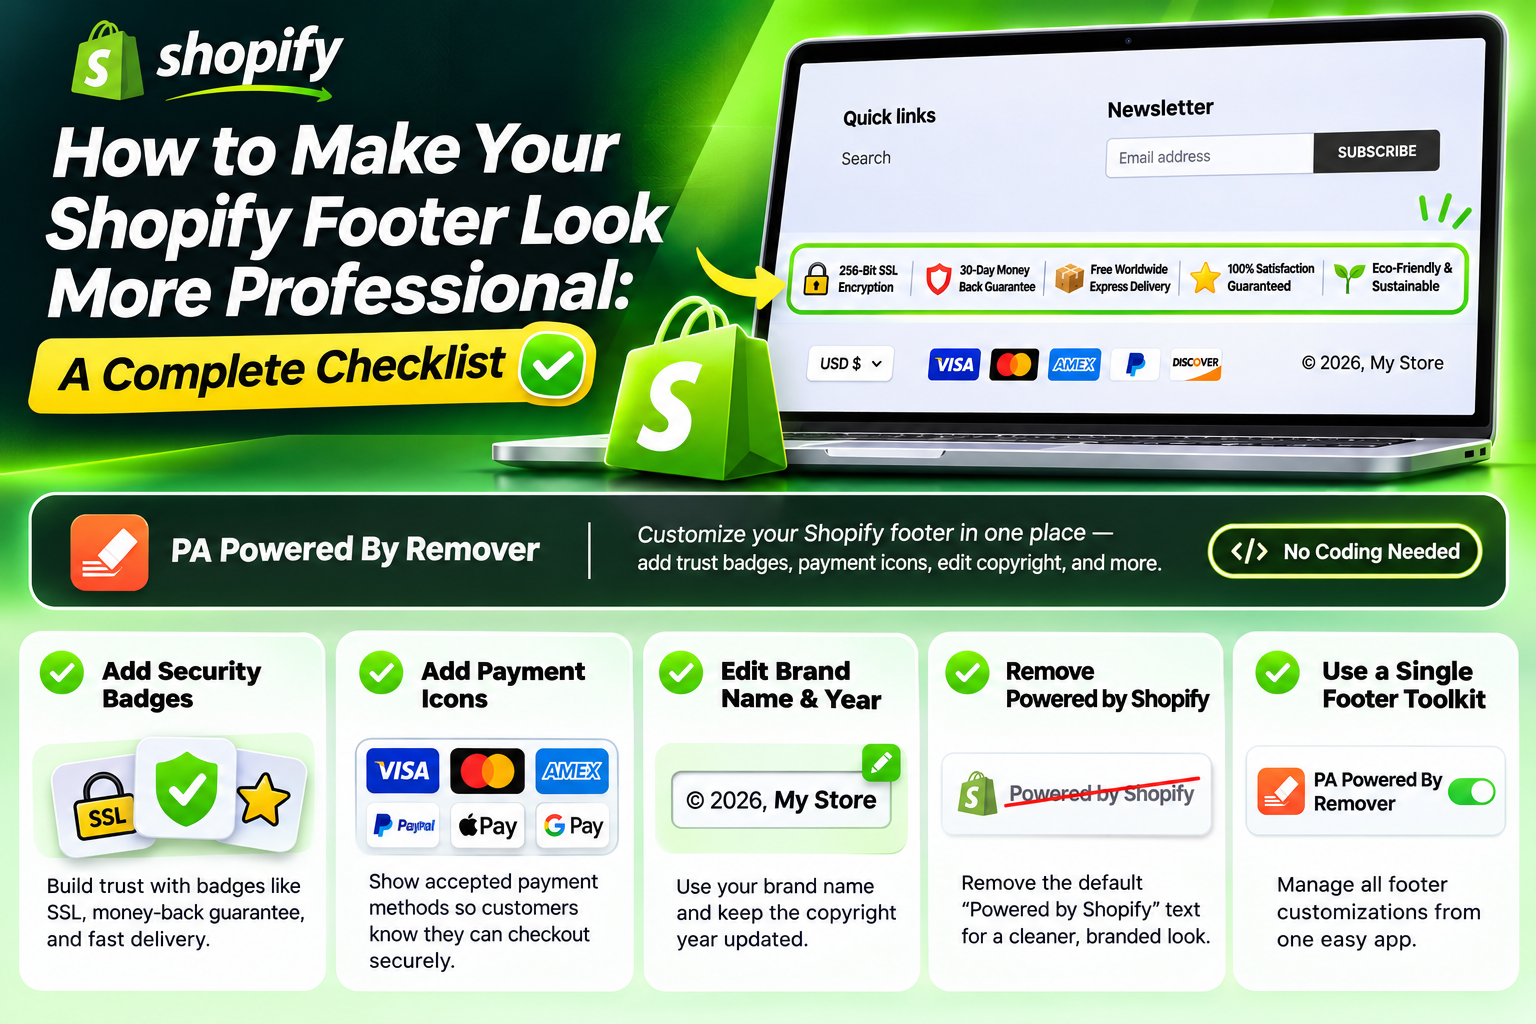
Your Shopify store footer may be the last thing visitors see, but it is an important part of your store’s overall appearance and credibility.
A professional footer does more than display links. It gives customers easy access to important information, shows supported payment methods, communicates your store policies, and reinforces your brand identity.
However, many Shopify stores still have default “Powered by Shopify” branding, outdated copyright information, missing payment icons, and poorly organized trust badges.
In this guide, we’ll cover a complete Shopify footer checklist and show you how to improve your footer using PA Powered By Remover, with your actual app screenshots and step-by-step explanations.
Why a Professional Shopify Footer Matters
A well-designed footer helps create a consistent shopping experience from the homepage to checkout.
It can help you:
- Build confidence by clearly communicating store policies.
- Display accepted payment methods.
- Strengthen your brand identity.
- Make essential information easier to find.
- Keep your copyright details up to date.
- Give your store a cleaner, more polished appearance.
The goal is not to fill your footer with unnecessary elements. It is to present useful information in a simple, organized way.
1. Remove Default “Powered by Shopify” Branding
One of the first improvements you can make is replacing the default Shopify attribution with your own brand information.
While “Powered by Shopify” is not inherently unprofessional, customizing the footer helps create a more consistent brand experience.
How to do it using PA Powered By Remover
Step 1: Open the Shopify App Store

Image 1: Search for Shopify App Store and open the official website.
Visit the Shopify App Store through your browser. This is where you can find apps for customizing different parts of your store.
Step 2: Find PA Powered By Remover
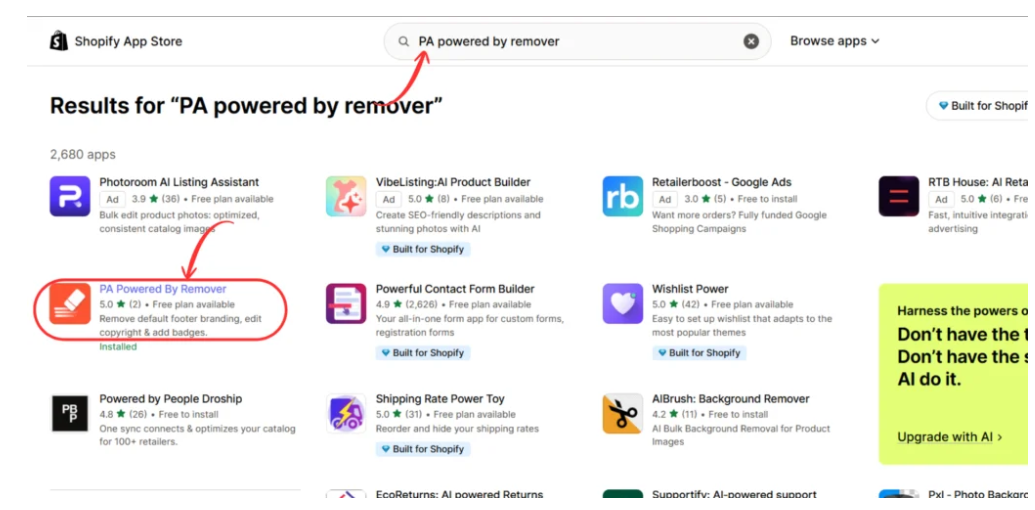
Image 2: Search for PA Powered By Remover and select the app from the results.
Enter PA Powered By Remover in the search bar. Open the app listing to review its features and installation options.
Step 3: Install or open the app

Image 3: Open the app listing and click Install or Open.
Once installed, you can access PA Powered By Remover from your Shopify admin.
Step 4: Configure the footer attribution settings
Open PA Powered By Remover from your Shopify admin.
Navigate to the Remove Branding section.
Inside the Branding & Footer Dashboard, locate the Store Attribution Settings panel.
Find the checkbox labeled:
Remove 'Powered by Shopify' credit
Enable this option to configure the removal of the default Shopify attribution.
Next, locate the Custom Copyright Text field.
Enter your preferred copyright information, such as:
© 2026 Your Brand Name. All Rights Reserved.
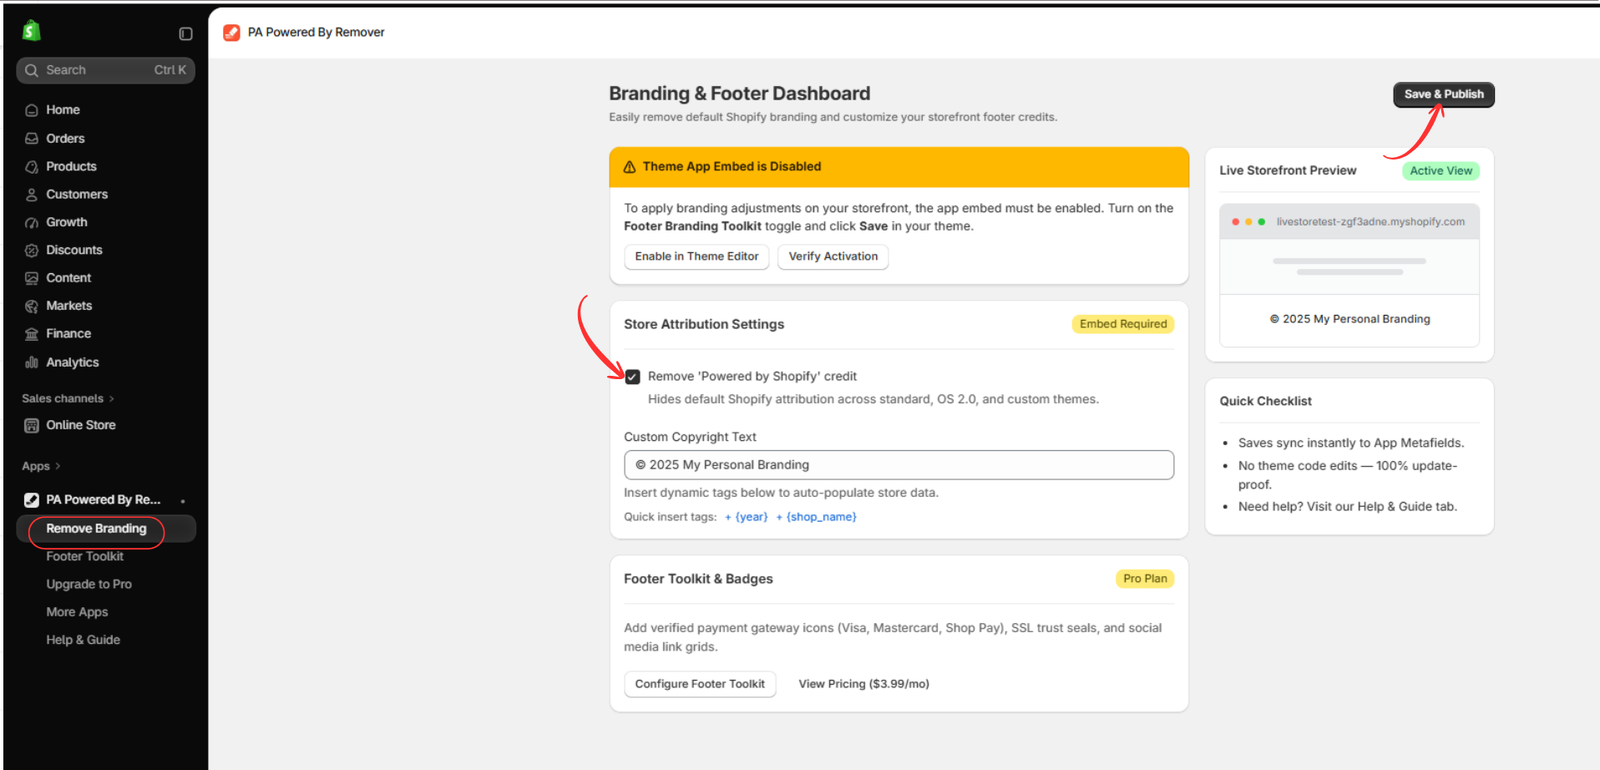
You may also be able to use dynamic placeholders for the current year and store name, depending on the app’s available functionality.
After updating the settings, click Save & Publish.
If the dashboard indicates that the theme app embed is disabled, continue to the next step.
Step 5: Open the Footer Toolkit and Select Payment Icons
From the app’s left sidebar, click Footer Toolkit.
This opens the Footer Customizer & Toolkit dashboard.
Scroll down to the Payment Gateway Icons section.
Enable Display Verified Payment Methods, then select the payment icons you want to show in your store’s footer.
The screenshot displays options including Visa, Mastercard, Amex, PayPal, Apple Pay, Google Pay, Shop Pay, Klarna, and Afterpay.
[2024 Updated] How to Add, Remove & Edit Shopify Payment Icons
Illustrative example of payment method logos. Use the actual app screenshot below for the configuration steps.
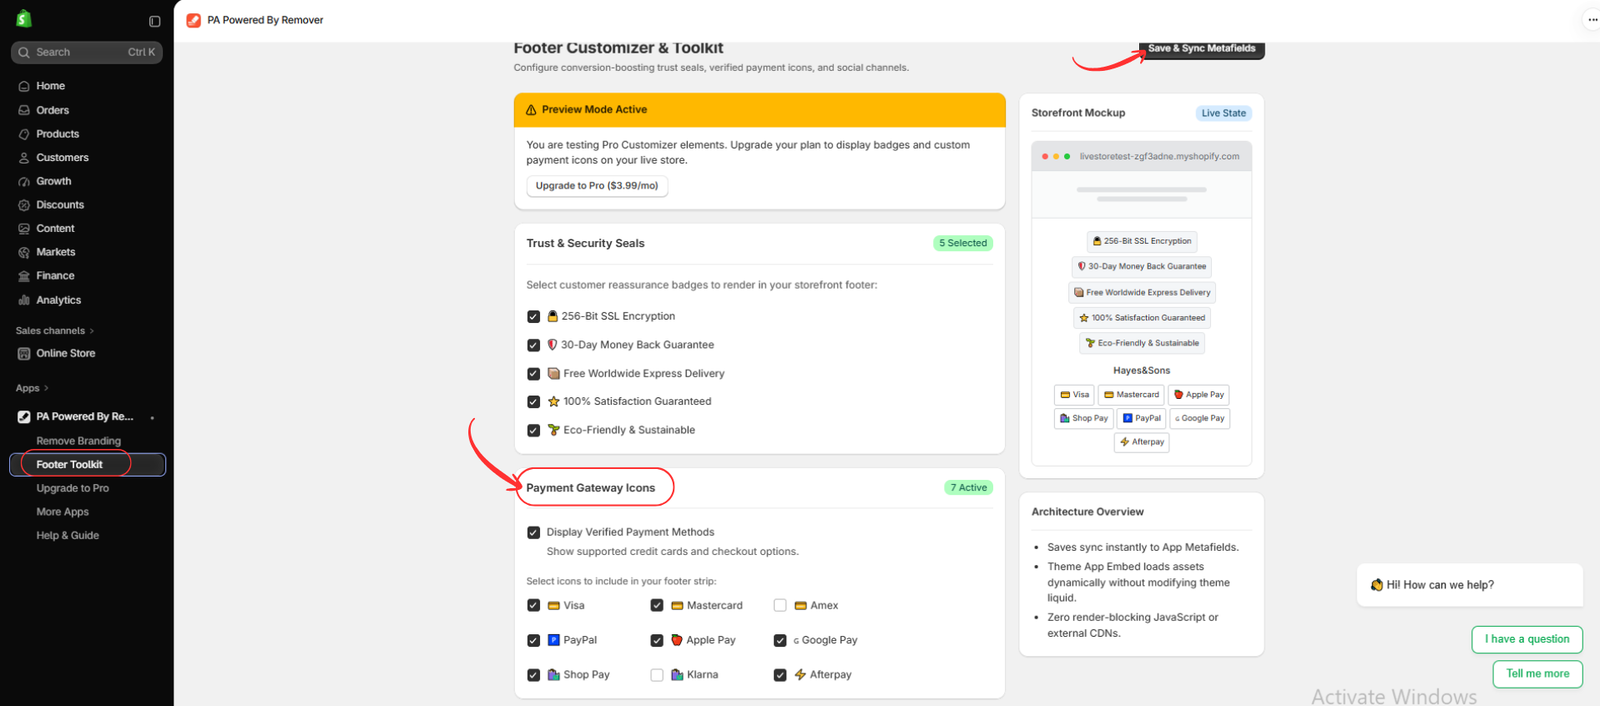
Image 1: The Footer Toolkit dashboard lets you select payment gateway icons and preview them before saving.
Important: Only select payment methods that your store actually accepts. Showing unsupported payment logos can mislead customers.
Step 6: Verify the Payment Icons on Your Storefront
Open your live Shopify store and scroll down to the footer.
Step 7: Open the Footer Toolkit and Select Security Badges

Inside the app, select Footer Toolkit from the left-hand menu.
Find the Trust & Security Seals section. Here, you can choose which badges you want to display.
The screenshot shows five available badge examples:
- 256-Bit SSL Encryption
- 30-Day Money Back Guarantee
- Free Worldwide Express Delivery
- 100% Satisfaction Guaranteed
- Eco-Friendly & Sustainable
Check the boxes beside the badges that accurately describe your store.
On the right side, the Storefront Mockup gives you a preview of how the selected badges may appear.
When you’re satisfied, click Save & Sync Metafields at the top of the page.
Important: The screenshot also shows Preview Mode Active. You may need to upgrade to the app’s Pro plan to display these security badges on your live storefront. Saving the configuration alone does not necessarily make them visible to customers.
Step 8: Check the Security Badges in Your Store Footer
Example Shopify footer showing security badges and payment icons
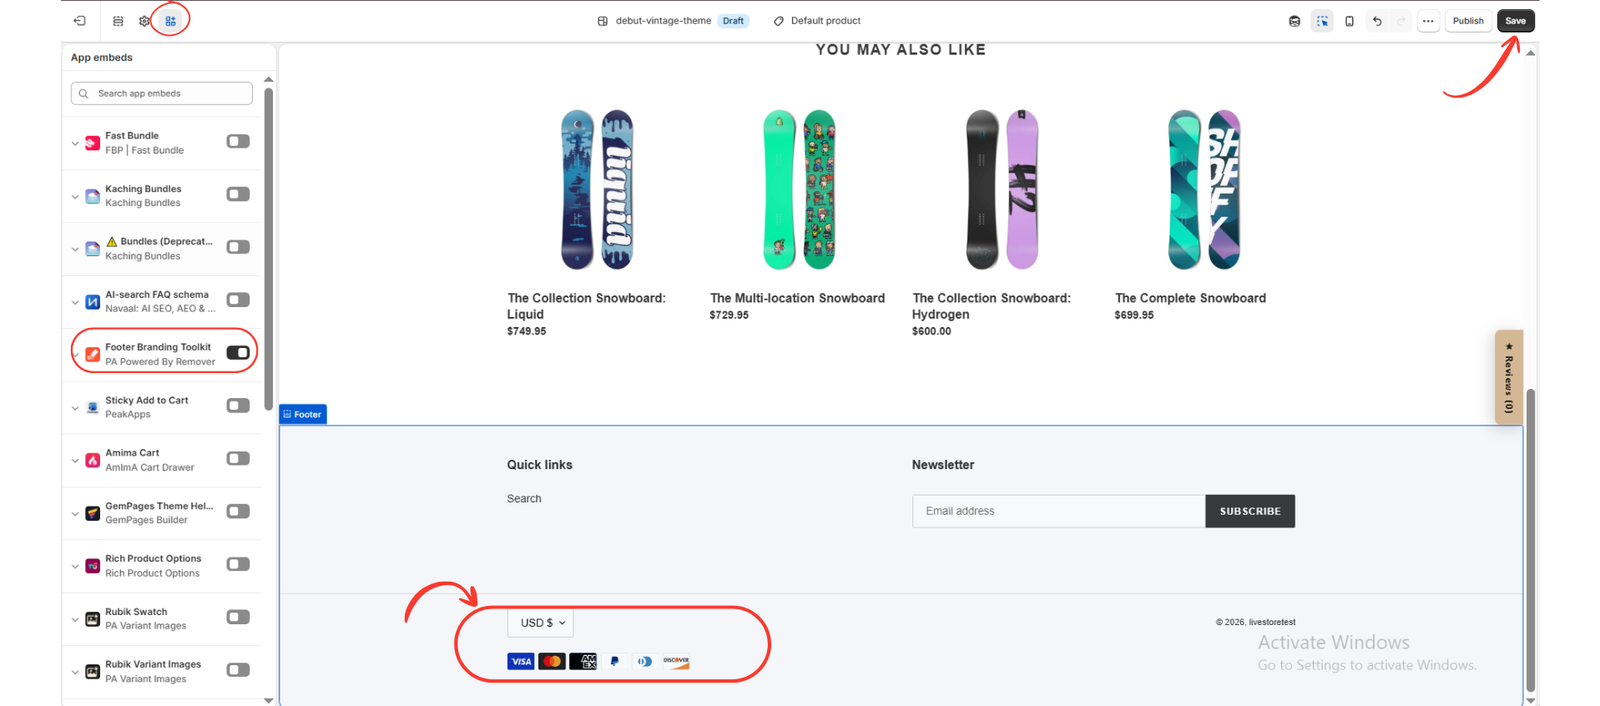
After enabling the app embed and ensuring the required plan is active, open your storefront preview and scroll down to the footer.

Step 9: Verify Your New Footer Branding
Once the app embed is enabled and the changes are saved, check your storefront preview.
Scroll to the bottom of the page and inspect the footer.

Image 6: The updated footer displays the store’s copyright text without the default Powered by Shopify attribution.
In the screenshot, the footer now displays:
© 2026, livestoretest
The default “Powered by Shopify” text is no longer visible.
This confirms that the footer branding change has been applied in the theme preview.
For your own store, the footer should display the brand name or copyright text you entered.
Finally, open your storefront in a separate browser tab and verify that the footer appears correctly on desktop and mobile.
If the default credit still appears, confirm that the app embed is enabled, your settings are saved, and you’re checking the correct theme.
Complete Shopify Footer Checklist
| Item | What to check |
|---|---|
| Brand name | Your business name is displayed correctly |
| Copyright year | The year is current or dynamically updated |
| Shopify attribution | Default branding is customized if desired |
| Payment icons | Only supported payment methods are shown |
| Security badges | Every displayed claim is accurate |
| Footer links | Essential pages are easy to access |
| Newsletter | Signup form works correctly |
| Mobile layout | Text, icons, and links display properly |
| Theme app embed | Footer Branding Toolkit is enabled |
| Final preview | All changes appear on the intended theme |
Frequently Asked Questions
Can I make my Shopify footer professional without coding?
Yes. Shopify’s theme editor supports basic footer customization, while PA Powered By Remover provides additional options for branding, copyright text, payment icons, and badges.
Can I remove the Powered by Shopify text?
Yes. You can customize or remove the default footer attribution using supported theme settings or an app.
Can I automatically update the copyright year?
Yes. PA Powered By Remover provides a dynamic year tag that can help keep your footer copyright information current.
Are payment icons and security badges the same?
No. Payment icons identify accepted payment methods, while security and trust badges communicate store protections, guarantees, or policies.
Do I need to enable the app embed?
Yes, the Footer Branding Toolkit app embed must be enabled for the relevant app-powered footer elements to display in your theme.
Conclusion
A professional Shopify footer helps create a more consistent, informative, and trustworthy shopping experience.
By removing unnecessary default branding, adding your brand name, keeping your copyright year updated, displaying supported payment methods, and including accurate security badges, you can transform a basic footer into a useful part of your storefront.
With PA Powered By Remover, you can manage these footer improvements from one app without manually editing theme code for every change.
Ready to customize your store footer? Explore PA Powered By Remover on the Shopify App Store.