How to Run A/B Tests on Shopify (5 Easy Steps)
Running a successful Shopify store is not just about getting traffic to your website. It’s about turning that traffic into paying customers. One of the best ways to do this is through A/B testing. If you’ve ever wondered how to run A/B tests on Shopify, this guide will walk you through the entire process in five easy, beginner friendly steps.
A/B testing might sound technical, but once you understand the basics, it becomes a simple and repeatable process that can help you grow your store month after month. In this guide, we will break everything down in plain, simple language so that anyone, even without a marketing background, can start testing today.
What is A/B Testing on Shopify?
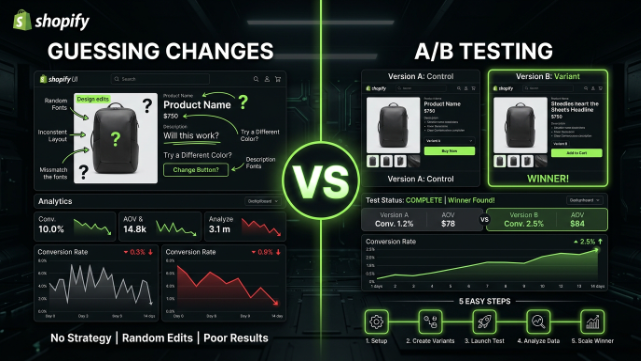
Before jumping into the steps, let’s quickly cover what A/B testing actually means. A/B testing, also known as split testing, is a method where you show two different versions of a page, button, or feature to two different groups of visitors at the same time.
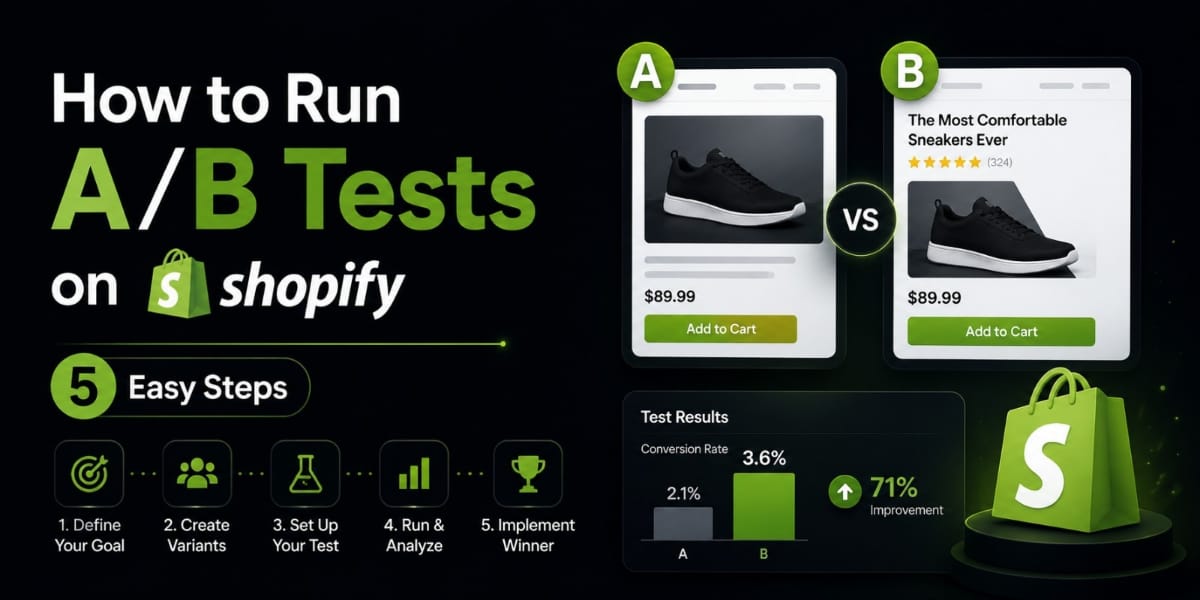
Version A is your original page (the “control”), and Version B is your new idea (the “variant”). By comparing how each version performs, you can find out which one leads to more clicks, more add to carts, or more completed sales.
Once you know which version works better, you apply that winning version to your entire store. This process helps you make decisions based on real customer behavior instead of guessing what might work.
Why A/B Testing is Important for Shopify Stores
Many Shopify store owners spend a lot of money on ads, influencer marketing, and SEO to bring visitors to their store. But if your store isn’t converting visitors into buyers, all that traffic goes to waste.
A/B testing helps you fix this problem by showing you exactly what changes lead to more sales. Here’s why it matters:
- It removes guesswork and replaces it with real data
- It helps increase your conversion rate without spending more on ads
- It reduces risk by letting you test changes before rolling them out fully
- It improves the overall shopping experience for your customers
- It helps you get more value out of the traffic you already have
Now that you understand why A/B testing matters, let’s get into the five easy steps to run your first test on Shopify.
Step 1: Set a Clear Goal and Pick What to Test
The first step in running any A/B test is deciding what you want to improve. Without a clear goal, it’s easy to test random things that don’t actually move the needle for your business.
Start by asking yourself a few questions:
- Do you want more visitors to add products to their cart?
- Do you want to reduce the number of people who leave without buying?
- Do you want to increase your average order value?
- Do you want more people to sign up for your email list?
Once you have a goal, choose one specific element of your store to test. Some of the most common things Shopify store owners test include:
Homepage Elements
This includes your banner image, headline, navigation menu, and overall layout.
Product Page Elements
This includes product titles, descriptions, images, pricing display, and review placement.
Call to Action (CTA) Buttons
This includes the color, size, wording, and placement of buttons like “Add to Cart” or “Buy Now.”
Checkout Process
This includes testing a one-page checkout versus a multi-step checkout, or adding trust badges near the payment section.
Pop ups and Email Opt ins
This includes testing different designs, timing, and offers for your email sign-up forms.
It’s important to only test one variable at a time. If you change multiple things at once, like the headline, image, and button color together, you won’t know which specific change caused the results. Keep it simple and focused.
Step 2: Create a Hypothesis Before You Start
Once you know what you want to test, the next step is to create a hypothesis. A hypothesis is simply a prediction about what will happen and why.
For example: “If we change our ‘Add to Cart’ button from blue to orange, more visitors will click it because orange stands out more against our website’s color scheme.”
Having a clear hypothesis keeps your test focused and helps you understand the reasoning behind your results, whether the test wins or loses. It also helps you learn more about your customers’ preferences over time, since even a losing test teaches you something valuable.
Here are a few example hypotheses you can use as inspiration:
- “Adding customer reviews closer to the product price will increase trust and improve add-to-cart rates.”
- “Shortening our product descriptions will make it easier for mobile users to scan and increase conversions.”
- “Offering free shipping above a certain order amount will increase our average order value.”
- “Using lifestyle photos instead of plain white background images will help customers imagine using the product, leading to more sales.”
Write your hypothesis down before starting your test. This keeps you accountable and makes it easier to review your results later.
Step 3: Choose the Right A/B Testing Tool for Shopify
Shopify does not have a fully built in native tool for testing most store elements, so you will need to use a third-party app. Choosing the right tool depends on your store size, budget, and comfort level with technology.
Here are some popular options:
Intelligems
This tool is especially useful for testing pricing, discounts, and shipping offers. It’s a great choice if you want to experiment with your pricing strategy.
Neat A/B Testing
This is a simple and beginner-friendly option, perfect for store owners who are just starting out with testing.
VWO (Visual Website Optimizer)
This is a more advanced tool with detailed analytics, useful for stores that want deeper insights into visitor behavior.
Convert Experiences
This tool is often used by larger stores that need more advanced targeting and segmentation options.
Page Builder Apps with Built in Testing
Apps like PageFly and Shogun, which are used to build custom Shopify pages, often come with built-in A/B testing features.
When choosing a tool, look for features like:
- Easy integration with your Shopify theme
- Clear and easy to understand reporting
- The ability to split traffic evenly and consistently
- Support for testing multiple types of elements (not just buttons or colors)
Take time to read reviews and even try free trials before committing to a paid plan. The right tool should match your store’s needs without being overly complicated.
Step 4: Set Up and Run Your Test
Once you’ve chosen your tool and created your hypothesis, it’s time to actually set up and launch your test. Here’s how to do it properly.
Create Your Two Versions
Build Version A (your original) and Version B (your variant) using your chosen tool. Make sure the only difference between the two versions is the element you’re testing.
Split Your Traffic
Most testing tools automatically split your traffic 50/50 between the two versions. This ensures a fair comparison. Make sure the tool keeps visitors on the same version throughout their session, so they don’t see both versions and get confused.
Set the Right Duration
This is one of the most important parts of running a successful test. Many store owners make the mistake of ending their tests too early, which can lead to inaccurate results.
As a general rule:
- Run your test for at least one to two full weeks
- Aim for at least 1,000 to 2,000 visitors per version before drawing conclusions
- Avoid stopping the test early just because one version appears to be “winning” in the first few days, results can change as more data comes in
If your store gets lower traffic, it may take longer to reach reliable results. In this case, consider testing bigger, more impactful changes rather than small details, since small changes require a much larger sample size to show a clear winner.
Monitor Without Interfering
While your test is running, avoid making other major changes to your store at the same time. This could affect your results and make it hard to know what actually caused any changes in performance.
Step 5: Analyze Results and Apply the Winner
Once your test has run long enough and collected enough data, it’s time to review the results and make a decision.
Look at Your Key Metric
Go back to the goal you set in Step 1. If your goal was to increase add-to-cart rate, focus on that metric specifically, rather than getting distracted by other numbers that aren’t directly related to your test.
Check for Statistical Significance
Most A/B testing tools will tell you whether your results are “statistically significant.” This means the difference between Version A and Version B is likely due to the actual change you made, not just random chance. Aim for at least a 95% confidence level before making a final decision.
Compare the Results to Your Hypothesis
Did the results match what you predicted? If yes, great, you’ve confirmed something valuable about your customers. If not, that’s okay too. Understanding why a test didn’t perform as expected can be just as valuable as a winning test.
Implement the Winning Version
Once you’ve identified a clear winner, apply that change permanently across your store. Remove the losing version and move on to your next test idea.
Document Your Results
Keep a simple log of every test you run, including your hypothesis, the results, and what you learned. Over time, this becomes a valuable resource that helps you avoid repeating tests and helps you understand your customers better.
Common Mistakes to Avoid When Running A/B Tests
Even with a clear five step process, it’s easy to make mistakes along the way. Here are a few things to watch out for:
Testing Too Many Variables at Once
Stick to one variable per test so you can clearly identify what caused any changes in performance.
Ending Tests Too Early
Give your test enough time and traffic before making a final decision. Early results can be misleading.
Ignoring Mobile Visitors
Since most Shopify traffic often comes from mobile devices, make sure your tests account for how mobile users experience your store, since behavior can be very different from desktop users.
Not Having a Clear Hypothesis
Testing random ideas without a clear reasoning behind them wastes time and makes it harder to learn from your results.
Running Tests During Unusual Periods
Avoid testing during major sales events like Black Friday unless you’re specifically testing for that period, since customer behavior tends to be very different during these times.
Tips for Getting the Most Out of Shopify A/B Testing
To make your testing efforts even more effective, keep these tips in mind:
Start With High Traffic Pages
Focus your first few tests on pages that get the most visitors, like your homepage or best-selling product pages. This helps you gather reliable data faster.
Prioritize Based on Impact
Not every test idea deserves the same priority. Focus on tests that are easy to implement and have the potential for a big impact on your revenue.
Combine Data with Customer Feedback
Numbers tell you what happened, but tools like heatmaps, session recordings, or customer surveys can help you understand why. Combining both gives you a fuller picture of your customers’ behavior.
Make Testing a Habit
A/B testing isn’t something you do once and forget about. Customer preferences and trends change over time, so make testing an ongoing part of your growth strategy.
Be Patient
Good results take time. Don’t rush your tests or jump to conclusions too quickly. Reliable data leads to better decisions.
Real Examples of Successful Shopify A/B Tests
To help illustrate how these steps work in real life, here are a few examples of changes that have helped Shopify stores improve their performance:
- A store tested short bullet-point product descriptions instead of long paragraphs and saw an improvement in add-to-cart rates, since customers found it easier to scan the information quickly.
- Another store moved customer reviews closer to the “Buy Now” button, which helped build trust and reduced hesitation before purchase.
- A store simplified its checkout process from multiple steps to a single page, which helped reduce cart abandonment significantly.
- Testing a free shipping threshold encouraged customers to add more items to their cart in order to qualify, which increased the average order value.
- Switching from plain white background product photos to lifestyle images helped customers better visualize the product in real life, leading to higher conversions.
These examples show that even small, thoughtful changes can lead to meaningful improvements when tested properly.
Final Thoughts
Learning how to run A/B tests on Shopify doesn’t have to be complicated. By following these five easy steps, setting a clear goal, creating a hypothesis, choosing the right tool, running your test properly, and analyzing your results, you can start making smarter, data-driven decisions for your store.
A/B testing is not about making huge, risky changes overnight. It’s about making small, consistent improvements over time based on real customer behavior. The more you test, the more you’ll understand what truly works for your audience, and the more your store will grow as a result.
Start with one simple test today. Pick a page, form your hypothesis, follow these five steps, and let your data guide you toward a smarter, more profitable Shopify store.