How to Set Up a Subscription Box on Shopify (The Complete Guide)
Alright, let’s talk subscriptions. If you’ve been thinking about adding a subscription box to your Shopify store, you’re onto something big. Subscription commerce isn’t just a trend anymore it’s become one of the most reliable ways to build predictable, recurring revenue instead of chasing one time buyers over and over again.
But I get it. The idea of “setting up subscriptions” sounds technical and a little intimidating if you’ve never done it before. So let’s break this whole thing down together, step by step, in plain simple language. No jargon, no confusing tech speak. Just you and me figuring this out like we’re sitting across a table with coffee.
Why Subscription Boxes Are Such a Big Deal Right Now
Before we jump into the “how,” let’s quickly talk about the “why.” Because understanding why subscriptions work will help you make smarter decisions when you’re setting yours up.
Think about it from a business owner’s perspective. Every time you make a sale, you spend money and effort getting that customer in the first place ads, discounts, content, outreach. That’s called customer acquisition cost, and it’s not cheap. Now imagine if that same customer bought from you every single month automatically, without you having to convince them all over again. That’s the magic of subscriptions. You get the customer once, and they keep paying you again and again.
For customers, subscriptions feel convenient too. They don’t have to remember to reorder their favorite coffee, skincare product, or pet treats. It just shows up. And a lot of people genuinely enjoy the “surprise box” feeling if you’re doing curated products.
So whether you’re selling coffee, beauty products, snacks, books, pet supplies, or literally anything that people use repeatedly or would enjoy discovering monthly, a subscription model can work for you.
Step 1: Decide What Kind of Subscription Model You Want
This is honestly the most important decision you’ll make, and a lot of store owners skip straight past it. There are a few common subscription types, and picking the right one changes everything about how you set things up.
The first type is the replenishment model. This is for products people use up and need again think supplements, coffee, skincare, pet food. Customers pick a product, choose how often they want it delivered, and it just keeps coming.
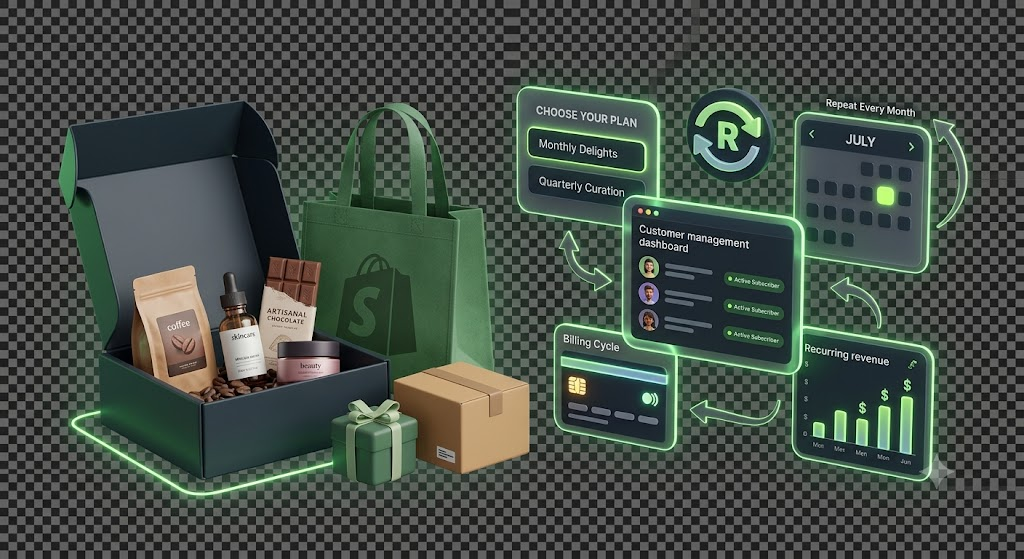
The second type is the curated box model. This is the classic “surprise box” style think Birchbox or FabFitFun. Every month, customers get a mix of products chosen by you, often based on a theme or their preferences.
The third type is access or membership subscriptions. This isn’t about physical products showing up it’s more about giving subscribers special perks, discounts, or exclusive access to certain products or content.
Take a minute and think about which one fits your business. If you already sell consumable products, replenishment is the easiest to launch. If you love the idea of curating a fun experience each month, go curated box. Once you know this, everything else becomes clearer.
Step 2: Pick a Subscription App for Shopify
Here’s something important to understand Shopify does not have subscriptions built in by default. You need an app to handle recurring billing, subscription management, and customer portals. Thankfully, there are some excellent options in the Shopify App Store.
Some of the most popular ones people use are Recharge, Bold Subscriptions, Appstle Subscriptions, Skio, and Loop Subscriptions. Each has its own pricing, features, and level of complexity, so it’s worth spending a bit of time comparing them before committing.
If you’re just starting out and want something simple and beginner friendly with a generous free plan, Appstle Subscriptions is a solid pick plenty of small to medium stores use it because it’s easy to set up without needing a developer.
If you’re scaling and need advanced features like subscription bundles, churn-reduction tools, and deep customization, Recharge is considered the industry heavyweight, though it comes with a steeper learning curve and higher pricing.
Bold Subscriptions is another well-known option, especially good if you want strong customer retention tools built in.
Whichever one you pick, make sure it integrates smoothly with your existing payment gateway and checkout, and double check it supports the country you’re shipping to and the currency you’re billing in this matters a lot if you’re running a store with international customers or working with local Pakistani payment gateways alongside international ones.
Step 3: Install and Connect the Subscription App
Once you’ve chosen your app, installing it is pretty straightforward. Head to your Shopify admin panel, go to the Apps section, search for the subscription app you picked, and click install. Most of these apps will walk you through an onboarding flow the moment you install them.
During this setup, the app will usually ask you to connect your payment processor. This is a crucial step because recurring billing needs a payment gateway that supports “vaulting” basically storing a customer’s card securely so it can be charged automatically each billing cycle without asking them to reenter details every time.
Shopify Payments supports this natively, so if you’re already using Shopify Payments, you’re in good shape. If you’re using a different processor, just double check with the subscription app’s documentation to confirm compatibility, because not all gateways support recurring charges the same way.
Step 4: Choose Which Products Will Be Subscription Eligible
Now here’s where it gets fun. You get to decide which products in your store will be available as subscriptions. You don’t have to make everything subscription based in fact, most successful stores mix it up. They offer some products as one time purchases and others as “subscribe and save” options.
Inside your subscription app, you’ll usually find a section where you select products or collections and toggle on subscription options for them. From there, you’ll set things like delivery frequency (weekly, monthly, every two months, etc.), and whether customers can choose their own frequency or you set a fixed one.
A smart move here is to offer a discount for subscribing. Something like 10 to 20 percent off compared to a one-time purchase. This incentivizes customers to commit to the subscription instead of just buying once, and it’s honestly one of the biggest levers for growing your subscriber base quickly.
Step 5: Design Your Subscription Box Experience
If you’re doing a curated box model, this step is where your creativity really gets to shine. You want customers to feel like they’re getting something special, not just a random assortment of stuff thrown in a box.
Think about a theme for each box. Maybe it’s seasonal, maybe it’s based on customer preferences they select during signup, maybe it’s tied to a “surprise reveal” concept. Whatever you choose, make sure there’s a story behind it. People pay a premium for the feeling of unboxing something exciting.
Also think carefully about your packaging. Subscription boxes live and die by their unboxing experience. Custom branded boxes, tissue paper, a little thank-you card, maybe a discount code for their next purchase all these small touches build an emotional connection with your subscribers and reduce the chances of them canceling.
Step 6: Set Up Your Subscription Page on Shopify
Once your app is configured, you’ll want a clean subscription landing page on your store. This is the page where new customers learn about your subscription, see what’s included, understand pricing, and sign up.
Keep this page simple and benefit focused. Explain clearly what the customer gets, how often they’ll be billed, what the savings are compared to buying individually, and how easy it is to cancel or pause anytime. That last part matters a lot customers are far more likely to subscribe if they know they’re not locked into something scary and permanent.
Most subscription apps come with pre-built templates or blocks you can drag onto your page using Shopify’s theme editor, so you don’t need coding knowledge for this part. Just make sure your branding stays consistent with the rest of your store.
Step 7: Set Up the Customer Portal
This is something a lot of store owners forget about, and it causes major headaches later. Your subscription app will typically create a customer portal where subscribers can log in and manage their own subscriptions pausing, skipping a delivery, changing their frequency, updating payment info, or canceling.
Make sure this portal is easy to find. Add a clear link to it in your website’s account section, in your order confirmation emails, and in your subscription confirmation emails. When customers can self manage their subscriptions easily, you get fewer support tickets and happier subscribers. When they can’t find how to pause or cancel, they get frustrated and often just dispute the charge with their bank instead, which is worse for you.
Step 8: Set Up Subscription Emails and Notifications
Communication is everything when it comes to subscriptions. You need automated emails going out for a few key moments: when someone subscribes, before every renewal charge (a heads up a few days in advance), when a payment fails, and when a subscription is about to renew or has been successfully renewed.
The “upcoming renewal” reminder email is especially important. It builds trust because customers don’t feel like they’re being charged secretly, and it gives them a chance to pause or modify their box if something changed.
Most subscription apps let you customize these emails to match your brand voice and design. Take the time to make them feel personal rather than robotic it makes a real difference in retention.
Step 9: Plan for Failed Payments
Here’s something that catches a lot of new subscription store owners off guard. Cards expire, banks decline charges, and sometimes payments just fail for random reasons. If you don’t have a plan for this, you’ll silently lose subscribers without even realizing it.
Most good subscription apps include what’s called “dunning management” this is just a fancy term for automatically retrying failed payments a few times over several days, and sending the customer an email asking them to update their card. Make sure this feature is turned on and configured well, because it can genuinely save a good chunk of revenue that would otherwise slip through the cracks.
Step 10: Test Everything Before Going Live
Before you announce your subscription box to the world, test the entire flow yourself. Sign up as a test customer, go through checkout, check that the discount applied correctly, confirm you receive the right confirmation email, then go into the customer portal and try pausing, skipping, and canceling to make sure everything works the way it should.
It’s also smart to test what happens with a failed payment, if your app allows a sandbox or test mode for this. Catching a broken flow now is a lot better than catching it after fifty customers have already signed up.
Step 11: Promote Your Subscription Box
Once everything is tested and working, it’s time to actually get subscribers. A few things that tend to work really well here are offering a first box discount to new subscribers, running an email campaign to your existing customer list letting them know subscriptions are now available, using social proof like reviews or unboxing videos from early customers, and highlighting the convenience and savings clearly on your homepage and product pages.
You can also consider working with micro influencers who do unboxing content, since subscription boxes are naturally suited for that kind of visual, engaging content.
Step 12: Keep an Eye on Your Subscription Metrics
Once your box is live, the real work is in optimizing it over time. Keep track of a few key numbers: your subscriber growth rate, your churn rate (how many people cancel each month), your average subscription lifetime, and your monthly recurring revenue.
If churn feels high, dig into why. Are people canceling because the value isn’t clear, because the products aren’t matching expectations, or because payments are failing? Most subscription apps give you decent analytics dashboards, so use them regularly instead of just checking in once a month.
Bringing It All Together
Setting up a subscription box on Shopify isn’t as complicated as it might seem once you break it into these steps. You choose your subscription model, pick the right app, connect your payment gateway, set your products up, design a great unboxing experience, build a clean subscription page, give customers a portal to manage things themselves, set up smart email communication, plan for failed payments, test everything, and then focus on promotion and tracking your numbers.
The beauty of subscriptions is that once it’s set up properly, it becomes this steady engine running in the background of your store, bringing in predictable revenue every single month. It takes a bit of setup work upfront, but the payoff in customer loyalty and recurring income makes it more than worth it.
If you’re serious about growing your Shopify store long term, subscriptions are one of those features that can genuinely change the trajectory of your business. Take it one step at a time, don’t rush the setup, and focus on making the experience feel good for your customers at every single touchpoint. That’s really the whole secret.