How to Set Up Quantity Breaks for Shopify Products
A customer who adds one item to their cart may be willing to buy two or three—if the savings are easy to understand. Quantity breaks give shoppers a clear reason to purchase more by offering a better price at selected quantities.
In this guide, you will learn how to set up quantity breaks for Shopify products using Section Kit Bundles. We will cover the merchant challenge, why a dedicated app helps, and the setup process using the images below in their supplied order.
The Merchant Challenge: More Traffic, Small Orders
Bringing visitors to your store takes effort, but traffic alone does not ensure profitable orders. When customers buy only one low-priced item, acquisition, packing, and shipping costs can leave little room for profit. A generic discount may reduce your margin without encouraging shoppers to increase their order size.
Another challenge is communicating the offer. If customers must calculate savings themselves or discover a discount late in checkout, they may miss the reason to buy more. Merchants need an offer that explains the quantity, total price, and savings directly on the product page.
What Are Quantity Breaks?
Quantity breaks are pricing tiers based on how many units a customer buys. For example, a store might offer the regular price for one unit, 10% off for two units, and 15% off for three units. The discount grows at predefined quantities.
| Quantity | Illustrative discount | Total at $20 per unit |
|---|---|---|
| 1 unit | No discount | $20 |
| 2 units | 10% off | $36 |
| 3 units | 15% off | $51 |
These figures are an example, not the prices shown in the app images. Choose tiers that fit your product costs, fulfillment expenses, and target margin.
Why Use Section Kit Bundles?
Section Kit Bundles supports quantity breaks, volume discounts, BOGO offers, and product bundles. It lets merchants display offers on product pages and customize the widget’s colors and typography without coding. A centralized dashboard helps manage campaigns, while its analytics and A/B testing features can support offer evaluation.
For this tutorial, the relevant starting point is the Classic volume discount template. BOGO and frequently bought together are different offer types, even though they appear in the same template library.
Why Quantity Breaks Matter
- Give shoppers a clear incentive: make the benefit of buying additional units visible before checkout.
- Support a higher average order value: larger quantities can increase order totals when customers find the offer useful.
- Encourage replenishment purchases: multipacks can suit products customers use regularly.
- Keep offers consistent: clear quantity tiers make pricing easier to compare.
Results depend on product demand, pricing, and margins. Track profit as well as revenue so that larger orders remain worthwhile.
Before You Begin
- Choose a product customers have a practical reason to buy in multiples.
- Plan the quantities and discounts before creating the offer.
- Check available stock and product variants.
- Decide whether the offer applies to selected products, collections, or a wider catalog.
Step 1: Install Section Kit Bundles
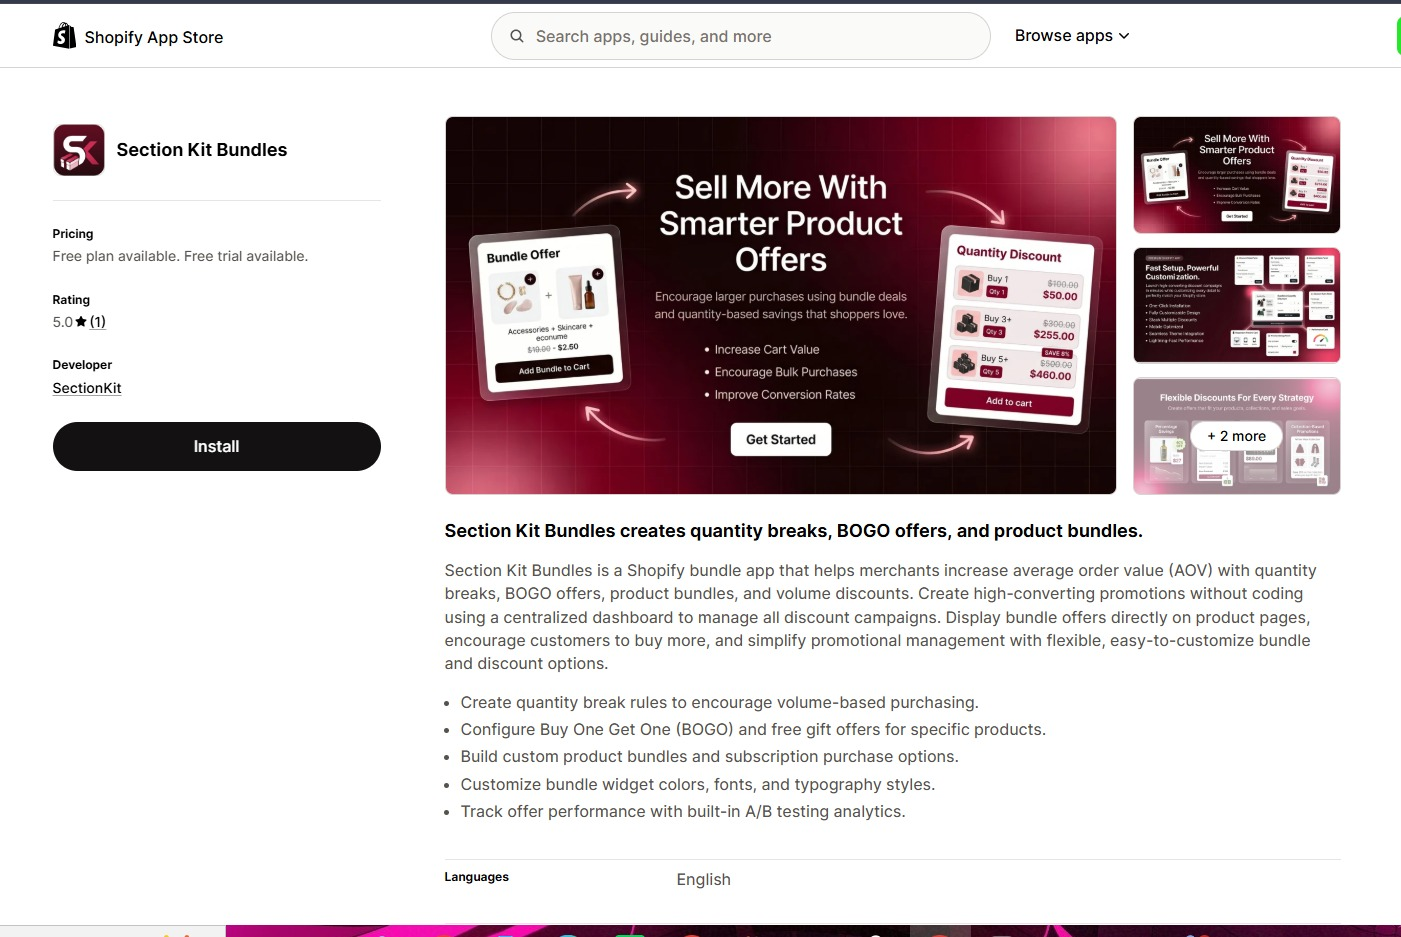
Open the Section Kit Bundles Shopify App Store listing and click Install. Select your store if prompted, review the requested access, and complete the installation. Then open the app from your Shopify admin.
Step 2: Open the Dashboard and Create a Bundle
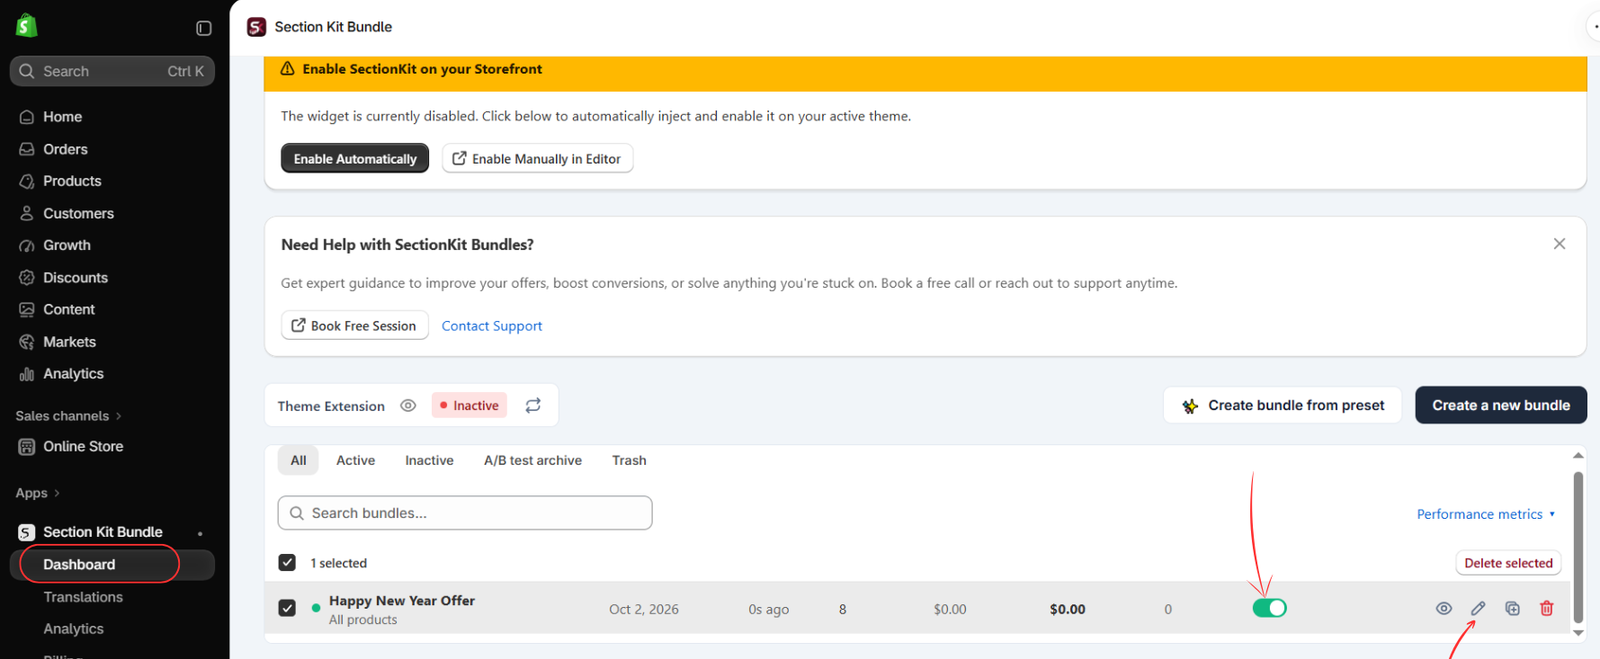
In Shopify admin, open Apps → Section Kit Bundle → Dashboard. Click Create a new bundle, highlighted in the image. This opens the bundle setup flow.
The image also shows an inactive theme extension. To display your offer on the storefront, use Enable Automatically or Enable Manually in Editor as appropriate. If you use the theme editor, save the change and confirm the extension is active before testing.
Step 3: Choose the Classic Volume Discount Template
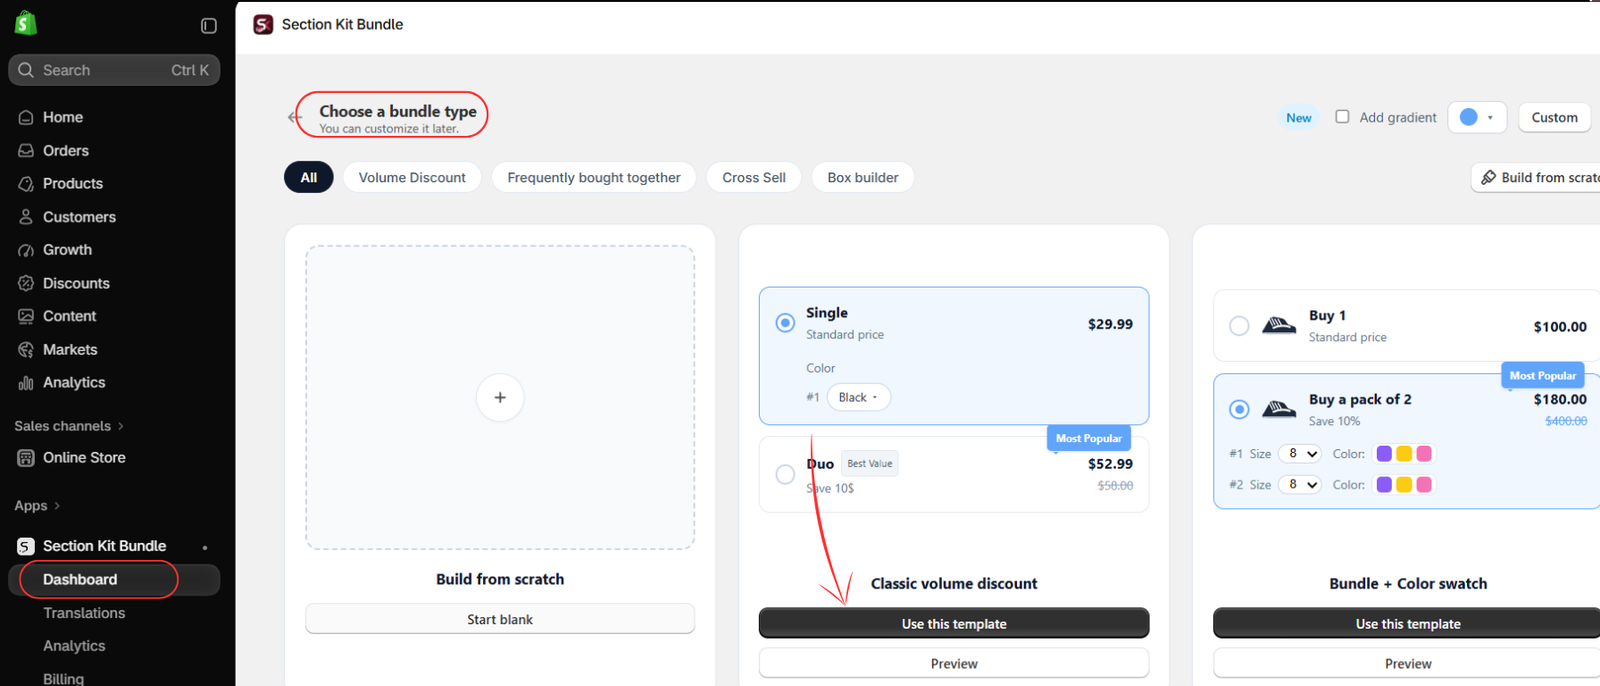
On the Choose a bundle type screen, locate Classic volume discount and click Use this template. You can use the Volume Discount category to narrow the options. This is the template highlighted in the image and the appropriate choice for quantity-based savings.
In the offer editor, define the quantity and discount for each tier. A simple starting structure is one unit at the regular price, two units with a modest discount, and three units with a larger discount. Check whether a displayed amount represents the total offer price or a per-unit price before saving. The supplied image shows template selection; the detailed tier fields are not visible here.
Step 4: Locate the Offer and Check Its Status
The next image shows the dashboard after an offer has been created. Locate your offer in the list. The pencil icon opens its editor, and the status toggle controls whether the offer is active. A green toggle indicates the offer is enabled in this image.
Use the editor to review your quantities and savings before leaving the offer active. An enabled offer still requires the storefront extension to be working; the inactive extension notice in the image should be resolved before launch.
Step 5: Understand the Other Templates
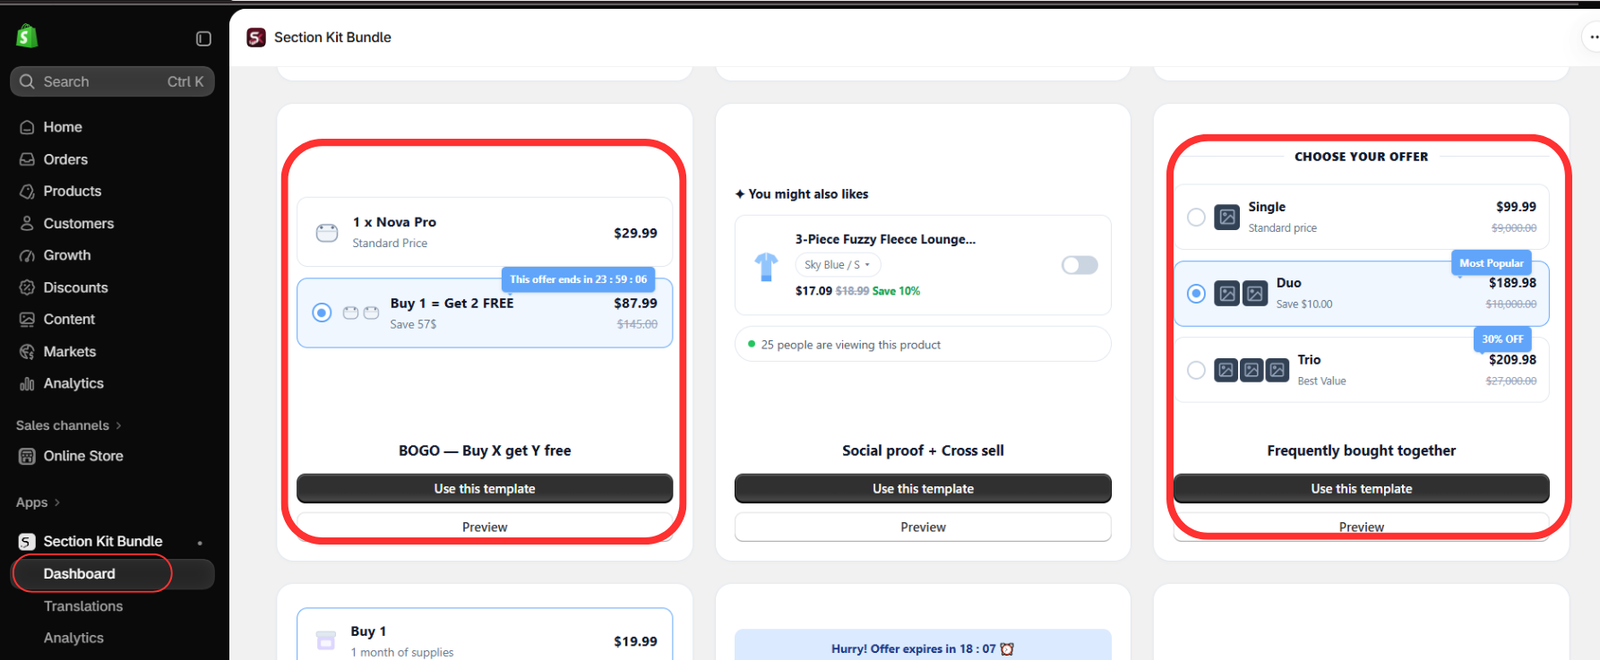
The fifth image highlights BOGO — Buy X get Y free and Frequently bought together. These illustrate other promotional layouts in the app. BOGO rewards a qualifying purchase with additional items, while frequently bought together presents a combined purchase offer.
For a straightforward quantity-break campaign, continue with the Classic volume discount template selected earlier. You do not need to enable BOGO or switch templates to offer a discount at two or three units.
Step 6: Set Visibility, Review the Preview, and Publish
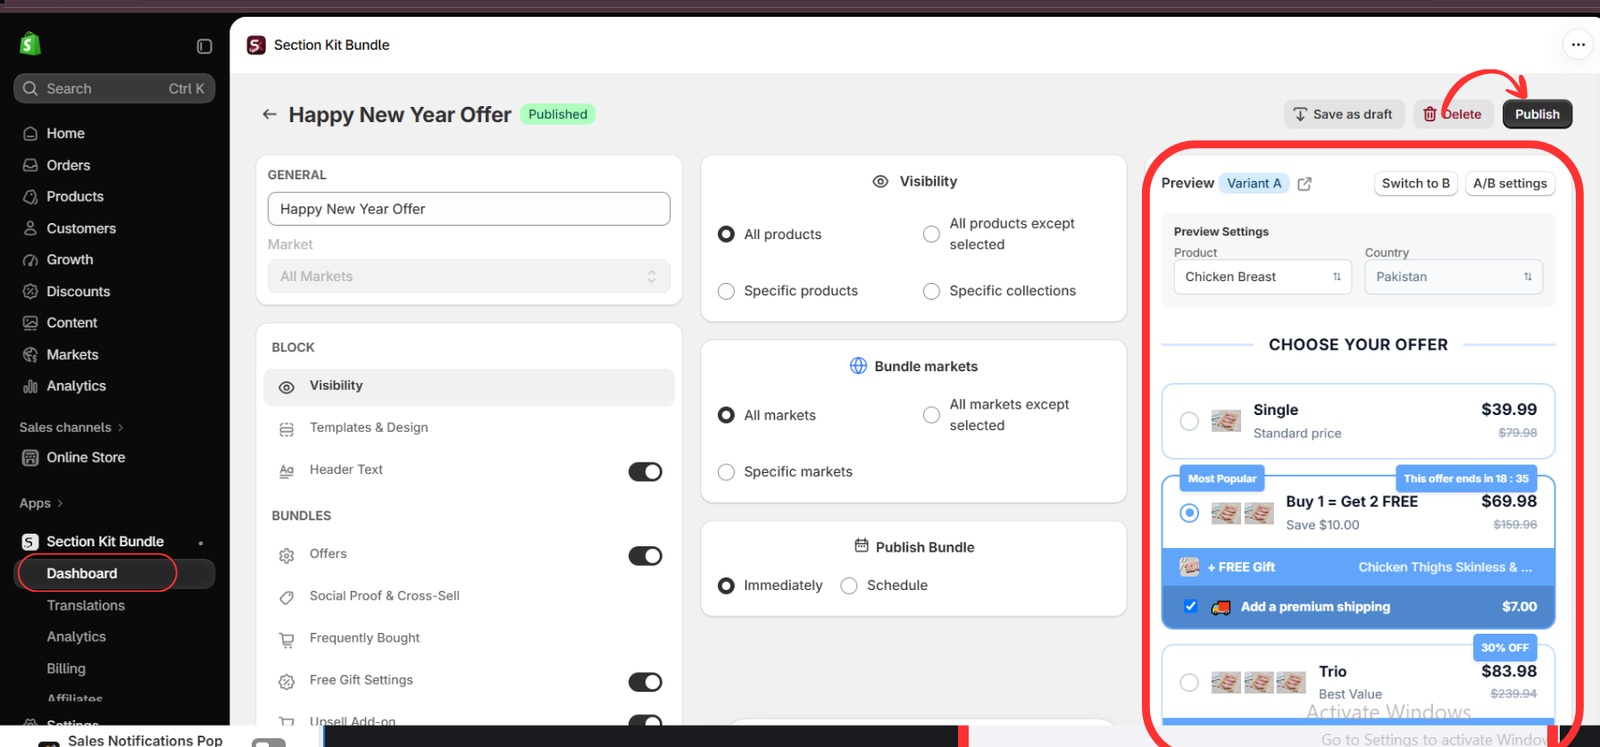
In the offer editor, give the campaign a clear internal name. Under Visibility, choose the appropriate product scope, such as Specific products or Specific collections. Review Bundle markets so the offer appears in the intended markets.
Under Publish Bundle, choose Immediately or Schedule to match your campaign timing. Use the preview product and country selectors to inspect the offer in context. After checking the configured tiers, click Publish.
This image uses a BOGO example in its preview. For your quantity-break offer, verify that the preview reflects your own quantities and discounts rather than copying the “Buy 1 = Get 2 FREE” wording.
Step 7: Refine the Layout and Test the Offer
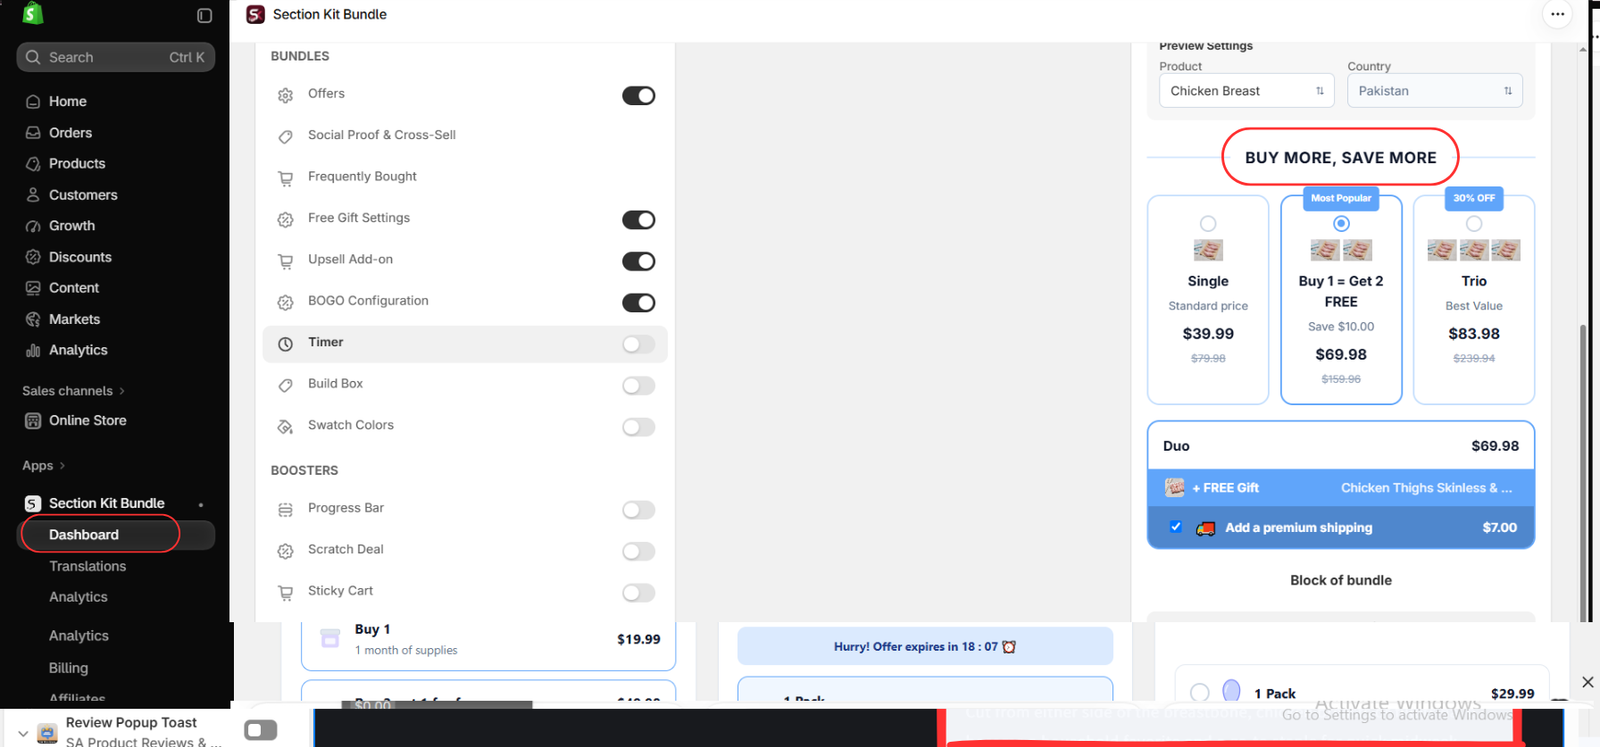
The final image shows another offer layout with the heading BUY MORE, SAVE MORE. Use the design and header settings available in your editor to create a clear presentation that matches your store. Keep tier labels, totals, and savings easy to read on both desktop and mobile.
Only enable optional components that belong to your campaign. The image includes free-gift, shipping add-on, and BOGO-related examples; these are not required for a basic quantity-break offer. Make sure any add-on and its price are clearly disclosed.
Open an eligible product page on your storefront and test every tier. Confirm the correct quantity and variants reach the cart, verify the discount and final total at checkout, and check the offer’s behavior with other promotions. Also test a product outside the selected scope to confirm targeting works as intended.
Common Setup Issues to Check
- The offer does not appear: verify publication status, the dashboard toggle, the theme extension, and product and market targeting.
- The savings look incorrect: review quantities, discount values, and whether labels show total or per-unit pricing.
- The preview shows a free-item offer: check that you selected a volume-discount template and removed unrelated BOGO settings.
- The campaign raises revenue but lowers profit: revisit discounts using product and fulfillment costs.
Monitor and Improve Your Quantity Breaks
After launch, review order quantities, average order value, discount cost, and profit per order. Start with a small number of clear tiers, then adjust based on actual purchasing behavior. If your plan supports the relevant analytics or A/B testing tools, use them to compare meaningful changes, such as the second-tier discount or offer layout.
Conclusion
Setting up quantity breaks for Shopify products starts with a useful offer and a clear product-page layout. Install Section Kit Bundles, choose Classic volume discount, configure your tiers, check targeting, publish, and test the full purchase flow.
Ready to create your offer? Explore Section Kit Bundles on the Shopify App Store and build quantity-based savings that suit your products and margins.




