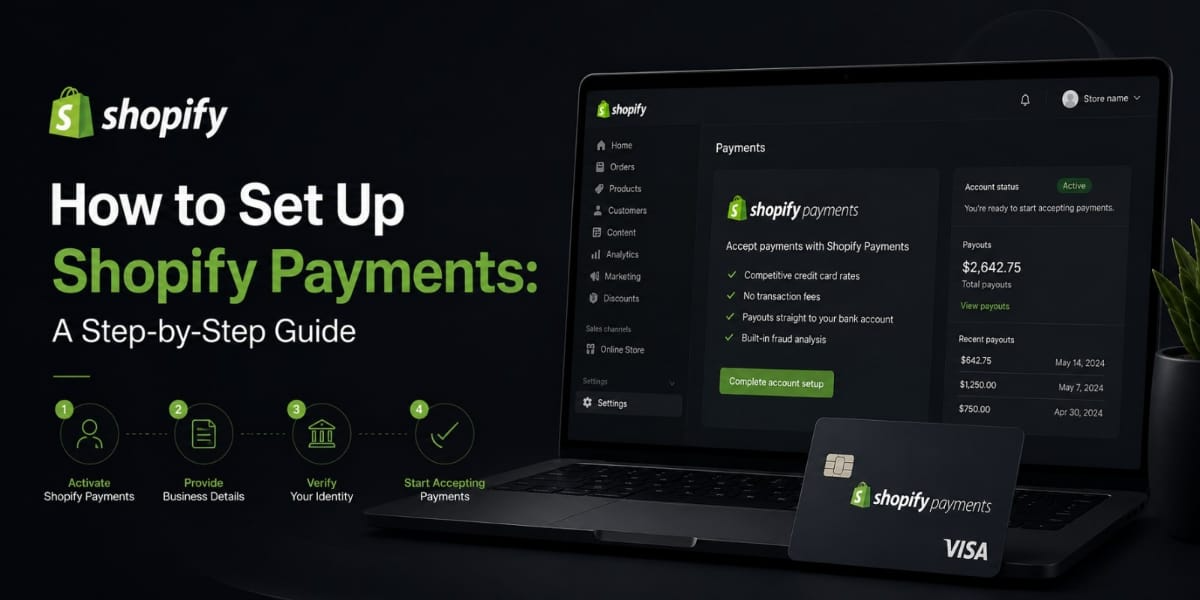
How to Set Up Shopify Payments: A Step by Step Guide
Let me ask you something.
You’ve built your Shopify store. Your products are listed. Your theme looks great. But there’s one thing missing.
You haven’t set up your payments yet.
And honestly? That one missing piece means your store can’t make a single rupee or dollar no matter how good everything else looks.
Today we’re fixing that. I’m going to walk you through exactly how to set up Shopify Payments, step by step, in plain simple language. No confusing tech talk. No skipping important details.
By the end of this, your store will be ready to take real money from real customers.
Let’s go.
First, Let’s Make Sure You’re Eligible
Before we dive into the actual setup, there’s one thing you need to check.
Shopify Payments isn’t available in every country. It currently works in the United States, United Kingdom, Canada, Australia, Ireland, New Zealand, Singapore, Hong Kong, Japan, Austria, Belgium, Denmark, Finland, Germany, Italy, Netherlands, Spain, Sweden, and Switzerland.
If your business is registered in one of these countries, you’re good to go.
If you’re based in Pakistan or another country not on that list, Shopify Payments won’t show up as an option for you. In that case, you’ll need to use a third-party payment gateway like PayPal or a local option. We’ll touch on that later in this guide too.
But if you are eligible great. Let’s set this thing up.
What You’ll Need Before You Start
Getting your payments set up is smooth when you have everything ready beforehand. So before you even open your Shopify dashboard, gather these things.
You’ll need your business details your legal business name, your business address, and your business type. Are you a sole trader, a registered company, or something else? Know this before you start.
You’ll need your personal details for identity verification. This usually means your full legal name, date of birth, and a government-issued ID like a passport or national identity card.
You’ll need your banking information. Specifically, your bank account number and routing number or IBAN and sort code depending on your country. This is where Shopify will deposit your earnings.
And you’ll need your Shopify store to already be set up with at least the basics in place.
Got all that? Perfect. Now let’s move.
Step One : Log Into Your Shopify Admin
This one’s obvious but let’s keep things in order.
Go to your Shopify store URL and log in. Once you’re inside your dashboard, you’ll see the main menu on the left side of your screen.
You’re going to look for Settings. It’s at the very bottom of that left hand menu. Click on it.
This opens up all your store’s configuration options. Things like your store name, billing, shipping, and the one we care about right now Payments.
Step Two : Open the Payments Section
Inside Settings, look for the option that says Payments and click on it.
This is your payment hub. Everything related to how your store processes money lives here.
If Shopify Payments is available in your country, you’ll see it right at the top of this page as the recommended option. It’ll say something like “Shopify Payments” with a button to complete the setup.
If you don’t see it, your country isn’t supported yet. In that case, scroll down to the section that says “Third party providers” and we’ll deal with that separately.
But assuming you do see Shopify Payments click that “Complete account setup” button and let’s keep going.
Step Three : Enter Your Business Details
Now Shopify is going to ask you some questions about your business.
The first thing it’ll want is your business type. You’ll usually see options like individual or sole proprietor, corporation, partnership, or non-profit. Pick whatever applies to your situation.
If you’re just starting out and haven’t registered a formal business yet, selecting individual or sole proprietor is completely fine. Tons of successful store owners start this way.
Next, it’ll ask for your legal business name. If you’re operating as an individual, this might just be your personal name. If you have a registered business, use the exact legal name on your registration documents.
Then comes your business address. Enter it accurately. This should match what’s on your official documents or what you’d give to a bank.
Some regions also ask for your business registration number or tax identification number at this stage. If yours does, have that ready.
Fill everything in carefully and accurately. Mistakes here can cause delays in getting your account verified.
Step Four : Add Your Personal Details
Shopify Payments is a regulated financial service. That means they’re required by law to verify the identity of the people behind the stores they process payments for.
This is called KYC Know Your Customer. It’s completely standard. Banks do it. PayPal does it. Shopify does it too.
You’ll be asked to enter your full legal name exactly as it appears on your ID. You’ll also enter your date of birth and your home address.
In some cases, Shopify will ask you to upload a copy of your government issued ID. This could be a passport, a driver’s license, or a national identity card depending on your country.
Don’t skip this or try to rush through it. If your details don’t match or something looks off, Shopify can put a hold on your payouts until it’s sorted. Get it right from the start and save yourself the headache.
Step Five : Enter Your Banking Information
This is the part everyone cares most about. Where does the money go?
Shopify will now ask for your bank account details so it knows where to send your payouts.
In the US, you’ll enter your routing number and account number. In the UK, you’ll enter your sort code and account number. In other countries, you might need your IBAN. The form will adjust based on your region.
Make absolutely sure these numbers are correct. If you enter the wrong bank details, your money will either get stuck or go somewhere it shouldn’t. Double-check. Then check again.
Also make sure the bank account you’re entering is in your name or your business name. Shopify won’t send money to an account that doesn’t match the identity on your Shopify Payments account.
Once you’ve entered your banking info, save it and move on.
Step Six : Set Up Two Step Authentication
Shopify will prompt you to enable two-step authentication if you haven’t already.
This is a security feature. It means that even if someone gets hold of your password, they still can’t access your account without a second verification step usually a code sent to your phone.
Do not skip this.
Your payment settings contain sensitive financial information. Protecting your account with two-factor authentication is one of the simplest and most important things you can do to keep your store and your money safe.
Set it up. It takes about two minutes.
Step Seven : Review Your Payout Schedule
Once your account details are saved, take a moment to look at your payout schedule settings.
Your payout schedule is how often Shopify sends your earnings to your bank account. Depending on your country, this could be daily, every two days, every three days, or weekly.
In the US, daily payouts are available. In many other countries, it’s every two to three business days.
You can often adjust this inside your Shopify Payments settings. Some store owners prefer weekly payouts so they get one bigger transfer rather than small daily ones. Others prefer daily because cash flow is important to them.
There’s no right or wrong answer. Pick whatever makes the most sense for how you manage your money.
Step Eight : Choose Your Accepted Payment Methods
Now here’s where you can really customize your checkout experience.
Inside Shopify Payments settings, you’ll see options for which payment methods you want to offer. At minimum, you’ll be accepting major credit and debit cards — Visa, Mastercard, American Express, and Discover.
But you can also enable Shop Pay. This is Shopify’s own accelerated checkout where customers can save their payment and shipping details so they can check out faster next time. It’s worth enabling this because it genuinely does increase conversion rates.
Depending on your region and plan, you may also be able to enable Apple Pay and Google Pay. Both of these let customers pay with just a tap on their phone or computer without entering any card details manually. Faster checkout almost always means more completed purchases.
If Shop Pay Installments is available in your country, seriously consider enabling that too. It lets customers split their order into smaller payments over time. This is especially powerful for higher-priced products because it lowers the barrier to buying.
Enable everything that’s available and relevant to your customers. More payment options means fewer reasons for someone to abandon their cart.
Step Nine : Test Your Checkout
Your Shopify Payments account is set up. But before you start sending customers to your store, you need to make sure everything actually works.
Shopify has a built in test mode for exactly this reason.
Go back to your Payments settings and look for the option to enable test mode. When test mode is on, you can place fake orders using Shopify’s test credit card numbers to simulate a real transaction.
The test card number Shopify gives you is 4111 1111 1111 1111. Use any future expiry date and any three digit CVV. Place a test order, go through the entire checkout, and confirm that the order shows up in your admin and that everything looks right.
Once you’ve confirmed it’s working, go back and turn test mode off. You don’t want to accidentally leave it on because then real customer payments won’t process.
This step takes five minutes and can save you from finding out your payments are broken only after a real customer tries to buy something.
Step Ten : Add PayPal as an Additional Option
This isn’t mandatory but it’s highly recommended.
Even with Shopify Payments fully set up, a good chunk of online shoppers prefer to pay through PayPal. Some people just trust it more. Some don’t want to enter their card details anywhere that isn’t PayPal. Whatever the reason, offering PayPal as an option can capture sales you’d otherwise lose.
Go back to your Payments settings and scroll down. You’ll see a section for PayPal. Click to connect your PayPal business account. If you don’t have one, creating a PayPal business account is free and only takes a few minutes.
Once connected, PayPal will appear as an option at your checkout alongside your card payment options.
And here’s the good news because you’re using Shopify Payments as your primary provider, Shopify won’t charge you the extra transaction fee when customers choose PayPal either.
What Happens After You Go Live
Once everything is set up and tested, your store is officially ready to accept payments.
Here’s what happens when a customer places an order.
They go through your checkout, enter their payment details, and complete their purchase. Shopify Payments processes the transaction in real time. The money — minus the processing fee sits in your Shopify Payments balance.
Then, on your payout schedule, Shopify transfers that balance to your bank account. You’ll get an email notification when a payout is sent and you can see full details inside your dashboard under Payments.
It usually takes one to three business days for the transfer to actually appear in your bank account after it’s been sent. This depends on your bank more than on Shopify.
What If Your Account Gets Flagged or Held?
Sometimes, especially with new accounts, Shopify might put a temporary hold on your payouts.
Don’t panic if this happens.
It’s usually just part of their standard verification process for new accounts. They want to make sure everything checks out before releasing funds.
If your payout is on hold, you’ll typically receive an email from Shopify explaining what’s happening and what they need from you. It might be additional ID verification or some documentation about your business.
Respond quickly, provide whatever they ask for, and the hold is usually resolved within a few days.
To reduce the chances of this happening in the first place, make sure all your account details are accurate and up to date, your products are clearly described, and your store looks like a legitimate, professional operation.
What If Shopify Payments Isn’t Available in Your Country?
If you’re in a country like Pakistan where Shopify Payments isn’t available yet, here are your best options.
PayPal is the most widely available and globally trusted option. Setting it up is simple just connect your PayPal business account inside your Payments settings.
Stripe is another excellent option if it’s available where you are. It offers a lot of the same features as Shopify Payments and integrates smoothly with Shopify.
For Pakistani store owners specifically, options like JazzCash, EasyPaisa, and bank-specific payment integrations exist depending on your setup. Some merchants also use international payment gateways where their business is registered in a supported country.
Just keep in mind that with third-party providers, Shopify charges an additional transaction fee on top of the gateway’s own fees. On the Basic plan, that’s an extra 2%. On higher plans, it’s less. Factor that into your pricing.
A Few Final Tips to Keep Things Running Smoothly
Keep your bank details updated. If you change banks or accounts, update your information in Shopify Payments immediately. Outdated bank details mean your money gets stuck.
Check your payments dashboard regularly. Make it a weekly habit to look at your payouts, review any flagged orders, and keep an eye on your overall finances.
Take fraud alerts seriously. If Shopify flags an order as high risk, don’t just ignore it and ship the order anyway. Review it carefully. One fraudulent order can turn into a chargeback that costs you the product and the money.
Keep your contact email active. Shopify sends important notifications chargebacks, payout holds, verification requests to your account email. Make sure it’s an address you actually check.
Stay on top of chargebacks. If you receive one, respond within the deadline. Submit tracking numbers, order details, and any customer communication you have. The faster and more thoroughly you respond, the better your chances of winning.
You’re Ready
Setting up Shopify Payments really isn’t as complicated as it might seem at first.
It’s a handful of steps, some basic information about yourself and your business, and a quick test to make sure everything works. That’s it.
And once it’s done, your store is a real business. One that can take payments, process orders, and send money to your bank account.
Everything else you do — your marketing, your product selection, your customer service all of it leads to this moment where a customer hands over their money and trusts you with their order.
Make sure that moment works perfectly.
Get your payments set up today. Your first sale might be closer than you think.