HOW TO REPLACE THE DEFAULT MOUSE CURSOR ON A SHOPIFY STORE
Your store’s branding appears in its colors, typography, product photography, and layout. A custom mouse cursor can extend that style into the way visitors browse. Whether you prefer a simple branded pointer or a playful design, you can replace the default mouse cursor on a Shopify store without editing theme code.
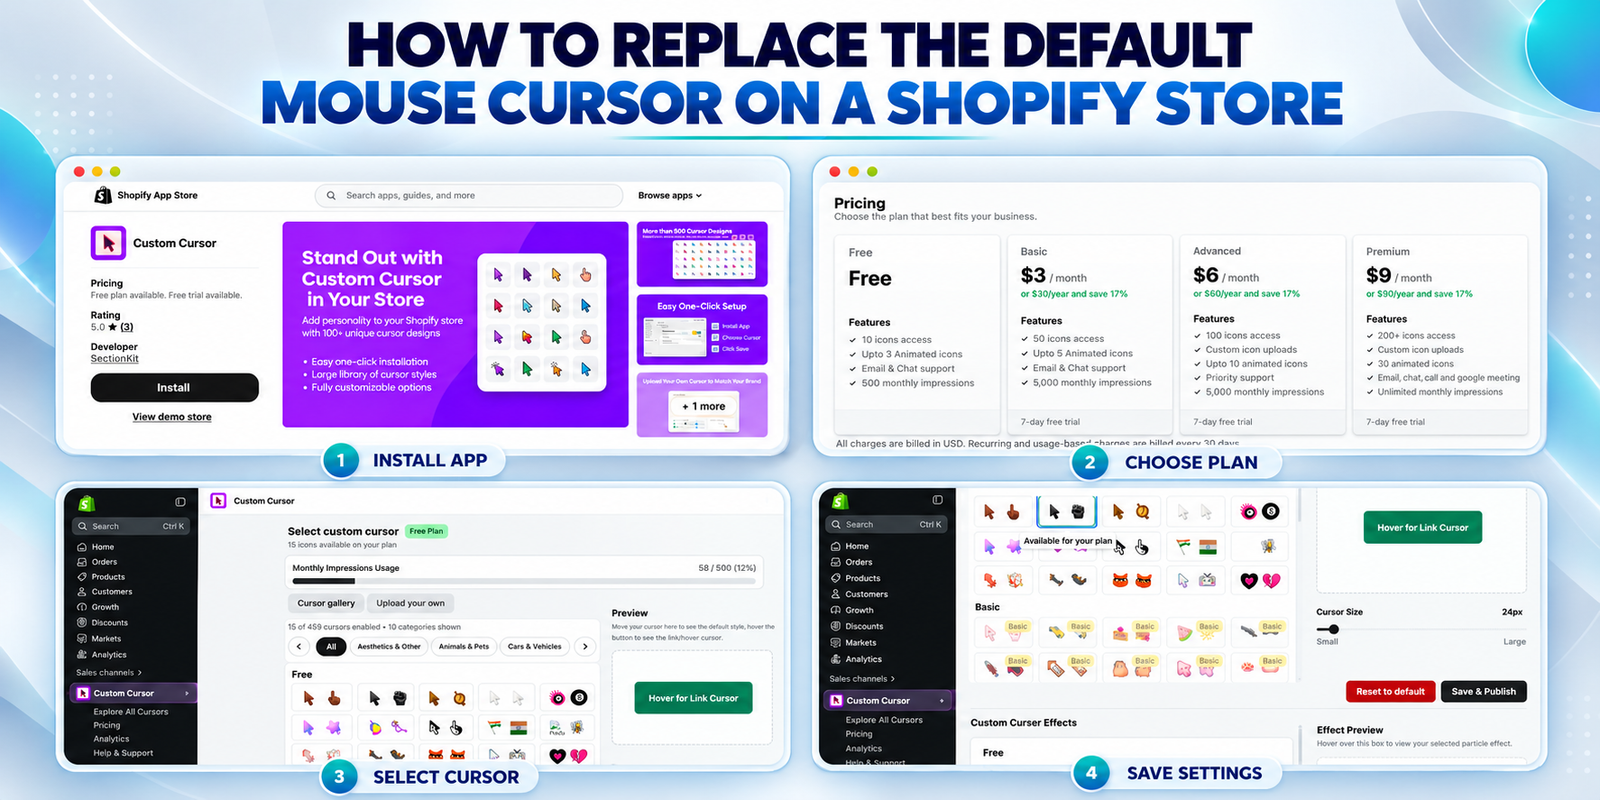
This guide explains how to use Custom Cursor, choose a suitable design, preview its behavior, and save your settings. The four images below follow the setup sequence you provided.
The headache: a small design change can become extra work
Shopify merchants often want a distinctive storefront but find that their theme settings do not include a dedicated cursor selector. Making the change manually can mean finding a suitable cursor file, writing CSS, and checking how the pointer behaves over links and buttons.
The harder part is choosing a design that stays useful. An oversized cursor can cover product details, while a low-contrast design can disappear against a banner. Adding too many effects can also compete with the products visitors came to see.
Why use the Custom Cursor app?
Custom Cursor provides a visual way to select cursor designs and personalize the storefront without coding. Its Shopify App Store listing includes ready-made cursors, custom uploads, animations, trails, and hover effects. For this tutorial, the goal is a straightforward replacement of the default pointer.
The supplied images show a cursor gallery, a preview area, a size slider, and saving controls. These tools let merchants compare a design before applying it, rather than making repeated manual edits.
Why the right cursor matters
A well-chosen cursor can add a consistent finishing touch to your store. A restrained pointer can suit a clean product catalog, while a playful cursor may complement a colorful accessories or gift store. The best choice depends on your brand and the people shopping with you.
Keep navigation clear. Visitors should still be able to identify links, read prices, and use product options comfortably. A custom cursor is a design detail; it does not guarantee more sales. Its value depends on how well it supports the overall browsing experience.
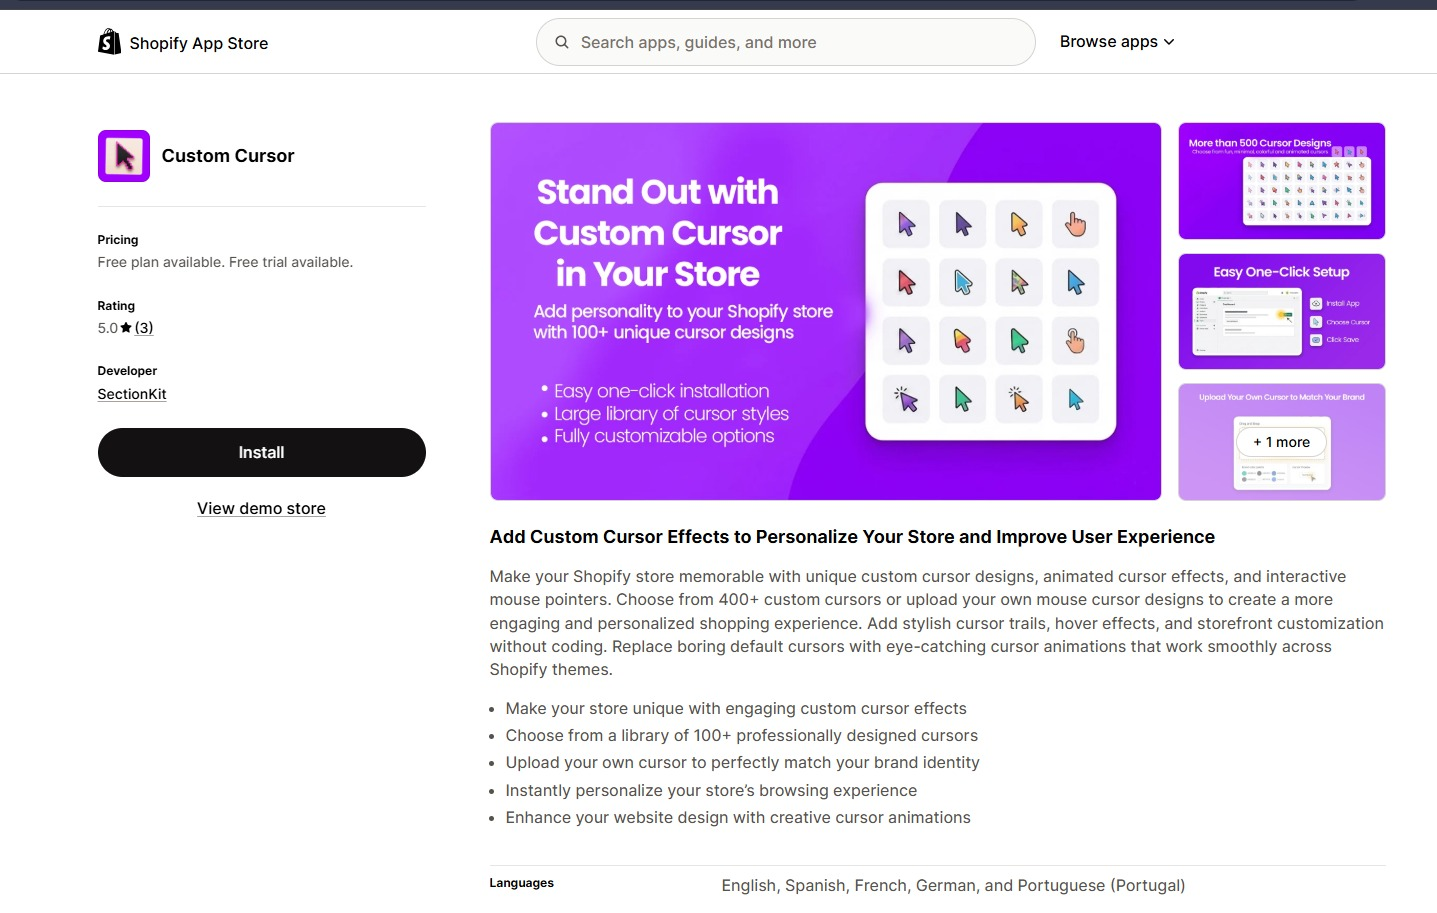
Step 1: install Custom Cursor
- Open the Custom Cursor listing in the Shopify App Store.
- Click Install and select the store you want to customize.
- Review the installation details and complete Shopify’s installation flow.
- Open the app from your Shopify admin.
Image 1 shows the app listing and its Install button. Check the current listing before installing because available features and plan terms can change.
Step 2: choose a plan that covers your needs
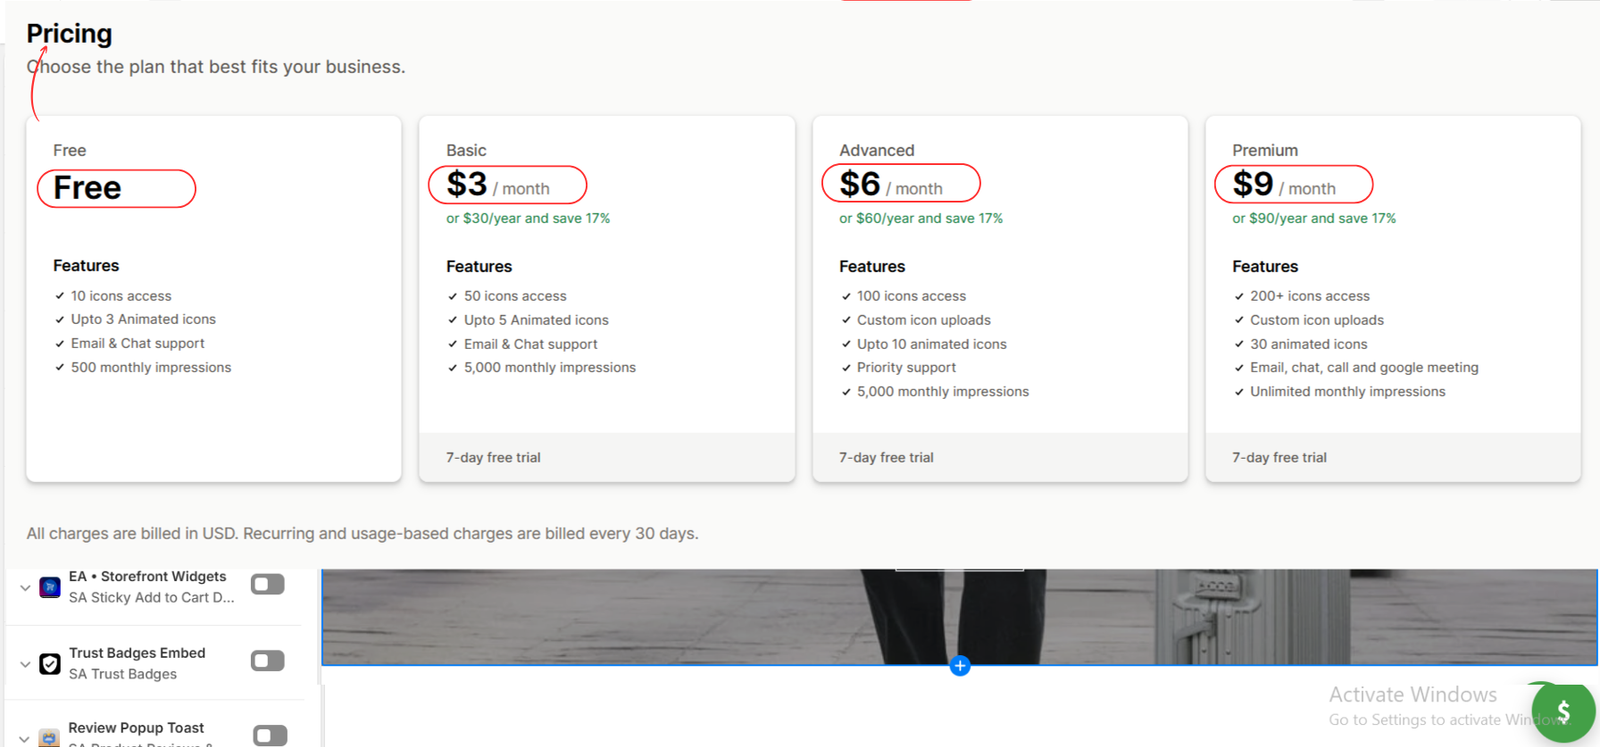
Open Pricing inside the app and compare the available plans. Choose according to the cursor designs you need and your expected usage. A higher tier is useful only when its additional features fit your requirements.
Image 2 shows Free, Basic, Advanced, and Premium options. It also lists different icon access and monthly impression allowances. Custom uploads appear on the Advanced and Premium plans in this image. You do not need to upload an image if a suitable cursor is already available in your gallery.
Review the current subscription terms in the app before accepting a paid plan.
Step 3: browse the gallery and select a cursor
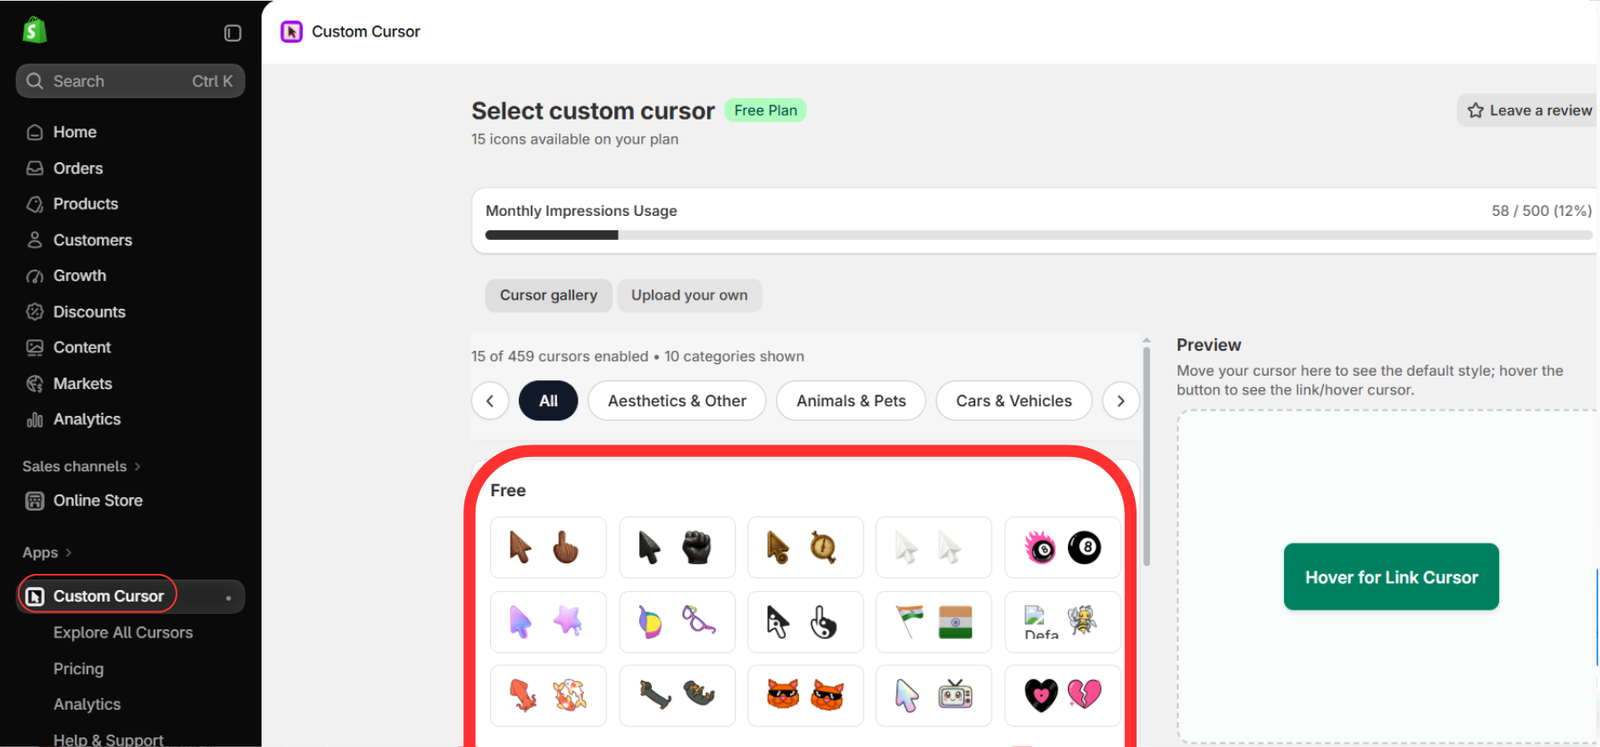
- Open Custom Cursor in Shopify admin.
- Choose the Cursor gallery tab.
- Browse the category filters or view all available designs.
- Select a cursor pair included in your plan.
- Move your pointer inside the Preview area to inspect the default style.
- Hover over Hover for Link Cursor to check its link or hover style.
Image 3 shows the gallery and preview panel. Some designs appear as pairs because the normal pointer and the pointer over a link can use different artwork. Check both states before deciding.
Choose a shape that remains clear against your store’s light and dark backgrounds. Keep the design consistent with your products and audience, rather than selecting it only because it looks unusual.
Step 4: adjust the size and save your selection
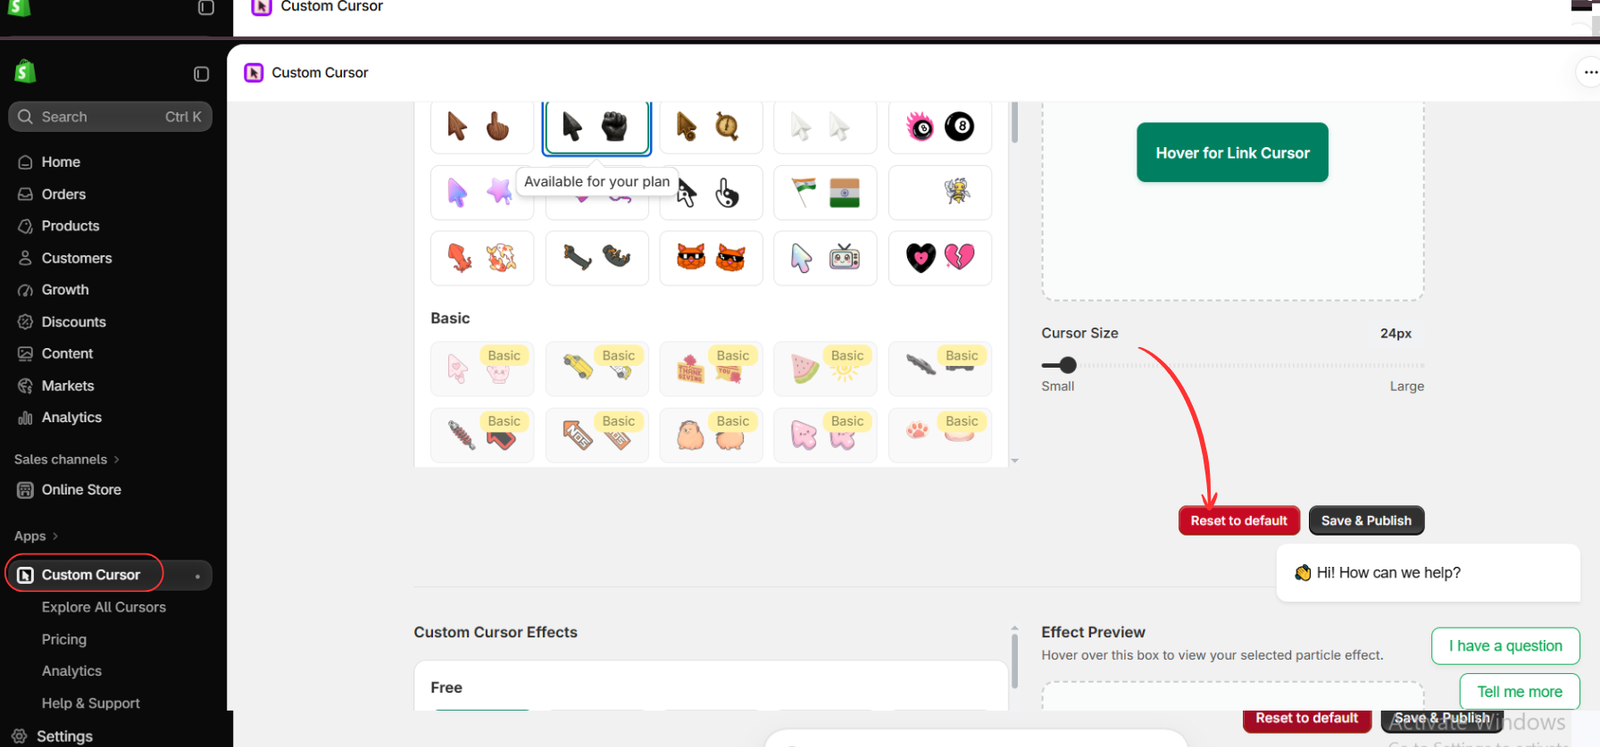
Use the Cursor Size slider to make the pointer easy to see without covering nearby content. Image 4 shows a selected dark pointer and fist pair, a size setting of 24px, and the two main controls.
- Confirm your preferred cursor is selected.
- Adjust its size and check the preview again.
- Click Save & Publish to save the custom cursor settings.
Read the final image carefully: its red arrow points to Reset to default. Use that control when you want to return the cursor setting to its default state. To keep your chosen custom design, use Save & Publish, located beside it.
Step 5: enable the app embed and check the storefront
After saving your cursor, check whether the app’s theme embed is enabled. In Shopify admin, open Online Store → Themes, open the theme editor for the theme you intend to use, and select App embeds. Enable Custom Cursor if it is switched off, then click Save.
Open the storefront in a separate browser tab and refresh it. Move your mouse over the homepage, product pages, menus, and buttons. Confirm that your custom pointer appears and that links remain easy to use.
Mouse cursor customization is mainly relevant to visitors using a mouse or trackpad. Touch-only shoppers generally do not have a visible mouse pointer, so keep the mobile shopping experience useful on its own.
If the default cursor still appears
- Confirm that you clicked Save & Publish after selecting the design.
- Check that Custom Cursor is enabled in the theme you are viewing.
- Refresh the storefront and test in a new browser tab.
- Check that your selected design and usage remain covered by your plan.
- If another cursor tool is active, check for competing cursor settings.
If the issue continues, contact the app’s support team with your theme name and a description of where the default pointer still appears.
Choose the cursor your store and visitors need
Replacing the default mouse cursor on a Shopify store can be a simple way to personalize its design. Start with a clear, recognizable pointer, preview both normal and hover states, and test the saved result across your storefront.
The final choice belongs to you as the merchant. Consider your viewers’ preferences, your brand’s personality, and how comfortably customers can browse. Keep the custom design when it fits; return to the default setting when that serves your audience better.
Explore the app: Custom Cursor on the Shopify App Store




