WHERE SHOULD TRUST BADGES APPEAR ON A SHOPIFY PRODUCT PAGE?
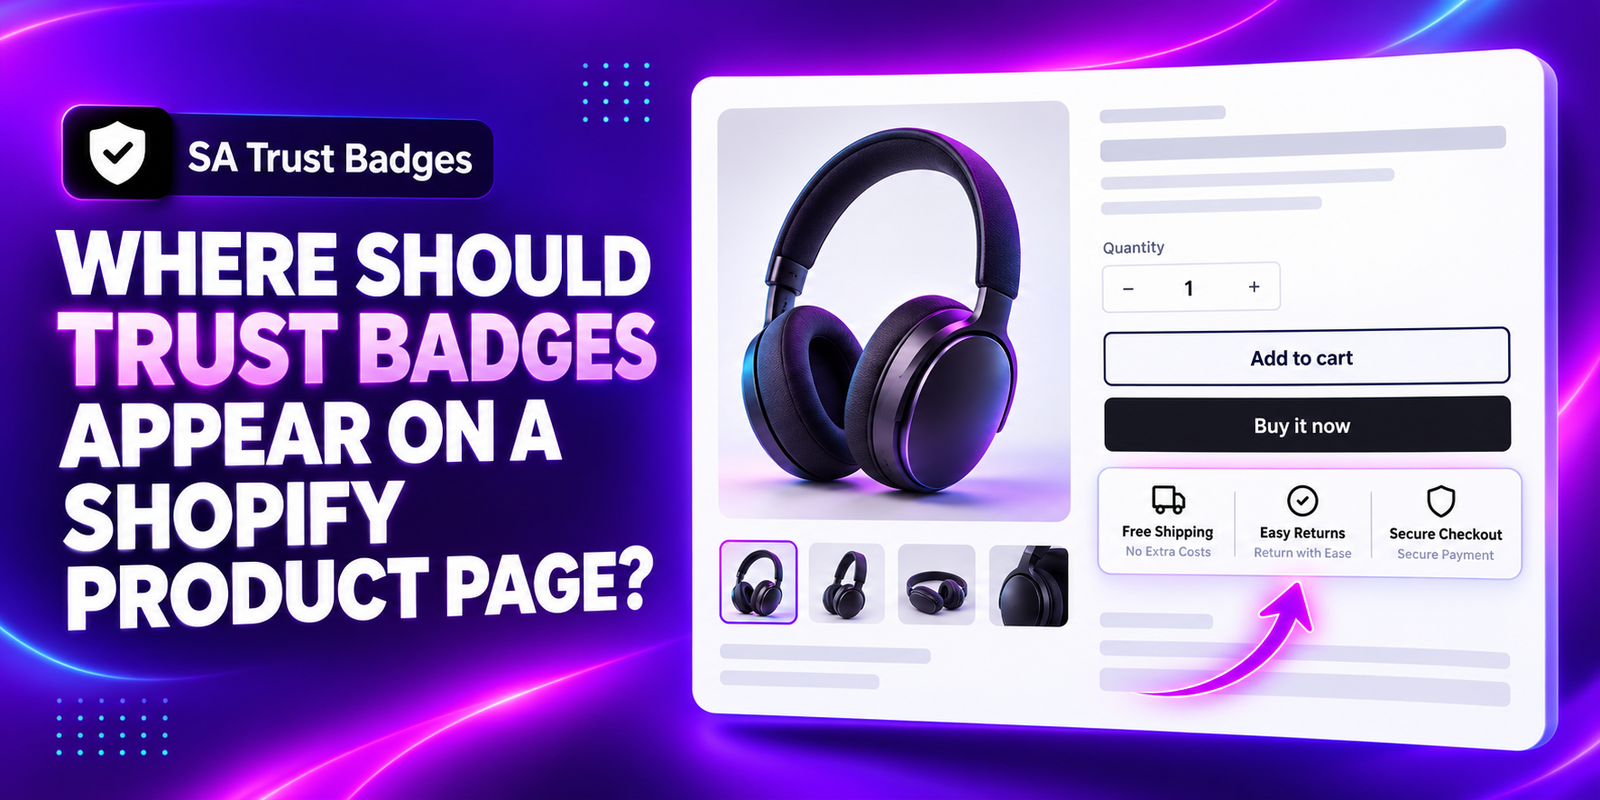
A useful starting point is directly below the product’s purchase buttons, close to Add to Cart and Buy it now. This keeps shipping, returns, and payment reassurance near the buying decision without placing another block between the shopper and the main action. The right final position depends on your theme, the message, and how the page works on mobile.
This guide explains where trust badges should appear on a Shopify product page and how to set up a compact badge block with SA Trust Badges. The four images below follow the setup from installation through the finished product preview.
The problem: reassurance is easy to miss
Merchants often place shipping and return information in a footer or a long description. Customers who are ready to order may not notice it. At the other extreme, stacking several large badge banners around the purchase controls can make the page crowded and push useful information farther down the screen.
The challenge is to make reassurance visible while keeping product options, pricing, and purchase buttons easy to use. A small badge row beneath the buying controls is a practical starting point to evaluate in your own store.
Why use a trust badge app?
SA Trust Badges supports product-page badges, guarantee banners, and payment icons. Its official listing describes customizable layouts, colors, icon sizes, borders, product or collection targeting, and Shopify Theme App Embed integration.
These controls let you configure the message and presentation in the app, then check how it fits your theme. Review the current plans and limits before choosing your setup. Exact placement can depend on the selected settings and theme integration.
Choose placement according to the message
| Location | Suitable use | What to check |
|---|---|---|
| Below purchase buttons | A compact shipping, returns, or payment reassurance row | Keep the buttons prominent and avoid duplicate blocks. |
| Near delivery information | Shipping conditions or delivery-related reassurance | Show relevant conditions alongside the message. |
| Near a guarantee explanation | A product-specific guarantee or warranty summary | Make the detailed terms easy to find. |
| Footer or policy pages | Supporting store information | Do not rely on these locations as the only place for important purchase reassurance. |
These are design suggestions, not a claim that every location is available as a preset in the app. For the setup shown here, use the badge row below the purchase buttons and inspect the actual result in your theme.
Why proximity and simplicity matter
Placing relevant information near the buying controls can help shoppers find answers without searching elsewhere. Keep the row short: a few useful messages are easier to scan than a wall of icons.
Only show promises your store supports. Free Shipping must reflect eligible products and destinations; Easy Returns should match your return conditions. A security icon communicates reassurance but does not add a security feature or certify your store. Placement alone does not guarantee an increase in sales.
Step 1: Install SA Trust Badges
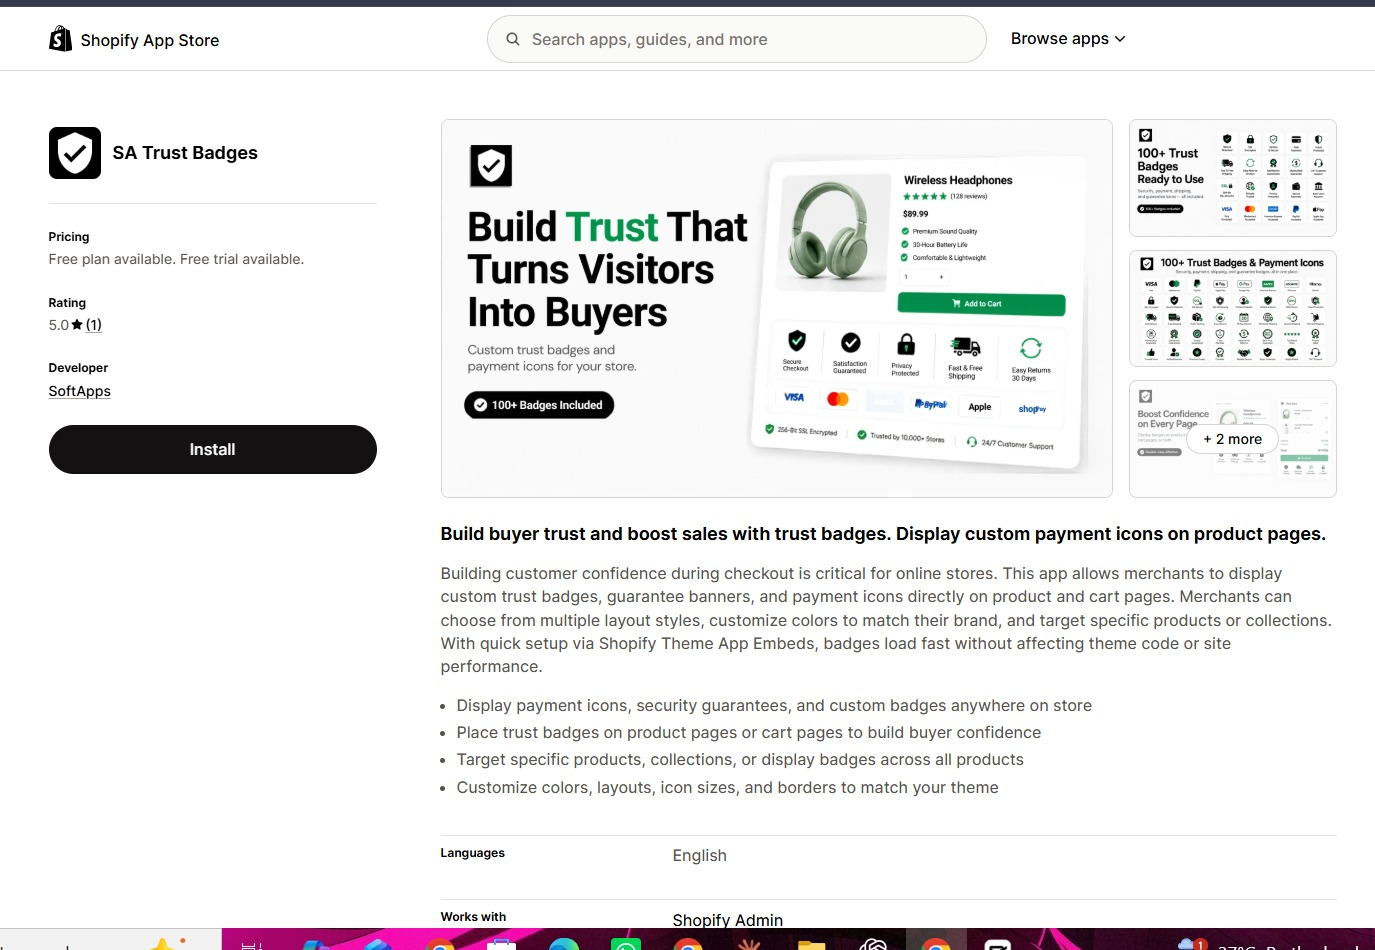
Open SA Trust Badges on the Shopify App Store and click Install. Select your store if prompted, review the installation details, and complete setup. Open the app from your Shopify admin.
Step 2: Create a compact product badge block
Choose Create Product Badge. In Content, select Icon block to create a row like the second image. Enter a descriptive internal Badge name and configure the icons, titles, and supporting text.
The example preview contains Free Shipping, Easy Returns, and Secure Checkout. Use these messages only where they apply, or replace them with relevant information for your products. Choose recognizable icons and concise text.
Open Design to match the block to your theme. Keep the icon size and spacing modest so the block supports the purchase controls. Check the mobile preview as well as desktop.
Review Placement to configure the intended product-page display and any product or collection targeting available for your setup. The supplied image shows Content, so it does not demonstrate an exact position selector. Use the controls in your app and verify the final position in the theme preview. Click Publish when the badge is ready.
Step 3: Open the intended theme
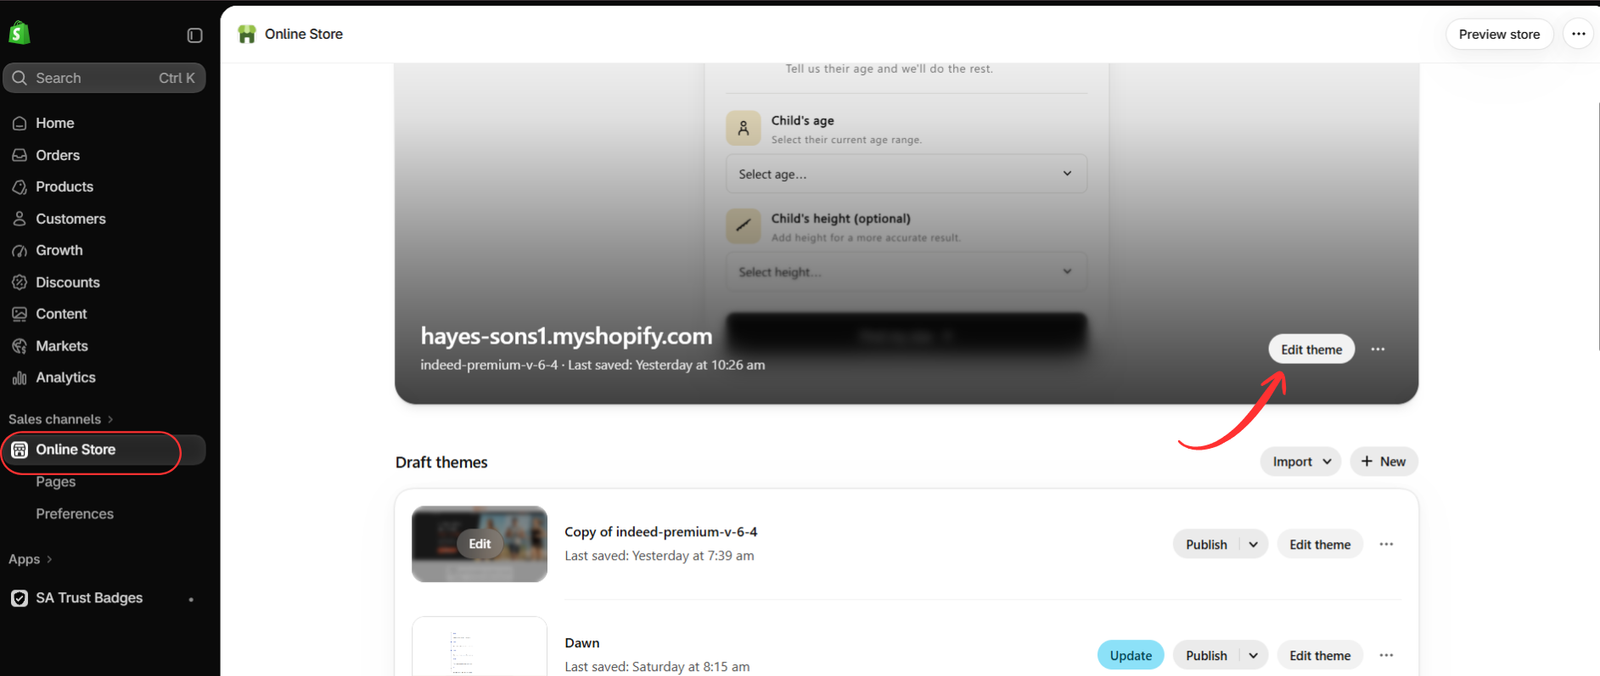
Go to Online Store → Themes and click Edit theme for the theme you want to configure. Your Shopify admin may label this action Customize.
Check that you are opening the correct theme. If you work on a draft theme, use its preview before expecting the badge to appear on your live storefront.
Step 4: Enable the embed and inspect the position
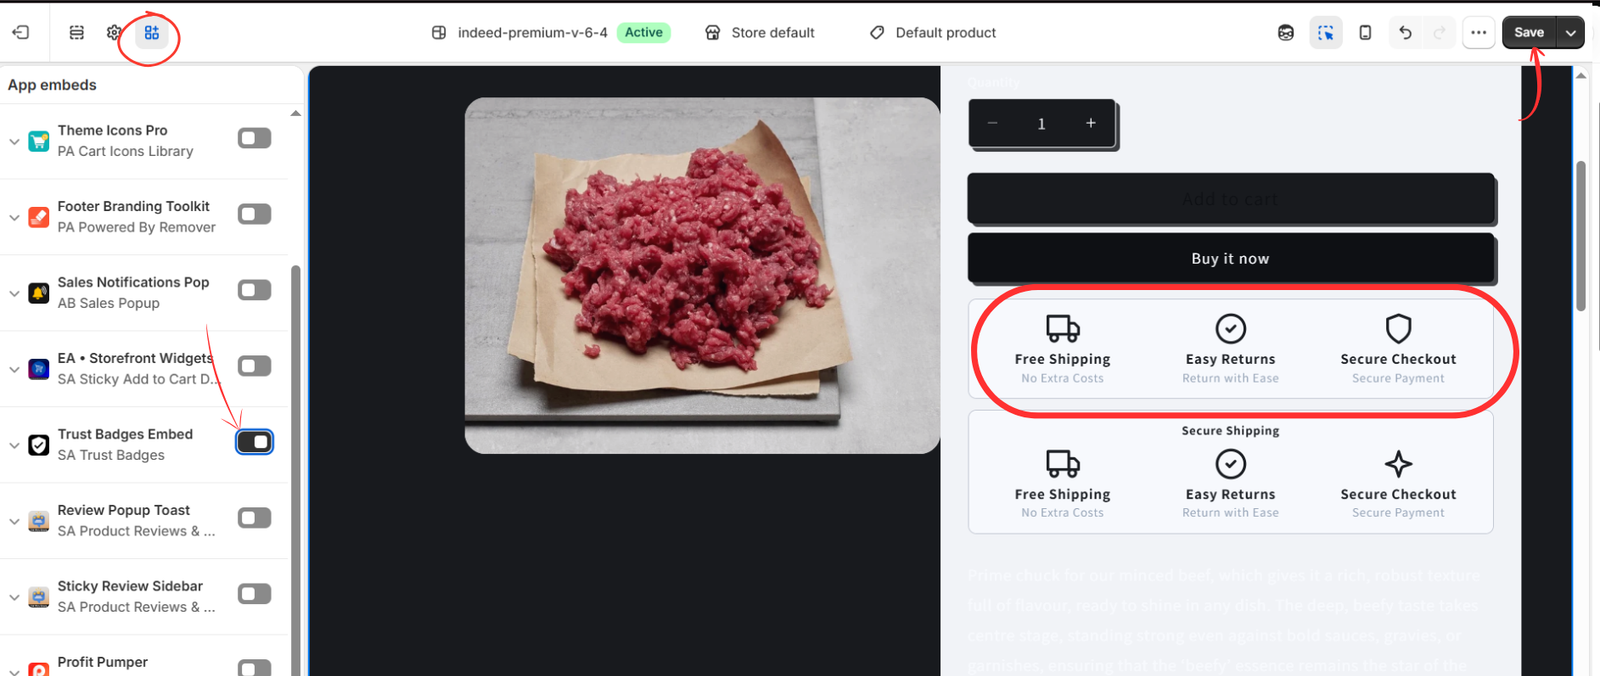
Open App embeds in the theme editor. Find Trust Badges Embed under SA Trust Badges, switch it on, and open a relevant product template. Click Save to retain the theme setting.
The fourth image shows a badge row directly below Buy it now, with Add to Cart above it. This is the placement example used in this guide. Confirm that the row is close to the purchase controls and does not overlap them.
The image also contains another trust block below the highlighted row. Review whether you need both. Removing repeated messages can keep the product page shorter and easier to scan.
Check placement on mobile
Open the product on your storefront using a phone or a mobile preview. Check that the badge text stays readable, the icons fit the available width, and the block follows the purchase controls in a sensible order.
Do not force a wide desktop row into a small screen if the text becomes tiny. Use the available design controls or shorten the wording, then inspect the resulting mobile layout. If your theme has a sticky purchase bar, check that it does not cover the badge or other content.
Verify the finished page
Review representative products, especially if you use multiple templates or product targeting. Check that selected products show the intended messages and that excluded products do not show promises that are irrelevant to them.
If the badge is missing, confirm its published status, the embed in the correct theme, placement settings, and your plan limits. If the position is unsuitable, review the app’s available placement controls or contact app support about your theme. Avoid adding duplicate blocks as a workaround.
Keep badges close to the decision
Begin with one compact row beneath the purchase buttons. Keep its messages accurate, its design consistent with your theme, and detailed policies easy to find. Then evaluate the placement on actual desktop and mobile product pages.
To set up the example, install SA Trust Badges, create a product Icon block, publish it, enable the theme embed, and check the result beneath your purchase controls.
Feature reference: SA Trust Badges official listing. Placement guidance is a design recommendation; the supplied images demonstrate one theme’s result.




