HOW TO TURN A PHONE PHOTO INTO A PROFESSIONAL PRODUCT IMAGE

Introduction
Professional product photography plays an important role in building a successful Shopify store. Clear, attractive product images help customers understand what they’re buying and make your online store look more trustworthy.
However, hiring photographers, booking studios, and arranging lifestyle photoshoots can be expensive, particularly for small businesses.
What if you could take a simple product photograph with your smartphone and use AI to create professional-looking studio and lifestyle images?
With PA AI Image Generator, Shopify merchants can use existing product photos as references and create new images using artificial intelligence.
In this guide, we’ll show you how to turn an ordinary product photo into professional-looking Shopify product photography, using real examples of snowboard images generated with PA AI Image Generator.
Why Professional Product Images Matter
High-quality product images help merchants:
- Create a stronger first impression.
- Show products in attractive environments.
- Maintain consistent product photography.
- Prepare images for social media and marketing.
- Help customers visualize products in real-world settings.
- Reduce the need for repeated photography sessions.
The Challenge: Turning Simple Photos Into Professional Product Photography
Many Shopify merchants start with basic product photographs taken using a mobile phone.
Although these photographs may show the product clearly, they often lack attractive backgrounds, professional lighting, styled compositions, and lifestyle context.
Manually improving every image takes time, especially when a store contains hundreds of products.
AI image generation offers a way to create additional visual variations from existing product references.
Introducing PA AI Image Generator
PA AI Image Generator helps Shopify merchants create studio-style, lifestyle, seasonal, and on-model product images from existing catalog photographs.
With this application, merchants can select products, choose photography presets, configure image settings, and review generated results before publishing.
Shopify App: Install PA AI Image Generator
Step 1: Search for the Shopify App Store
Open Google Chrome or your preferred web browser.
Type Shopify App Store into Google and press Enter.
Find the official Shopify App Store result and click it.

Step 2: Install and Open PA AI Image Generator
First, open the Shopify App Store.
Use the search bar to search for PA AI Image Generator.
The search results will display the app alongside other image generation and ecommerce photography applications.

Image 1: Search for PA AI Image Generator in the Shopify App Store.
Image explanation: The screenshot shows the Shopify App Store search results, with PA AI Image Generator highlighted. Its listing describes the app as a tool for creating studio and on-model AI product photography.
Click the app to open its listing.
Step 3: Install and Open PA AI Image Generator
On the app listing, review the description, available features, and pricing information.
Click Install if the app has not yet been installed, then approve the requested Shopify permissions.
Once installation is complete, select Open to launch the application.
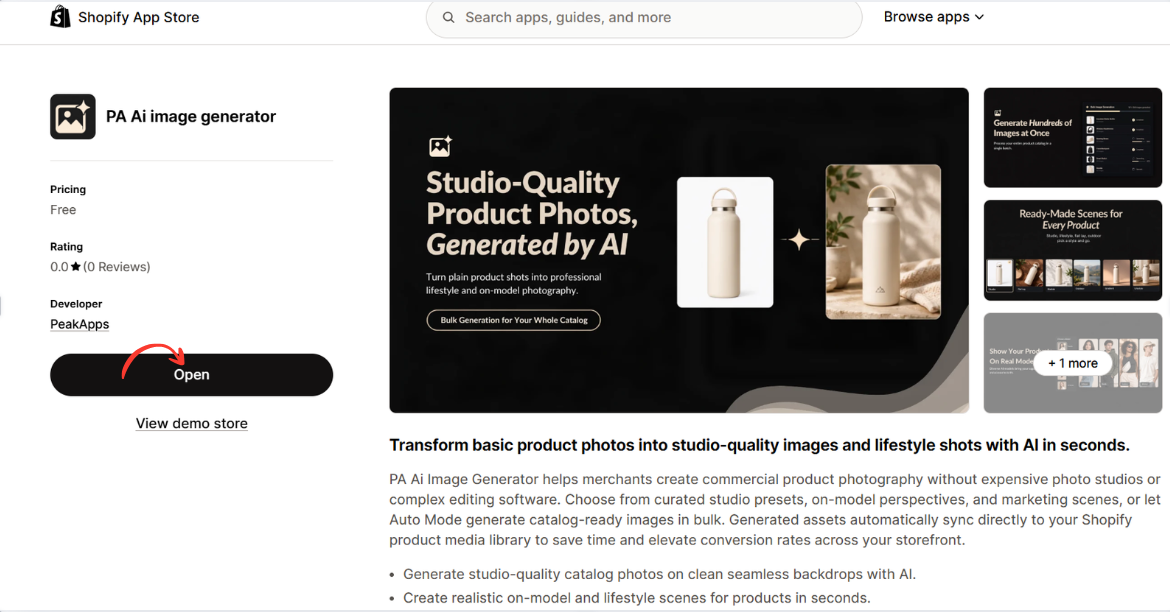
Image 2: Open PA AI Image Generator from its Shopify App Store listing.
Image explanation: The screenshot displays the app listing, including an illustration demonstrating how an ordinary product image can become a lifestyle-style photograph.
The Open button is highlighted, showing how merchants can access the installed app.
Step 4: Open the Generate Images Dashboard
After opening the app, locate Generate Images in the left navigation menu.
The image-generation workflow begins with selecting the products you want to use.
Click Browse Products to choose individual products from your Shopify catalog.
Alternatively, you can use Browse Collections to work with a collection.
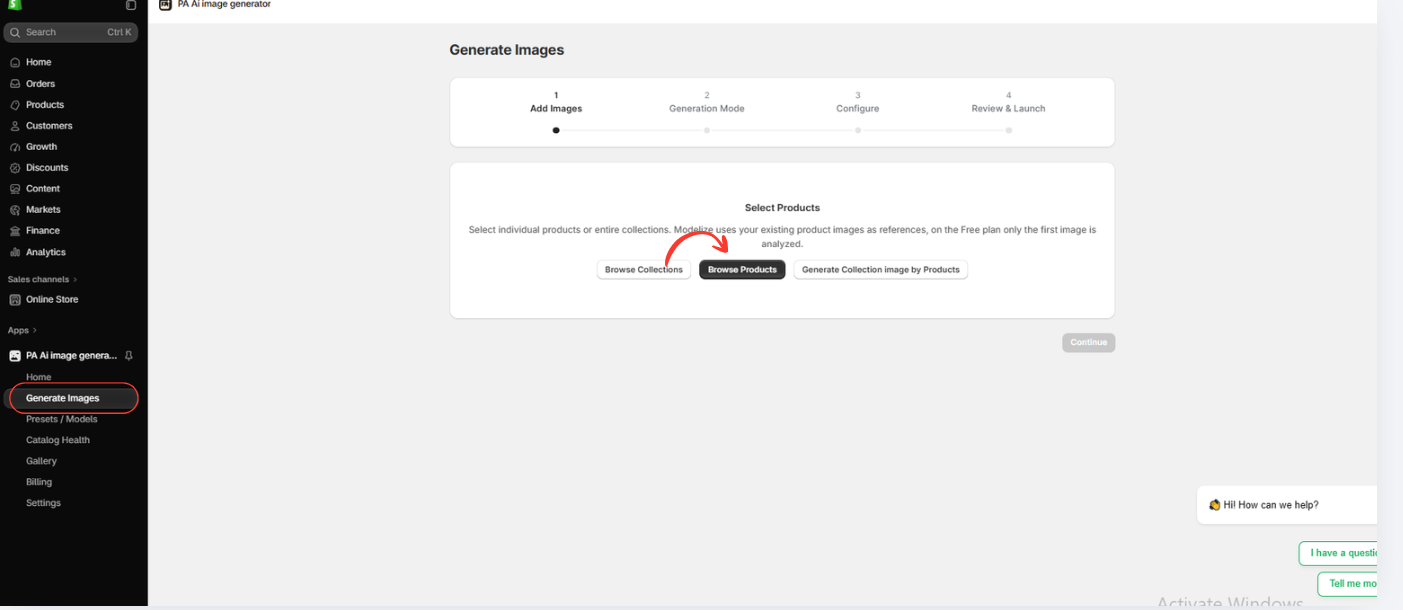
Image 3: Open Generate Images and select Browse Products.
Image explanation: The screenshot displays the image-generation interface with a progress indicator for selecting images, choosing a generation mode, configuring settings, and reviewing the generation request.
The Browse Products option allows merchants to use images already stored in Shopify.
Step 5: Choose an AI Image Generation Mode
The next screen displays two generation approaches:
Auto Mode: Allows AI to create a set of optimized product images based on the available product references.
Choose Presets: Allows you to select specific photography styles and compositions.
For this tutorial, select Choose Presets.
This option gives you more control over the visual direction of your final product photographs.

Image 6: Select Choose Presets to customize the style of AI-generated product images.
Image explanation: The screenshot shows the available generation modes. The Choose Presets option is highlighted, with previews of different photography styles.
Click Continue to browse the preset library.
Step 6: Explore Professional Product Photography Presets
The app provides a library of presets organized into several categories.
You can browse photography types such as Studio, On Model, Ghost Mannequin, Floating, Lifestyle, Flat Lay, Detail/Macro, Packaging, and Seasonal.
Industry filters include fashion, beauty, electronics, home products, jewelry, and sports.
Choose presets based on your product category and intended use.

Image 7: Explore the photography presets and choose the visual styles for your product.
Image explanation: The screenshot displays preset thumbnails including Studio – Clean, Flat Lay – Front, Studio – Back View, and Lifestyle – Home.
Each preset contains a preview image showing the intended photography style.
For an ecommerce catalog, a clean studio preset is often a useful starting point. Lifestyle presets can then provide additional variety for marketing materials.
Step 7: Select Seasonal or Promotional Image Styles
The preset library also includes creative options for seasonal and promotional content.
These can help merchants prepare visuals for special events without arranging additional photoshoots.
For example, the tutorial shows the Seasonal – Christmas preset selected.
After choosing your desired presets, click Continue.
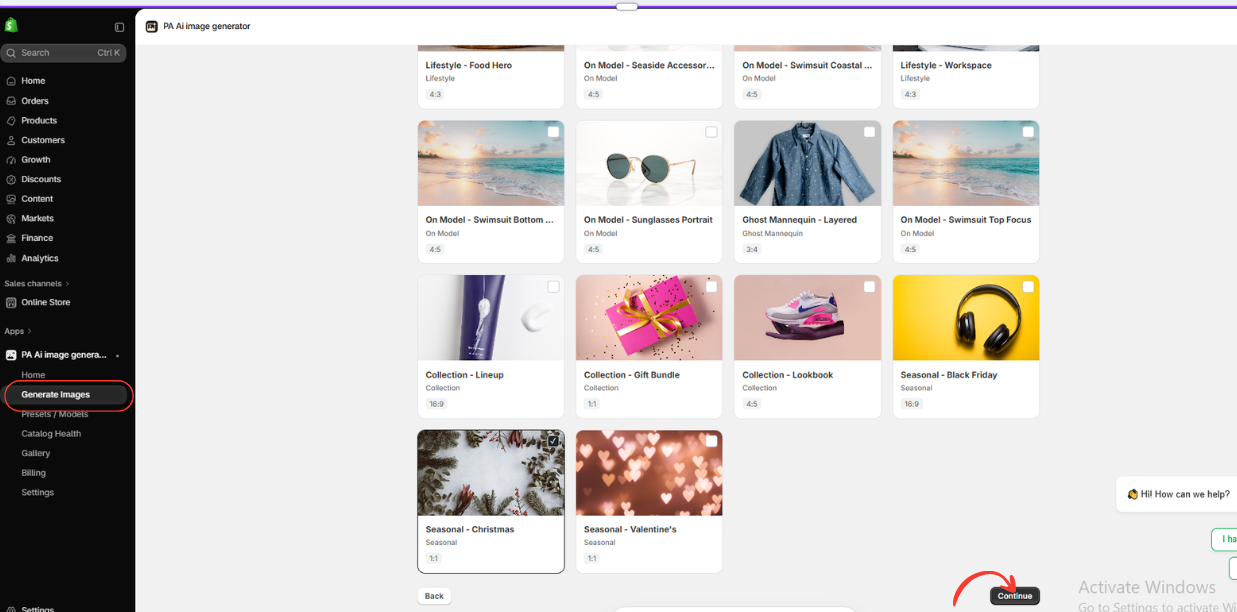
Image 8: Select a seasonal product photography preset and continue.
Image explanation: The screenshot displays presets such as Collection – Lineup, Collection – Gift Bundle, Seasonal – Black Friday, Seasonal – Christmas, and Seasonal – Valentine’s.
The Christmas option is selected, demonstrating how the app can prepare holiday-themed product visuals.
Selecting multiple appropriate presets allows you to generate different compositions from the same source product.
Step 8: Configure Image Settings Before Generation
After selecting presets, the app opens the Generation Settings screen.
Here, you can customize how the images should be generated and managed.
Available settings shown include:
- Auto-publish to product: Control whether generated images are automatically added to the Shopify product.
- How to add to product: Choose how images are added, including keeping existing images.
- Custom instructions: Provide additional visual requirements.
- Background color: Use the preset background.
- Aspect ratio: Choose preset, default, or custom proportions.
- Resolution: Use the recommended default or a custom resolution.
- Image format: Choose JPEG, PNG, or WebP.
For example, a merchant could enter:

Step 10: Check Image Generation Progress in the Gallery
After submitting an image-generation request, open Gallery in the app’s sidebar.
The gallery shows recent generation jobs and their statuses.
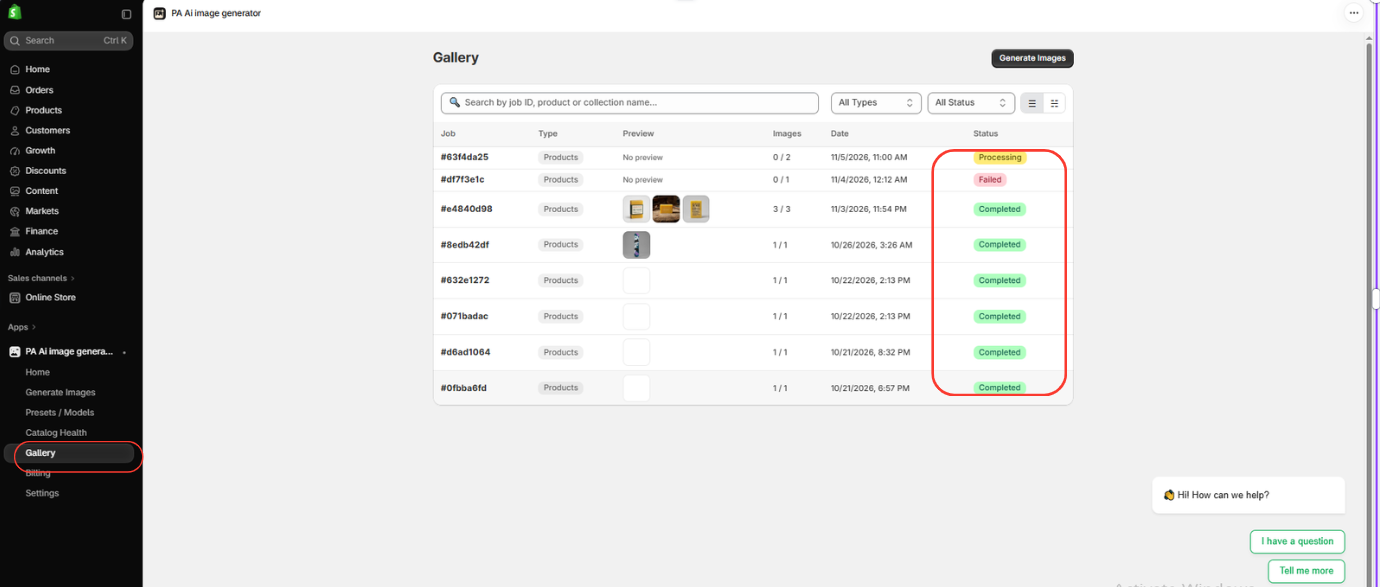
Possible statuses shown in the screenshot include:
- Processing
- Completed
- Failed
You can use the gallery to track generation results and identify jobs requiring further attention.
PA AI Image Generator gallery with processing, failed, and completed statusesImage 10: Track generated product images and check their completion status in Gallery.
Image explanation: The screenshot displays a table containing job identifiers, product image previews, dates, image counts, and status labels.
Several earlier jobs are marked Completed, while another is Processing and one is Failed.
This dashboard helps merchants manage image-generation jobs from a single location.
The five images below are your actual uploaded images, not illustrative replacements. Use these at the corresponding steps above.
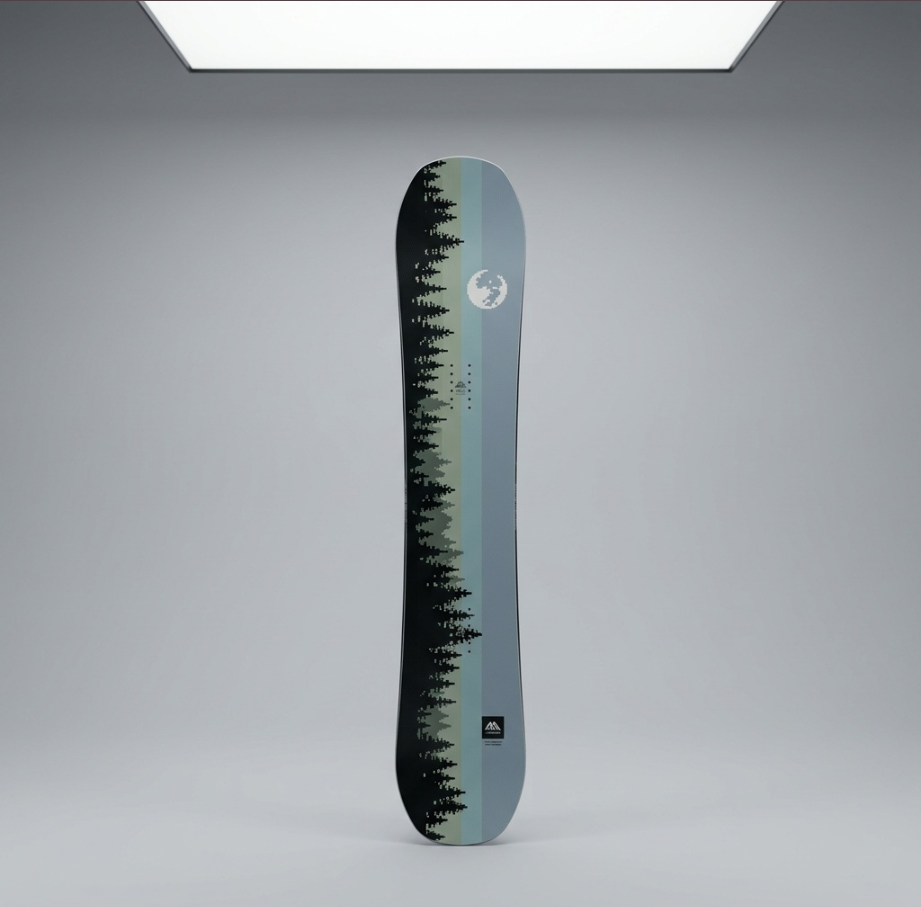
Step 1 — Original Product Photograph
Original snowboard product photoImage 1: The original product photo with a clean, simple background, ready to be used as an AI reference.
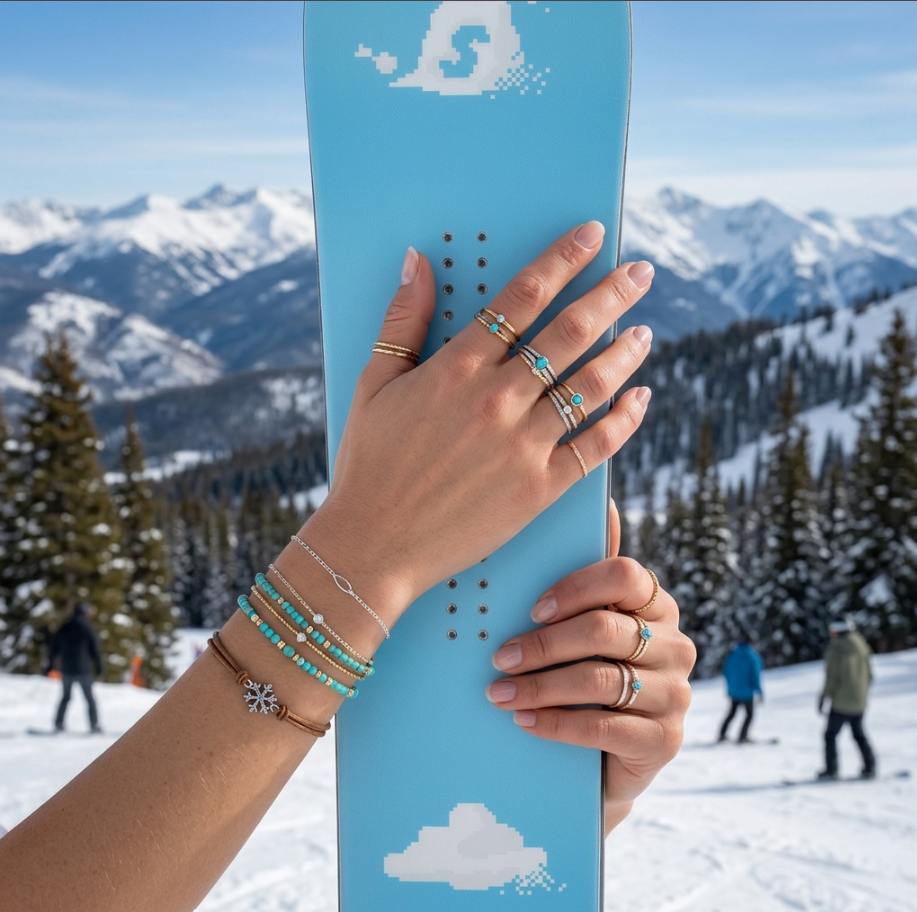
Step 4 — AI Lifestyle Close-Up Result
AI generated snowboard close-upImage 2: The generated lifestyle result featuring hands, accessories, and a snowboard against a snowy mountain background.
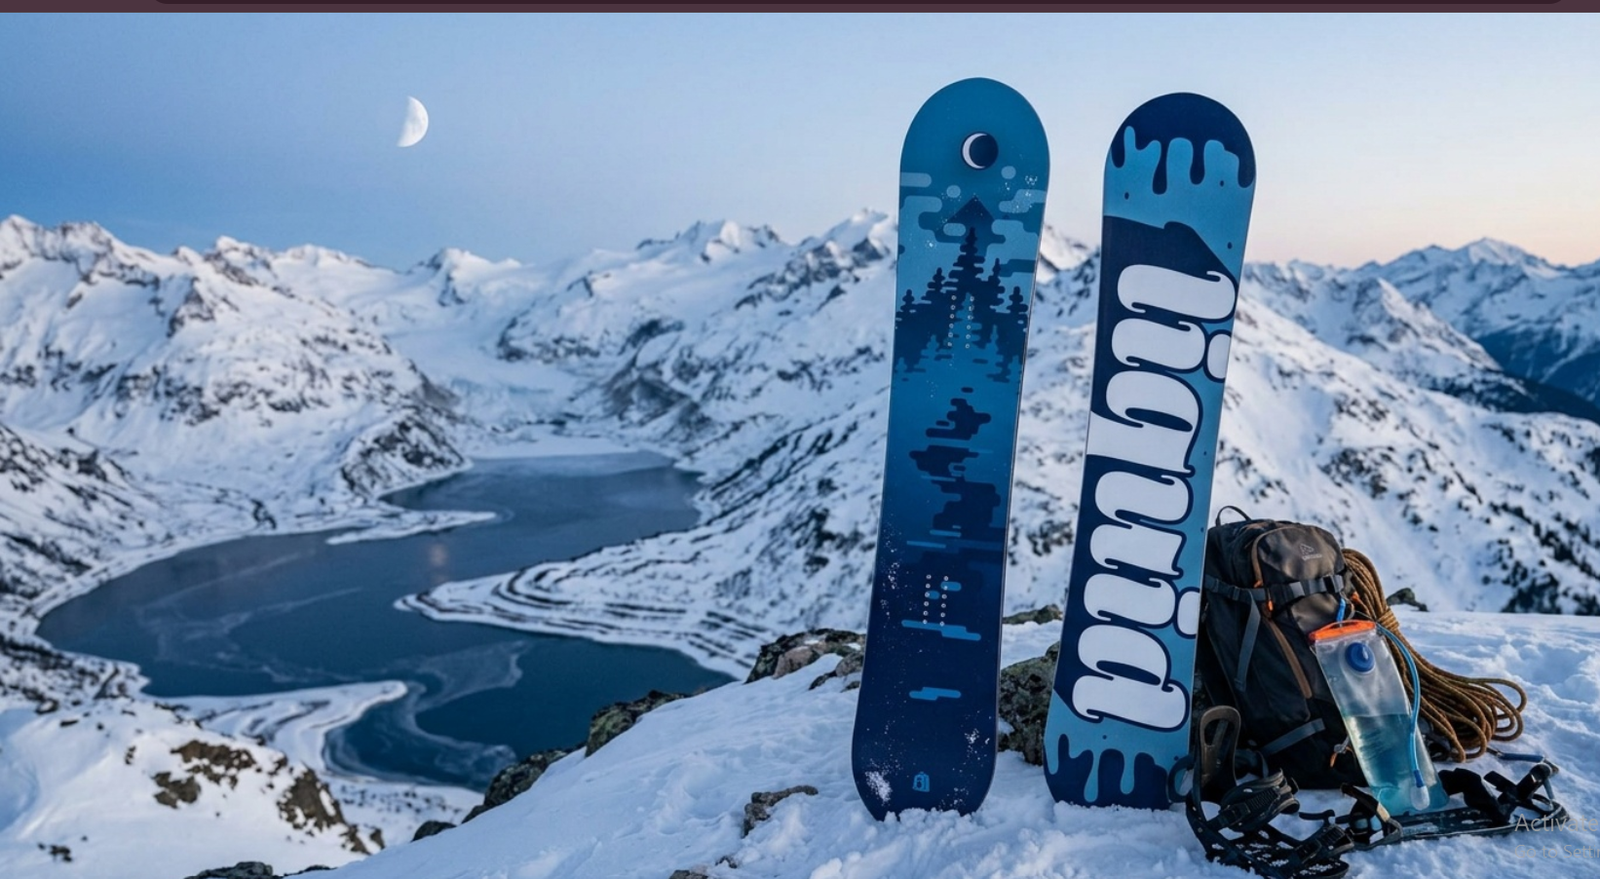
Step 5 — Professional Mountain Product Photography
AI generated outdoor snowboard photoImage 3: An outdoor product composition with two snowboards in a dramatic alpine setting.
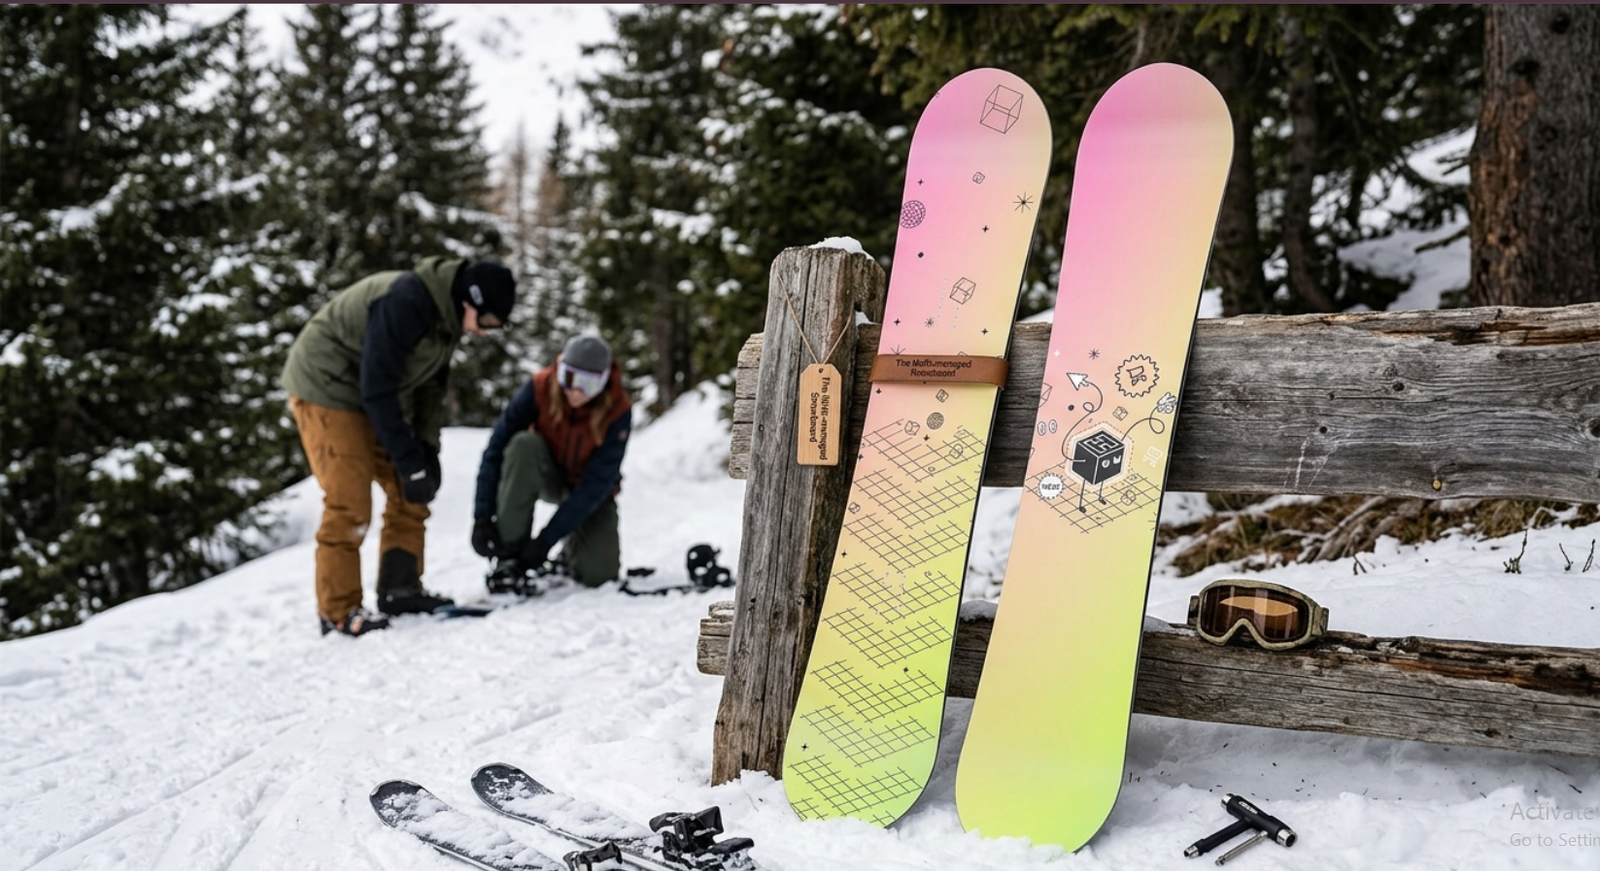
Step 6 — Natural Winter Lifestyle Photography
AI generated snowboard winter sceneImage 4: A lifestyle photograph featuring two snowboards beside a wooden fence in a snowy forest.
Step 7 — On-Model and Product Detail Photography
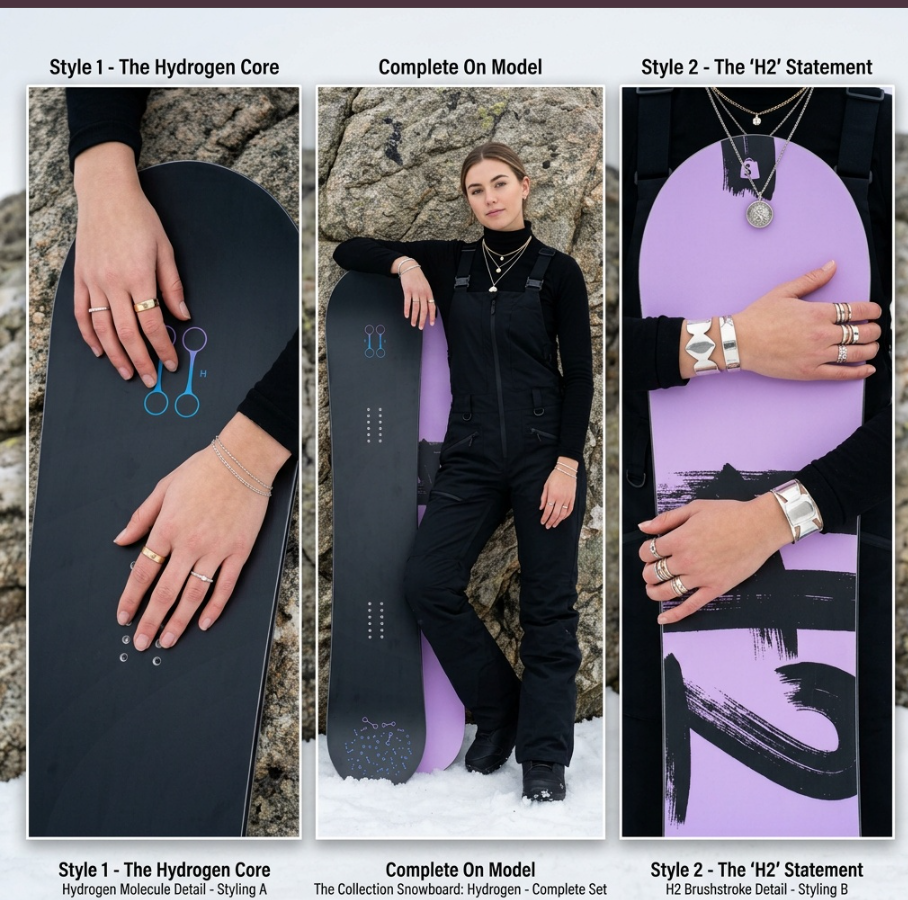
AI generated snowboard on model and detail imagesImage 5: A three-part photography showcase combining product close-ups and full-body on-model imagery.
Benefits of Using AI Instead of Traditional Product Photography
Using PA AI Image Generator can help Shopify merchants create additional professional-looking product images without arranging separate photoshoots for every scene.
The biggest advantage is flexibility: one catalog product can be presented in several visual environments, including studio photography, outdoor lifestyle scenes, and on-model compositions.
Merchants can then choose which results fit their product pages, collection banners, and marketing campaigns.
Frequently Asked Questions
Can I turn a smartphone product photo into a professional-looking image?
Yes. A clear original photograph can be used as a reference for generating styled product images with AI.
Does PA AI Image Generator support lifestyle photography?
Yes. The app includes lifestyle, studio, on-model, seasonal, and other photography presets.
Can I create several images for one Shopify product?
Yes. You can select multiple presets to generate alternative visual compositions.
Can I publish AI-generated images directly to Shopify?
The app offers publishing controls for adding approved images to Shopify products.
Do I need professional photography equipment?
No professional studio is required to generate AI images, although good reference photographs can help improve results.
Will AI preserve every product detail accurately?
Not necessarily. Always compare generated images with the original product before publishing.
Conclusion
Professional-looking product photography is now more accessible to Shopify merchants who want to improve their store’s visual presentation without organizing repeated photoshoots.
As the examples in this guide demonstrate, an ordinary product photograph can serve as the starting point for multiple creative compositions, including close-up lifestyle photographs, mountain scenery, natural outdoor imagery, and on-model product presentations.
With PA AI Image Generator, merchants can explore photography presets, create image variations, review results, and publish approved photographs to their Shopify products.
This makes AI product photography a useful option for expanding visual content while maintaining control over what appears in your store.Explore PA AI Image Generator on Shopify