How to Add Custom CSS to Your Shopify Store
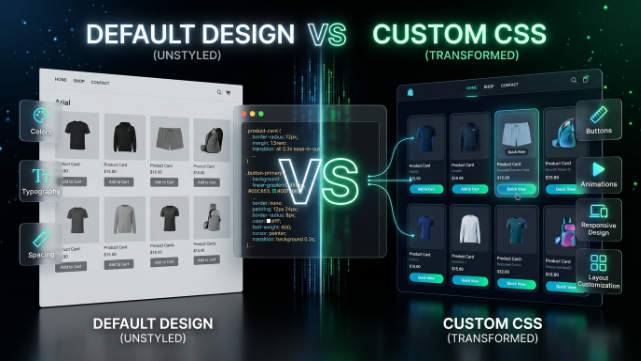
At some point, almost every Shopify store owner hits the same wall. Your theme looks good, but it’s not quite you. Maybe the buttons are a little too rounded, maybe you want more spacing between your product images, maybe the font on your headings just isn’t hitting the way you pictured it. This is where custom CSS comes in, and honestly, it’s one of the most underrated tools available to Shopify merchants.
You don’t need to hire a developer for every small visual tweak, and you definitely don’t need to switch themes just because a few details feel off. In this guide, we’re going to walk through everything you need to know about adding custom CSS to your Shopify store, from the safest beginner friendly methods to more advanced techniques, along with the mistakes to avoid along the way.
What Custom CSS Actually Does for Your Store
CSS, or Cascading Style Sheets, is the language that controls how your store looks. If Liquid and HTML are responsible for the structure and content of your pages, CSS is responsible for the visual layer on top of it, colors, fonts, spacing, borders, animations, and layout behavior. Every Shopify theme already comes with its own CSS, that’s what gives each theme its distinct look. Custom CSS lets you go in and override or add to those existing styles so your store reflects your brand more precisely.
The great thing about CSS is that small changes can make a surprisingly big visual impact. Adjusting padding around your product cards, tweaking your button hover states, or changing your font weights can make your store feel noticeably more polished, even though the changes themselves are pretty simple under the hood.
Where Custom CSS Lives in a Shopify Theme
Before you start adding your own styles, it helps to understand where CSS actually lives inside a Shopify theme. Most modern Shopify themes, especially ones built for Online Store 2.0, organize their CSS inside asset files, usually with names like theme.css or base.css, sitting inside the Assets folder of your theme.
These files get loaded into your store through your theme.liquid layout file, usually referenced with a stylesheet tag near the top of the document. Every page on your store pulls from this central stylesheet, which is why editing it affects your entire site rather than just one page.
Some themes also split their CSS across multiple files for organization, separating things like typography, buttons, and section-specific styles into their own smaller files. Understanding this structure matters because it affects where you should be adding your custom code, and how much of the existing styling you might accidentally be overriding.
The Safest Way to Add Custom CSS: Using a Custom CSS File
The cleanest and safest approach to adding custom CSS is to create a separate, dedicated CSS file just for your customizations, rather than editing your theme’s existing core stylesheet directly. This keeps your custom changes isolated, making it much easier to track what you’ve changed, and much easier to undo if something goes wrong.
Here’s the general process. Head into your Shopify admin, go to Online Store, then Themes, and click Edit Code on the theme you want to customize. Inside the Assets folder, create a new blank file and name it something like custom.css. This is where all your personal styling changes will live.
Once that file exists, you need to tell your theme to actually load it. Open your theme.liquid file, and near the closing head tag, add a line that links to your new custom.css file using Liquid’s asset url filter. This ensures the file loads properly no matter what your theme’s file structure looks like.
From that point forward, any CSS you write inside custom.css will apply across your store, and because it loads after your theme’s original stylesheet, your custom styles will take priority over the default ones as long as your selectors are specific enough.
Using the Theme Editor for Quick CSS Tweaks
If editing code feels intimidating, some Shopify themes, especially premium ones, offer built in custom CSS fields directly inside the theme editor’s customization settings. This is a great option for smaller, safer tweaks without needing to touch the code editor at all.
You’ll usually find this option under Theme Settings inside the customizer, sometimes labeled as Custom CSS or Additional CSS. Not every theme includes this feature, but if yours does, it’s a good starting point for simple changes like adjusting colors or spacing without diving into code files.
That said, this method has limitations. It’s usually best suited for smaller adjustments rather than large scale custom styling projects, and it doesn’t give you the same level of organization and control that a dedicated CSS file does.
Finding the Right CSS Selectors to Target
This is honestly where most beginners get stuck, not because CSS itself is hard, but because figuring out what to target can be confusing if you don’t know where to look. The good news is your browser already has the tool you need, and it’s called Inspect Element.
Right click on anything on your storefront, whether it’s a button, a product title, or a section background, and choose Inspect. This opens your browser’s developer tools and shows you the exact HTML element and its associated class names. Once you know the class name, you can target that same element in your custom CSS file and adjust its styling.
For example, if you right click on your add to cart button and see a class like product form submit, you can write a rule targeting that class in your custom.css file to change its color, size, or shape. This process of inspecting elements and writing targeted rules is really the entire game when it comes to custom CSS.
A word of caution here, Shopify themes often reuse class names across multiple elements throughout the store. Before making a change, it’s worth checking whether that class appears elsewhere on your site so you don’t accidentally affect something you didn’t mean to touch.
Common Custom CSS Changes Store Owners Make
There are a handful of tweaks that come up again and again, and knowing these can save you time if you’re just starting out.
Button styling is probably the most requested change. Store owners often want rounder or squarer corners, different hover effects, bolder text, or different colors that better match their branding. Typography adjustments are also extremely common, changing font sizes, weights, and spacing to make headings and body text feel more intentional.
Spacing and layout tweaks come up a lot too, things like adding more breathing room between sections, adjusting product grid gaps, or fixing awkward spacing on mobile devices. Many store owners also like customizing hover effects on product images, adding subtle zoom or fade transitions that make browsing feel a bit more premium.
Announcement bars, badges, and sale tags are another popular target, since these small design elements often carry a lot of visual weight in terms of grabbing customer attention, and tweaking their appearance can make a real difference in how professional your store feels.
Mobile Responsiveness and Custom CSS
This is a step a lot of beginners skip, and it causes real problems. When you add custom CSS, it’s easy to test your changes on desktop, see that everything looks great, and assume you’re done. But the majority of Shopify traffic, especially here in Pakistan where mobile browsing dominates ecommerce activity, comes from phones.
Always test your custom CSS changes across different screen sizes before considering the job finished. You can do this easily using your browser’s developer tools by toggling the device toolbar, which lets you preview your site at different screen widths without needing an actual phone in hand.
If a style change looks perfect on desktop but breaks your layout on mobile, you’ll need to use media queries, which let you write CSS rules that only apply below or above certain screen widths. This is a common and normal part of the process, and it’s worth the extra time to get right, since a broken mobile layout can directly hurt your conversion rate.
Mistakes to Avoid When Adding Custom CSS
One of the most common mistakes is editing the theme’s original core CSS file directly instead of creating a separate custom file. This makes it much harder to track your changes, and if you ever update your theme, those edits can get wiped out entirely.
Another mistake is using overly broad selectors that accidentally affect elements you didn’t intend to change. For example, targeting a generic class like button without being specific enough can end up changing every button across your entire store, including ones in your cart, checkout, and other sections you didn’t mean to touch.
People also tend to forget about specificity issues in CSS. If your custom style isn’t showing up, it’s often because the theme’s original CSS has a more specific selector that’s overriding your rule. Using more specific selectors, or in some cases the important flag as a last resort, can help resolve this, though relying on important too heavily is generally considered messy practice.
Skipping browser testing across different devices is another common issue, as we mentioned above. And finally, not keeping a backup or record of your original theme before making changes is a mistake that can turn a small styling project into a much bigger headache if something goes wrong.
Should You Duplicate Your Theme Before Editing?
Yes, and this is genuinely one of the most important habits to build. Before making any code changes to your live theme, duplicate it first inside your Shopify admin under the Themes section. This gives you a safe backup copy that isn’t visible to customers, so you can experiment freely on the duplicate without any risk to your live store.
Once you’re happy with your changes on the duplicate, you can publish it to make it live, or continue testing further. This simple habit protects you from accidentally breaking your storefront while customers are actively browsing and shopping.
When Custom CSS Isn’t Enough
Sometimes what you’re picturing goes beyond what CSS alone can achieve. If you’re trying to change actual functionality, rearrange the underlying structure of a page, or build something that doesn’t exist in your theme at all, that usually requires changes to your Liquid templates and HTML structure, not just CSS.
CSS controls appearance, but it can’t create new elements or change how your store’s underlying logic works. If you find yourself needing new sections, custom functionality, or a layout that your current theme structure simply doesn’t support, that’s usually the point where it makes sense to bring in a developer who can work directly with your theme’s code rather than trying to force a CSS-only solution.
Why This Matters for Pakistani Ecommerce Businesses
For store owners running Shopify stores out of Pakistan, whether you’re targeting the local market with cash on delivery and local courier integrations, or selling internationally, your storefront’s appearance plays a huge role in building trust with customers who’ve never heard of your brand before. A store that looks slightly off, misaligned buttons, cramped spacing, generic default styling, can quietly hurt your conversion rate without you even realizing it’s happening.
Investing a bit of time into custom CSS, even small polish here and there, helps your store feel more credible and more intentional. In a market where customers are often comparing you against dozens of other similar stores, that extra bit of visual polish can be the difference between someone trusting you enough to place an order or bouncing off to a competitor.
Wrapping It Up
Custom CSS is one of the most accessible ways to make your Shopify store feel genuinely yours without needing to rebuild your theme from scratch. By creating a dedicated custom CSS file, using your browser’s inspect tool to find the right selectors, and testing carefully across devices, you can make meaningful improvements to your store’s design safely and efficiently.
If you’ve been putting off these small design fixes because coding feels intimidating, or if you’ve tried making changes yourself and things didn’t turn out quite right, that’s exactly the kind of work we help with at TheScriptFlow. We work with Shopify store owners across Pakistan and internationally to fine-tune themes, fix styling issues, and build custom designs that actually reflect the brand behind them. Feel free to reach out if you’d like a hand getting your store looking exactly the way you pictured it.